


How to lay vinyl flooring and save money on your reno
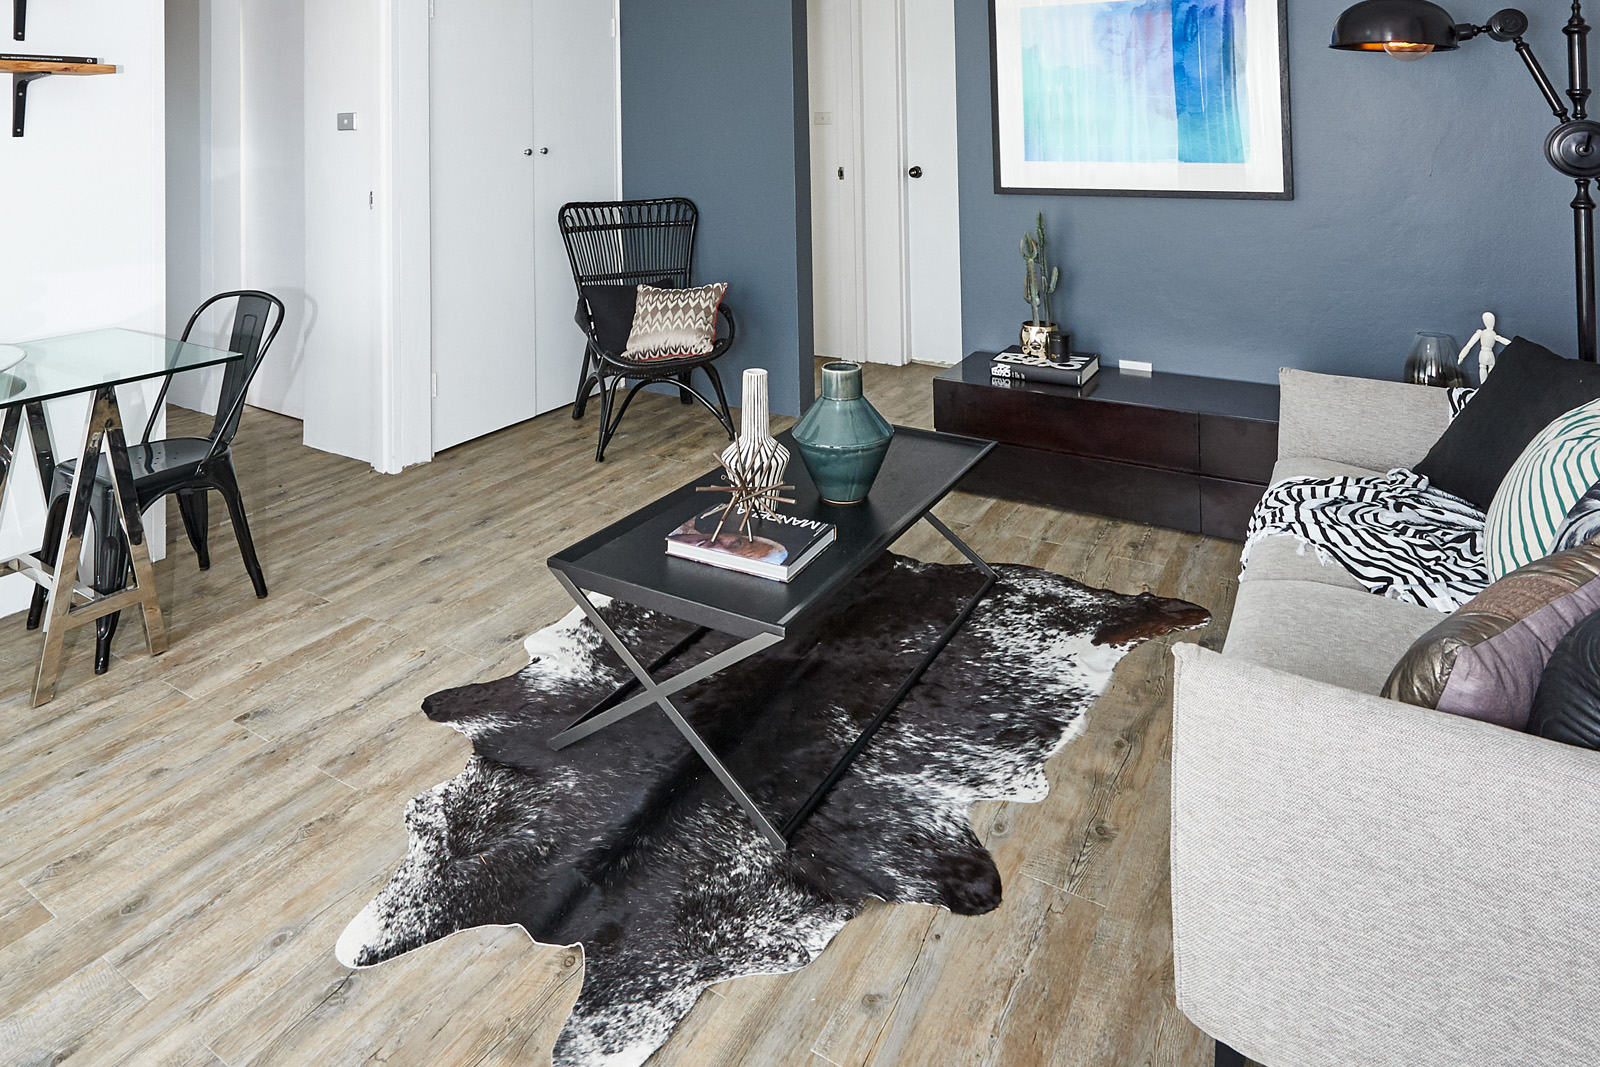
So, I have used these affordable Gerflor self-adhesive vinyl laminate planks, which are great! You can buy them from Bunnings.
And you’ll be amazed at just how easy they are to lay and very practical to maintain. They’re also fully waterproof, which means you can use them safely in bathrooms and kitchens.
So… to make a start, sweep well then vacuum, finally finish off cleaning the entire area with a damp mop.
Remember – adhesives’ worst enemies are
without a doubt – dust and moisture.
When completely dry, you will need to seal your subfloor before laying the vinyl plank flooring. I recommend using Bondcrete as this helps the vinyl floor planks adhere really well .
First paint a coat of sealant onto your subfloor. Protect the bottom of your walls and cabinets from any splashes of sealant by covering them with strips of masking tape. Once the floor is sealed, let it cure for as long as required before you start laying your vinyl planks.

What you’ll need
- A pen
- strong scissors
- A ruler
- A stanley knife
- A tape measure
- A hammer
- A few nails and
- Your chosen planks
steps on how to lay your planks
STEP 1: Choose which direction you will lay your vinyl planks. Once you’ve decided this, measure the floor to work out where the middle of your middle row will sit. This is now your centre line, hammer a nail at each end of this line and then tie a string chalk line between them. Snap your string chalk line ( pull it up and let go ) to mark your centre line on the floor.
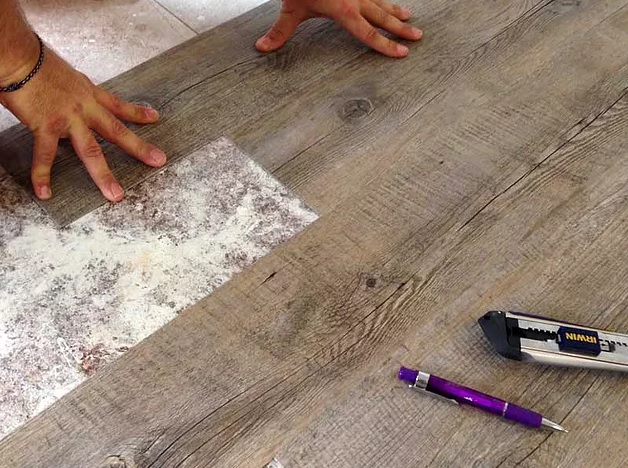
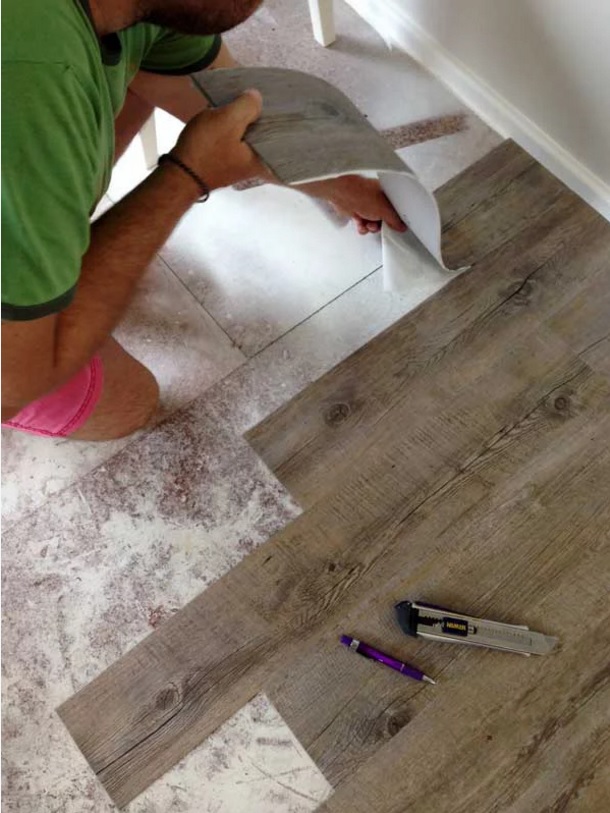
STEP 2: Lay the first row of vinyl plank flooring by peeling off the back for each plank and flattening it into place, over the top of the centreline. Each vinyl plank has a directional arrow on its backing paper. To get the best visual result, lay all your planks facing the same way.
STEP 3: Lay the second row of vinyl plank flooring next to the first. Stagger the second row so the end of each plank lines up with the middle of the plank in the previous row. When laying the third row of planks, use your combination square to make sure its joins line up with the joins in the first row. Keep this staggered pattern going the whole way across the floor.
STEP 4: Some of your vinyl floor planks will need to be trimmed to fit around the kitchen cabinets. Measure and mark out your lines on each plank and make your cuts with a Stanley knife. To get the best results, go over the cut line two or three times instead of trying to cut through in one go. Once your trim is finished, remove the backing paper and stick the plank in place
STEP 5: Sometimes you only need a short end of a plank to complete a row. A quick way to measure your cut line is to lay the plank in position with its backing still on. Then use your combination square to mark where it hangs over the previous plank and make your cut there. Now take off the backing paper and stick the plank in place. It’s worth keeping your offcuts in case you have any small sections to fill. For the neatest effect take away the skirting and replace it after laying the boards.
STEP 6: Once the planks are on the floor apply pressure, walk on it, even get the children in and make it a game… the aim is to get rid of any air bubbles so the flooring will stay there for a long time. Maybe add wine and chocolate… wine for you and chocolate for the kids! Trust me the final effect will look stunning, I guarantee you!
Your friends will be wowed by just how good it looks, you can also enjoy boasting how good your handy work is. If you consider the time you spend with the children… stomping and sliding helping you to lay the floor, plus the wine and chocolate you savored finishing the job – then I’d say you have all the ingredients for not only a great floor… but a great day too!
Good luck!
James
Want to learn more? Register for a FREE 2.5 Hour Property Masterclass near you or check out more tips and tricks on how I completed the two most key rooms in any property:


Like!! Really appreciate you sharing this blog post.Really thank you! Keep writing.