Cherie’s Very Unique Rental Renovation
Hi ,
If you watched the latest episode of Channel 9’s Space Invaders, you would have seen that I renovated a very unique rental property…
I’ve been renovating homes for 32 years now & I have to say, it’s not every day you’re asked to renovate a rental property & one that’s the home of a drag queen.
The subject property was home to Ben & his alter ego, Carla from Bankstown. He & she share the home with Ben’s mum & dad, both who were becoming bothered by the growing amount of Carla’s clutter around them (particularly as her celebrity profile started to rise).

Now that you have the backstory, let’s start talking about the reno. Renovating a rental property feels akin to trying to give yourself a haircut using a Stanley knife … it’s theoretically possible but may not look that great. When the landlord has barred you from making any permanent changes to the ceilings, walls, floors or any fixture & fitting, it starts to test your creativity as a renovator.
Imagine the scene: you’ve been living in your rental property. It’s perfect, except for the avocado-green bathroom, the kitchen that’s a throwback to the disco era, and a dining room that screams ‘I love the 80s’ a little too loudly. You’re itching to make the place feel like your own, but there’s a catch – the dreaded lease agreement that prohibits permanent changes of any kind.
So, what’s a tenant to do? First, you consider the basics. Painting? Out of the question. New flooring? Forget it. Installing stylish new light fixtures? Not unless you want to lose your bond on lawyers. This is where the plot thickens & you realise, you’re going to have to get creative. Bring on temporary décor ….
THE DINING ROOM
Renovating this property felt like being on a diet at a buffet: so many temptations, yet so many restrictions…
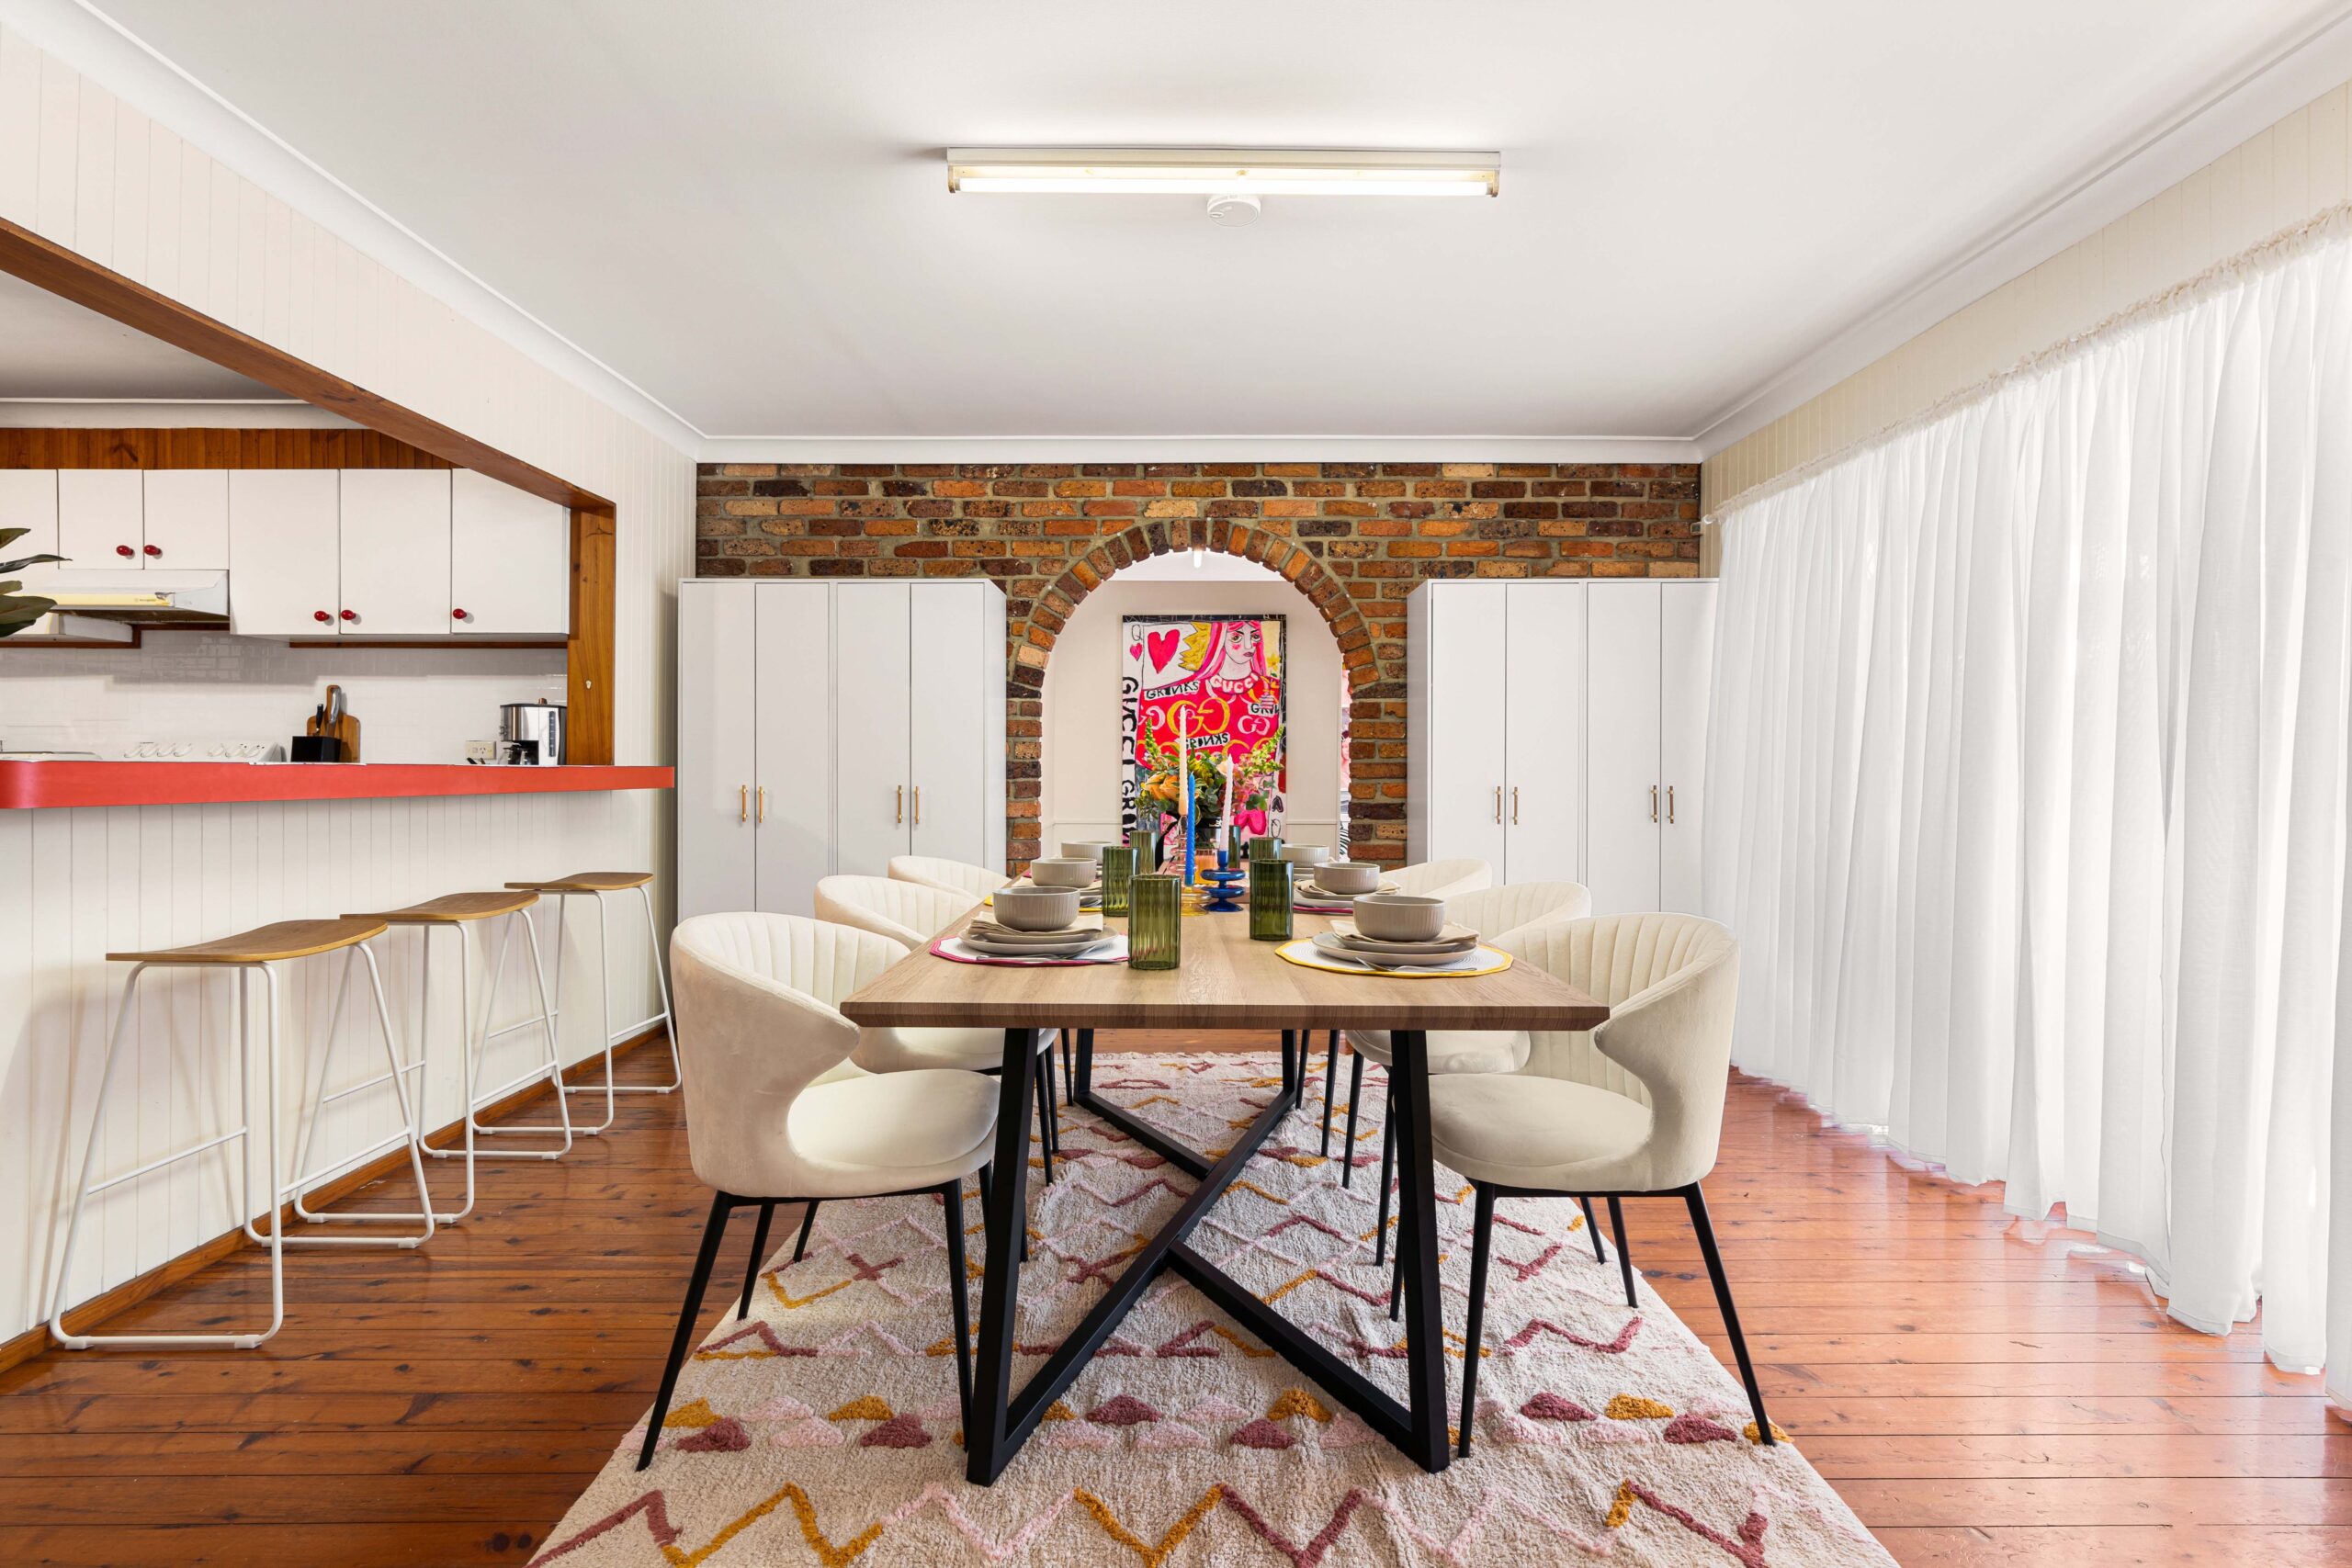
In the dining room, I was given strict instructions not to touch any of the surfaces, except the painting of 2 walls in the landlord’s dictated colour of Taubmans “Creamy White”. At least this allowed me to paint the old timber wall panelling away from the Swedish sauna vibe & you can see the massive difference the lighter wall colour does to improving the lighting in the room (even though the ceiling light wasn’t touched either).


One of my bugbears in this room was the brick feature wall which I’m sure was the height of fashion at some point in time, but now, just borders on daggy. With a directive “not to touch the brick walls in any way”, I installed 4 sets of off-the-shelf Kmart wardrobes that are not only affordable, but provide plenty of practical storage to hide belongings away, out of sight. These wardrobes sit on the floor (not braced to the walls) & strategically, hide a lot of that brick wall so it becomes a lot less visually overpowering.
Let’s talk about those vertical drapes: because nothing says “I’m guilty of style crimes” quite like these. Luckily, an old curtain rod already sat on top of those drapes, so I simply rolled the vertical drapes back to one side of the window & installed 4 packs of the Ikea Hilja curtain on the existing rail. Bunched up & at just $25 per pack, these curtains instantly make the room look lighter & airer. As a rental tenant, you’re allowed to change the curtains, provided you put the original curtains back up before you vacate the property. When the tenants move out of this property eventually, they can take the curtains with them, if they wish.


To return this room to its functional purpose of a dining room, a large dining table with a timber top was installed (to blend with the existing floorboards) with the Ange Chairs in Cream that fuse beautifully with the wall colour. A floor lamp from Beacon Lighting injects further light into the room & colourful new artworks on 3M Command Hooks are perfect for rental tenants because they don’t require you to drill any holes in your rental property walls. I styled the dining table with accessories solely from Kmart & fresh flowers from Interflora.
We all know this room ain’t going to win any design awards but hey, you must admit, it now looks 10 times better!
BEN’S BEDROOM
The goal with this renovation was to create separate zones for Ben & his persona, Carla from Bankstown. Ben is a very down to earth kind of guy, whereas, Carla is bright, bold & loud so two very different decorating schemes were in order!

Prior to this makeover, Ben’s bedroom was dark & gloomy and more depressing than delightful. He installed contact adhesive on the walls, years ago, in an attempt to make his room look less dreary, and whilst successful in doing so, I knew my team & I could do better.
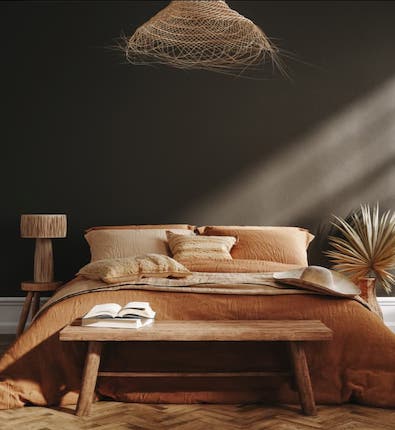
For Ben, I wanted to create a relaxing & welcoming space that reflected the calmer side of his personality. I wanted the room to feel mature & a bit more masculine, but still with that pop of fun that he shows through Carla.
Once again, in this room, I wasn’t allowed to make any permanent changes including a “no paint” rule. The first thing I removed was the contact adhesive from the walls, which proved more challenging than what I had originally anticipated. At first, it came off in tiny slithers & I thought to myself, “I’ll be here forever”. But here’s a little renovator trick, put your hairdryer on warm heat, point it towards the contact adhesive & presto, your contact adhesive will come off in large sheets (not tiny slithers). All up, it took me about an hour to get all the walls completely rid of the contact adhesive.

To inject a designer look in the room, I replaced all the old contact adhesive with the Paradise Palms wallpaper from Luxe Walls, which is a removable wallpaper, perfect for rental tenants! I also added a plain colour wallpaper to the other side of the wall, that makes it look like the wall has been painted, when it in fact it actually hasn’t. Being up against the clock, the team from Luxe Walls installed all the wallpaper but if you have more time than me, you can definately install it yourself DIY, saving you those labour costs.
 The Luxe Walls team hard at work installing removable wallpaper for Ben’s new feature wall.
One of the biggest problems of Ben’s room were the black curtains. They did a fine job on the privacy front but little for the aesthetics of the room. We took the curtains down, stored them safely in the linen press & replaced them with a double curtain in a lighter room darkening fabric. Once again, when Ben & his family eventually vacate the house, they simply get put back up.
High on Ben’s wish list was also to have a couch in his room, so he had a space to hang out with friends. The super compact size of the Adele sofa from Kmart made it the perfect fit.
To finish off, cute cocktail prints from Urban Road give the room a swanky, vintage Palm Springs kind of vibe. To link with the artworks & tie the whole space together, I added forest green bedding & accessories, all from Kmart.


CARLA’S ROOM
Now for the really fun part … Carla’s drag room!
What I discovered is that Carla’s makeup collection is longer than a grocery store line up on Christmas eve, her shoe collection could rival Imelda Marcos’s & her costumes with all their sequins & feather boas, almost demanded their own postcode. So great in quantity was all her stuff, that it consumed the room in between the lounge & dining room, with much of it spilling into the dining area.
 My carpenter, Paul & I erected 2 temporary wall frames
to section the room off & provide instant privacy.
By now, you should already know the drill …. I wasn’t allowed to make any permanent changes in this room, full stop. No touching the ceiling, walls or floor. Yikes!
First up, my chippie Paul, erected two temporary wall frames which we then clad with 3-millimetre melamine lightweight sheets that instantly provided visual privacy in the room from those two rather unattractive looking arches. These not only provide Carla some privacy when getting dressed but another decoration opportunity …
Carla is a celebrity & having starred in numerous shows like “Celebrity Apprentice”, she’s often filming social media content. By erecting the fake walls (that can easily be dismantled when she vacates the property), it enabled me to get some custom wallpaper made, once again through Luxe Walls. I got a graphic designer to create an image of a picture frame over a bright pink, retro style wallpaper then got Luxe Walls to print the wallpaper. It now provides the perfect backdrop for Carla to film her social content from. My co-host Angie Kent upcycled a plain ottoman by cutting one of Carla’s unwanted feather boa & dresses up that now sits in front of that wall.


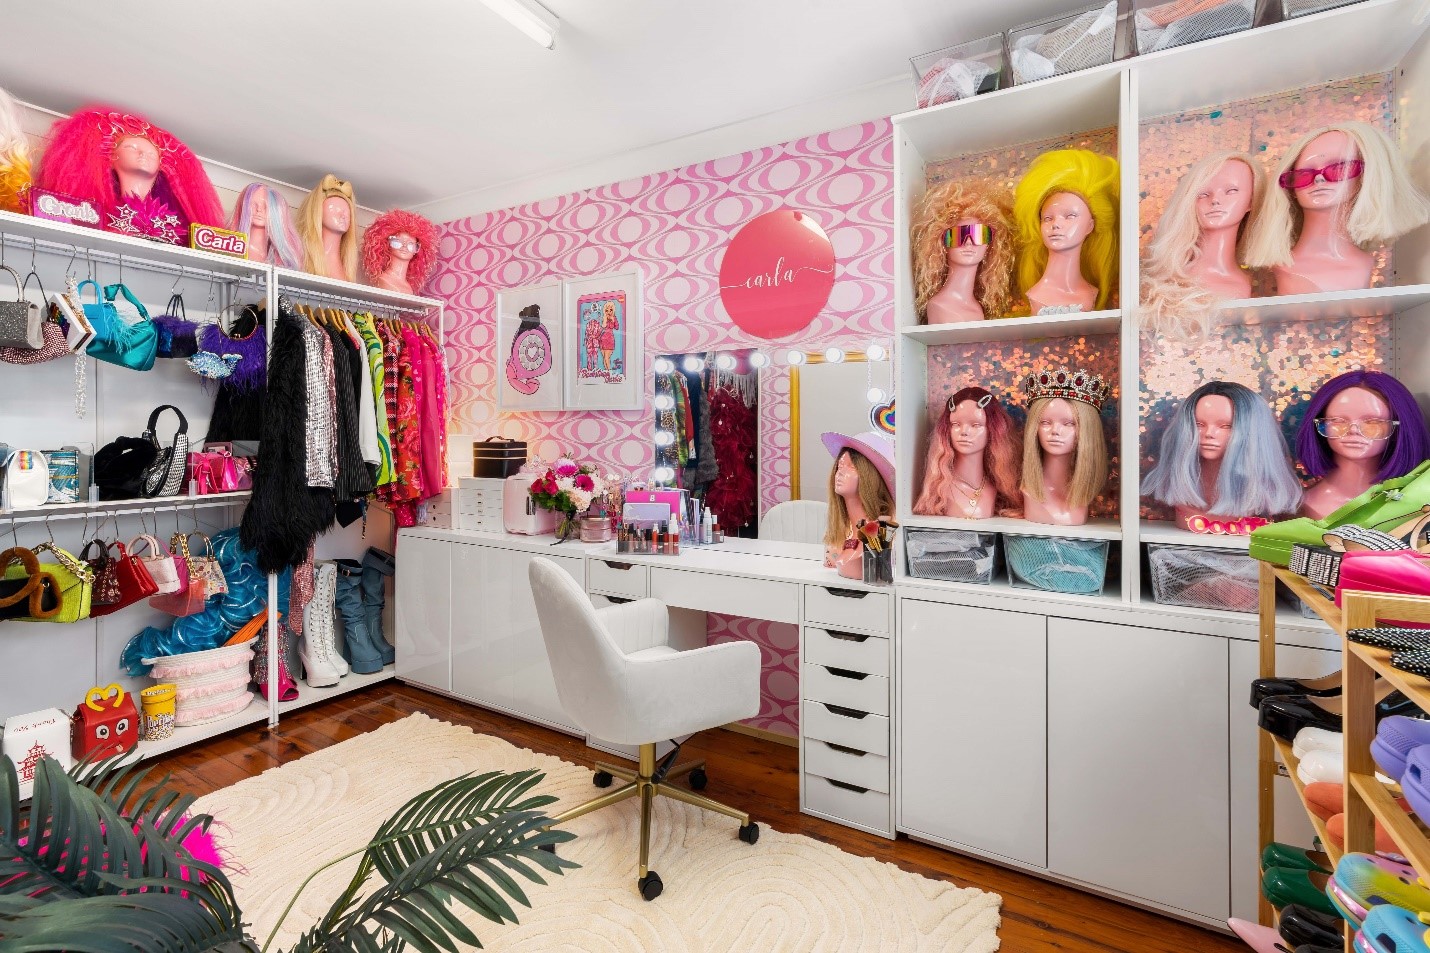
Continuing on, it was vital I create a direct extension of the image & brand that Ben has created for Carla. This was such a fun opportunity to use bright colours & glitter in a way that you never normally would in a home. Part of Carla’s branding is “Bankstown Barbie” so I ran with this to create a bright, pink & dazzling room. This is where again, Luxe Walls came to my rescue. I installed their Abstract Seamless wallpaper along the back wall of the room & when Carla vacates, she carefully peels it off, like nothing was ever there.
What’s also impressive is that Carla’s wardrobe would rival anyone’s. She owned a mountain of tops, dresses, jackets, wigs, shoes & an impressive collection of Crocs. I installed a bunch of Kmart clothes hanging racks to create a wall of open, easily moved storage space & screwed them all together for stability (as they couldn’t be braced to any of the walls). Some of Carla’s favourite wigs now sit atop of those.


Next, I needed to tackle storage. With so much makeup, there needed to be a designated space for all these things. Along the feature wall, I lined up the Elton High Gloss Cabinets from Kmart & a makeup table with built-in lights from Luxo Living creates a practical dressing table with lots of space to store makeup anyway. Decluttering guru & my lovable co-host, Peter Walsh installed clear containers within those cabinets & labelled everything up, so Carla can always find where everything is. I’m usually not a fan of high gloss cabinetry, however in this instance, it’s perfect to reflect all that glitter & pink.

So, there you have it, a renovation with a difference …
What this renovation does prove is that renovating a rental property where no permanent changes are allowed, can be a real challenge, but it’s also an opportunity to flex your creative ingenuity & learn the true meaning of ‘temporary solutions’.
Much of this renovation can be done DIY, even those of you who aren’t that handy. By shopping in affordable stores like Kmart & Luxo Living, you can keep costs to a minimum. The biggest expense in this reno was all the wallpaper totalling a smidge over $2,000 for supply & installation of that to 2 rooms. $1,000.00 went to carpentry labour & materials needed to build the 2 walls in Carla’s drag room, a small amount on paint & the balance on styling items.
The morale of this story is, you don’t need to spend a fortune to make your rental property feel like yours. It may not be the renovation you’ve always dreamed of, but it will make your rental property, at least, start to feel like home.
As always, if you have any questions on this renovation, be sure to ask them in the comments box below & my team or I will answer them promptly for you.
Until next week,
Cherie x


Cherie
This is sheer genius! You are the ‘challenge solver’ extraordinaire! I love your how your brain works and is manifest in your approach and style. You marry function and form playfully and to a budget.
How are you with curb appeal/privacy challenges with front yard vege garden and back yard entertaining North African themed? (All expensive hard landscaping already done. Need help with budget shade structures fit for purpose, plants and seating/conversation spaces. Have decor pieces from shops and facebook marketplace already.)
Hi Viktoria, If you head to our website, Cherie has a tonne of free renovation articles under the Blog & Video section which might give you some really good tips & advice on how to get started at least on some of the areas in your home. https://renovatingforprofit.com.au/blog/ We are sorry we could not be of more help and Cherie and The Team wish you all the very best for the future. Cherie Crew x
Hi Cherie
Just joined up and have enjoyed reading about your reno of Ben/Carla’s rental.
It looks amazing!!
I look forward to seeing more of your down to esrth and inspiring renos😀
Thank you Rosemary & we’re really glad to hear you love Cherie’s blogs. Thank you for letting us know. Cherie Crew x
Impressed
Great result! I really like your click & drag photos to show the before & after photos. Can you tell me what tech/app you used for that?
Keep up the great work! Shelley
Hi Shelley, it’s a plugin call Twenty20 Images Before-After. Cherie Crew x
If you had been able what would you do with the brick wallls??
Hi Wanda, it’s likely Cherie would have painted the brick wall a darker paint colour. Cherie Crew.
Hi, I love seeing all the before and after shots. I’m changing direction and going back to something more creative and these ideas really help. I’m actually a creative person but after over a decade of working in a stressful job my creativity is hiding somewhere inside. These photos really help
and inspire me.
Thank you
Lyn
Thanks Lyn and good luck! Cherie Crew x