


From Clutter Chaos To Dream Garage: A Stunning Transformation
Hi ,
Did you see the first episode of Season 4 – Space Invaders on Channel 9 last night? If you missed it, you can catch the replay on 9Now.
Each season, I normally do at least one garage renovation & this space was definitely bursting at the seams with all sorts of stuff.
With its lengthy dimensions (roughly 8 metres wide x 6 metres in depth), it was a spacious double garage, choc-o-block with all sorts of weird & wonderful belongings, but oozing potential to become a room with a higher & better use.
On one side of the garage was wife Jo’s stuff. She owned a property styling & events business, using the garage as her unofficial storage shed. Crammed in were vases, ornaments, dried floral arrangements, artworks & everything in between. But, a freak accident saw her mobility severely compromised a year ago, forcing Jo into an unplanned health crisis & her business to shut down.
On the other side of the garage was hubby Effrem’s stuff. Like any normal bloke, there were a thousand & one tools, garden bits & pieces, bikes, fishing paraphernalia, car parts & so forth. He’s also a musician so drums & a raft of other musical instruments were present.
With 2 people stuffing things in & out of this garage space in a rather haphazard way, it was no wonder things got a little cluttered. Effrem maintained though, he always knew where everything was. Gold star Effrem!
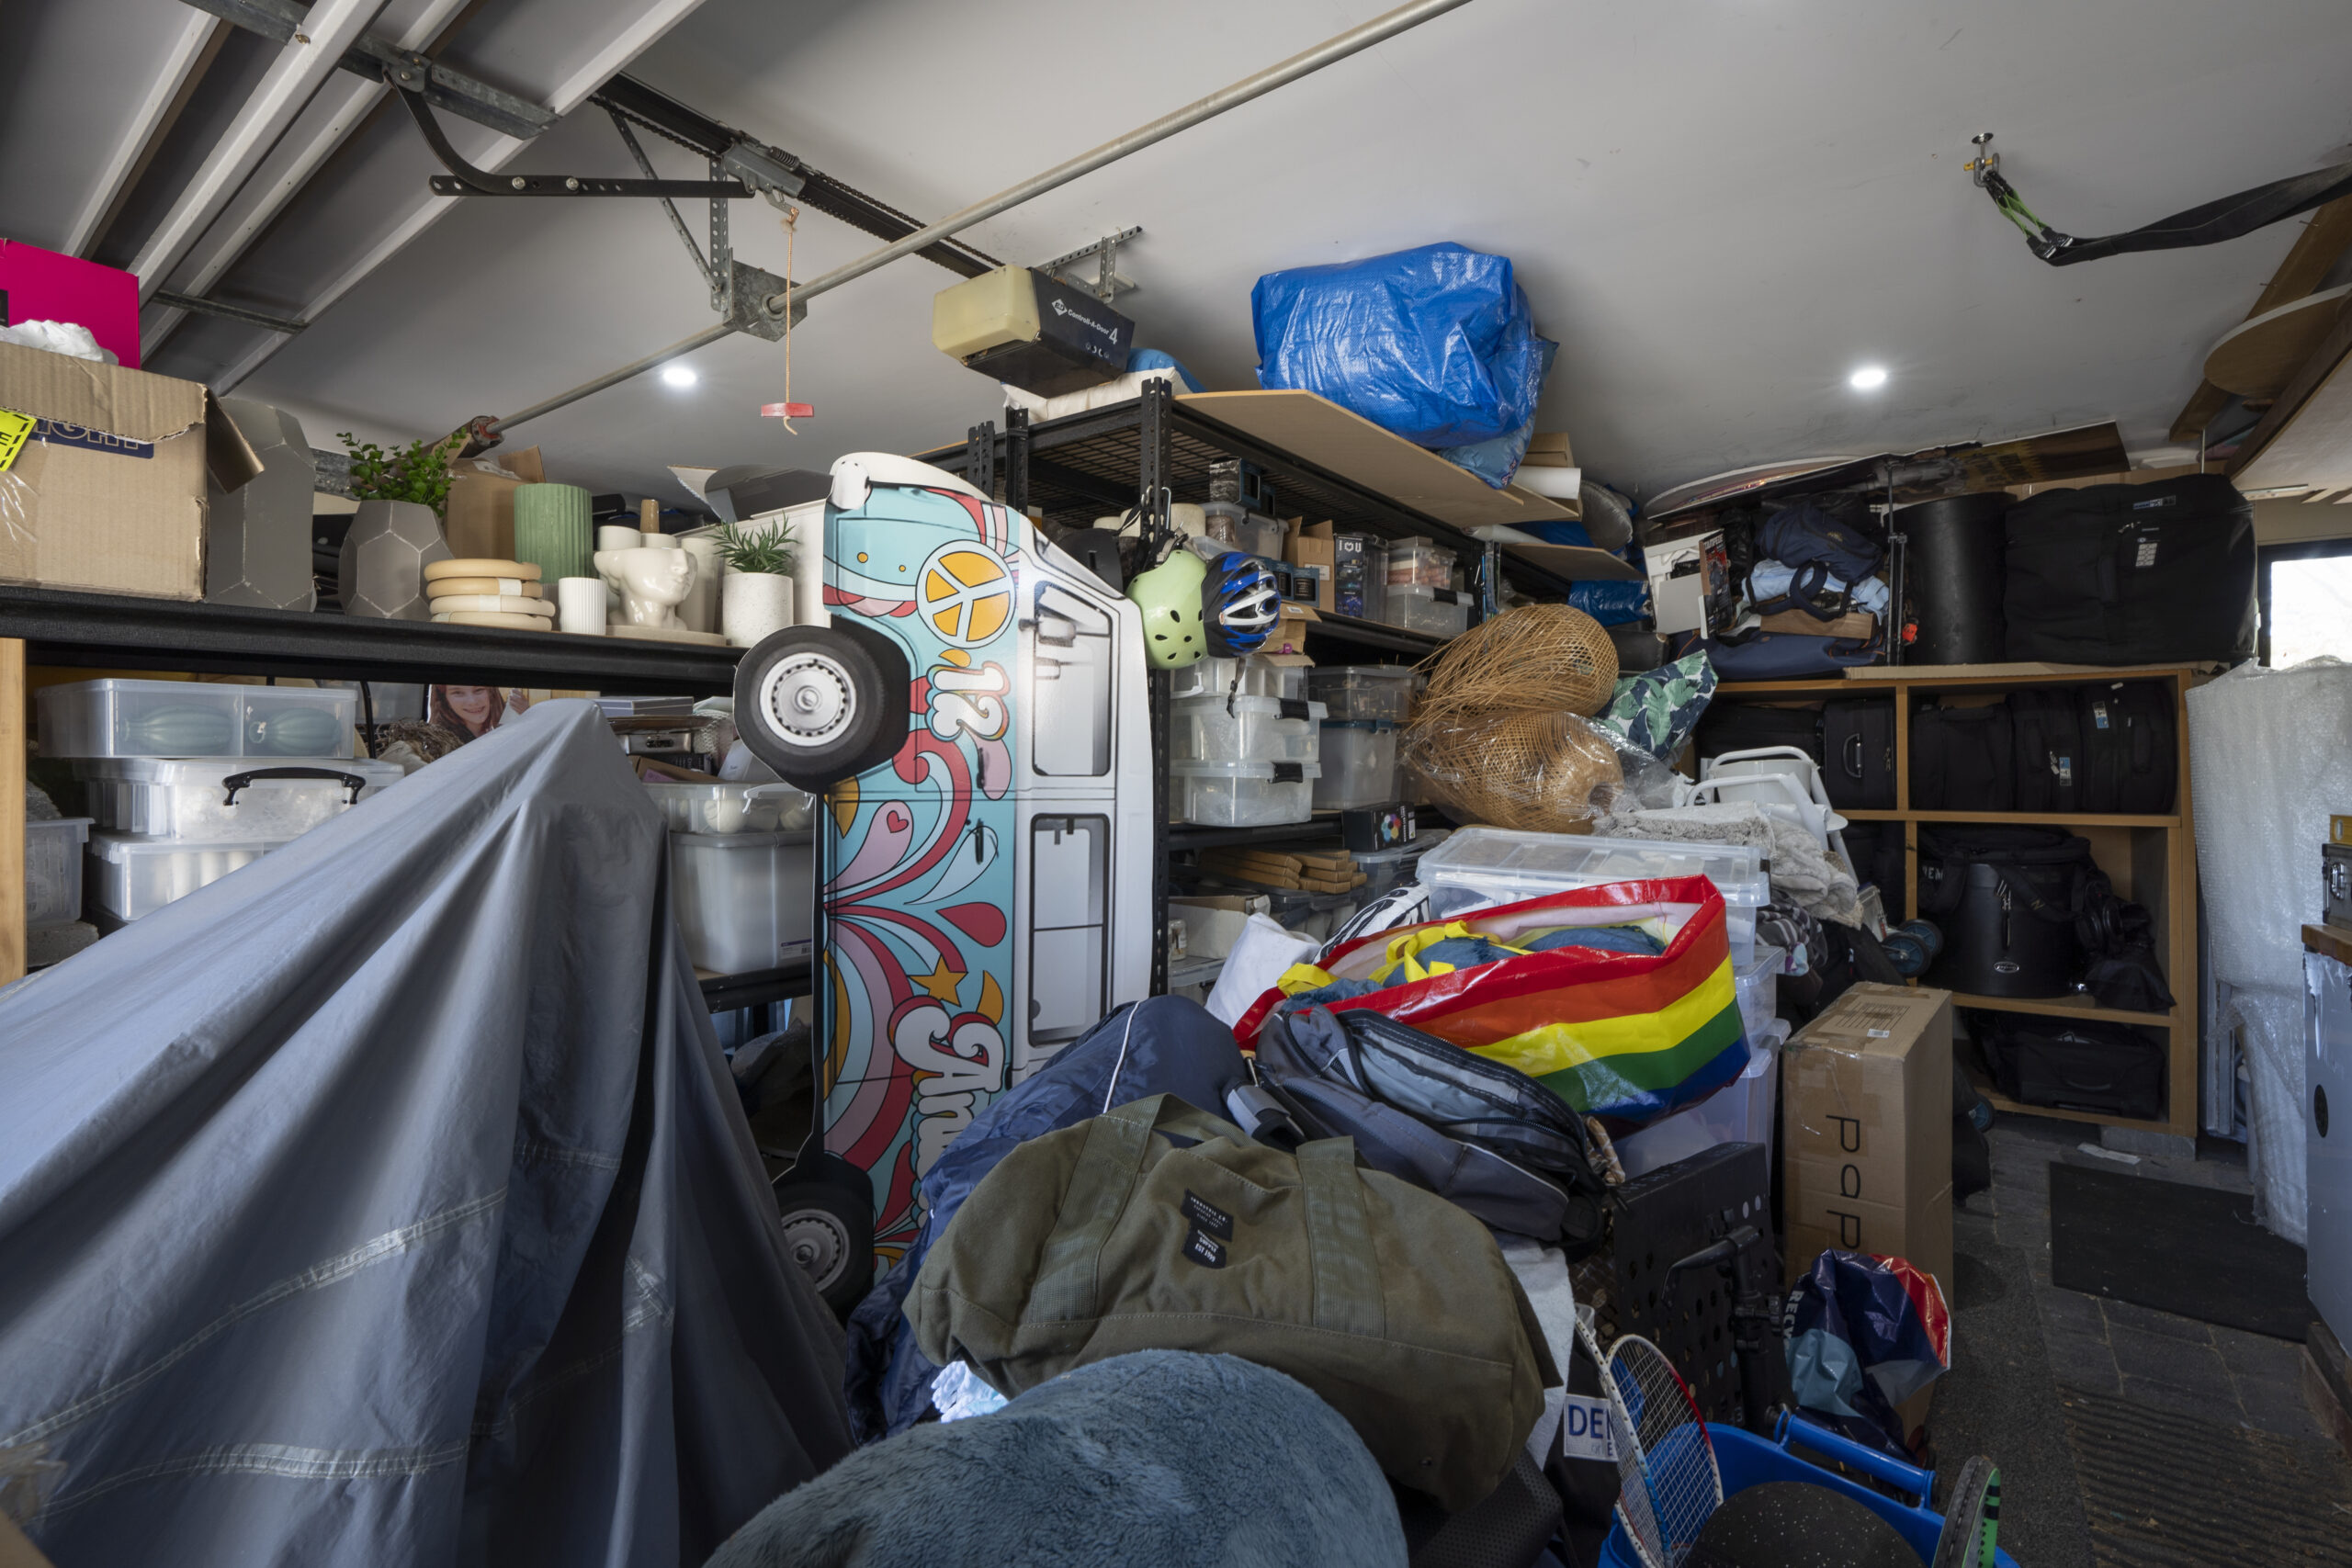 Before – Jo’s side of the garage that shows her belongings packed to the rafters.
WHATS GREAT ABOUT THE GARAGE?
Firstly, this garage was in great structural condition. That’s a big saving right there not having to do expensive structural works & I didn’t have to undergo council approval…bonus!
The size of this garage is a bit like Goldilocks & the three bears – it’s not too big & not too small, it’s just right. As a double garage, (never used for car parking due to the property having a reasonable length of driveway), it provided a decent amount of space to turn the room into something completely different.
The garage is also on one floor level, eliminating the need for flooring changes that chip into your budget…
It’s been well designed with a decent amount of windows that let plenty of light naturally stream in…
All in all, it was a decent space with great bones to begin with.
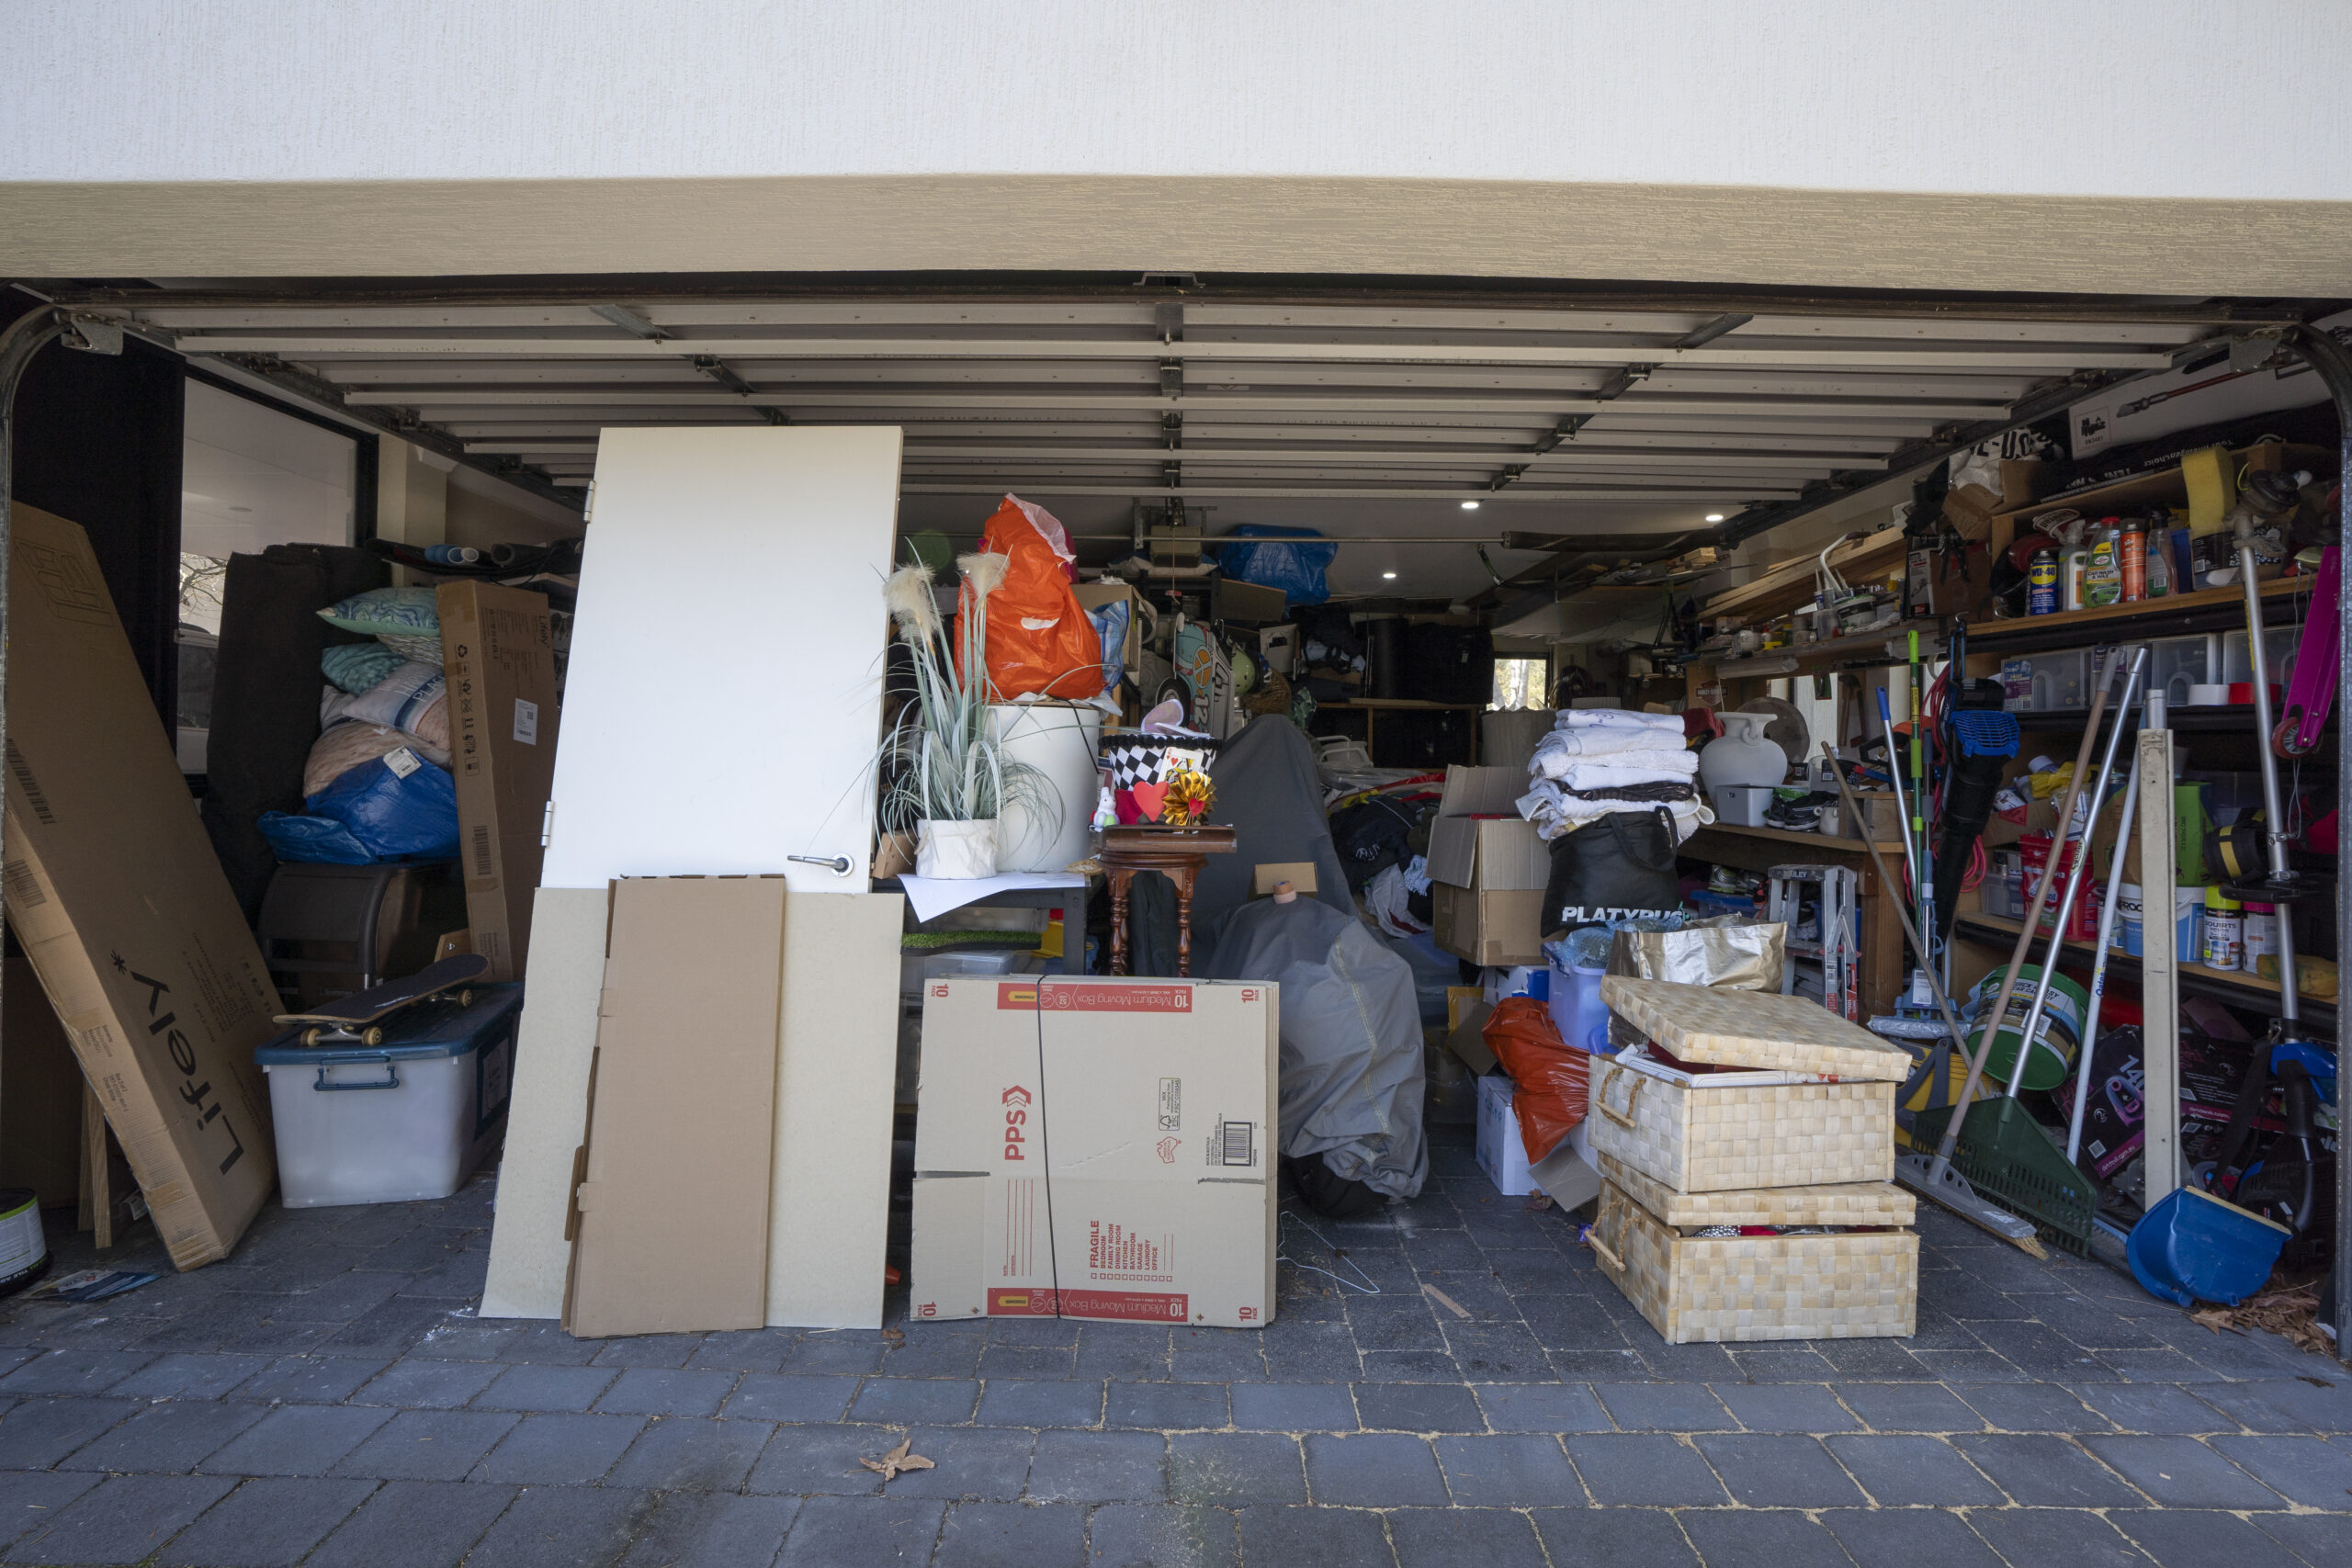
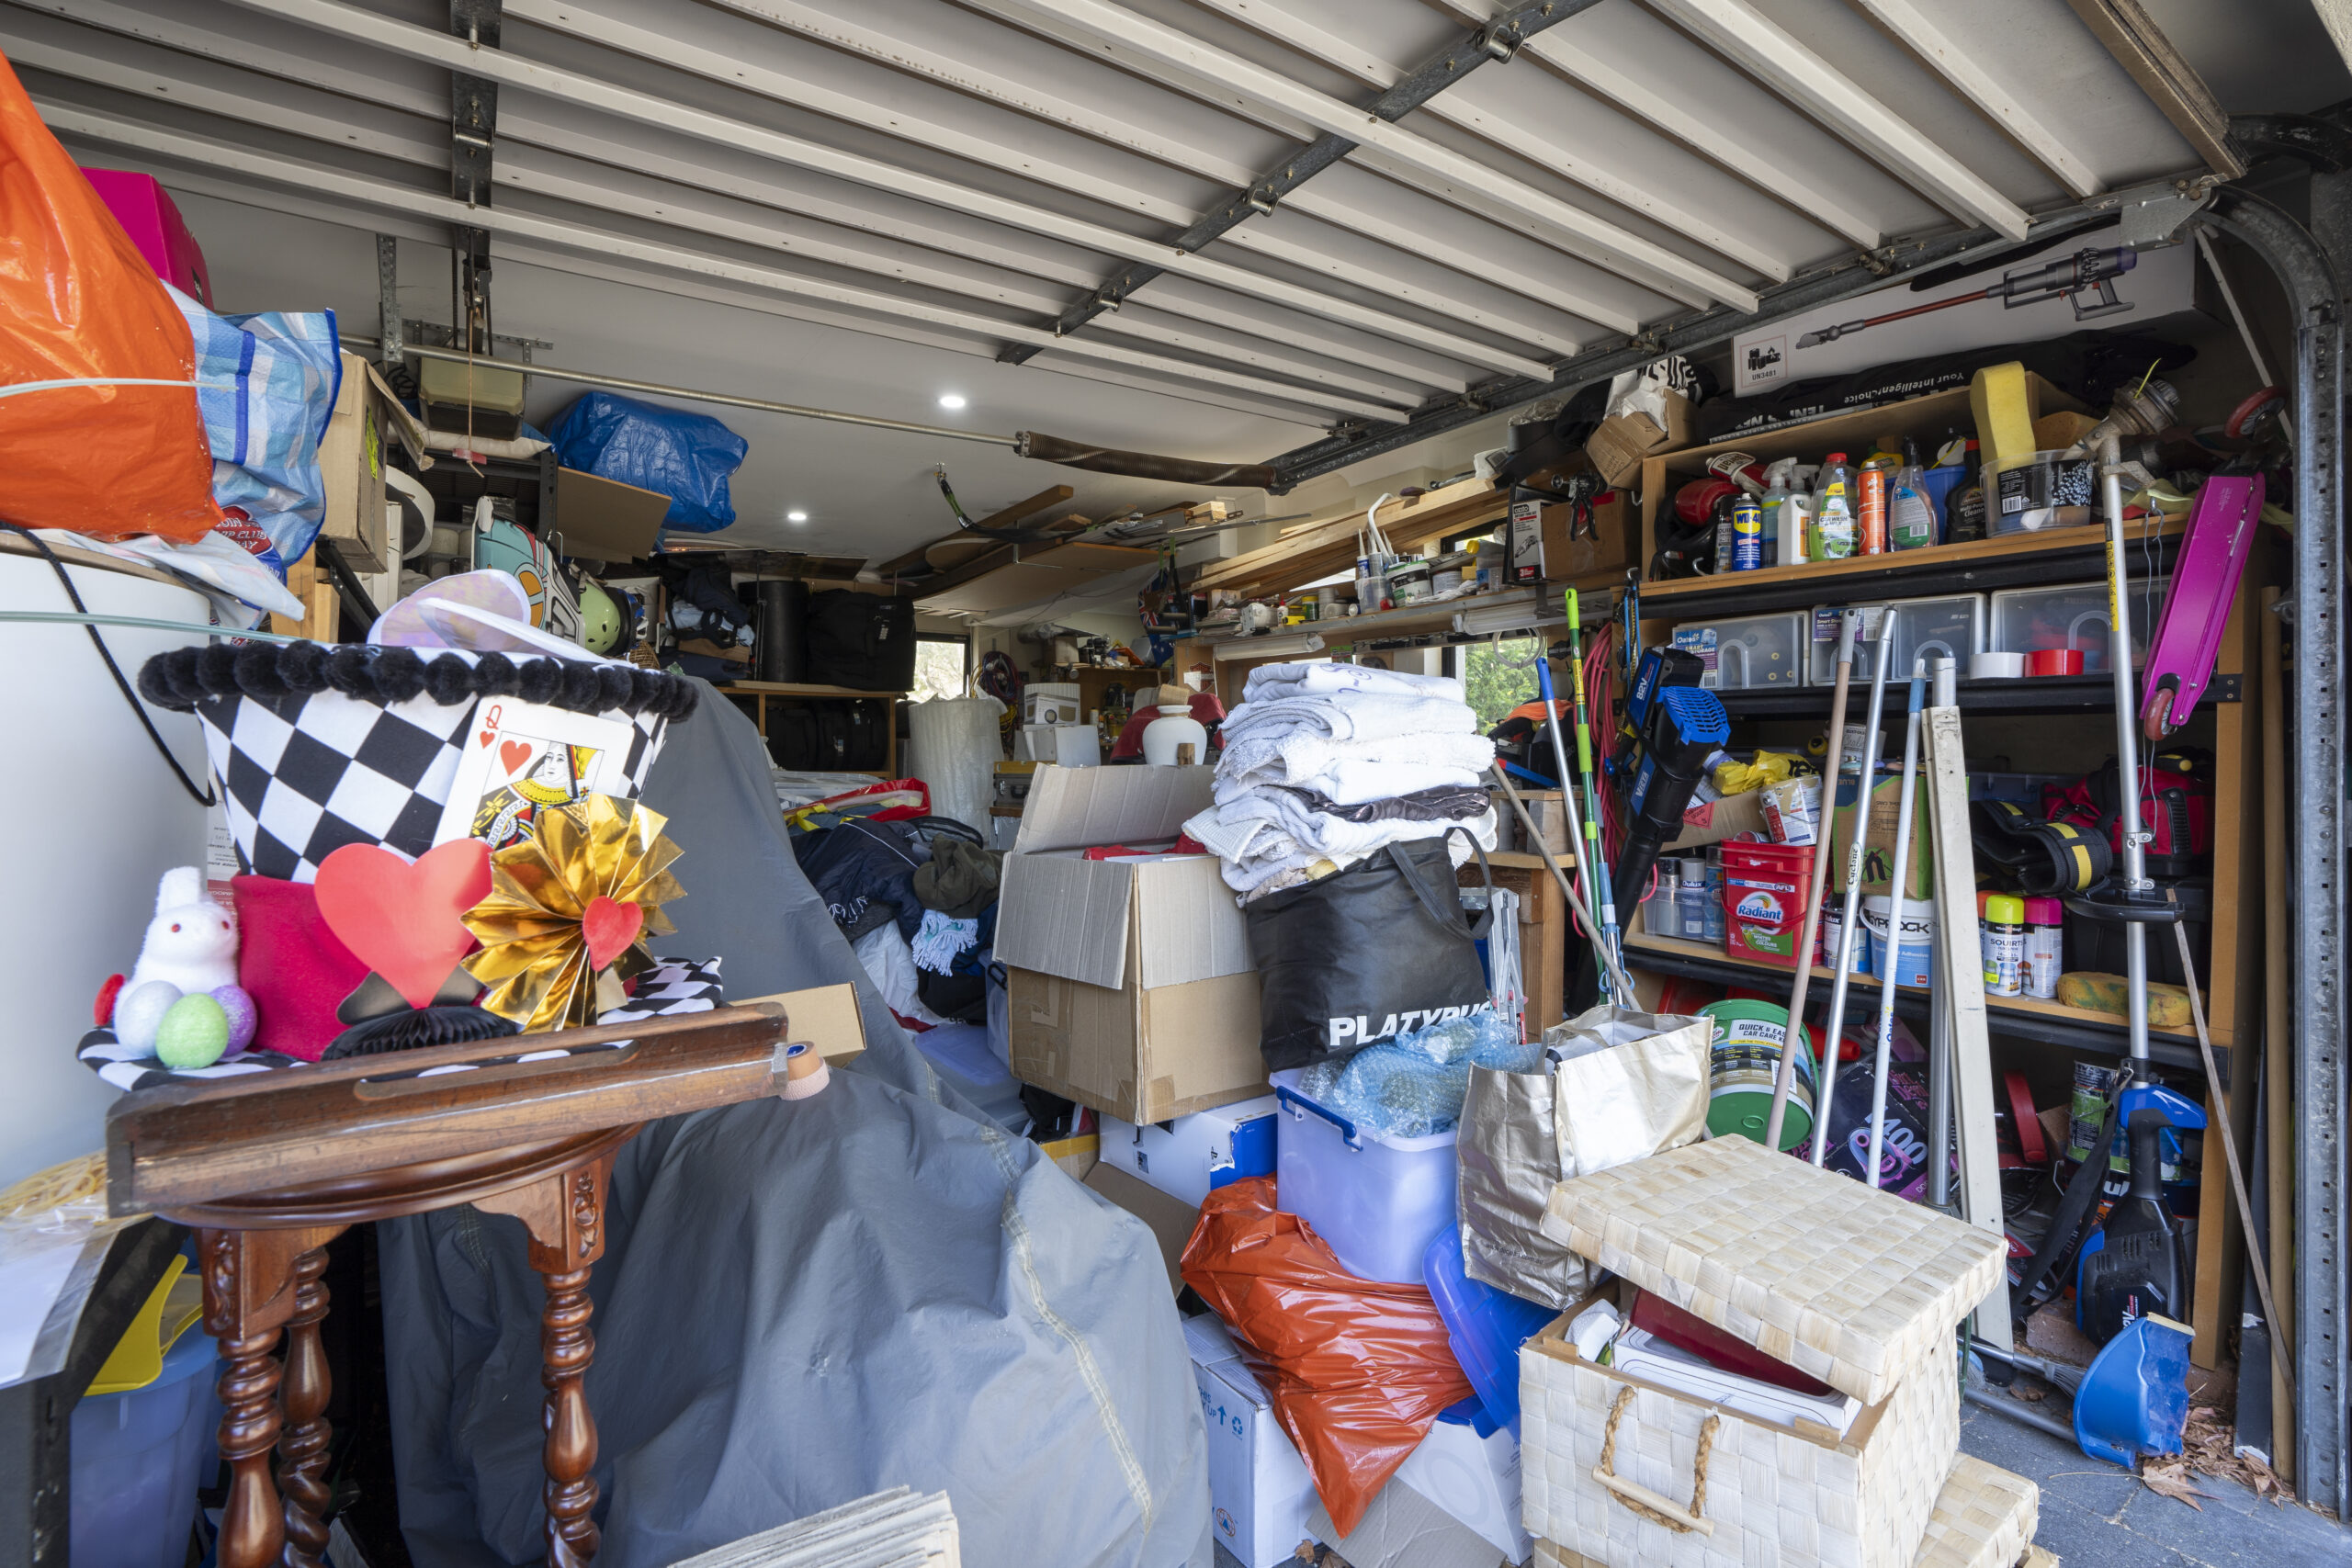
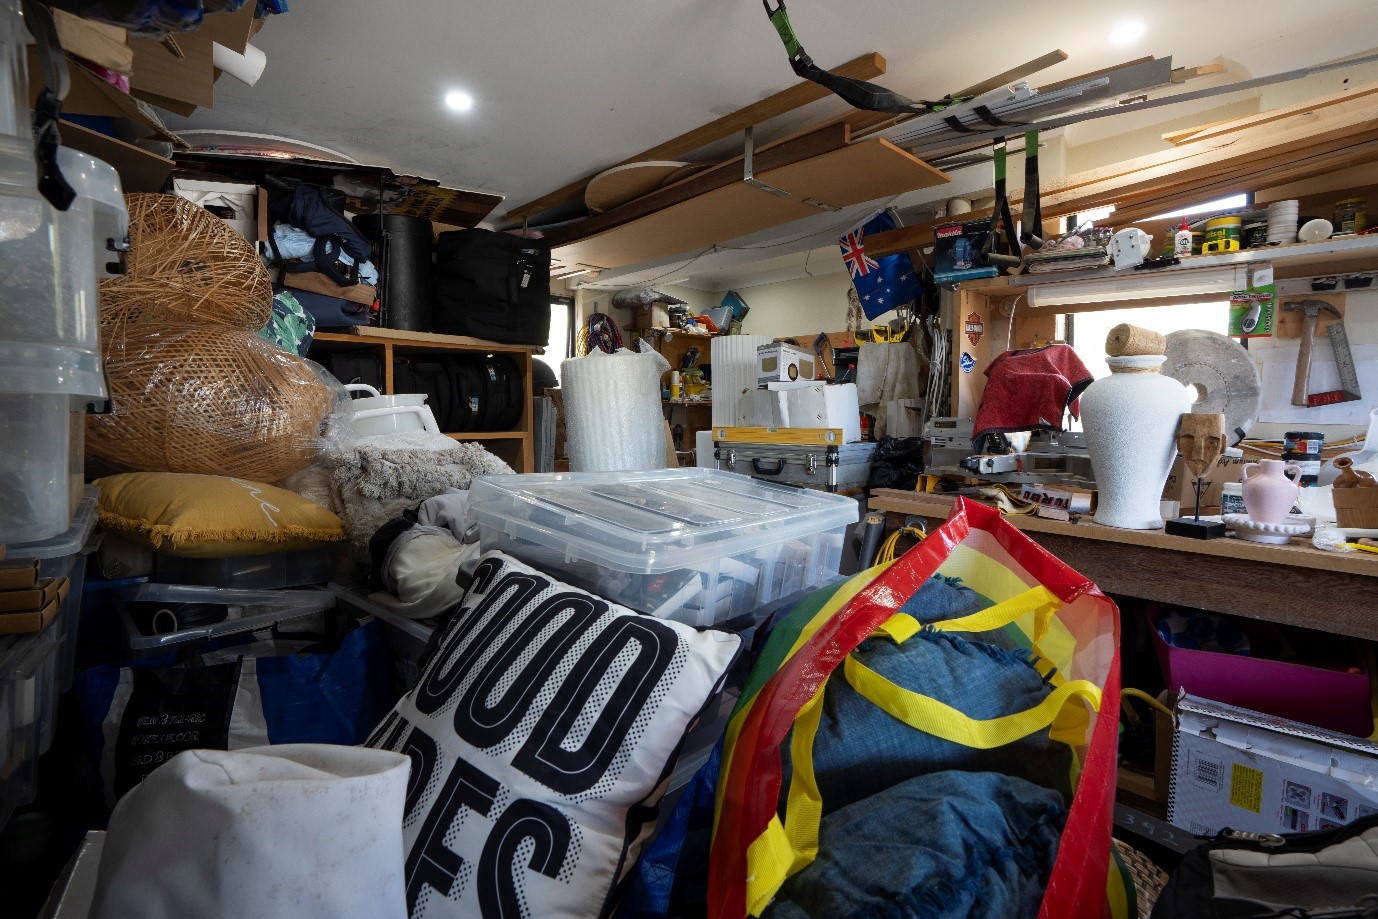 Before – Effrem’s side of the garage with anything & everything.
THE BAD POINTS
In its current form, the garage is cluttered & disorganised. Nothing has a purpose or place & everything lands wherever it lands…
It’s a terrible waste of space, considering its size. Is your garage best served as a storage shed or can it be something better that gives homeowner’s a better quality of life?
This garage is also visually drab & lifeless, looking more akin to a storage shed, than anything else.
What also can’t be seen from the before photos (due to the clutter in the way) is a sea of random exposed electrical wires, run in whatever way they landed. This was something I knew I didn’t want to leave as is.
WHAT THE HOMEOWNERS WANTED
Jo & Effrem are a delightful, “those that play together, stay together” sort of couple. Despite Jo’s health setbacks, they like doing things collectively. This set my mind spinning for a his ‘n’ her garage, 50% of the space allocated to each, where they could potter around in the room, pursuing their hobbies.
On Jo’s wishlist – a creative space she can get artistic, painting & making jewelry…
For Effrem, dedicated drum & instrument storage cabinets & plenty of workbench space to test out his DIY skills.
 Homeowners Jo & Effrem
WHERE I STARTED
As I’m always up against the clock on my TV reno’s, I measured the space once it was emptied (laser measure not tape measure for speed & accuracy) to devise a his & her floorplan where Jo & Effrem got fairly equal amounts of space.
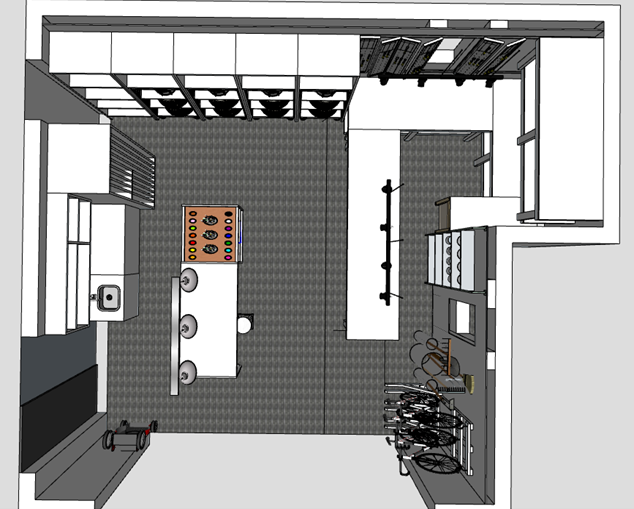
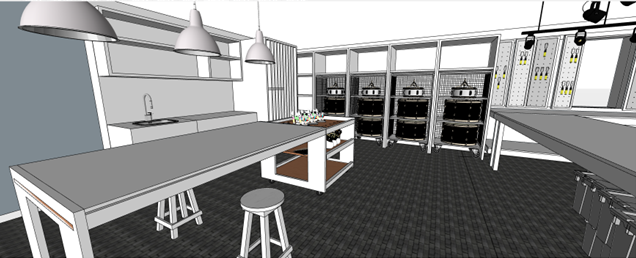
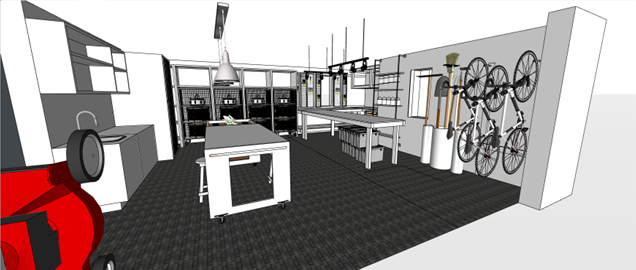
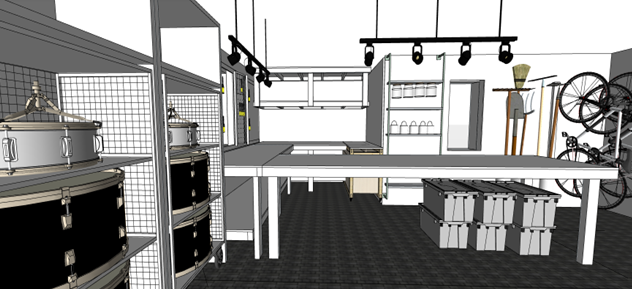
With my measurements in tow, I used a software program called SketchUp to design the space with Jo’s stuff on one side & Effrem’s the other. Software such as SketchUp is great for visually seeing how a space will look on completion, before your renovation has even begun.
When I’m using SketchUp, it’s not unusual for me to change things around, delete stuff, it’s a normal part of the design process. It often gives me clues if anything looks visually odd or if I need to up the ante somewhere, to make the space look even better. These days I’d never venture into a renovation without doing the Sketchup file first. If you want to learn SketchUp, companies like The Little Design Corner offer beginner courses that you can do online.
My SketchUp design files are below & as you will see when you see the “after” photos, ended up pretty close to what I initially designed.
Once my design plan was bedded down, I estimated what materials & tradies I’d need & quickly costed everything up to ensure I didn’t go over my allocated show budget.
THE RENOVATION WORKS
Without bogging you down with every detail, here’s a very brief, quick snapshot of the main flow of works …
Firstly, my sparkies got in, cleaned up the electrical wiring & made everything electrically safe. They also roughed in new electrical lines for all the new lights & powerpoints in the right places they needed to be.
Next up & the biggest job in this reno was lining all the brick garage walls with the Easycraft VJ100 decorative panels. 4 chippies had to work at lighting speed to get all the brick walls battoned out, then the panels nailed on, in just over a day. I used VJ cladding as some of the brick walls had an uneven surface & I also didn’t want all those random electrical power lines visually exposed. By cladding all the walls, those problems instantly disappear & the panels add texture & a designer touch to the room.
Following, my painters got in & gave the ceiling a fresh lick of paint & painted all the new decorative wall claddings. Even though the ceiling & walls are internally covered, I still used external paint throughout for added protection.
Moving right along, I got Flooring Xtra in to install carpet tiles. I could have left the existing pavers which were running from the driveway into the garage, but I felt it was a nice touch to have a more decorative surface on the floor. Carpet tiles were run straight over the top of the existing pavers that mean the homeowners can easily remove them anytime in the future, if they want. The great thing about carpet tiles is, if you spill anything on them, you simply pull one carpet tile up & replace it! Be sure though to order an extra box as ordering them in the future may not be that easy.
Making good progress, it was time then to get all the new Kaboodle cabinetry in for Jo’s side of the garage. She now has plenty of cabinetry space to put all of her belongings away behind closed doors & we added white melamine planks to a Kaboodle pantry cabinet, so it became an artwork storage area. A genius idea on my part, if I may say 😉
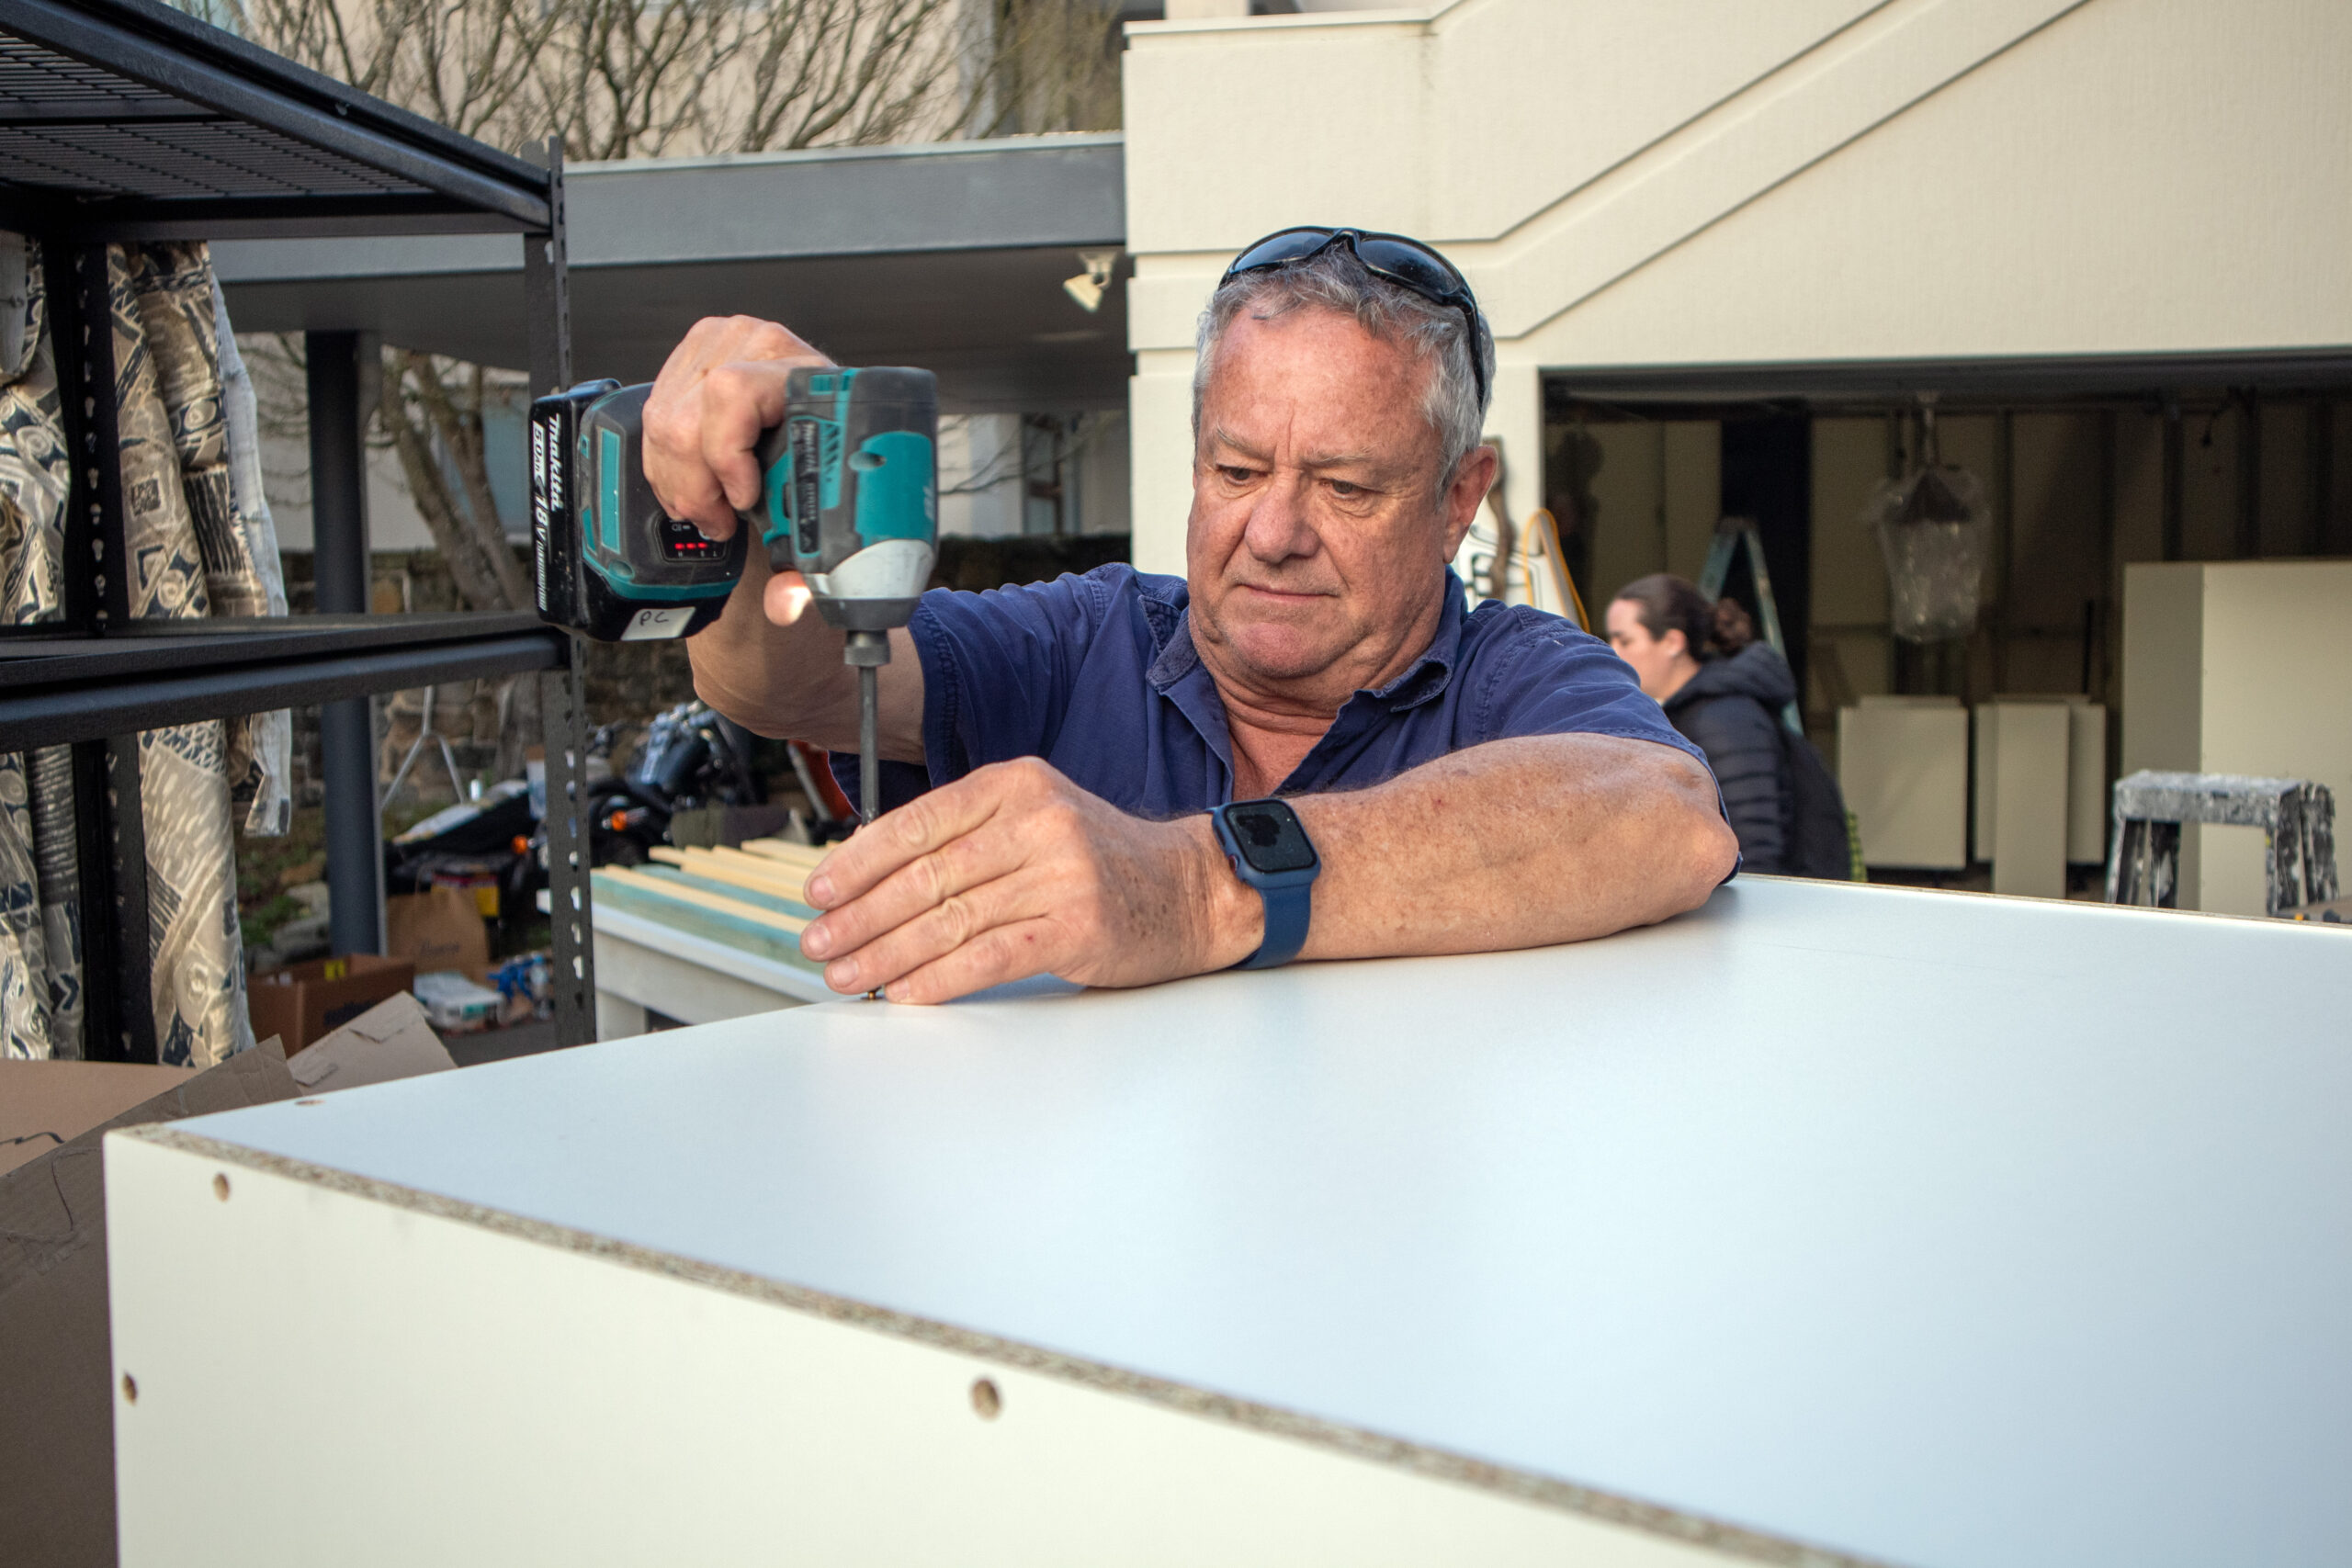 My chippie Paul, hard at work.
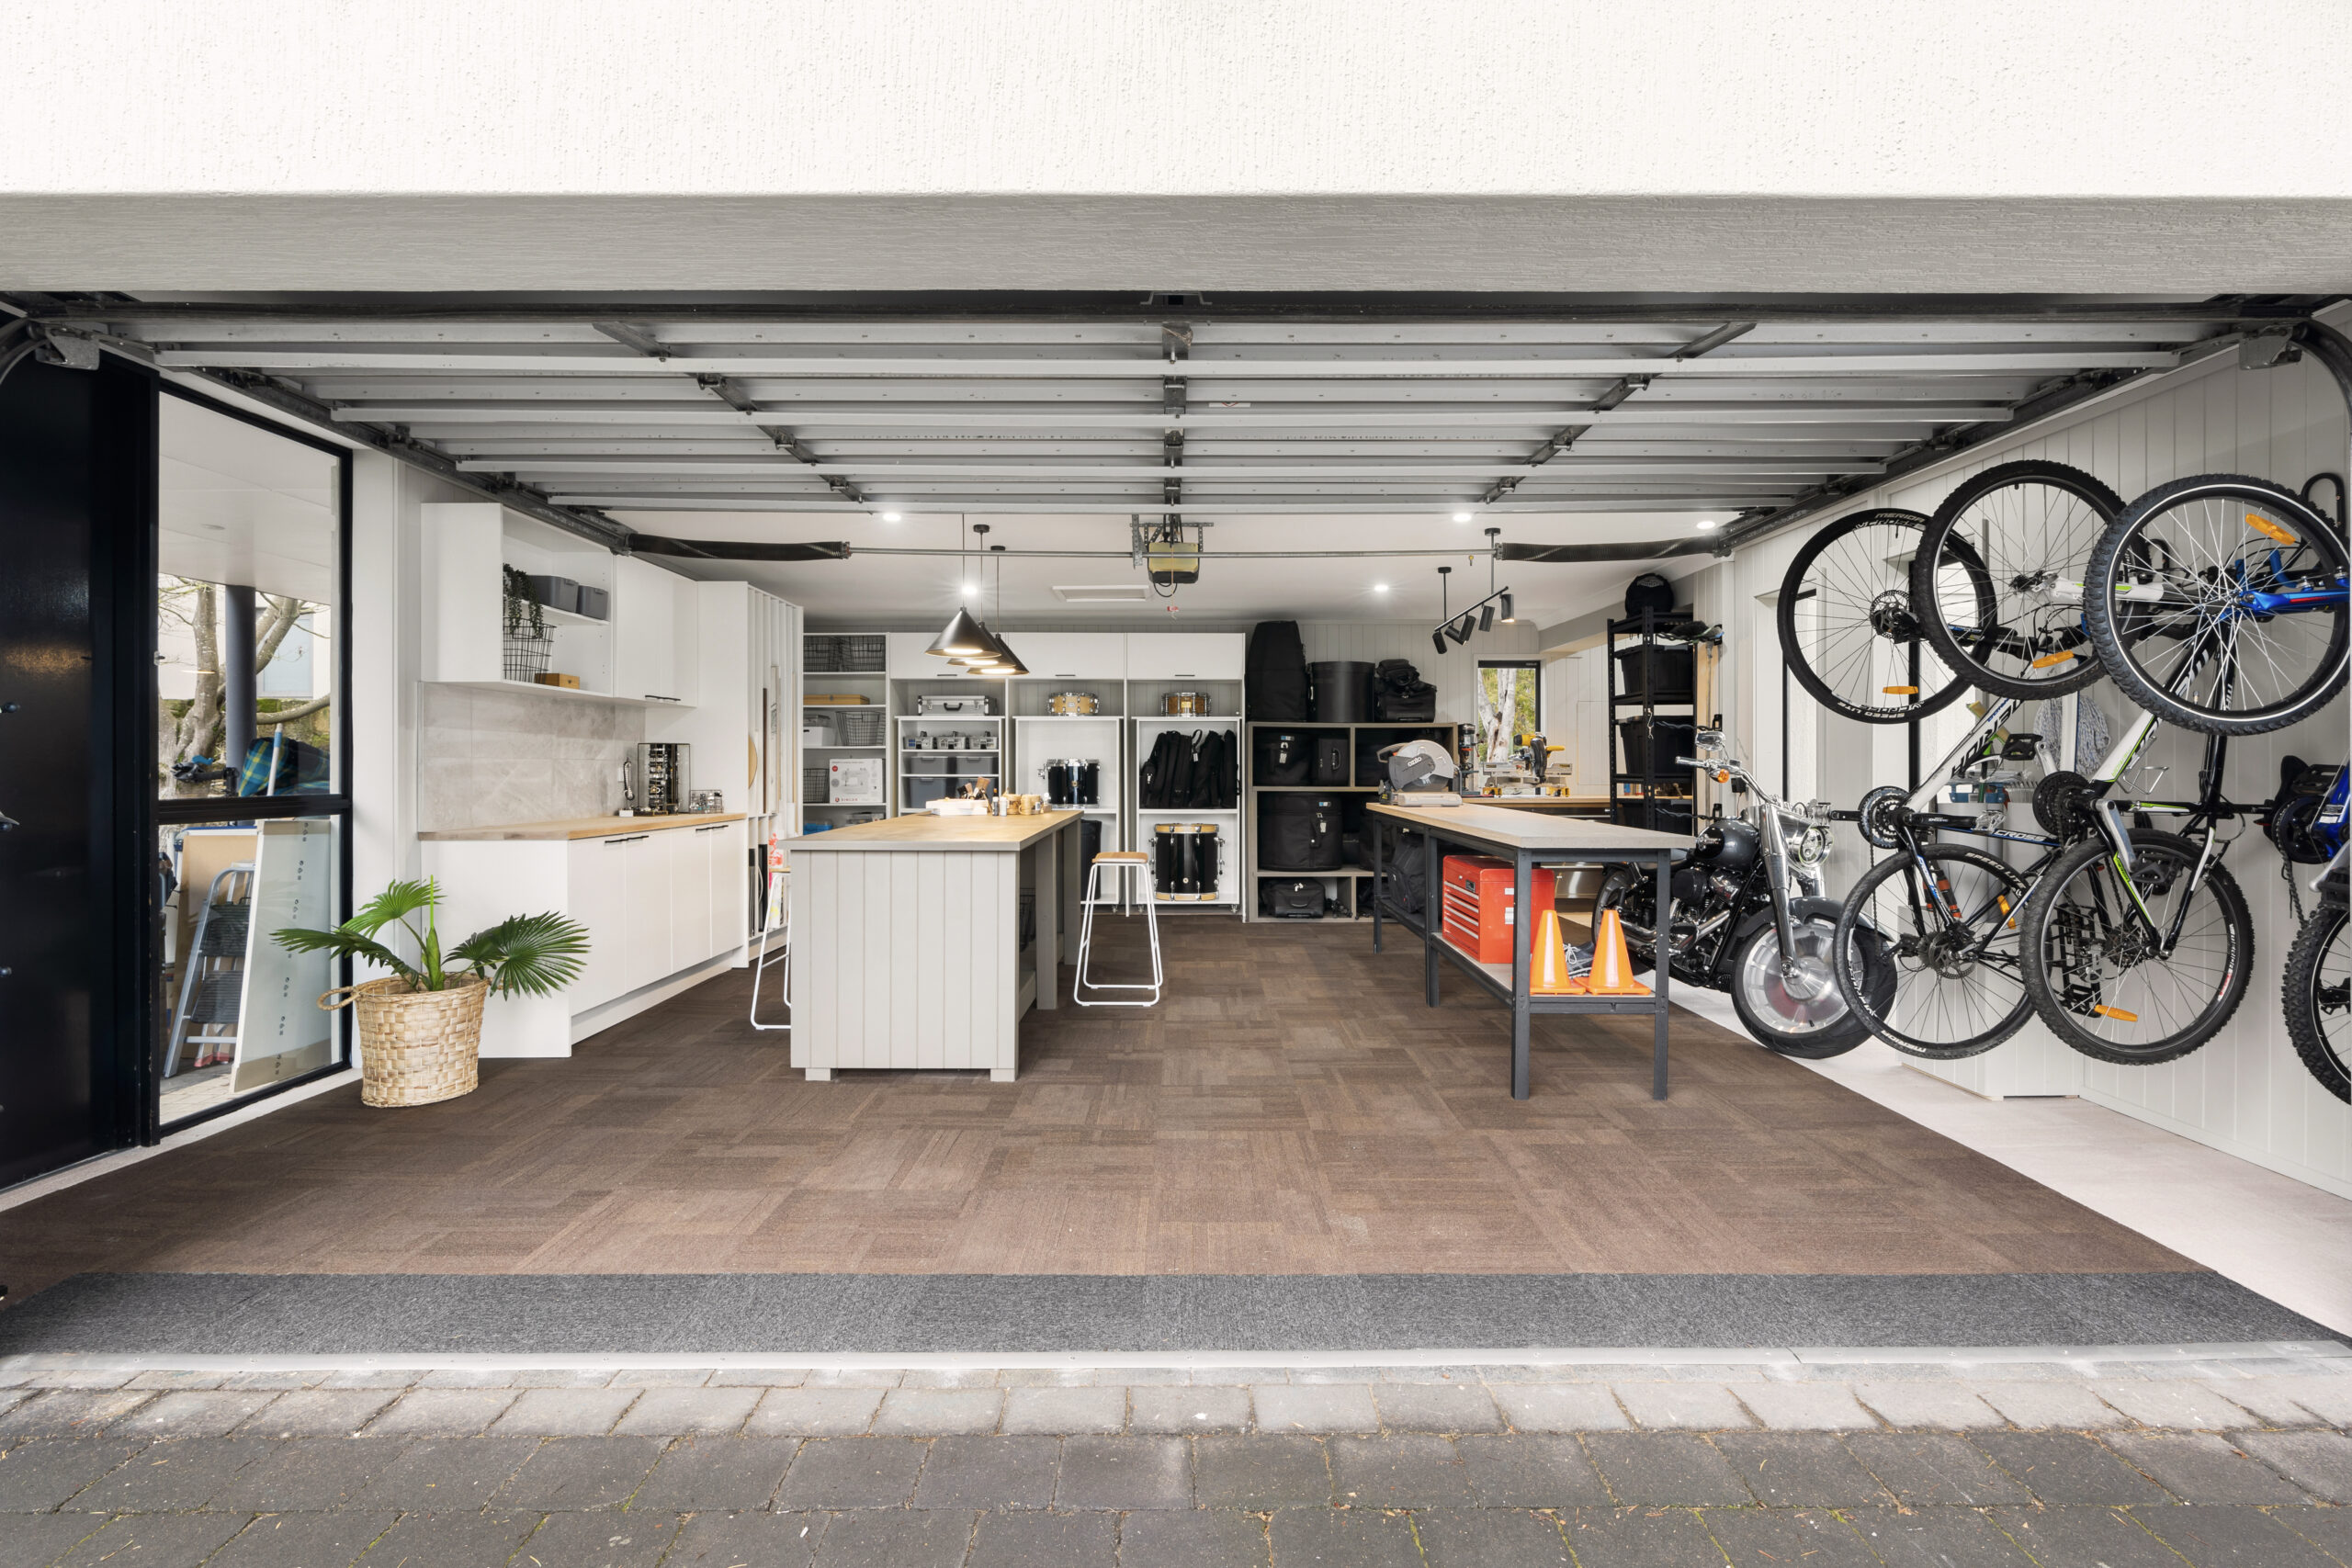
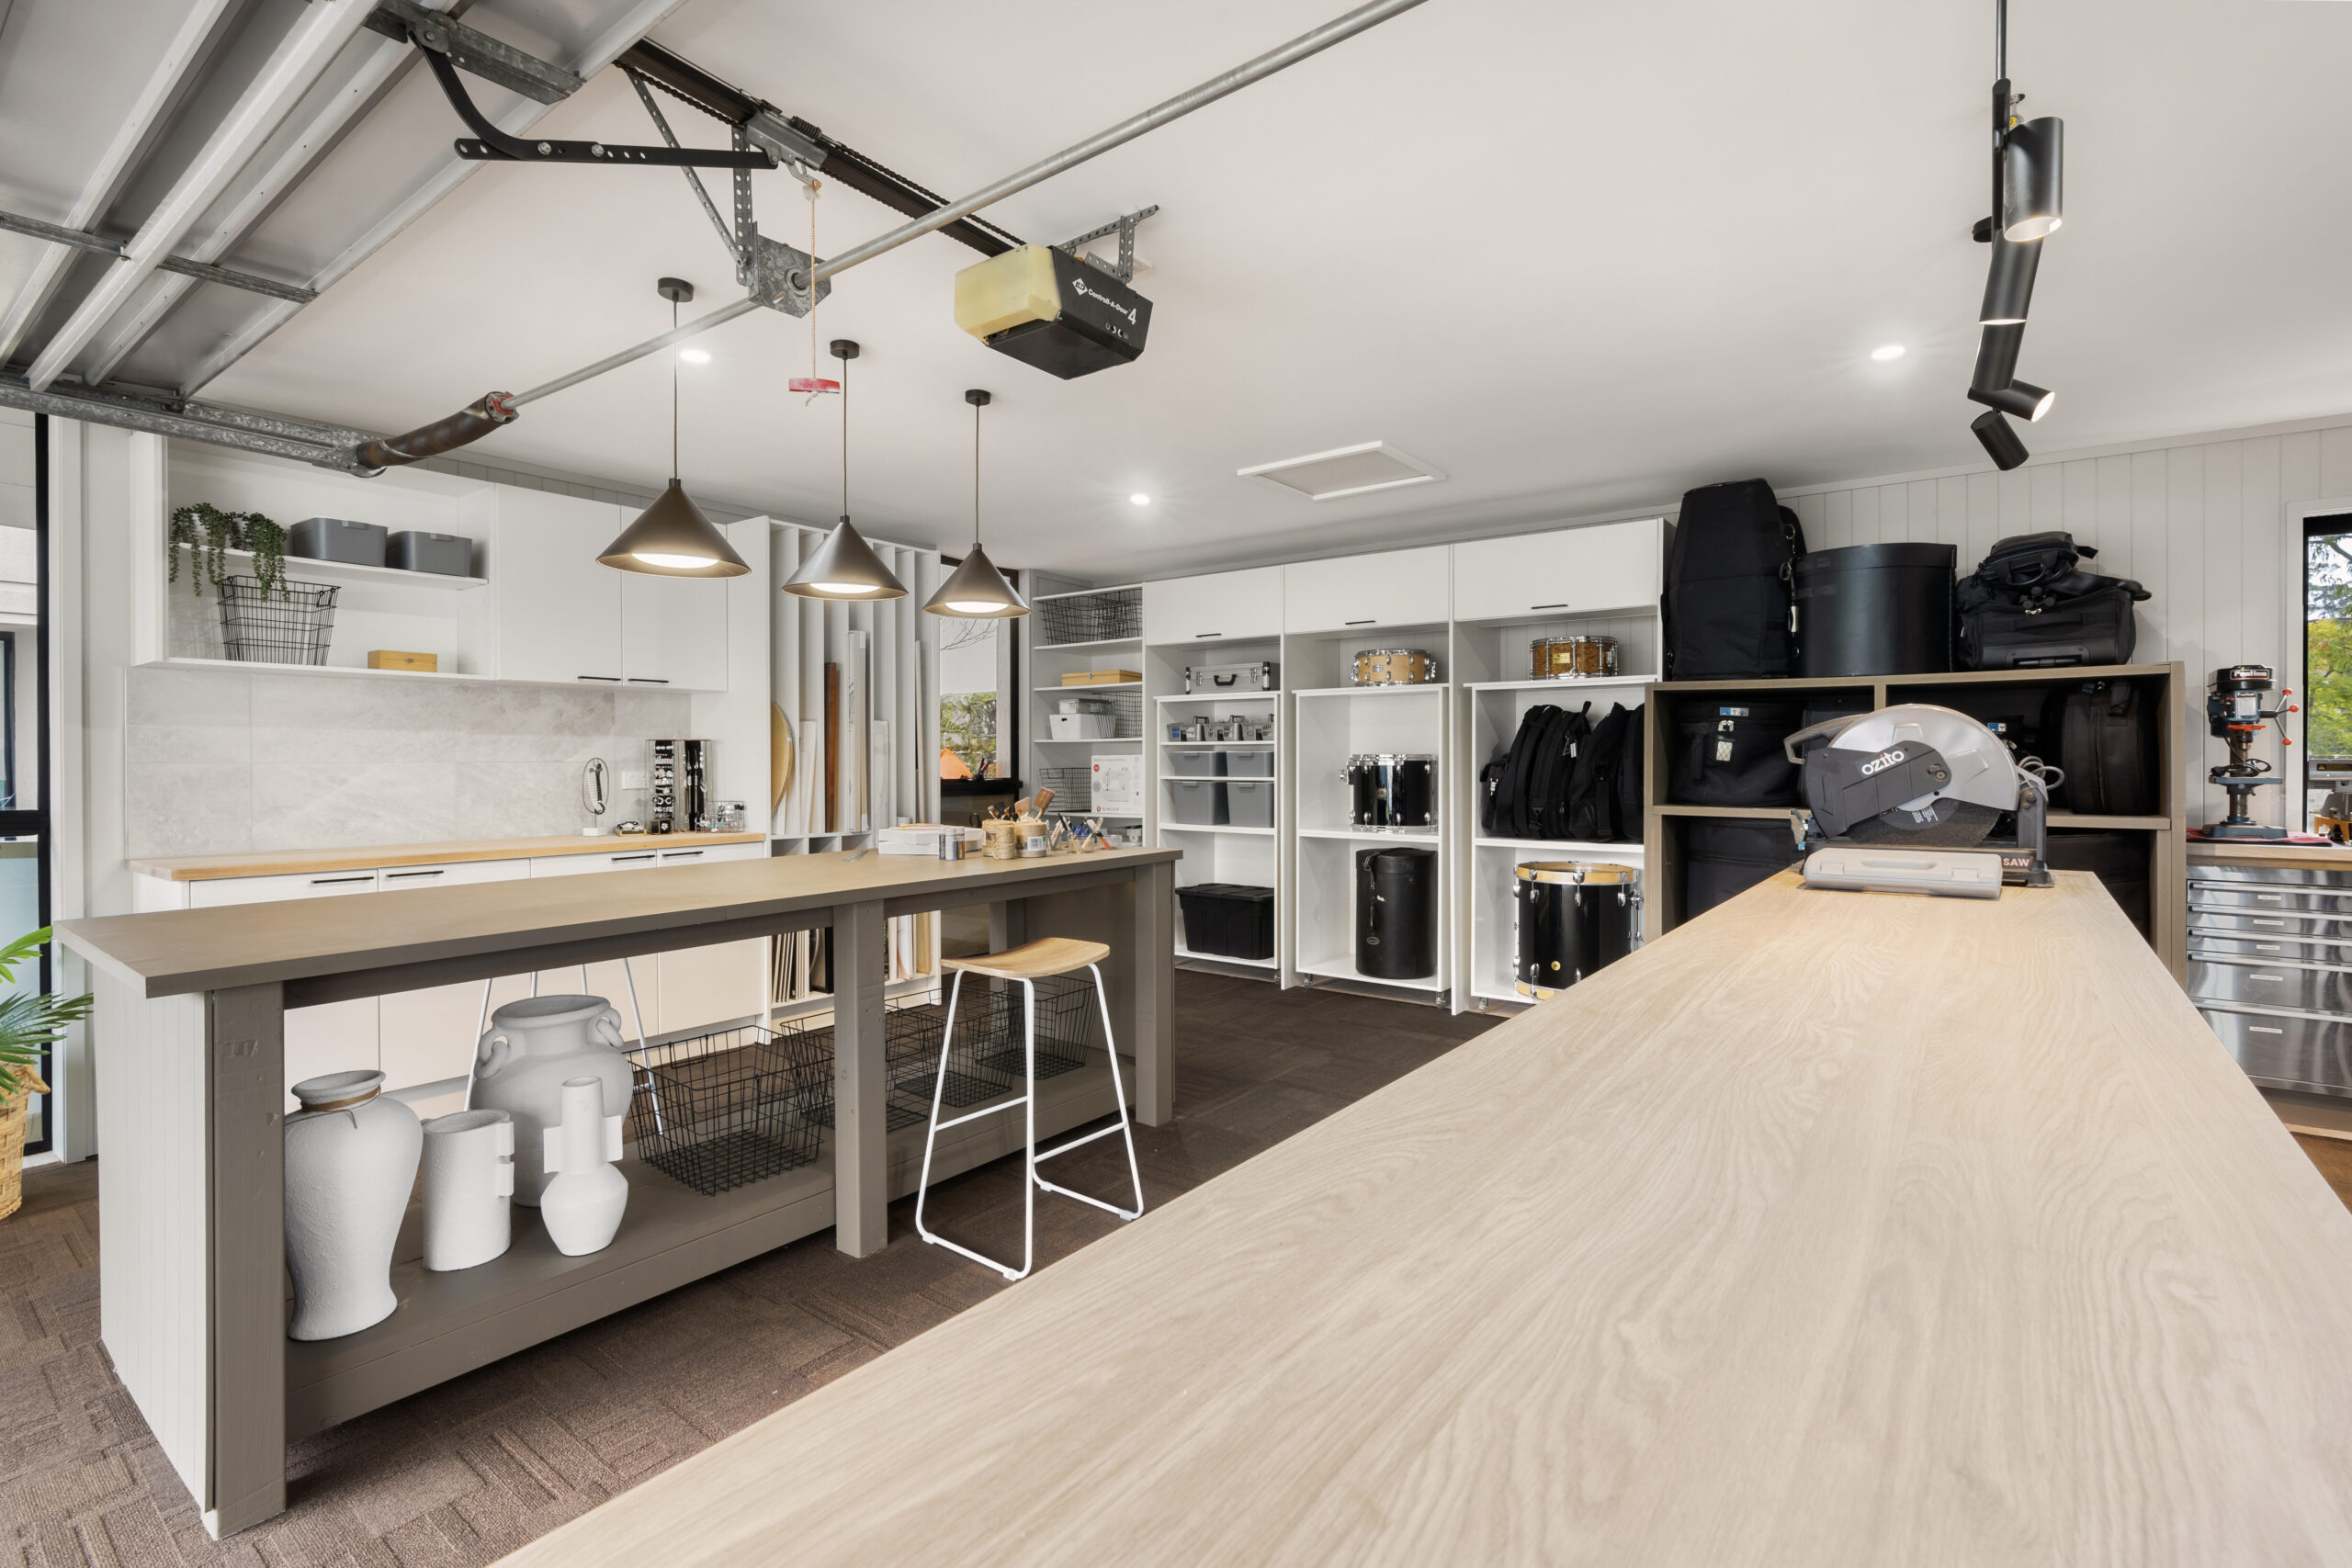
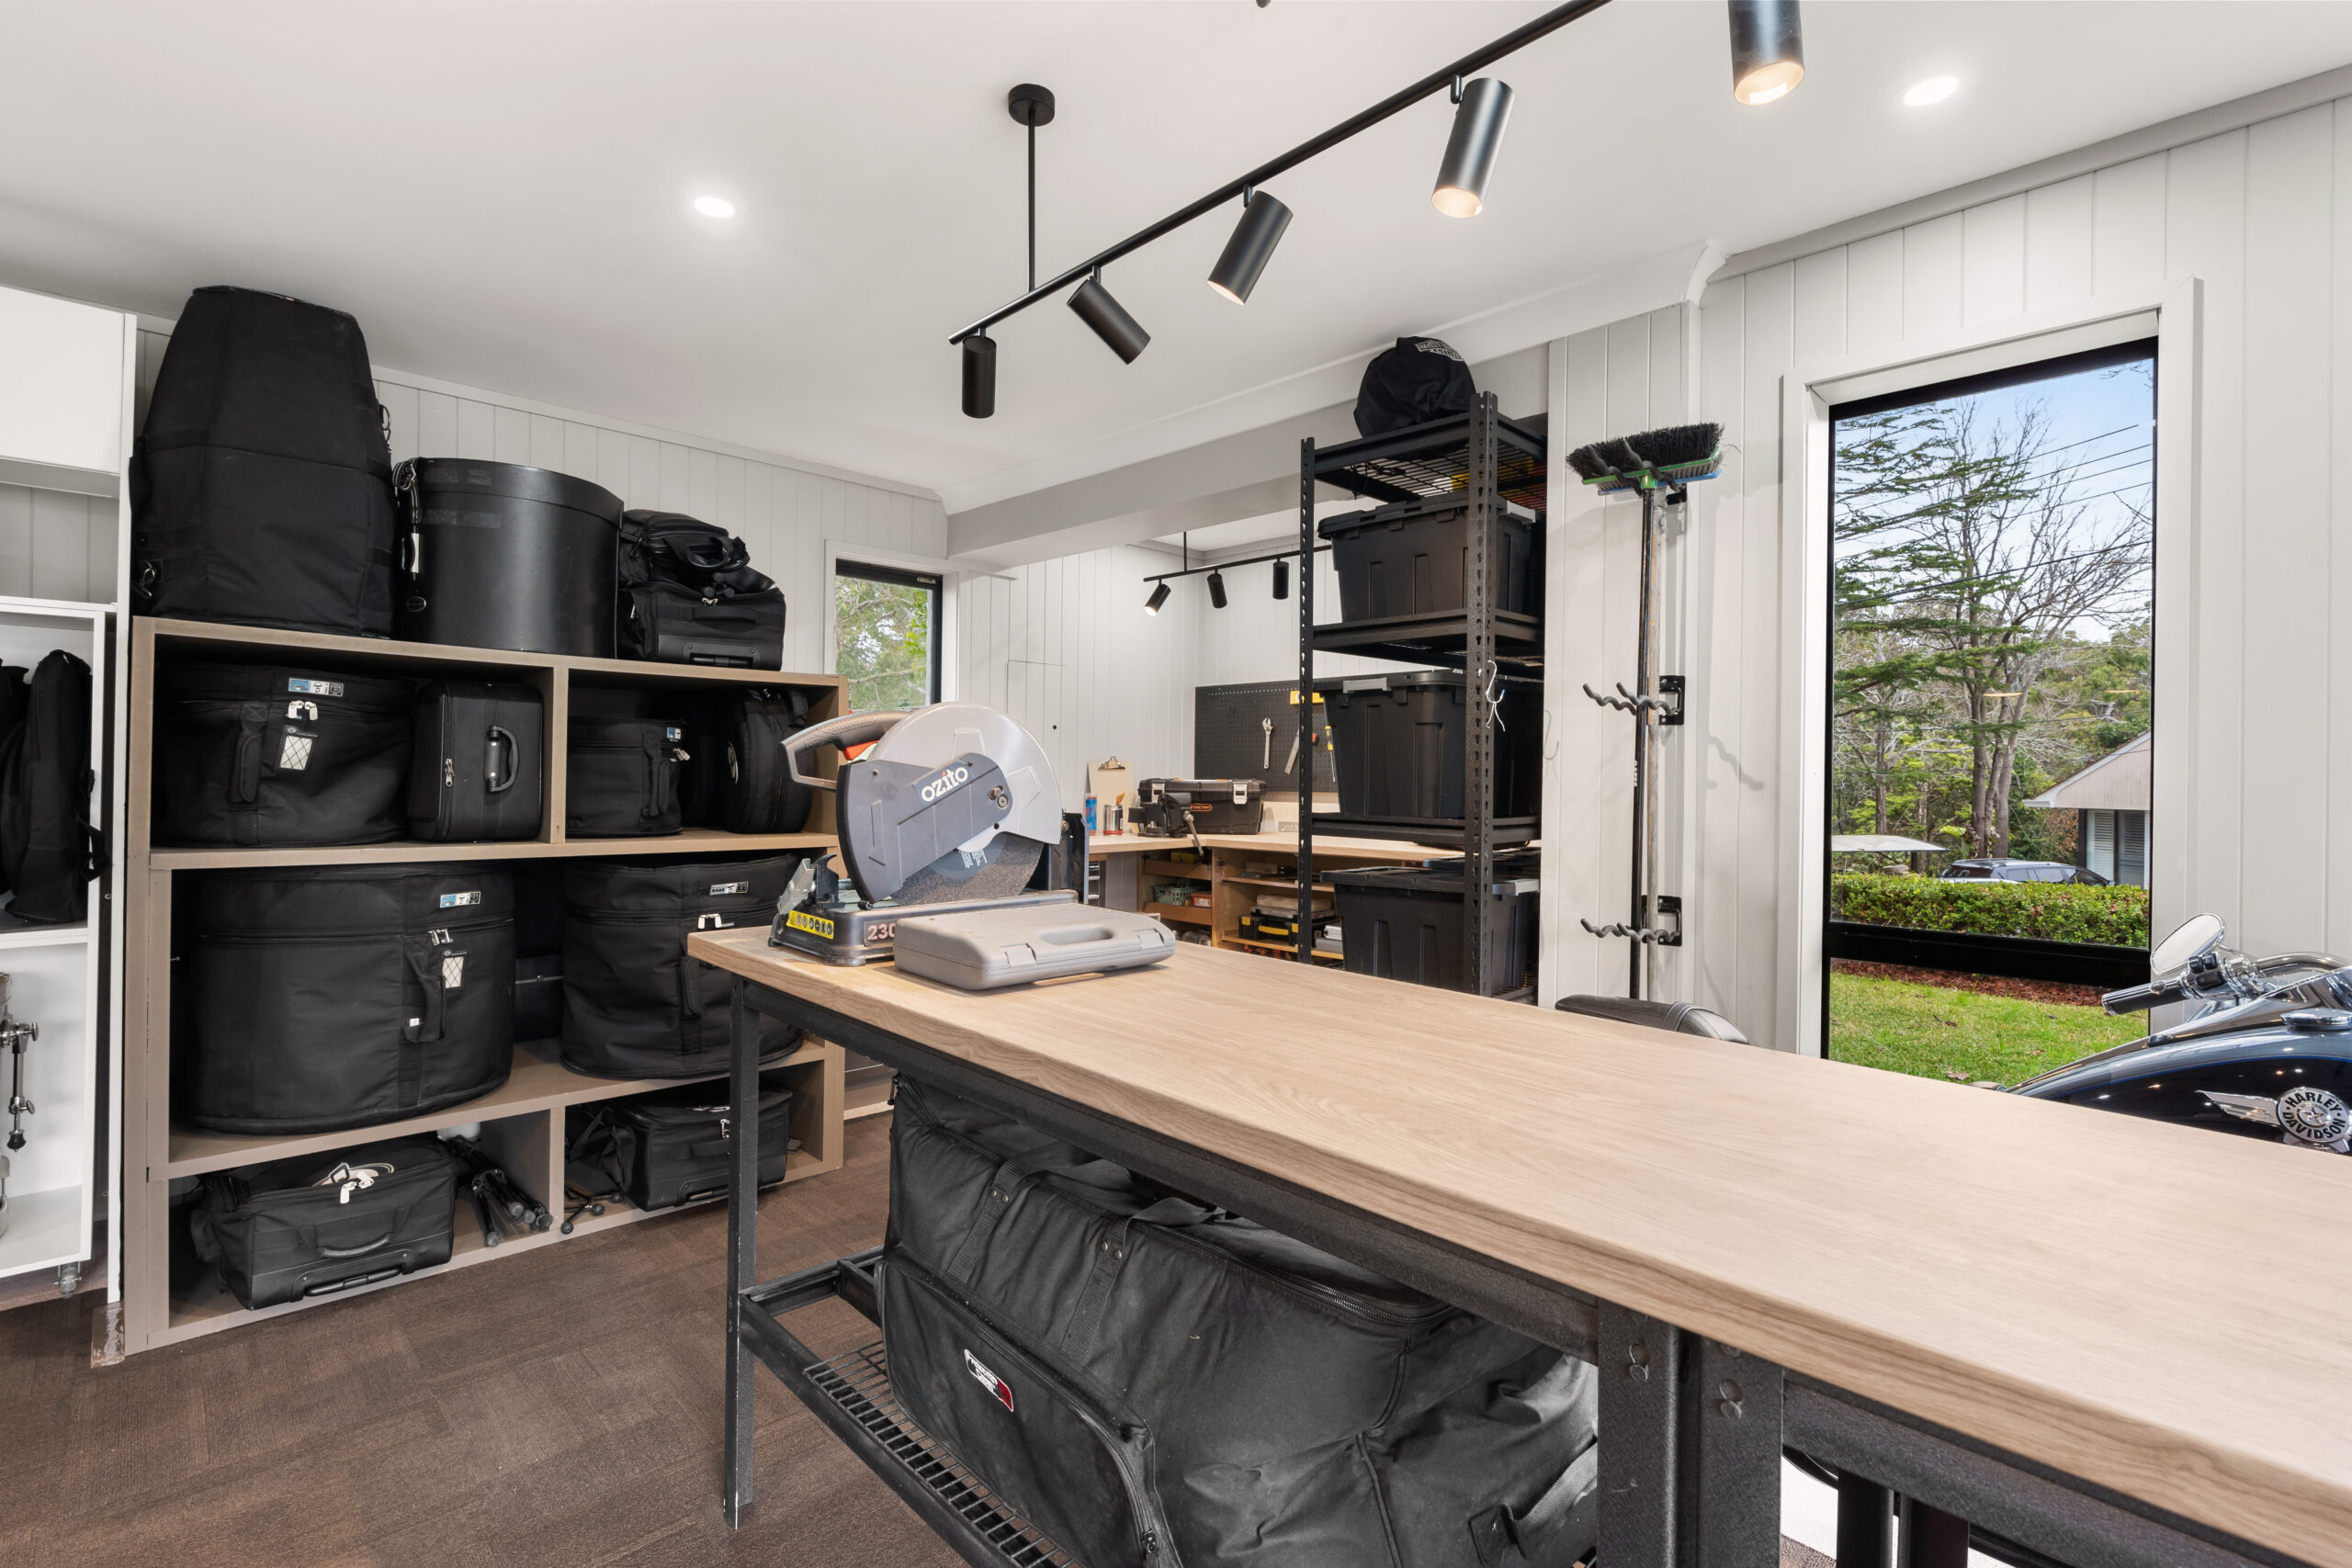
Talking of cabinetry, we installed Kaboodle cabinetry once again on the back wall of the garage to house all of Effrem’s drums & musical instruments. 3 of the cabinets on the bottom, never got bolted to the wall. Instead, we put castor wheels on those cabinets. Why? So Effrem can wheel those cabinets to the garage roller door, load his drums into the cabinets each weekend from the back of his car (when he comes home from gigs) & then simply roll them to the back wall so everything always looks nice & neat.
In this garage renovation, I also wanted to repurpose as many of the old existing metal work shelves & work benches as I possibly could. I purchased 3.6 metre long timber benchtops from Trademaster & installed them straight over the top of most of the existing workbenches, including Jo’s new workbench. Adding VJ panels on the side of her workbench, helps that piece visually tie in with all the other cladded walls in the garage. Effrem now also has plenty of work space to practically use on his side of the garage.
Last but not least, we finished this garage reno with the finishing touches – new bike storage hooks, tool hooks & fitting off all the new lighting. After Jo & Effrem decluttered all of their belongings with my decluttering co-host, Peter Walsh, everything came back in, with a new home allocated to each piece & plenty of empty storage space to spare.
WHAT IT COST
All up, this renovation cost $32,495.14 for all materials & labour at full retail cost (excluding GST) which you get back anyway, if you renovate in a company structure, as I always do. Of this, materials accounted for $21,507.14 & labour at $10,988.00 (ex GST).
At first glance, it seems like a lot of money for a space that was already built. So, where did it all go? Carpentry labour absorbed $5,400 of the cost due to multiple chippies having to batton out every brick wall & install all that VJ cladding. The purchase of all the Kaboodle cabinetry ate up roughly $8,300 of the budget & $3,855 went to paint & painting labour. Tidying up & reworking all the electrical including the purchase of new lights consumed another $3,500 with the balance of funds left for everything else. Yes, it all adds up quickly.
Unfortunately, the uplift of this renovation is unknown as the valuation process was cut out this season due to the show only being 42 minutes in length. Something I’m not stoked about but hey…I’m just the renovator. 😉
What this renovation does prove is that garages don’t necessarily need to be for cars. They can be anything you want them to be, there are no rule books.
This reno was definitely a race to the finish line in just 48 hours … but well worth the effort. I’m lucky that I have an amazing team of tradies who always put in their best. Jo & Effrem now have a great new his ‘n’ her space to work & play in, that structurally didn’t require anything new to be added onto the property.
 This is my glamour shot on site doing nothing which was so not the case…
As always, if you have any questions on this renovation, be sure to ask them in the comments box below & my team or I will answer them promptly for you. Until next week …
Much love,
Cherie x


Brilliant. I nearly fainted at the garage reno. My garage, unfortunately, is worst than theirs! Inspirational. I’m on to it. Thank you. .
Hi Cherie and team.
Two questions if I may….
1. Were all their possessions shown in the “before” photos kept, and successfully stored away, or was there some sort of purge – decluttering?
2. Although the $ uplift was not possible in the example, typically what sort of uplift could be expected from this type of Reno/re-using/organising a garage?
Kindly,
Henry
Hi Henry, you can ask as many questions as you like :-). This renovation was done for Channel 9’s Space Invaders show so yes, there was a major declutter done as part of the show. In terms of the value uplift, very hard to say with a garage reno as its not a core room in your home. I would expect that you might get your money back if you’re lucky in terms of value uplift, however aq real risk exists that you wont either. It very much depends on what you do in your garage and how much extra useable space you create & also what suburb you live in, in respect to what prices people pay within that suburb. My advice would be to be very diligent about what you do spend in your garage renovation so you don’t overcapitalise. If you’re happy to renovate your garage, just know that the great risk exists that you wont get a return on your money. CB x