


From Grungy Garage To Lavish Living Space
Some properties have quirks, you know … things that aren’t run of the mill sort of stuff that you see everyday. Such was the case for a Kurnell, NSW property that I recenty renovated for Channel 9’s show, Space Invaders … it had two garages on it!
This property was home to 5 lovely people, husband Rob, wife Sharon & their 3 young adult daughters. This family has conquered many battles, including Rob’s cancer diagnosis, years earlier. This caused the whole family to reassess life with house renovations, the least of their priorities. Time was invested into spending quality time together & enjoying life to the fullest.

Now, let’s talk about their property … it had two driveways on either side of their house with a garage on each. Strange but a bonus! The driveway on the left side of the house had a garage in line with the front façade, whilst the 2nd driveway had the garage pushed right down into the rear backyard.

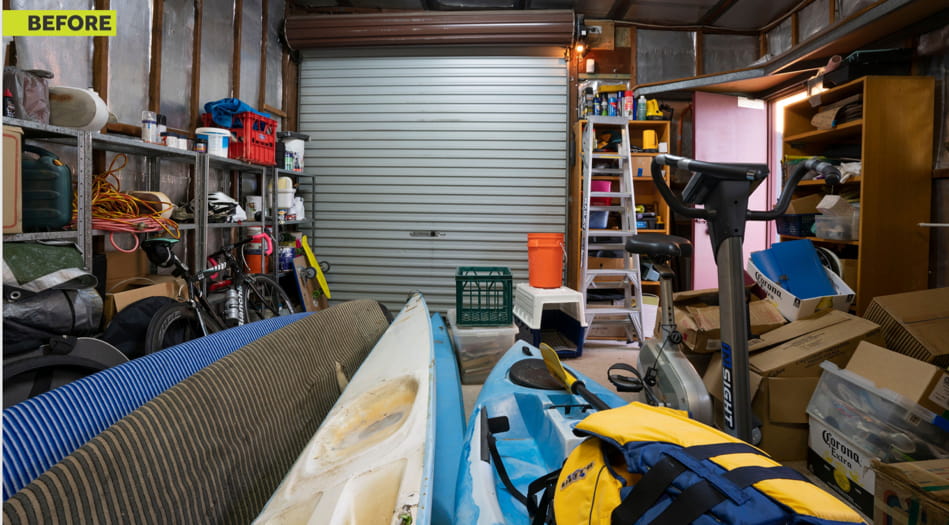
You wouldn’t be a true Aussie if your garage wasn’t stacked to the brim with all sorts of weird & wonderful things. This family didn’t disappoint in this regard.

OPEN SESAME
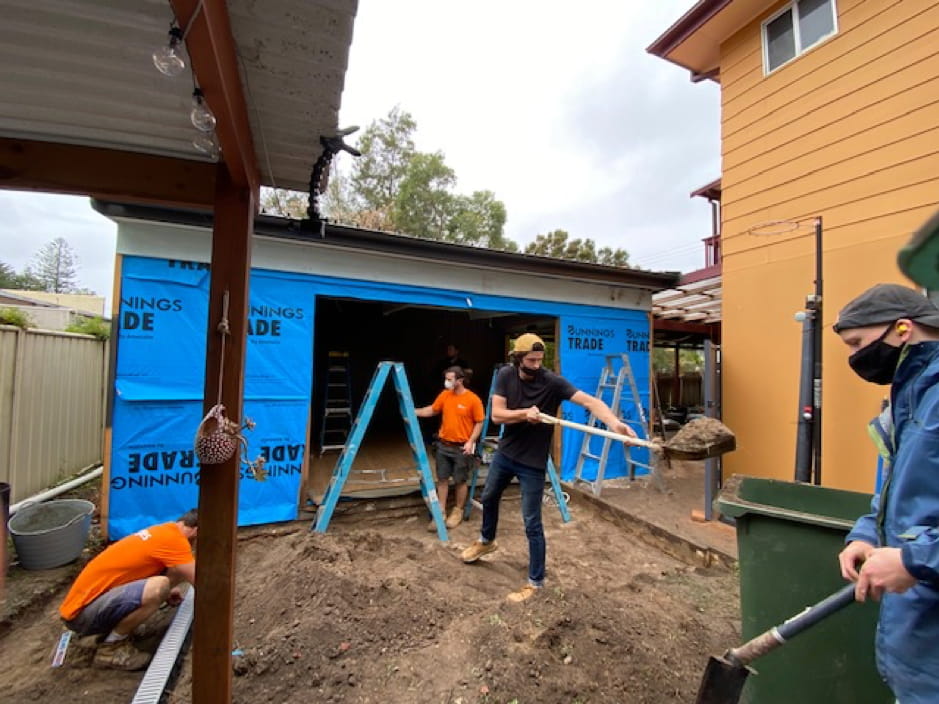
This garage of a decent car size & a little bit more, was an ugly duckling with no real purpose, other than to be a storage shed. It was structurally in good knick but I think you’ll all agree, the colour scheme is questionable … maroon & mustard … interesting.
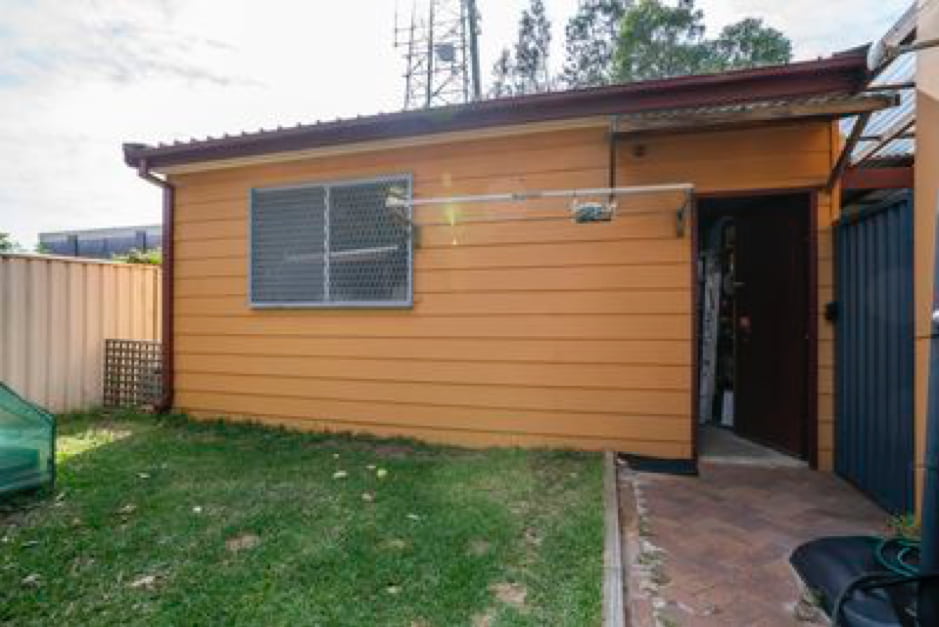
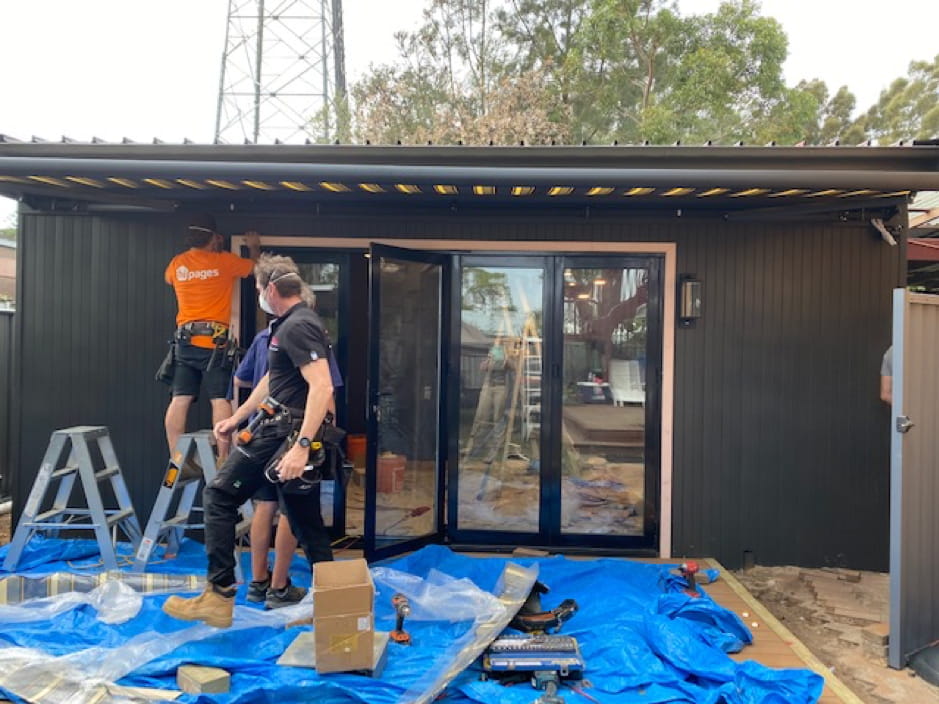
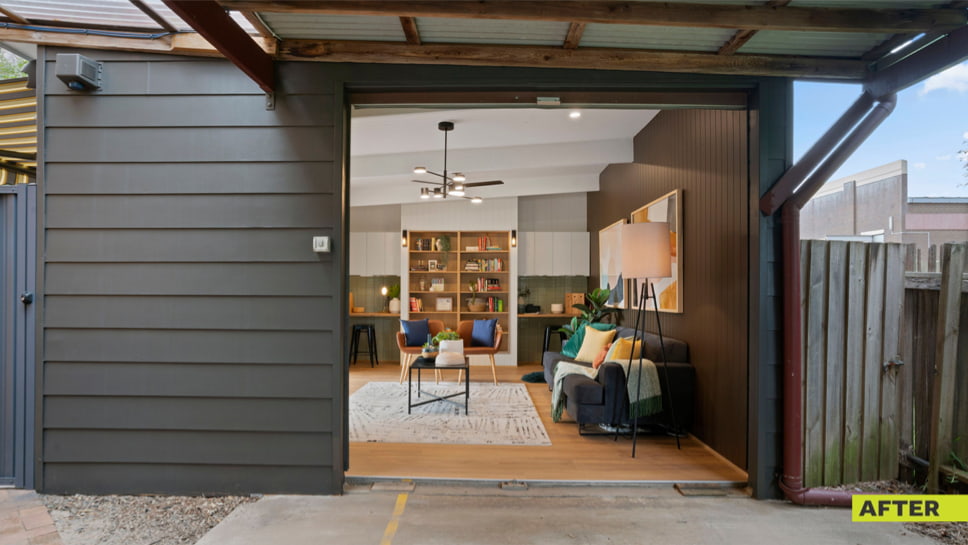
With the contents of the garage emptied, my first task was to get the externals of the garage right & much needed natural light into the space. This was achieved by demolishing one wall of the garage that faced into the backyard. All other parts of the garage externally, remained intact.
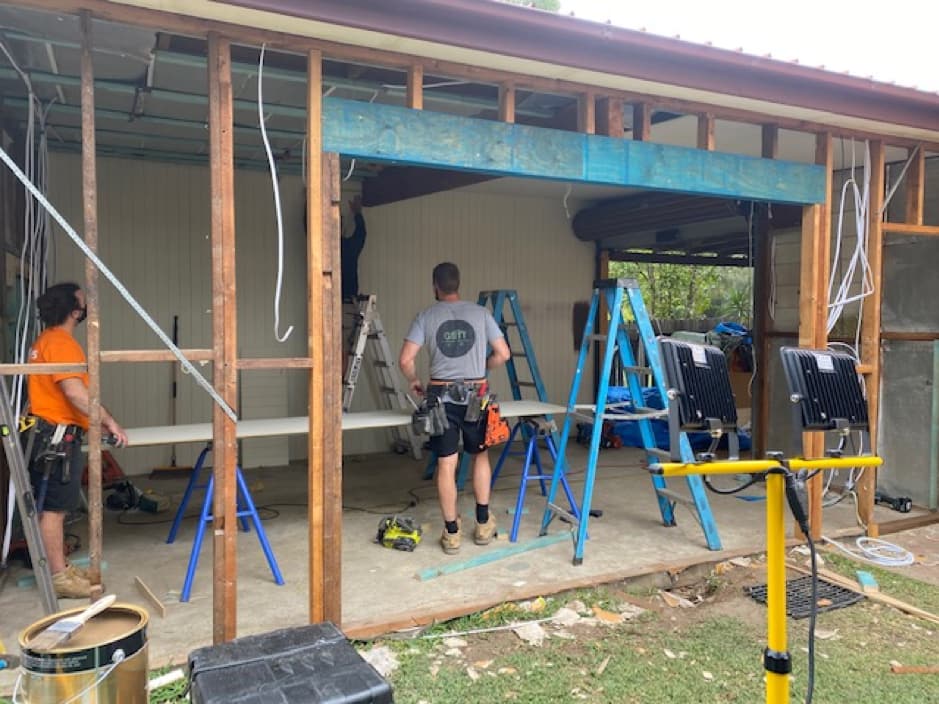
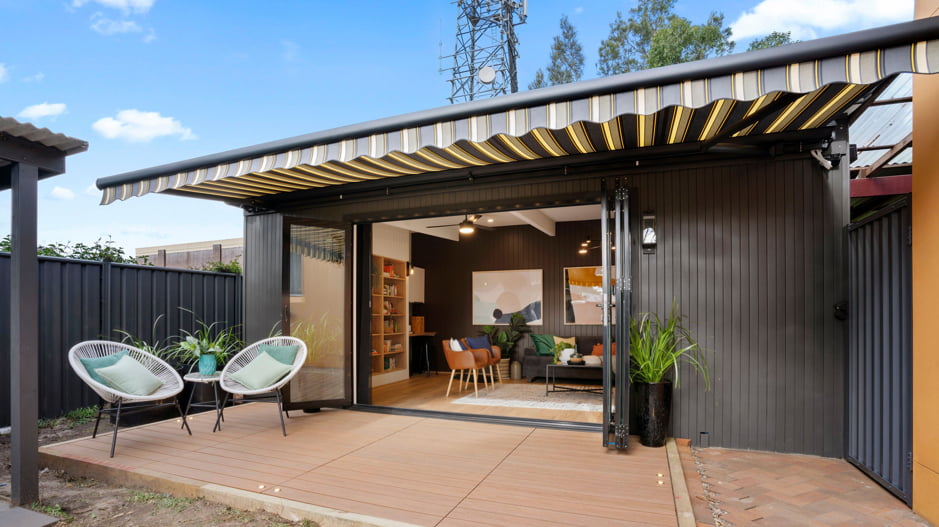
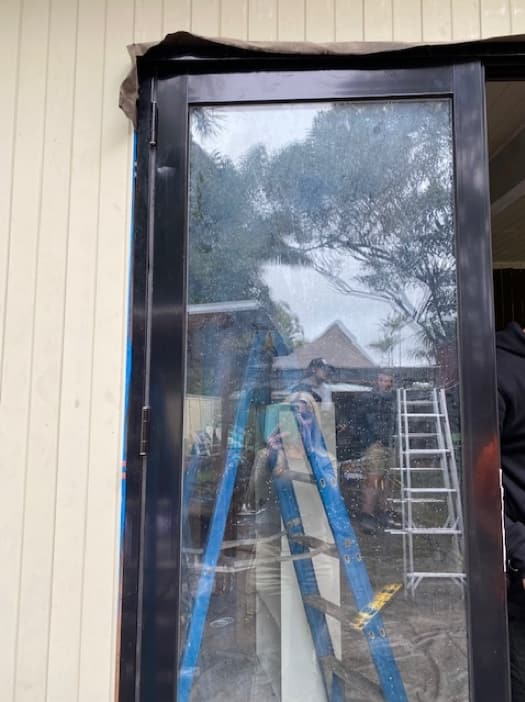
The old single doorway was deleted & a larger door opening installed. This made way for a new 3 metre, off-the-shelf bi-fold door that provides the perfect indoor / outdoor connection.
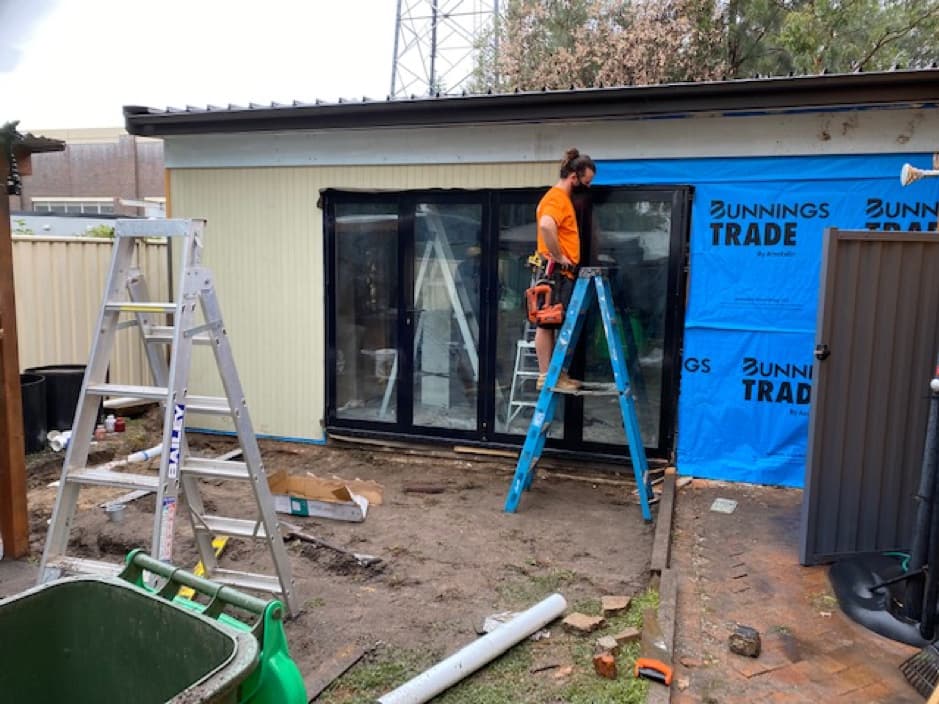
The face of the garage which had the new door installed, was clad in exterior grade VJ panels that were quick & easy to install. There are fast ways to do things in renovating & this was one of them.
This external change did require council approval, but it was a gamechanger in terms of how the space is used & more importantly, how it ‘feels’. It’s no longer a cavernous storage area but one that can be practically used, all year round.
BEAUTIFULLY DECKED OUT
If you’re going to install a bi-fold door to get that great indoor / outdoor connection, you better put something nice on the ground to step out onto. A new deck was installed from Good Times Decking that came in modular kit form. With the frames shipped to site already in their standard, pre-cut configurations & the decking lengths also pre-cut, installing this deck was a cinch.

I love the fact these decking boards are made of recycled plastic & timber, requiring zero maintenance, unlike standard timber decks which require regular oiling.
The generous new deck almost doubles the amount of useable living space, however some groundwork had to be done, before it went in. No-one likes digging holes but sometimes, it’s gotta be done. Installing proper drainage underneath was critical to catch any excess water in heavy rains. No-one wants water run-off pooling under their deck so we hand dug out a trench & installed proper drainage lines, before the deck went in.
Once the decking frame was set into position, I gave it a quick coat of black paint with my spray gun so you don’t see any part of the frame. The decking boards were then screwed into the frame, completing the deck in just a few short hours.
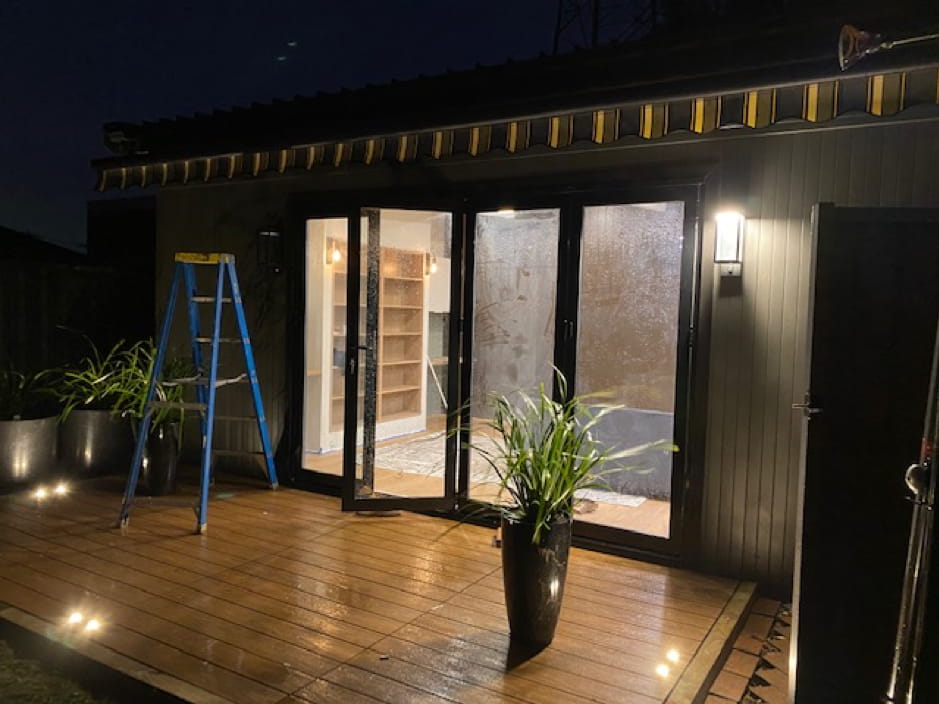
To avoid anyone tripping over the deck at night, small deck up lights were installed around the perimeters of the deck & 2 external wall lights flank both sides of the bi-fold door. They not only look good but add a touch of resort glamour at night. And, before you ask … yes, I did rough in all the electricals for those, before the deck went in, a common mistake made by inexperienced renovators.
BLACK IS BACK
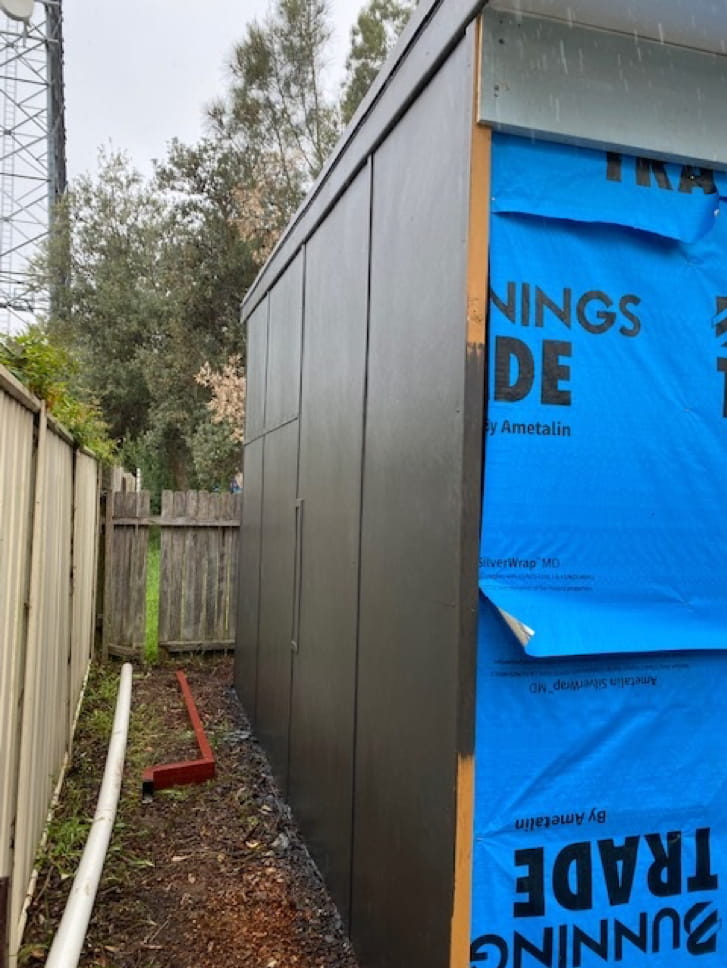
To create a bit of drama, I spray painted all the existing garage exteriors in Taubmans Weathershield paint (Taubmans colour number NCS S6500N). Again, the fastest way to do this was via my trusty Wagner spray gun. This task took about 4 hours in total, which was particularly helpful, with the forecast of torrential rain on the way.
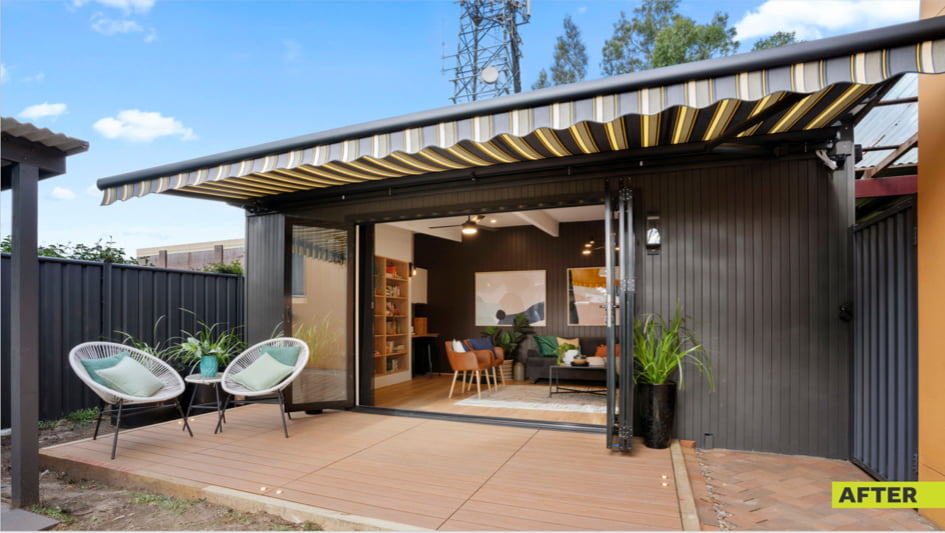
AWESOME AWNING
If you’re going to try & create a decent indoor / outdoor room, you’ll need to think about how weather impacts the space, all year round. Want to sit out on your lovely new deck in the scorching summer sun? No thank you.
Installing a folding arm, retractable awning from Wynstan was a luxury addition but adds so much, not only for practicality but visual aesthetics too. I think the awning actually makes the space! I choose a vibrant black, grey & yellow fabric & installed automation to the electricals so when it gets windy, the awning automatically retracts back in, all by itself. One things for sure, in Australia, an outdoor area without shade is virtually unusable, so this awning solves that problem.
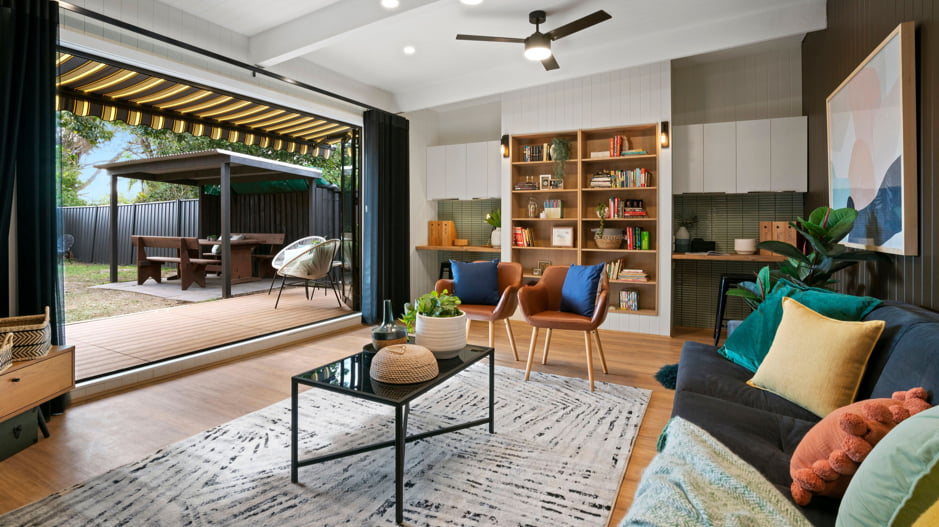
INTERIOR MOTIVES
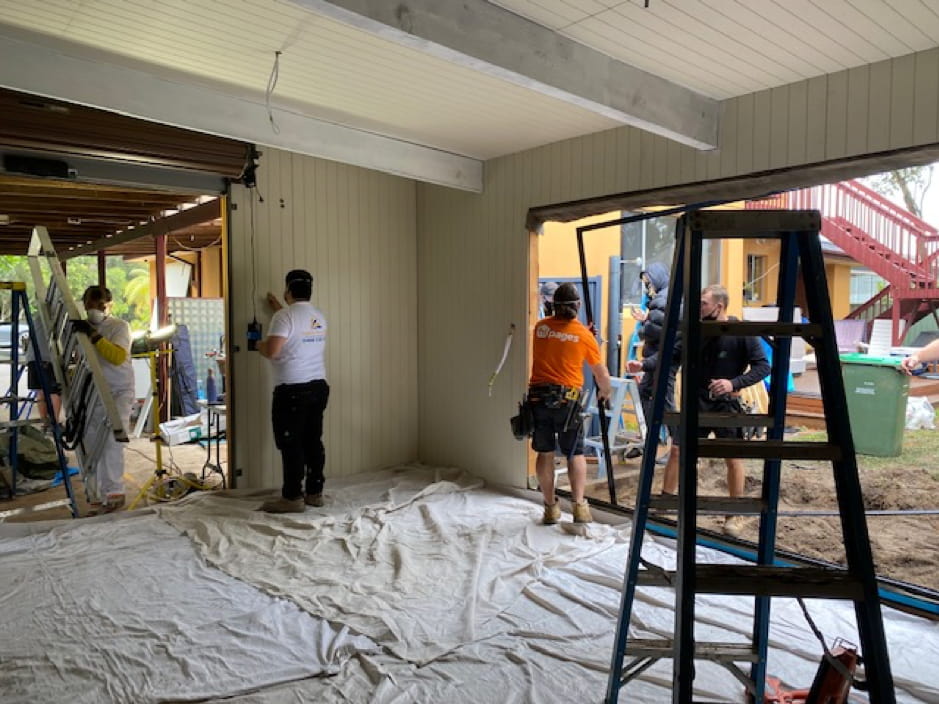
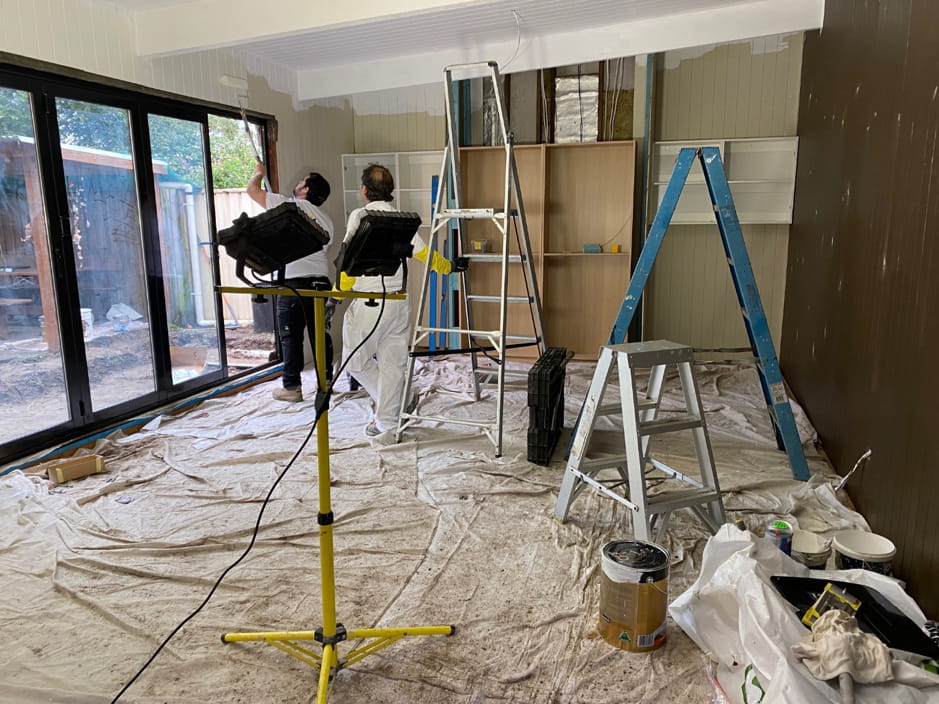
Inside, the priority was to create a relaxing living space (plus home office) – separate to the house – where family members could kick back & relax. I lined all the internal walls & ceilings with VJ wall panels to avoid all the mess associated with plasterboard, plaster setting, drying & sanding time.
Rather than playing it safe with traditional lighter / creamy hues, I went with moody, dark colours that lend a sense of drama to the space, choosing a dark chocolate brown colour called Taubmans Star Anise for the main feature wall.

Now let’s tackle the old garage door … lets, be honest, its fugly but it did make sense for the garage door to remain in place for a whole host of practical reasons. The easiest solution was to install either curtains or the Wynstan Verishades which is a combination of a curtain & vertical drape, all rolled into one. This type of window furnishing allows the garage door to be visually out of sight, but they can also be slide across at any time to totally expose the garage door behind.
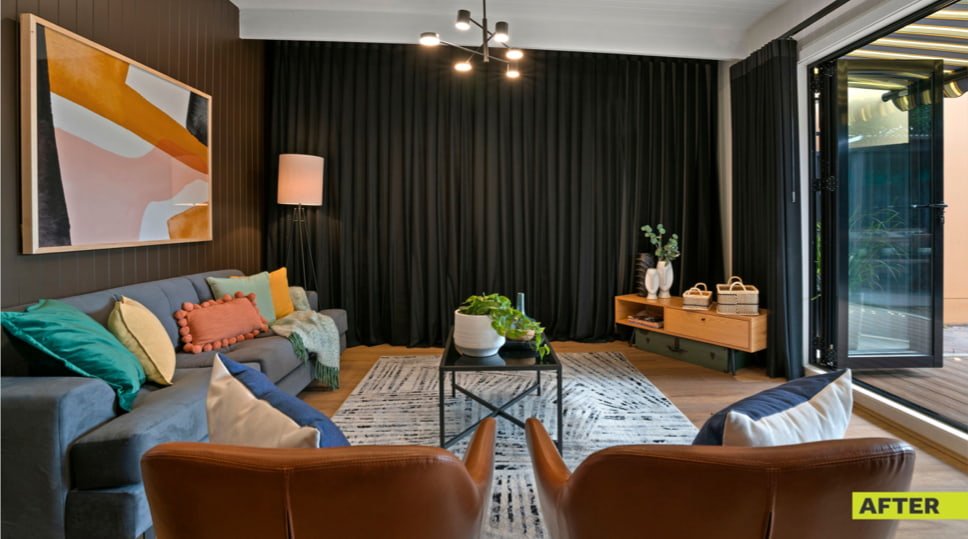
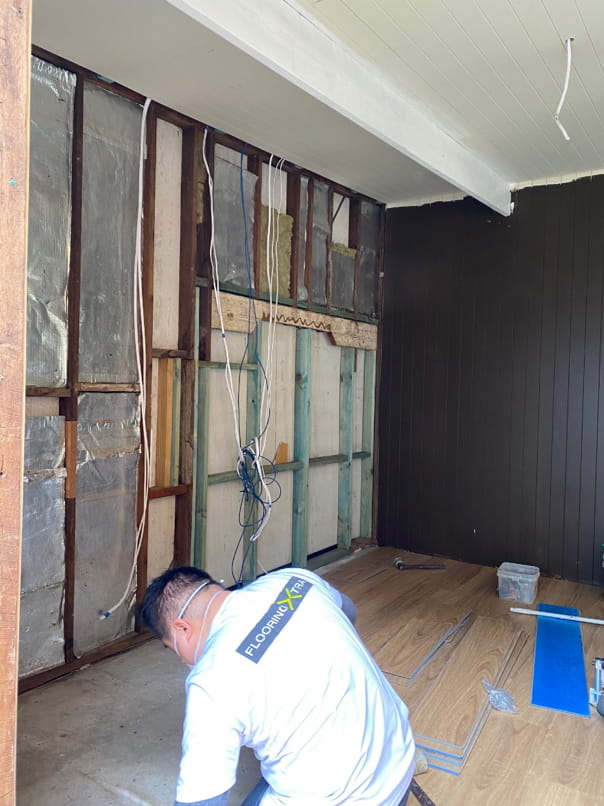
In regard to the floor, this had to be a strategic choice. The old garage featured a bare & rough concrete floor, soiled from years of general wear & tear. I opted for a hybrid floorboard that is a combination of timber & vinyl for its water resistance, durability & scratch resistance. The addition of new flooring elevated the space immediately – essential for this re-invented interior!
And as always, LED downlights throughout provide practical task lighting while the addition of a large LED feature pendant completes the look from cold garage to a cosy, warm living space.
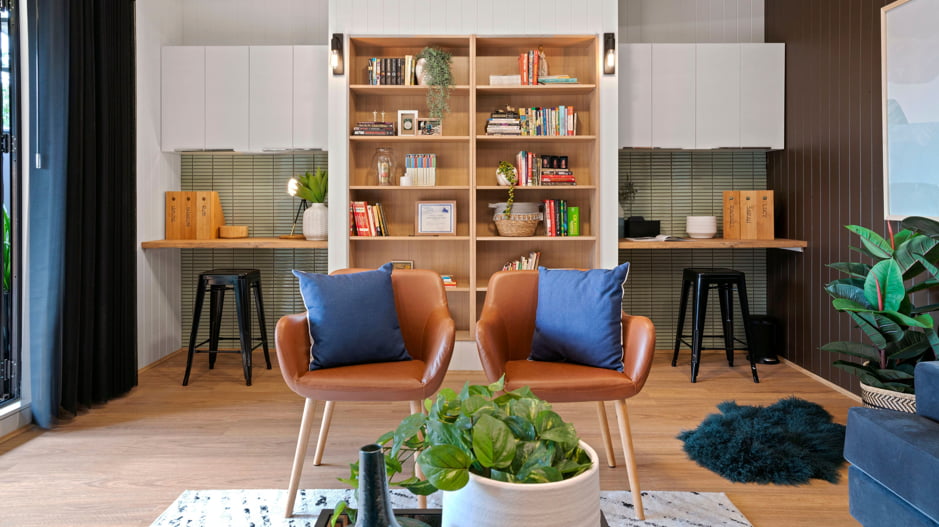
THE HOME OFFICE
This family lacked space in the main house to work & study without noise & distractions so a home office was added to solve this problem. I dedicated one wall to a work area, with bookcase shelving & 2 separate study nooks.

The storage in the middle of the two desks was done cost effectively by sourcing 2 of Fantastic Furniture’s Kobi Bookcase for just $139 each & recessing these into the wall. This avoided the need to get custom joinery made, helping keep my budget down. These bookcases now proudly display Rob’s treasured items, once buried in mountains of clutter.
Horizontal feature tiles were added to the study nook wall, to not only define the desk space but add visual interest. I chose a Mint Green tile from Beaumont Tiles as a way to bring the colours of nature into the space that makes it feel softer & less formal.
SHOW ME THE MONEY HONEY
In this renovation, my focus was not renovating for profit. Some renos you just do for love & lifestyle. But it sure is nice when you achieve both by default! A post renovation valuation revealed this garage makeover uplifted the home by an additional $130,000 in value. For a total cost of $42,870.39, (for all trade labour at full price, materials at full retail cost & all the furniture & styling within), a staggering $87,129.61 net profit was made, a nice bonus for this family to receive.
This renovation was done in just 3 days. In TV land, you need to move crazily fast but for you ordinary folk, you could easily pace this work out over the course of a month or 2 at most.
In 3 days, it was back breaking stuff with my team & I feeling the pressure, but so motivating for all of us to stand back, look at the end result & see what we’d accomplished as a team. The worst part of all? That torrential rain that caught us on Day 3. I can control a lot of things when renovating but certainly not Mother Nature. 😊

PS: For the last 2 months, I’ve taken my toolbelt & work boots off, slid into my tracky dackies & ugh boots & been busily penning away, totally re-writing my main flagship course, Cosmetic Renovations For Profit which teaches you how to do renovations just like this. All going well, I’m aiming to relaunch the 2022 version of this course at the end of “this” month. If you want to be notified when this course is formally launched (& receive an early bird offer on this), CLICK HERE to join the waitlist. You won’t receive any phone calls or be hounded by any pushy salespeople, that I promise!
Much love,
Cherie x


Great job Cherie!
Thanks Lisa, Cherie Crew x
Great job Cherie. We are currently renovating part of our old farm shed into a shed house as we are airbnb front half of our Old Queenslander house. Will have bedroom and small kitchenette. Love the idea of the Good Times Decking as we eventually will be added a deck out the back to enjoy the scenic rural views.
Absolutlely Fabulous Cherie !
Thanks Jo, Cherie Crew x
Excellent outcome for 2 ugly areas. thanks for the detailed reno
Your welcome Robyn, glad you enjoyed the blog! Cherie Crew x
Amazing work! Thanks for sharing Cherie (and team). You are so inspirational!!
Thanks so much Cee for your lovely feedback, Cherie Crew x
This looks amazing. My new garage looks almost identical. I am wanting to convert it into a granny flat. Do you have ‘graduates that can assist me as I have not yet done the course? Thank you
Hi Rhonda,
Thank you for your lovely comments. The students of my Cosmetic Renovations For Profit course dont normally project manage other peoples projects as they’re often busy doing their own. If you want access to the students, you would need to join the course so you can then liase with them through our private student facebook group. Hope this helps. Cherie Crew.
my wife and I have been looking about. This kind of information on this forum is one of a kind and needed and will assist my family and friends in our studies significantly. It looks like all of the members here acquired a significant amount of details about the things I am interested in and other subjects and info definitely show it. I’m not usually on the net all day long however when I get an opportunity I am always avidly searching for this type of factual information or others similarly related to it.
Thank you Michael, really glad this information has helped you with your own project. Good luck with your project. Cherie Crew.
Such fabulous work Cherie. You give us all so many great ideas to improve our homes, along with the stockists details which most of us wouldn’t have a clue about. I’m very much looking forward to the new season shows x
You’re most welcome Joy & thank you for your very lovely words. Cherie x
Hi Cheri,
Love your work! I’m just wondering where you would suggest I purchase exterior VJ paneling that will be undercover & exposedto the elements? Once again, great job.. 👌👌👌
Hi Narelle, you can find VJ paneling at your local hardware or Bunnings. Make sure you get water resistant panels for any wet areas, Cherie Crew x
Hi Narelle,
You can buy exterior grade VJ panelling from stores like Bunnings. Cherie Crew x
I like the valuable info you provide in your articles.
I’ll bookmark your weblog and check again here frequently.
I am quite sure I will learn a lot of new stuff right
here! Good luck for the next!
Glad you find our blogs useful Son. Thank you for letting us know. Cherie Crew.
Hey! Do you use Twitter? I’d like to follow you if that would
be ok. I’m absolutely enjoying your blog and look forward to new updates.
dark web link https://mydarkmarket.com
Excellent web site you have here.. It’s hard to find high-quality writing like yours these days. I really appreciate individuals like you!
Take care!!
So glad you liked it Beulah. Thank you for letting us know. Cherie Crew x