


From Shoebox to Superstar: A Big Profit on a Tiny Home
Hi,
First of all – CRIKEY! Over half a million of you tuned in to Channel 9 over the weekend to watch my tiny home reno – either you’re all obsessed with clever renos or there was absolutely nothing else on TV! 😆 The online feedback has been off the charts on my Facebook & Instagram pages & I’m feeling the love big time. So, a massive thank you from me – seriously, you guys are the best! ❤️🏡✨If you missed the show & are keen to see it, you can catch the replay on 9Now – simply click here .
Many of you know that when I do a project that’s televised, I try to send a blog to my community straight after, sharing as many details as possible. You can’t squeeze everything into a 1-hour TV show so here goes …
Picture this: a 18-square-metre apartment – basically the size of a car space or an average Aussie bedroom. Just 1 room, measuring 4.6 metres long x 3.7 metres wide, with about as much charm as a public toilet. It was lifeless, impractical & smelt like it had seen some bad things. The kind of place you’d expect a backpacker to squat in for a night, not somewhere anyone would actually want to live. But, as always, I love a challenge & this one was a doozy.

The apartment prior to renovation.
STAGE 1: DESIGNING THE IMPOSSIBLE
Normally, I can walk into a property & have a fairly good idea what to do with it, within 15 minutes or so. But this one? It took me weeks to crack. Weeks of staring at this tiny box, trying to figure out where to place the new kitchen, the living area, study and – oh yeah – a bedroom.
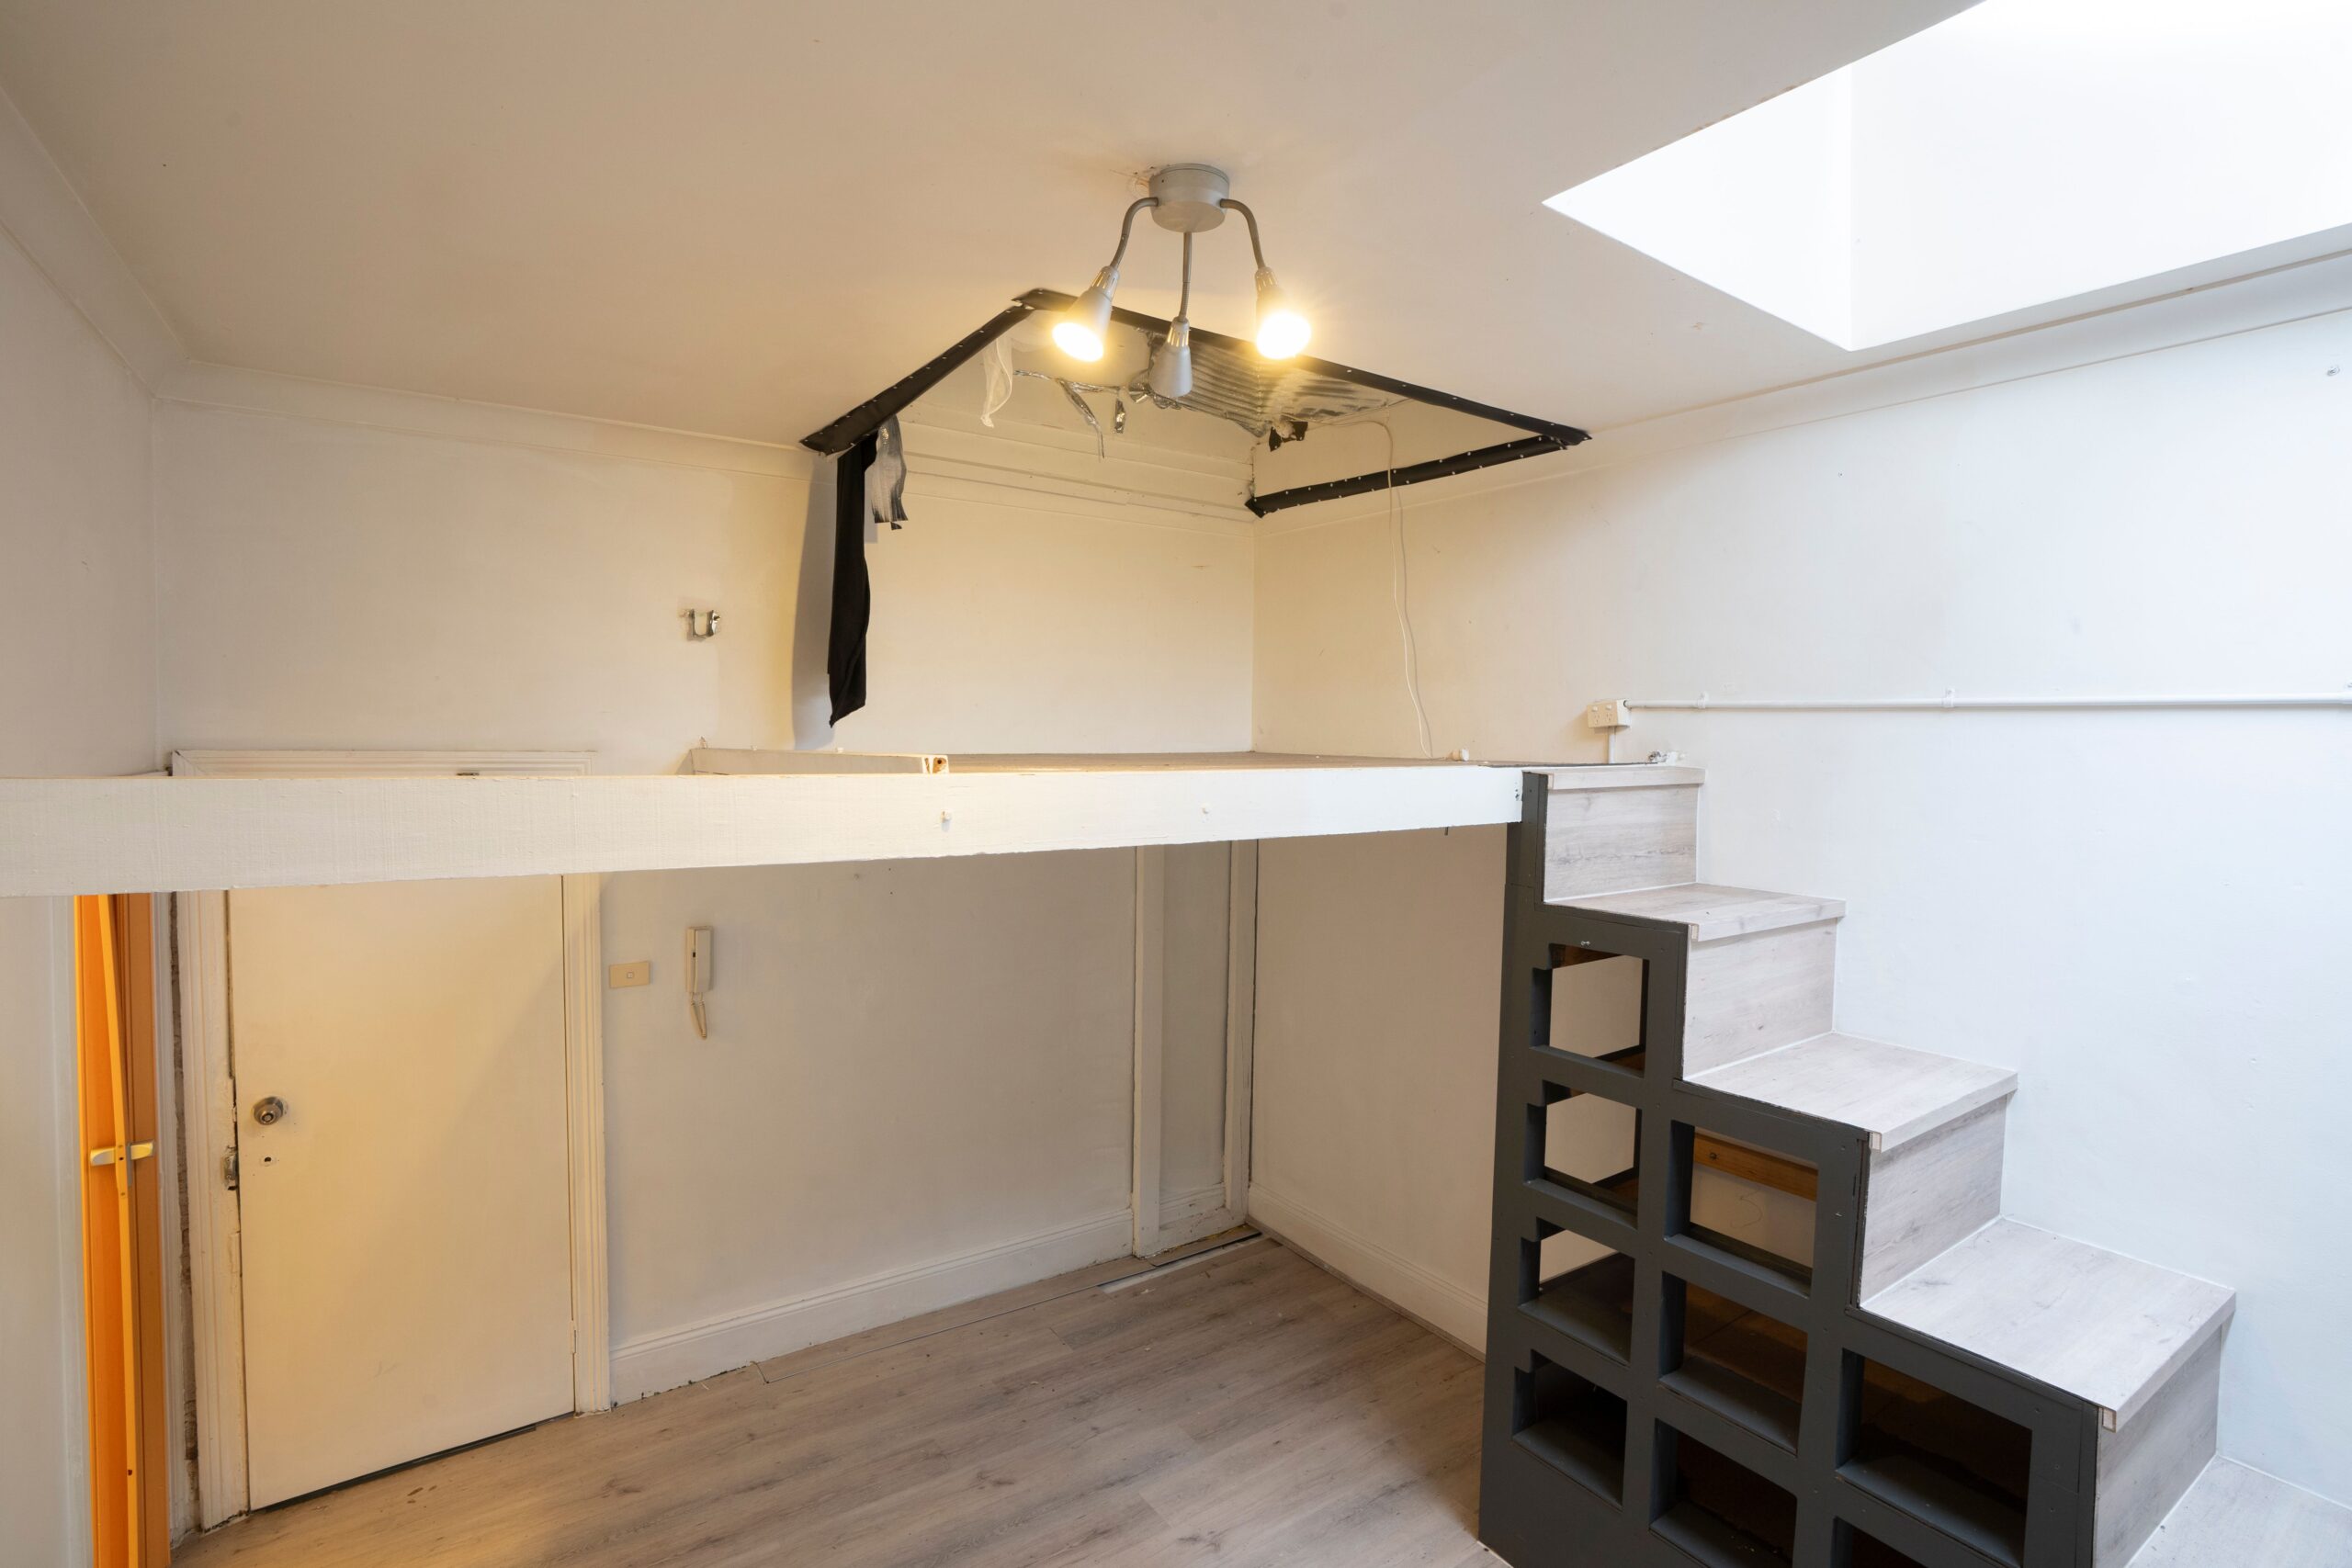
The upstairs bedroom pre-renovation.
Using design software SketchUp, I experimented & mucked around with different layouts, shifting things around like a puzzle until everything finally clicked into place. Once I was happy with the design, I handed it off to a local draughtsperson to do proper architectural plans. This little hack saved me thousands because my draughtsperson only had to redraw my design, not create the whole thing from scratch. Winner, winner.
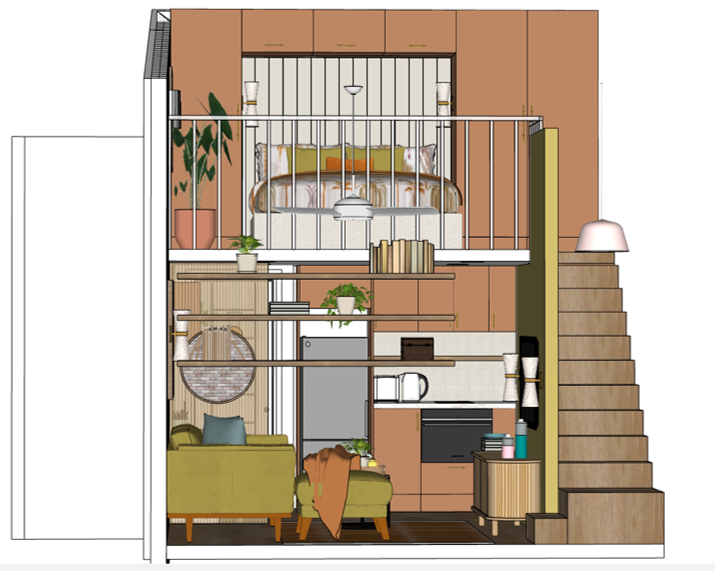
My 3D SketchUp design in the reno planning phase.
STAGE 2: PLANNING APPROVAL – THE PAINFUL BIT
Here’s where things went south…
Because I deliberately kept all the reno works strictly internal, I expected to sail through with Complying Development approval which should take 6 weeks on average, but, surprise! The apartment was in a heritage-listed building, which meant I got bumped into a full Development Application (DA) (6-month leadtime) & to make matters worse, pushed from Class 1 residential into Class 2 building regulations. And just like that …. I was no longer a renovator. I was categorised as a high-rise developer with all the planning rigmarole that comes with that.
Instead of a quick tick-and-flick approval, I had to submit:
✅ Architectural Drawings.
✅ Planning Report.
✅ Heritage Report.
✅ BASIX Report.
✅ Structural Engineering Drawings.
✅ Mechanical Engineering Drawings.
✅ And, several rounds of a Performance Solutions Report (because the mezzanine head height was less than the 2.4 metre minimum).
Total cost? $22,262.40 – before I even touched a single wall. That’s a quarter of my reno budget gone, just there. Lesson here: if you want to renovate in a heritage-listed building, be prepared to jump through enough hoops to qualify for the circus!
It’s been almost 6 months since I wrapped up this tiny home reno & I’m still waiting for the Occupation Certificate to come through from the government. Once it finally lands in my hands, the new buyers will contractually settle within 28 days – but honestly, the wait time to get my OC is beyond ridiculous. That said, who am I to question the mystical workings of government processes & the planning portals? 😅
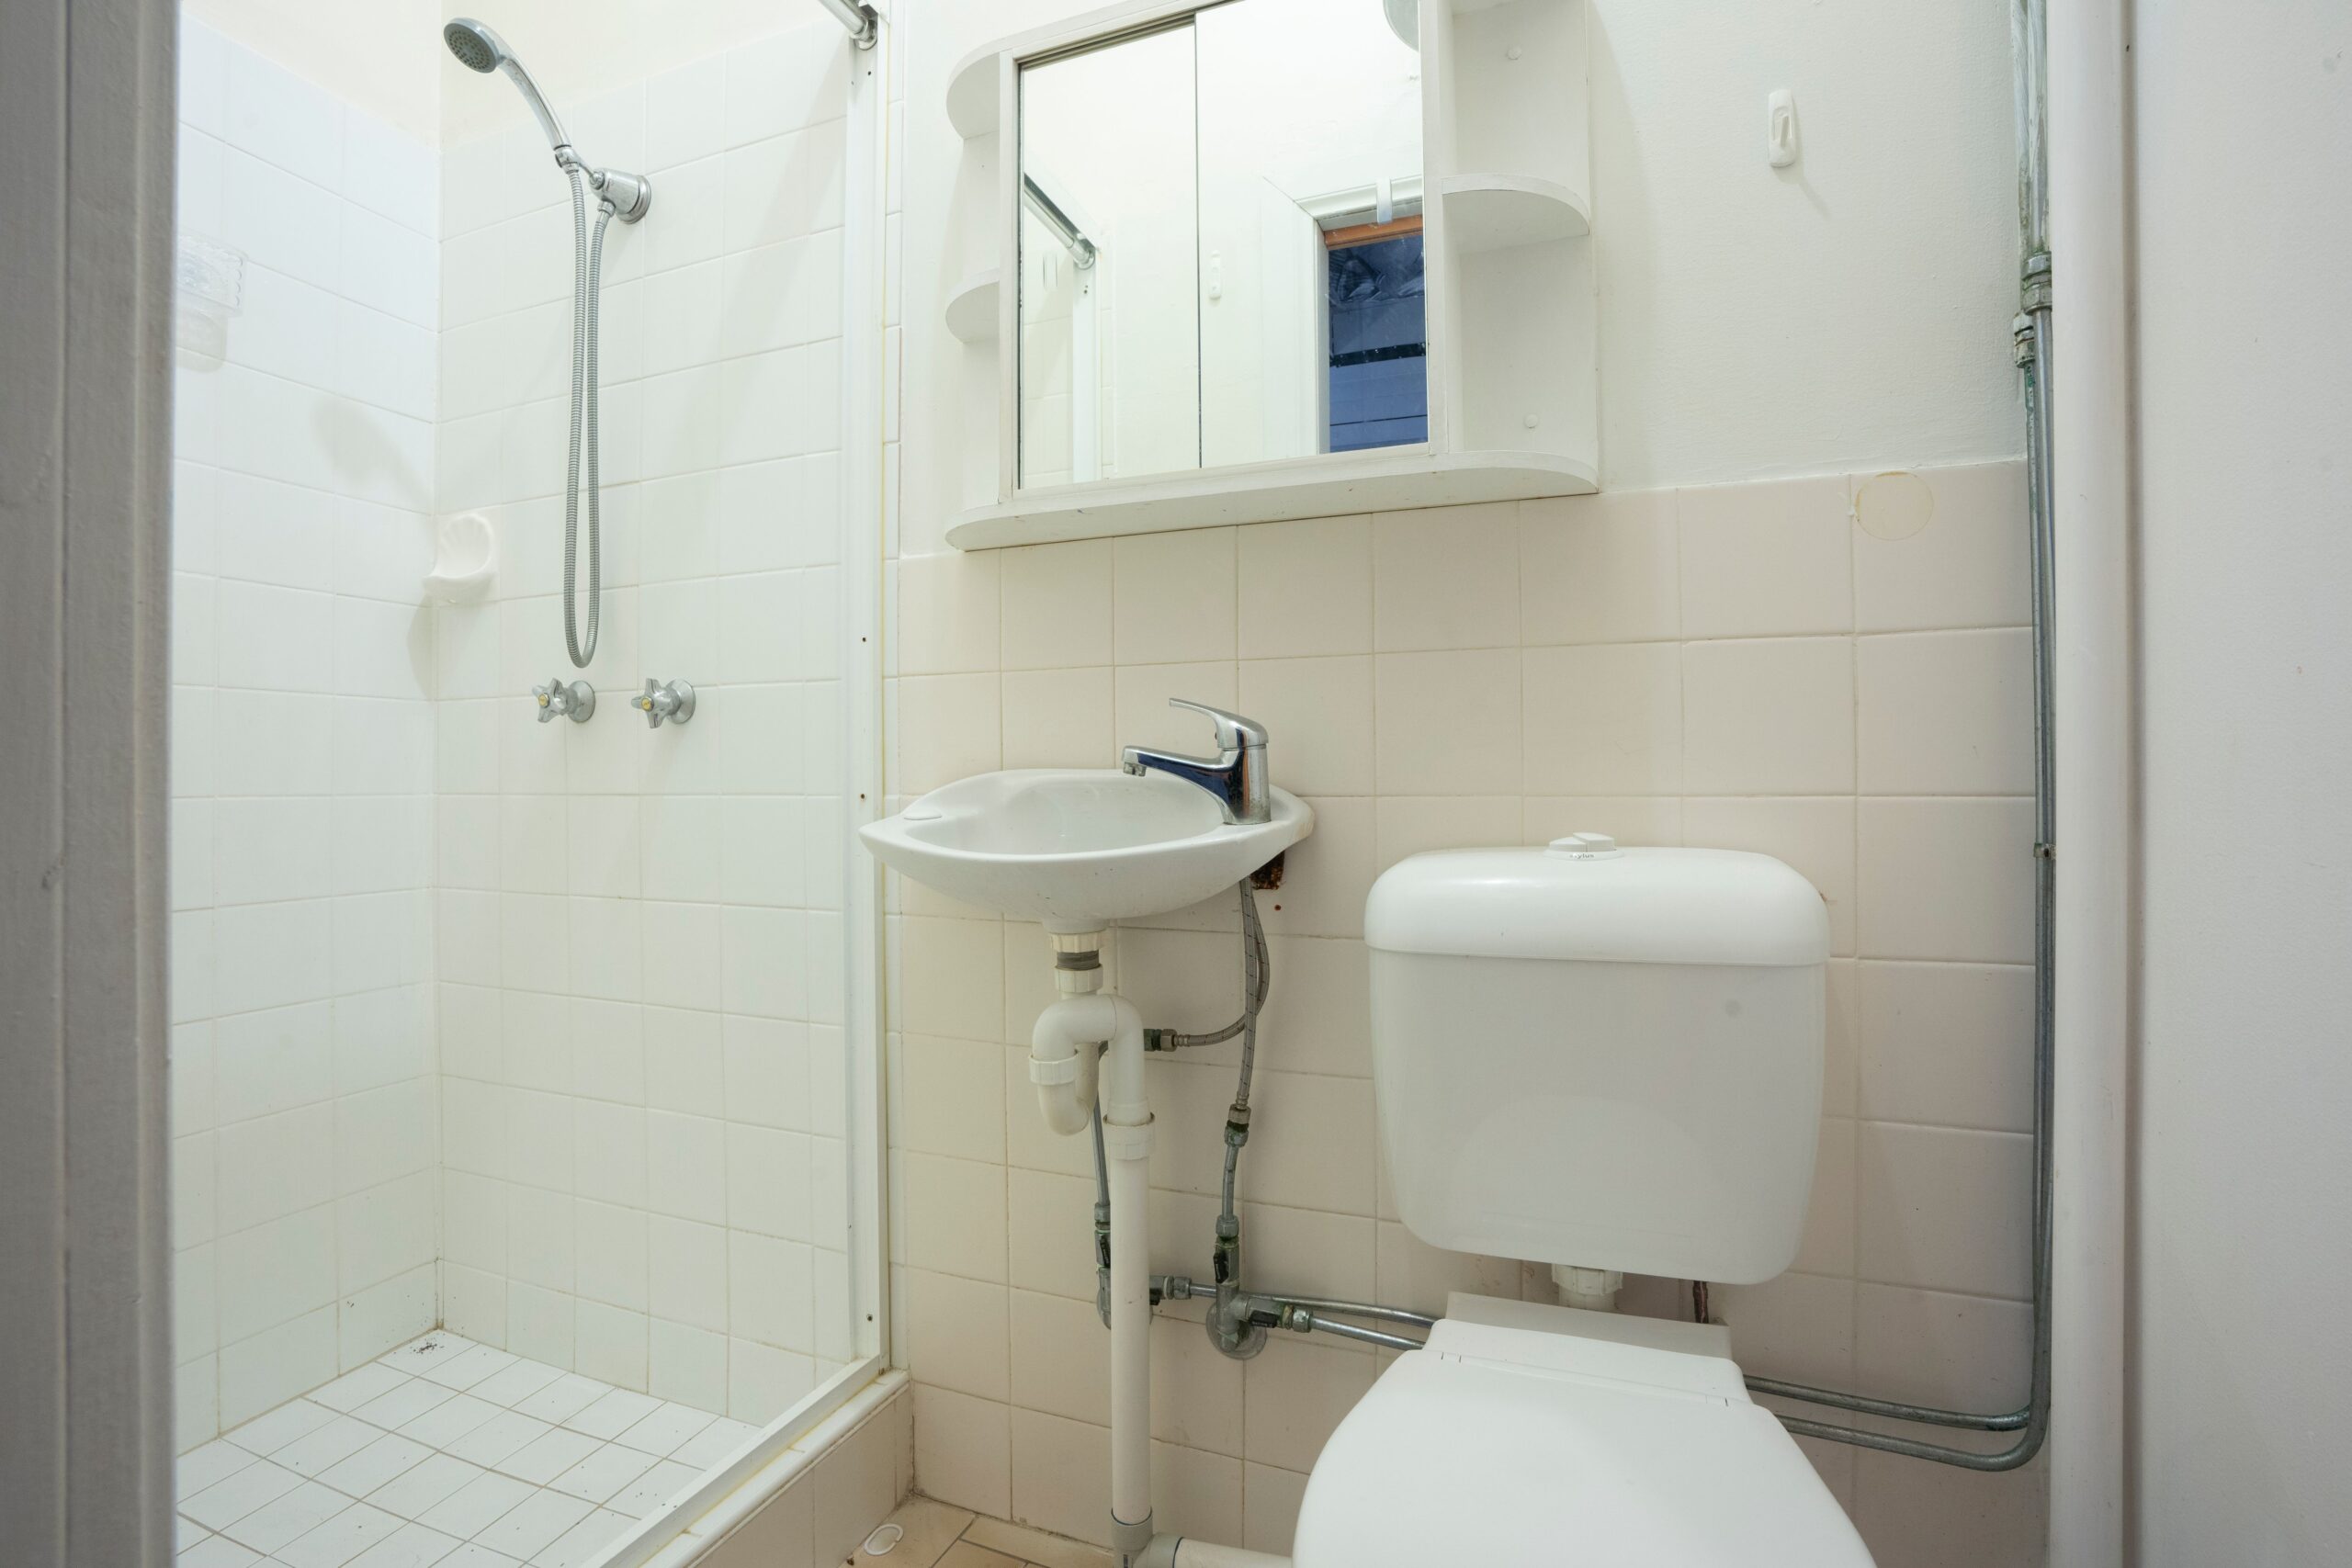
The bathroom prior to renovation.
STAGE 3: DEMOLITION – THE FUN PART
Once I got the planning approval green light, it was demo time. We gutted everything:
🔥 The dodgy mezzanine landing that was barely big enough for a mattress.
🔥 The rickety staircase that felt like a death trap.
🔥 The makeshift kitchen that looked like it belonged in a caravan.
🔥 The bathroom – because, 2 out of 4 walls were asbestos (joy!).
Cost of asbestos removal? $2,200 – because I wasn’t about to play Russian roulette with my lungs.
The biggest gamble? Ripping down the gyprock ceiling. A previous owner had lowered it (for who knows what reason), but I suspected there might be enough roof space I could use for a proper loft bedroom. If there were roof obstructions underneath all that gyprock that we couldn’t see, we’d have to replace all the gyprock again, at a cost. Massive risk. Huge reward. When we pulled it down, BAM – there it was, clear roof space. My golden ticket to creating a bedroom you can actually use.

The useable roof space after the gyprock was pulled off
STAGE 4: STRUCTURAL WORKS – TURNING A SHOEBOX INTO A HOME
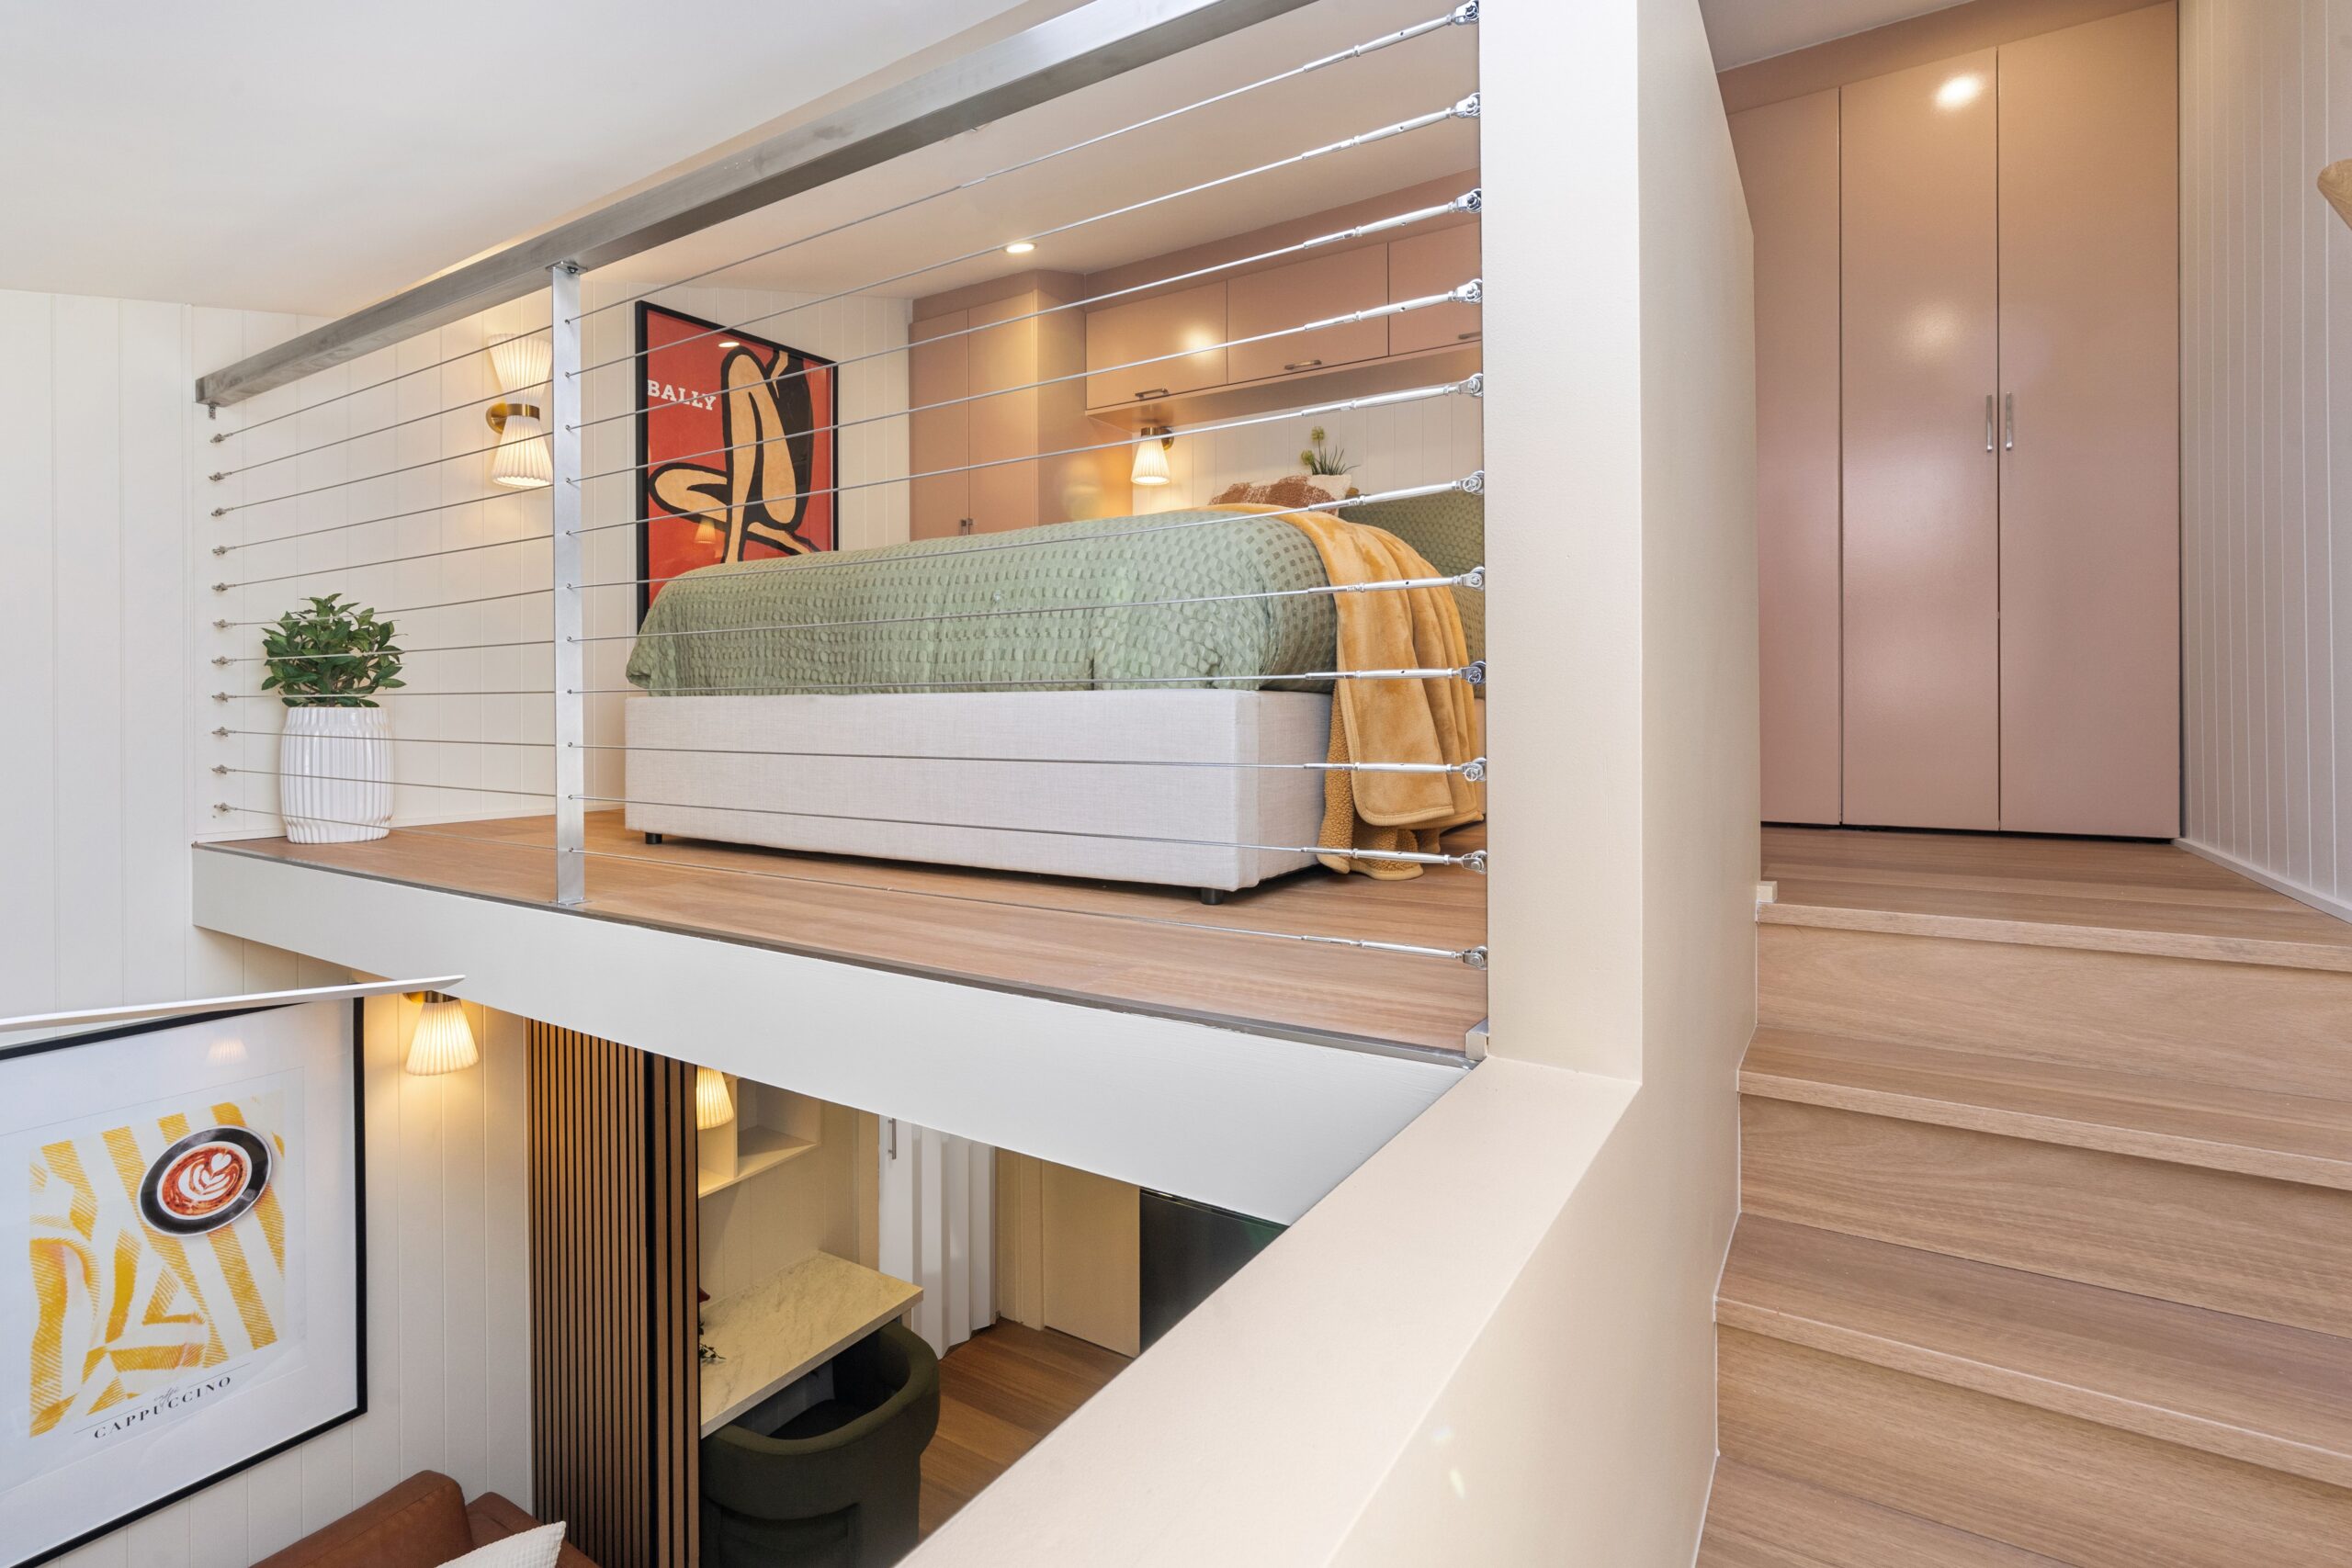
Now that I had my extra ceiling height, it was time to build a real mezzanine. The new landing stretched the full width of the apartment & was extended lengthwise by an additional metre & a bit. This meant the loft could now fit a proper queen size bed & wardrobes – not just a mattress shoved in a corner.
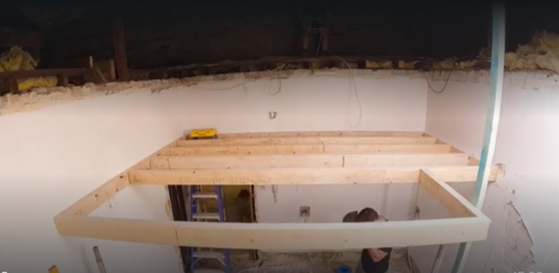
TThe new mezzanine landing that stretched wall to wall, width wise.
But with great mezzanines come great building regulations. Because of the heritage listing, I was pushed into those Class 2 building regulations again, meaning I had to structurally:
🚧 Reframe all the walls above the mezzanine.
🚧 Install fire-rated gyprock on multiple walls (2 layers, not 1 – more $$$).
🚧 Install fire-rated gyprock across the entire ceiling (yep, 2 layers again).
🚧 Install new wall & floor sheeting in the bathroom.
🚧 Upgrade the front door to a fire-rated steel door (not cheap).
🚧 Level the wildly uneven floors by laying ply over the old floorboards before installing new hybrid flooring.
Would I renovate a heritage-listed apartment again? Probably not, unless I develop a burning passion for endless paperwork & inspections! 😆
STAGE 5: PLUMBING & ELECTRICAL ROUGH-IN
The kitchen was relocated across the room, which functionally was a much better solution. What made this a little trickier was re-locating the water & electrical lines for the kitchen from one side of a room to the other, when the strata body wouldn’t allow cuts into any of the walls. The solution?
✔️ We ran new electrical services under the stairs & up the kitchen kickboards.
✔️ We cut a section of old floorboards out & ran the plumbing lines under those.
✔️ Cladded some walls to discreetly house the new electrical lines.
It was like playing an elaborate game of hide & seek with the services but we got there in the end.
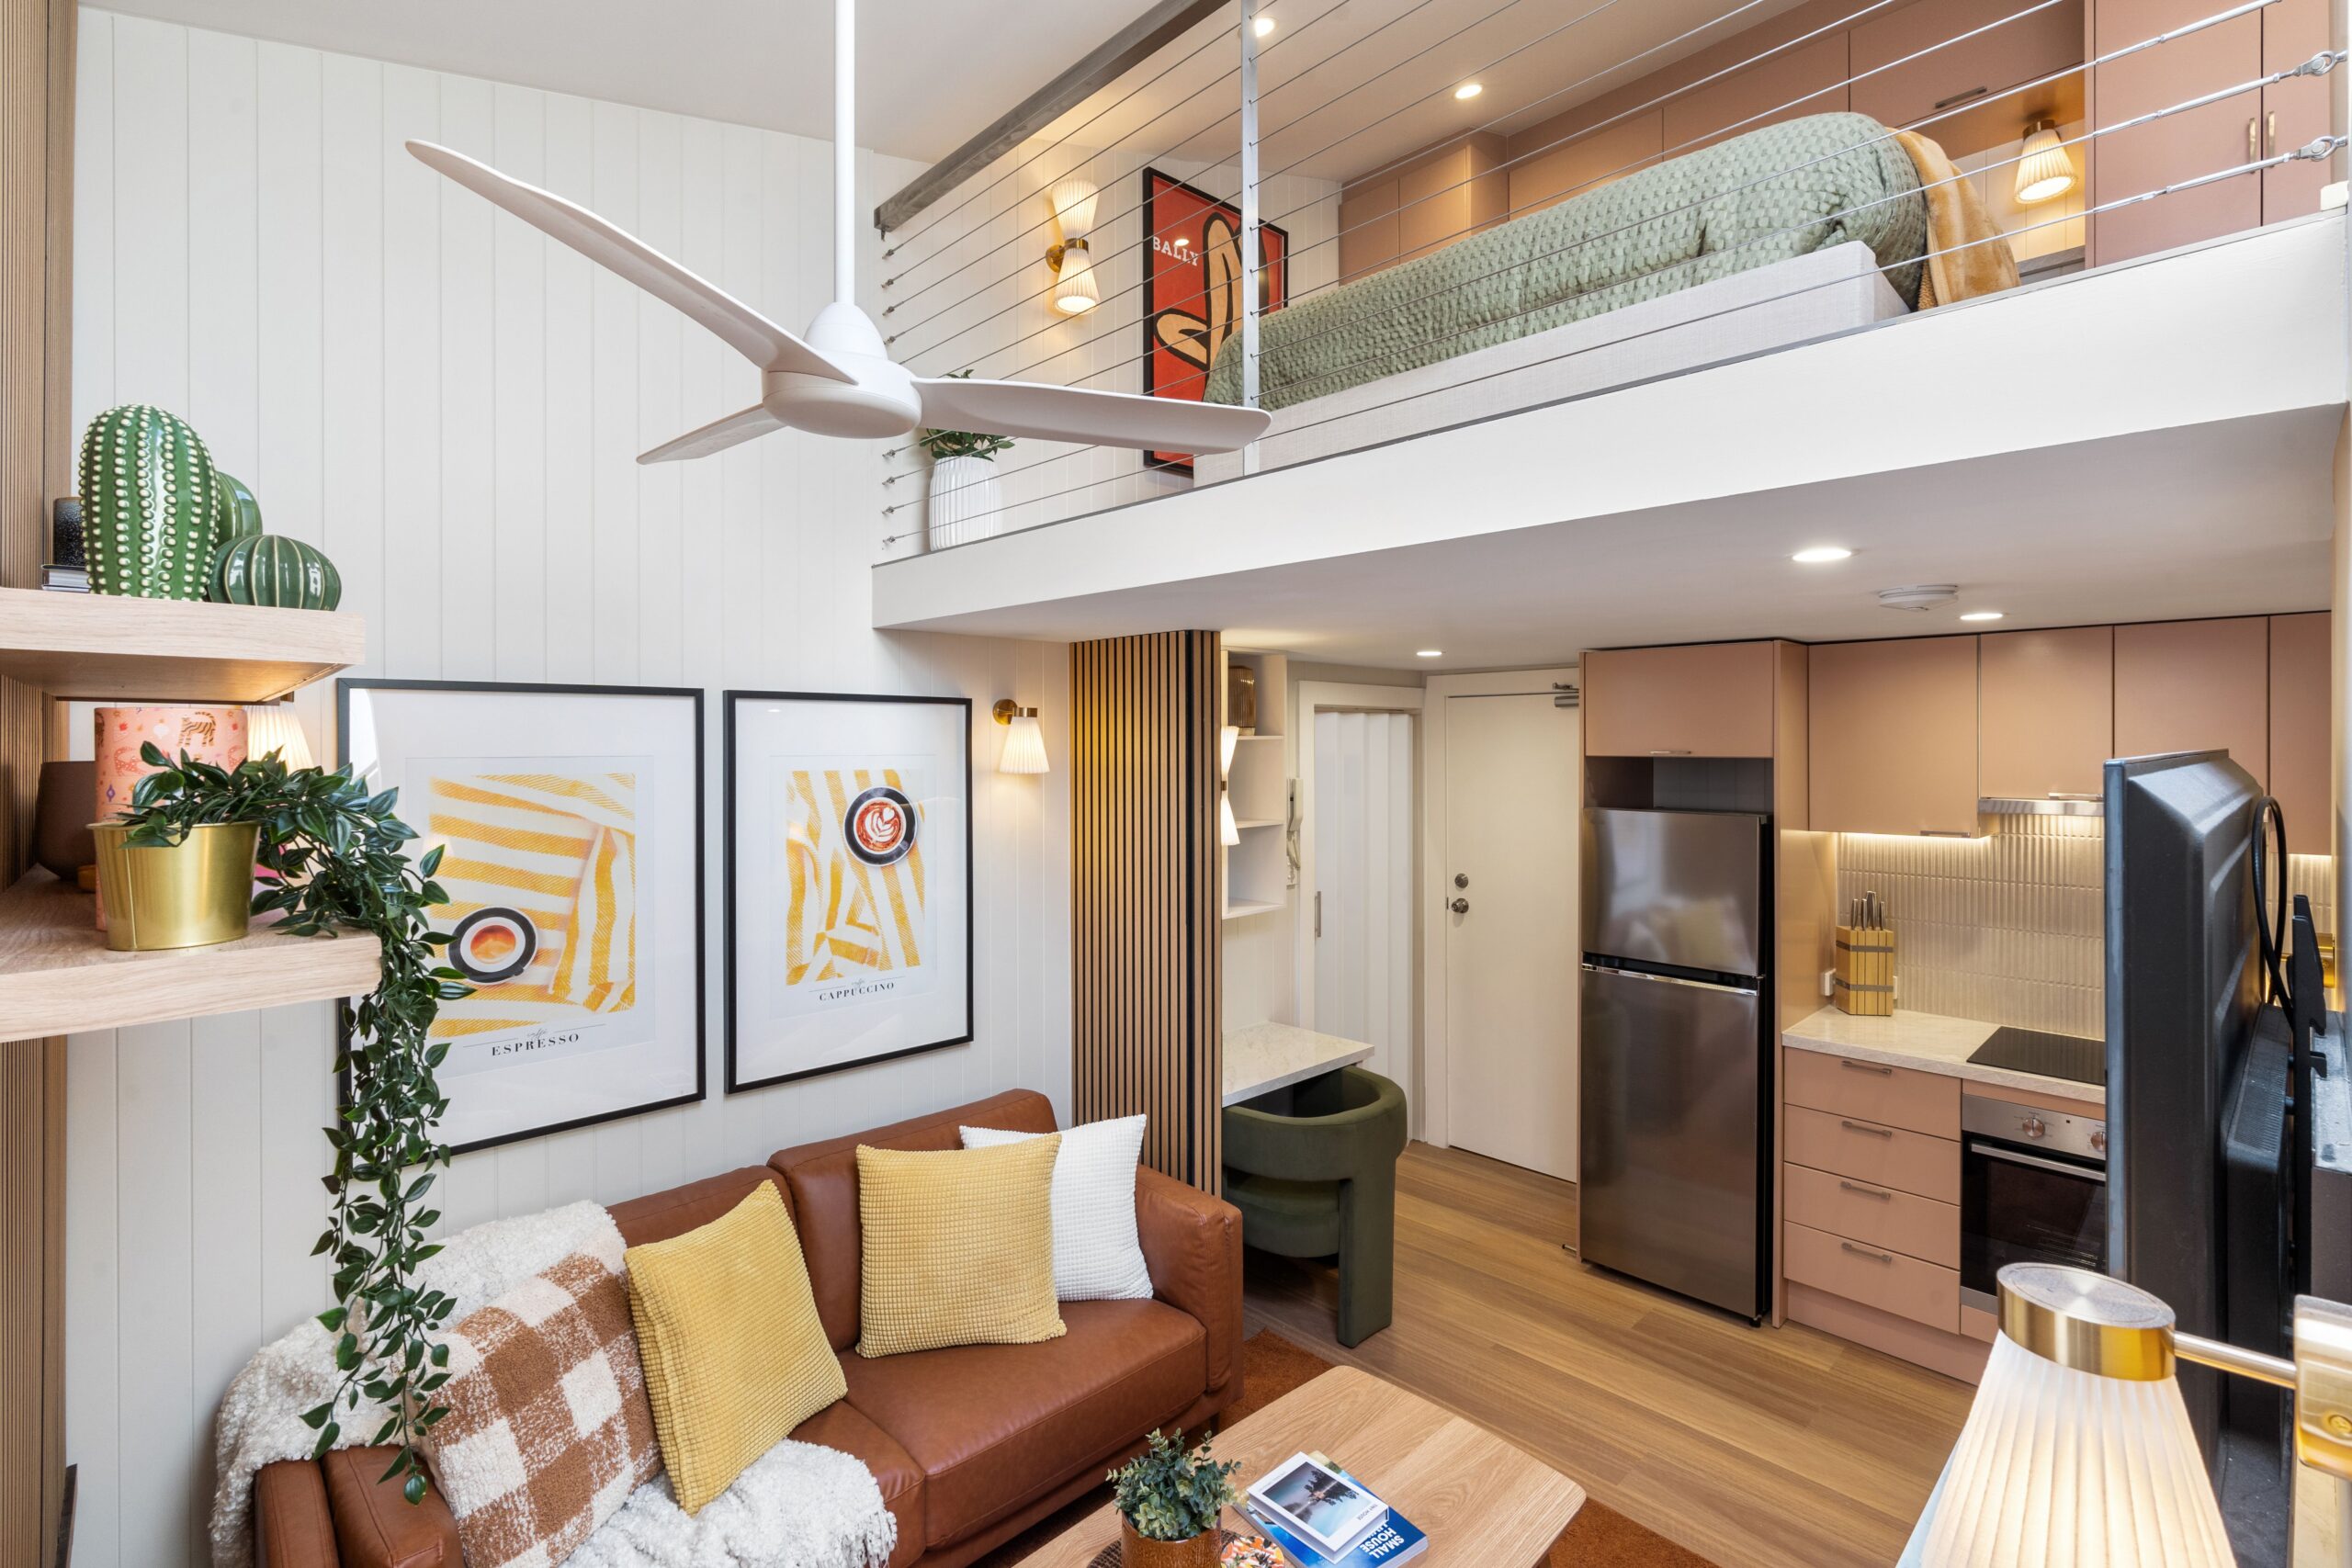
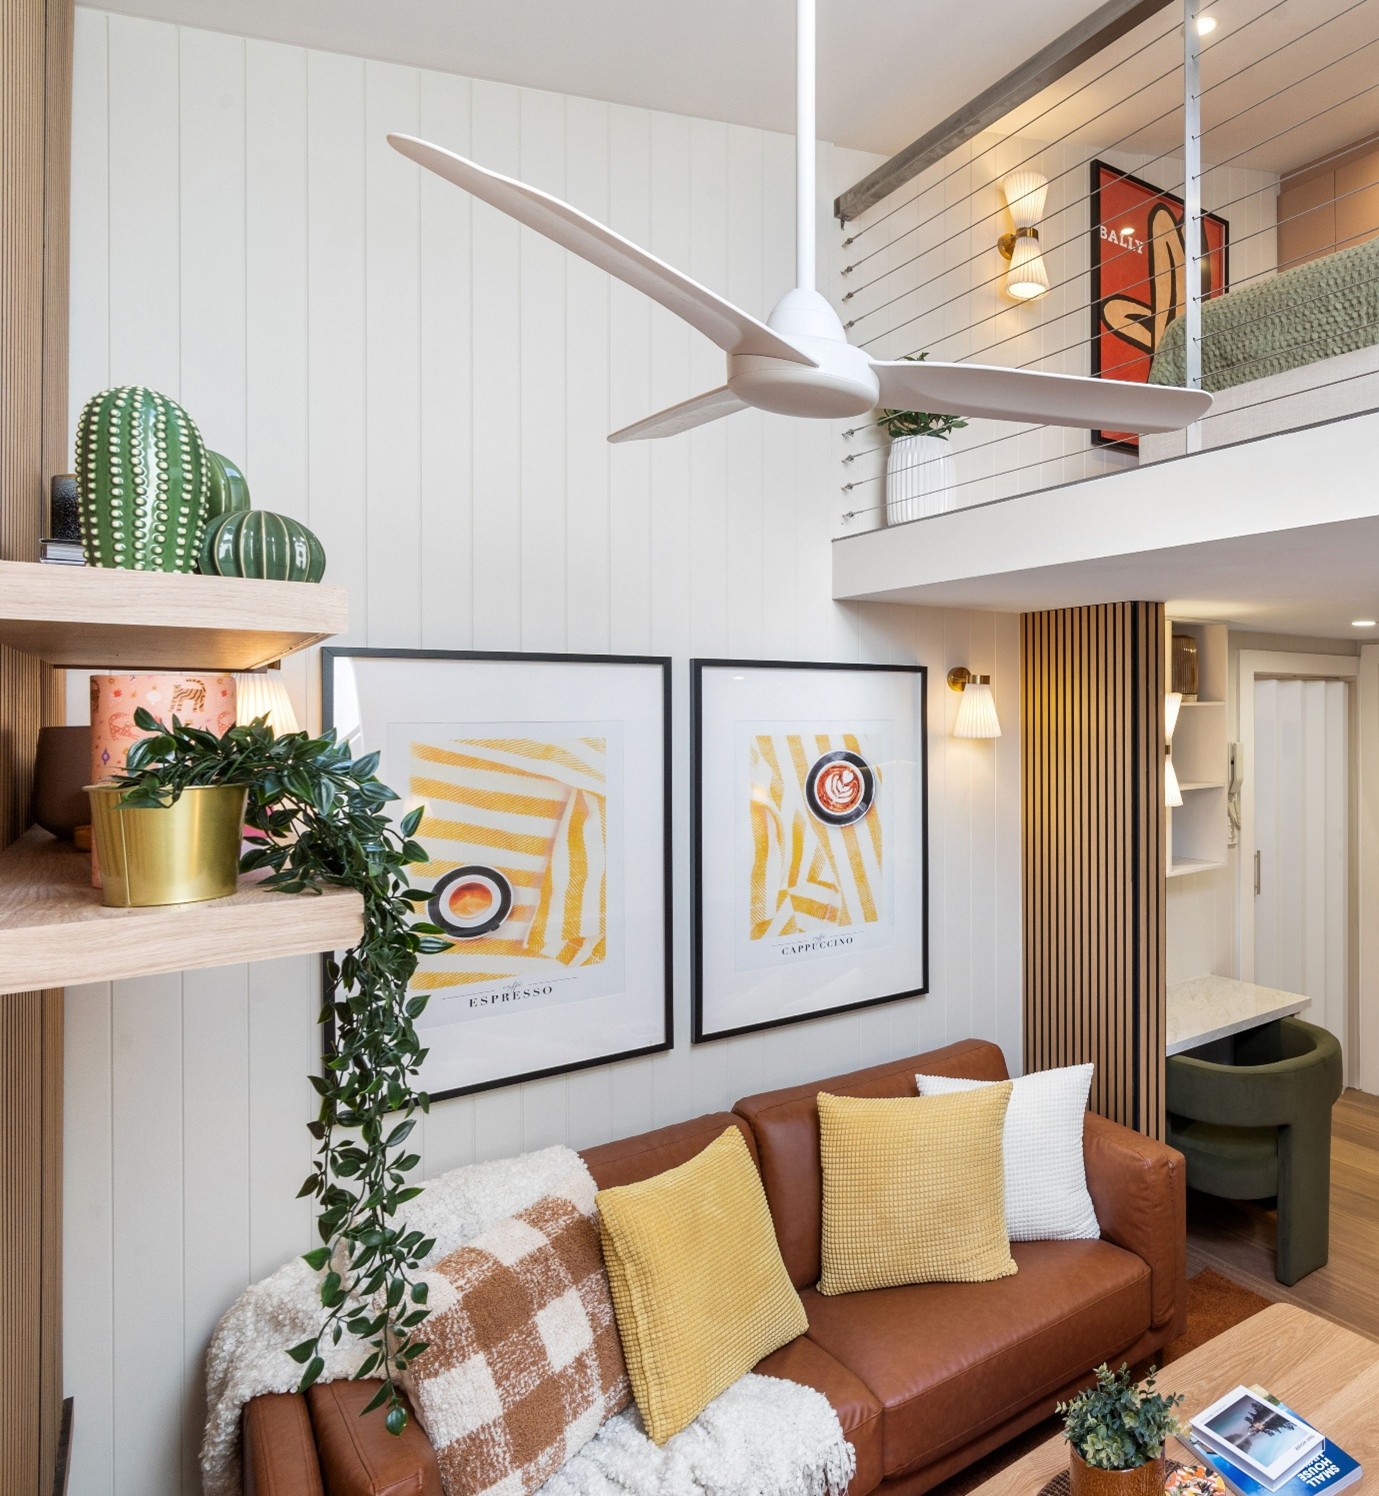
STAGE 6: GENERAL FIT-OUT – MAKING IT LOOK (HALF) A MILLION BUCKS
This is where it started looking like a home, instead of a construction site.
🛠 Walls: Cladded them with one of my favourite products, Easycraft’s easyVJ100 panels from Bunnings, glued with Sikabond Instant Nails Fast Construction Adhesive. These panels added much-needed texture, warmth & architectural interest, without making the space feel cramped.
🛠 Kitchen: Installed Kaboodle flat-pack cabinetry straight from Bunnings. I purchased the Paint Your Own Doors range, which my sister & I then painted in Taubmans Sombrero Tan (a warm, earthy clay colour because all-white can get boring).
🛠 Benchtops: Installed Trademaster’s Quartz Stone laminate benchtop, which at just $198.00 for a 3.6 metre slab, mimics the look of real stone but for a fraction of the cost.
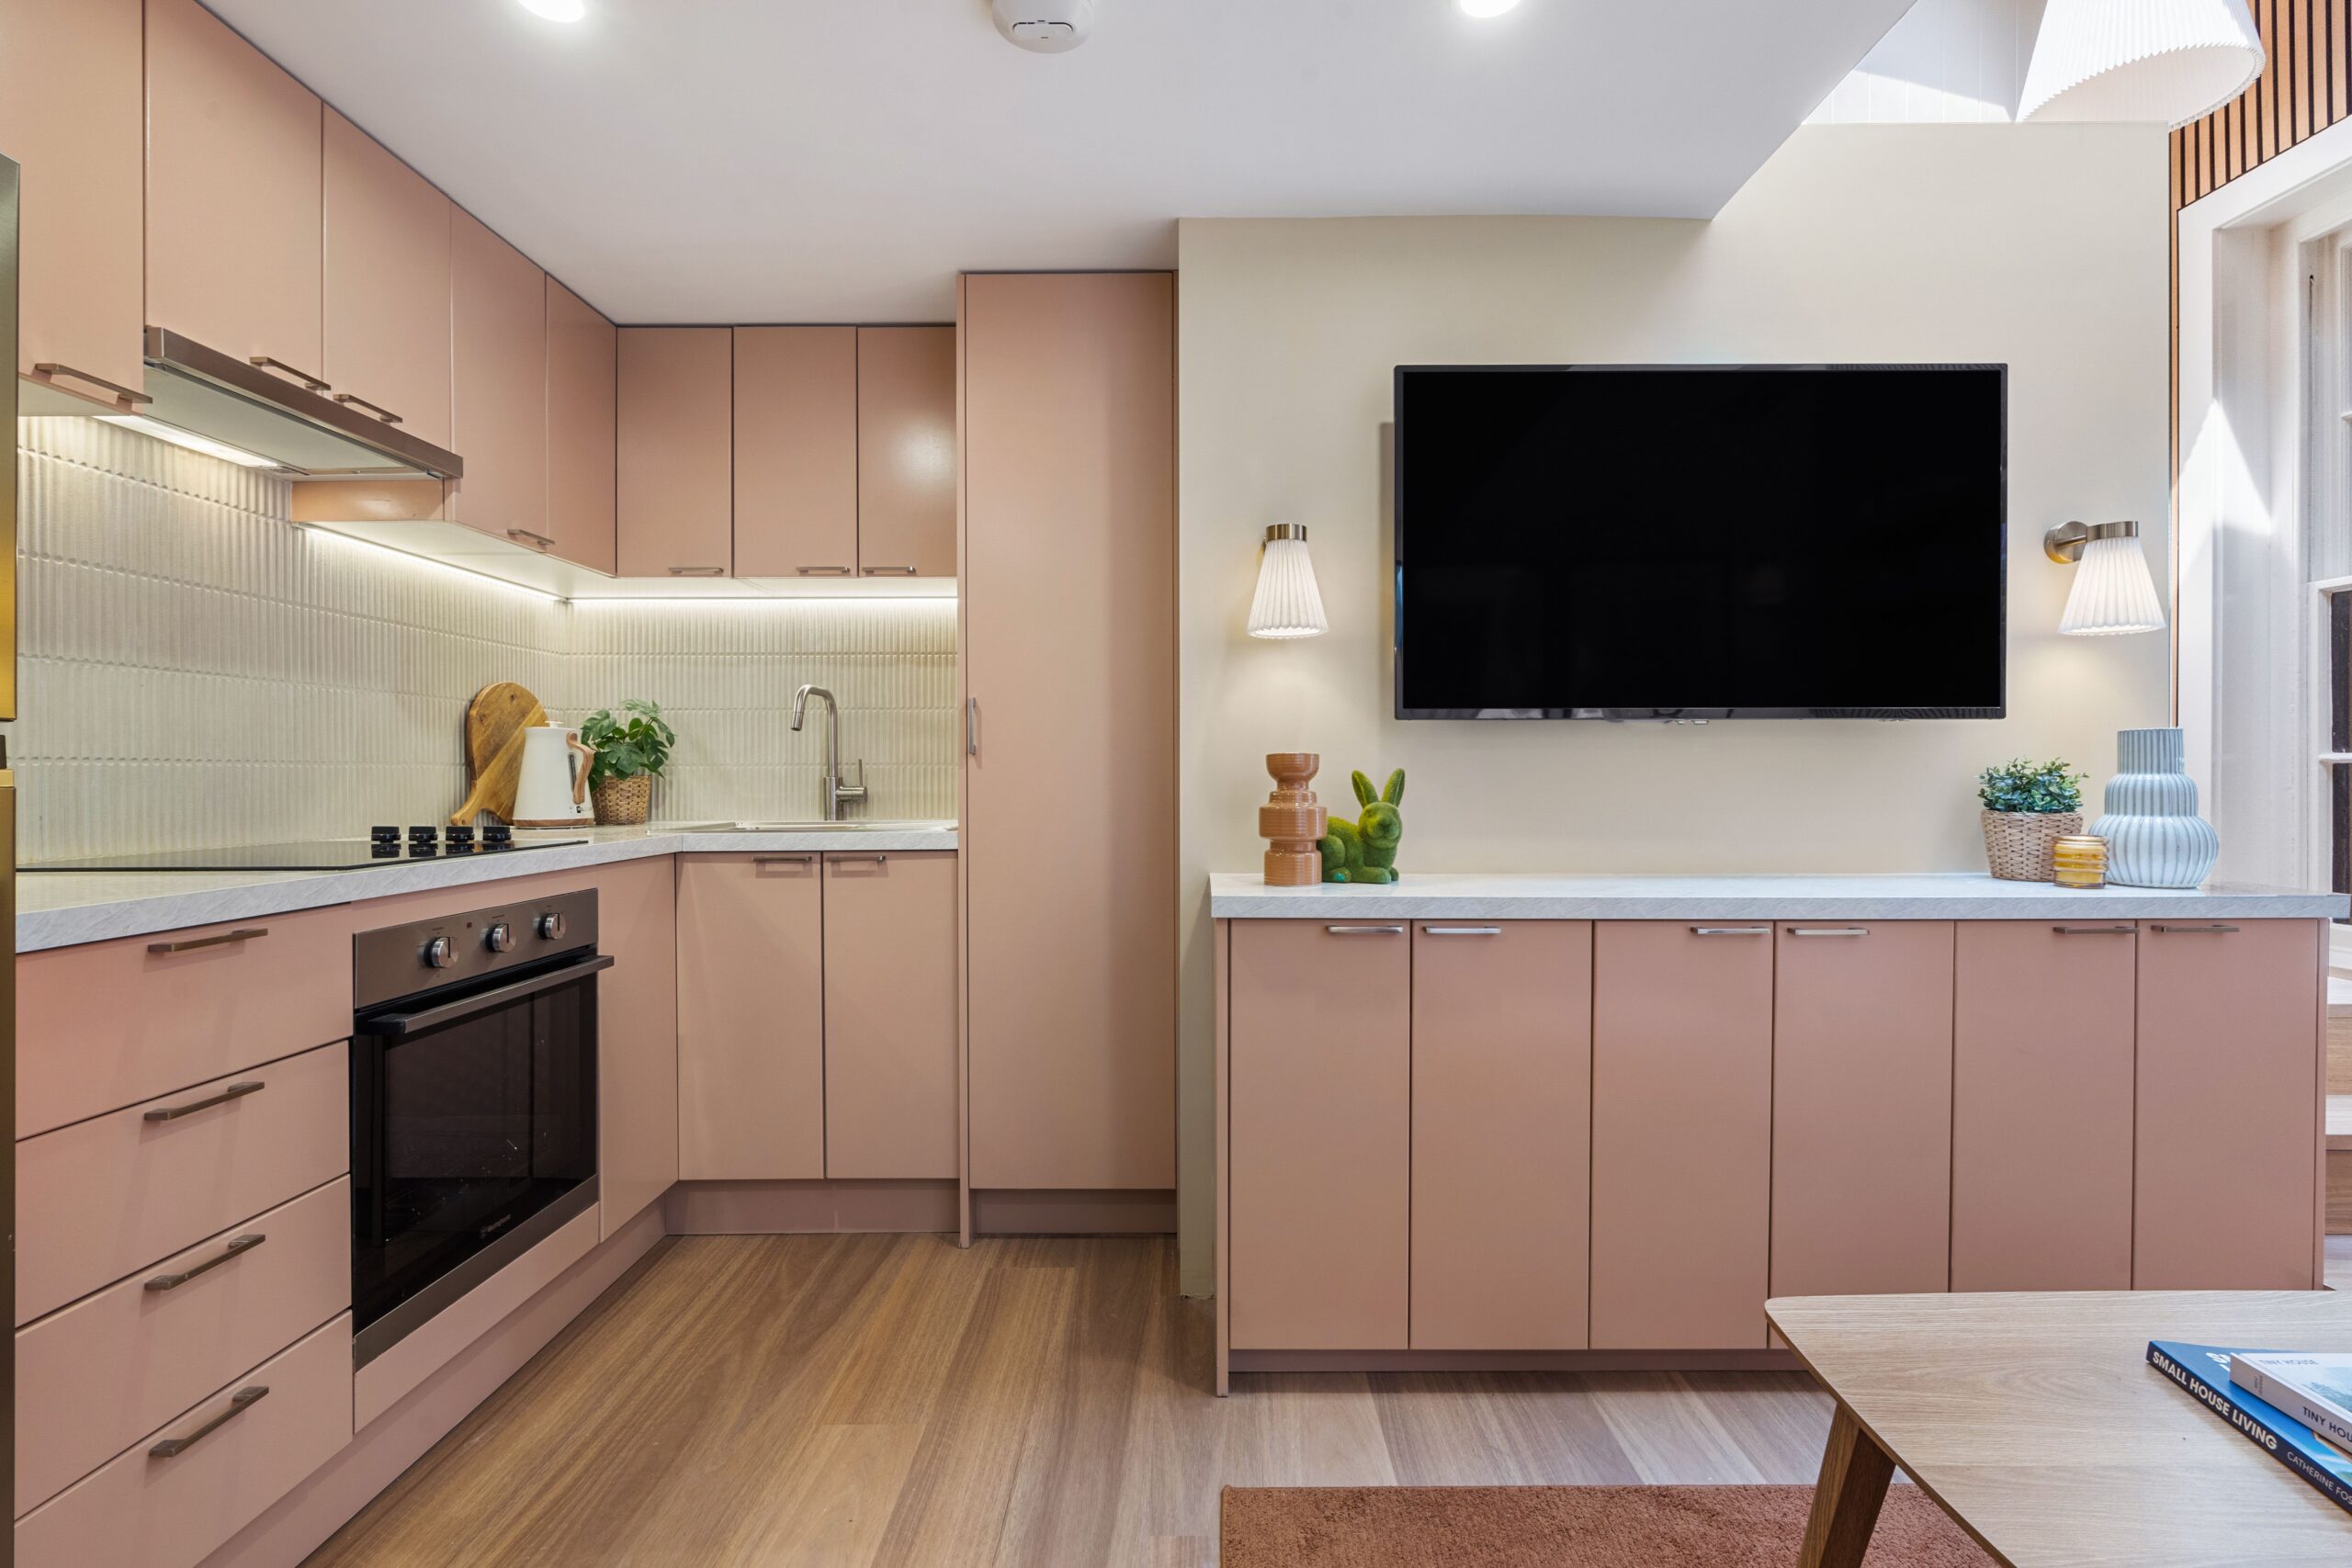
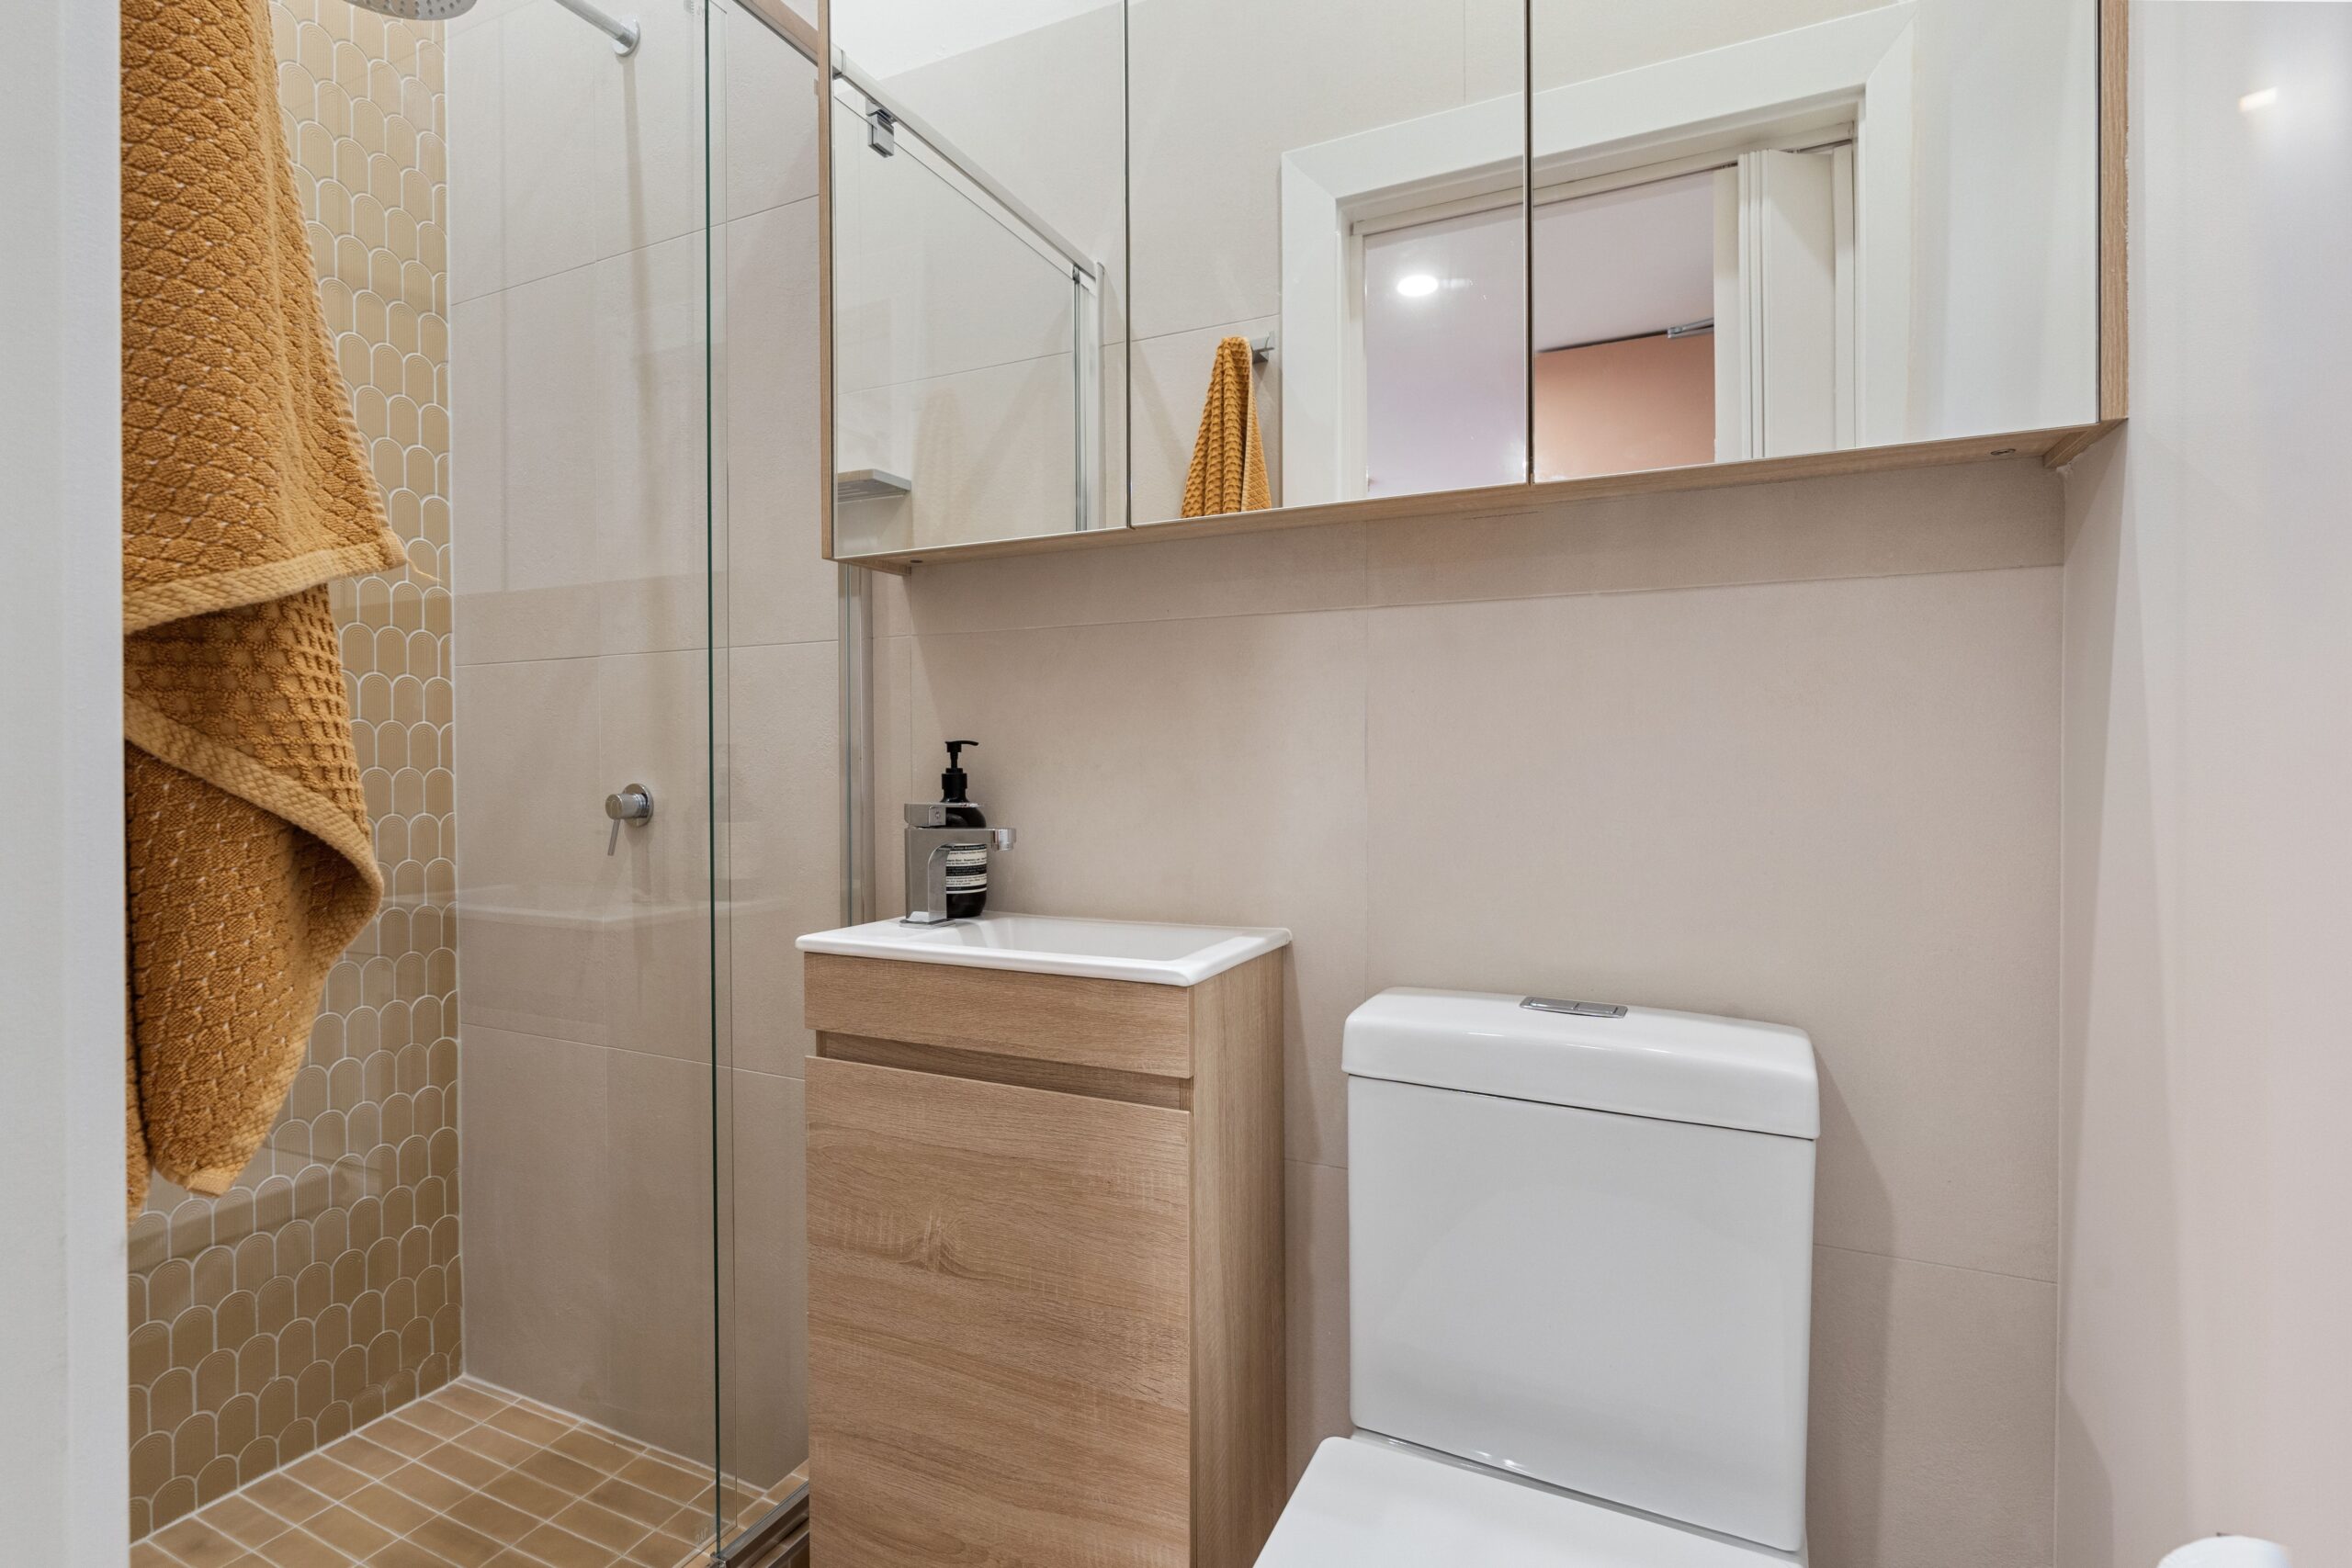
🛠 Kitchen & Bathroom Tiles: Installed a beautiful tile in the kitchen splashback with vertical lines to mimic the lines in the Easycraft cladding. Installed new floor & wall tiles in the bathroom in lighter colours to avoid making the space feel small. Used Davco sanitised grout (mould & bacteria resistant) for all tiles, then finished the tile edges with Sikaseal Sealant, which won’t crack over time (unlike tile grout).
🛠 Bathroom Fixtures: Installed all new bathroom fixtures including a toilet, vanity, shower screen, towel hook & a big mirrored shaving cabinet to maximise practical storage on the walls. To take it even further, I added Inabox Stackable Organisers inside the mirrored cabinet, making sure every centimetre of space was put to good use!
🛠 Lighting: Installed wall lights, new fire-rated downlights & a large pendant over the new stairs for function & ambience.
🛠 Feature Wall: Installed a touch of oak panelling, wall shelves & painted the TV feature wall in Taubmans Bamboo Cane – a soft, neutral tone that ties the whole space together.
STAGE 7: STYLING
Thankfully, a small apartment doesn’t need much furniture so I kept it simple:
🛏 Gas-lift storage bed (because storage is king in a tiny space).
🛋 Faux leather sofa bed – now the apartment sleeps 4, if airbnbing it out.
🖥 Office chair
🖼 Rug + coffee table
🎨 Decorator accessories (because the little details make all the difference!).
📦 Storage: Used stackable Inabox Modular Containers again to maximise every inch of cupboard space.
THE FINANCIALS
Now, your favourite part of my blogs, the numbers…
As soon as the reno was finished, I listed the property with Dean Owsnett from the Property Place Agency. Dean has a strong sales track record and, just as importantly, is diligent & easy to communicate with – a crucial trait for any agent, ensuring both vendors & buyers feel comfortable navigating a deal together.
💰 Purchase Price: $260,000
💰 Sale Price: $533,000 (furniture included).
💰 Net Profit (after all costs): $106,750.06
In this reno, it would be wrong for me not to mention, there were no finance holding costs factored in, as I bought the property outright using my super. You see, my super balance had been sitting at around $181,000 for years on end & being self-employed for the last 3 decades, I’ve never really prioritised it. Instead of letting that money just sit there, I decided to finally put it to work.
I used my entire super balance to purchase the property, adding an $80,000 on top to buy the apartment outright for cash. As for the construction budget, that was covered in cash too, using equity from one of my existing properties.
When the property settles, funds will go straight back into my super account, ready for the next project. The best part? Capital gains tax will be significantly lower compared to flipping properties under my personal name, making this a far more tax-efficient strategy at my ripe old age of 55.
THE TRADIES
One thing’s for sure, I’m not a one-woman renovation wonder!
This reno wouldn’t been possible without my incredible team of hard-working tradies, who pulled off a 7-day transformation – no small feat, especially with all the heritage building challenges thrown our way. This tiny reno tested not just our skills, but our patience & problem-solving abilities, pushing us to the limit at times. But we soldiered on, tackled every curveball & came out with a great result.
I’ve worked with most of my tradies for years now & after all the projects we’ve been through together, I figured it was time to properly say thanks – so I’m taking all the fella’s on an all-expenses-paid trip to Las Vegas next month. Hopefully it won’t end up like that movie, The Hangover, where one of us or worst still, me, goes missing! 😆No doubt there’ll be plenty of mischief & mayhem, but more importantly, it’s a well-earned reward for their hard work, loyalty & dedication.
If you’re tackling a reno & struggling to get tradies on your side, here’s a golden rule – treat them well & they’ll have your back. That means paying them on time, showing a bit of appreciation (shouting the odd coffee, muffin or meal if your budget allows) & treating them fairly at all times.
For this reno, I even went the extra mile – I bought in my Cherie Barber mobile tiny home & parked it out the front of the apartment block, giving two of my tradies a place to crash for the week. It saved them a gruelling 2-hour commute each way, each day & meant they could focus on the job, without running on fumes. While you don’t need to go to these extremes, small gestures of appreciation do go a long way. Don’t be afraid to ask tradies for their input too – they like to feel valued & when they know you respect their skills, they’ll go the extra mile to help you get the best result. Build solid relationships & your reno jouney becomes a lot smoother! 💪🏽🏡🔨
WHAT’S NEXT?
Last week, I secured another project, an acreage property renovation but this time, I’ve gone all-in with my tradies as a property syndicate, pooling all our time & money together. If you want a sneak peek of the property pre-reno, check it out here. Over the next 6 months, I’ll get the property DA approved for major structural works, and having negotiated 6 months extended settlement, we’ll have no holding costs during this time. We’ll start construction in November this year & hopefully finish middle of 2026. If you’re a registered student in my Cosmetic Renovations For Profit Course, you’ll have the opportunity to attend monthly student only progress inspections – before, during & after the project.
In other news, I’ve just launched my very first mobile tiny home on wheels! Click here to download the brochure. It’s available to be shipped nationally & we’re holding a public inspection opportunity on Saturday 15th March, 2025 from 10am to 12pm in Sydney’s West so you can see it in real life. To attend the open for inspection, register here.
For now however, cheers to tiny homes, big profits & never underestimating a shoebox apartment! Thank you again for watching me do what I love doing every day (renovating). It’s an absolute honour sharing all the details of my projects with you & I hope that you learn a thing or 2 from them.
Much love
Cherie (CB x)


