


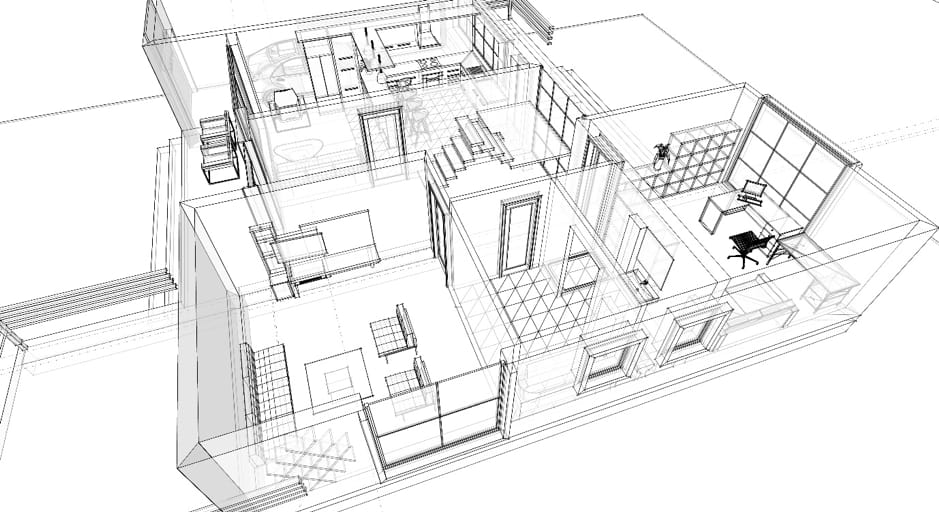
How To Create A Fabulous Floorplan
Quite simply, if you start a renovation without a detailed floorplan, it’s the fastest way to hell. For those of you who don’t know, a floorplan is simply a drawing that shows the design of one or more rooms from an aerial view. It can quickly help anyone visually see the size & scale of rooms & more importantly, what goes where.
Now, I know you’re probably thinking… gee all I’m doing is a simple room makeover Cherie – isn’t that a bit of overkill?
No, it’s not. Those few hours you spend pulling your floorplan together, can save you from making mistakes you potentially can’t reverse. It goes something like this … you’ve got your colour scheme sorted, you love the feature light you’ve chosen, the flooring looks great, you know you want a 3-seater sofa here & a tellie over there… but you then add your coffee table & it’s all getting rather squishy. Woops! The store won’t take back the sofa because you’ve removed the packaging, your feature light looks wrong because it’s now not properly centred over the coffee table you originally bought but now need to change, you get the drift…
That, people, is why we do a floorplan! You make those mistakes on graph paper (numerous times if need be) & it doesn’t cost you a cent. When you’re happy with the floorplan, only then go shopping, knowing everything will perfectly fit.
FLOORPLAN & LAYOUT FUNDAMENTALS
Achieving a fabulous floorplan is easy once you have some basic know-how:
Firstly, your floor plan should dictate how people circulate through your home, whether they can easily navigate from A to B or you send them on an obstacle course around all your furnishings. This is particularly important in open plan rooms, when you’ve got your kitchen, living area & dining area all flowing together. You need to consider your furniture layout right at the very beginning or you may have annoying things happen like family members walking in front of your TV, every time they go to the kitchen.
Ideally, your floorplan should minimise the need to suddenly change direction when navigating around your furniture. You want to lead people on a smooth, logical path, walking in arcs, rather than sharp right angles. Don’t block natural walking areas in your home with large pieces of furniture otherwise your furniture layout becomes a mini obstacle course.
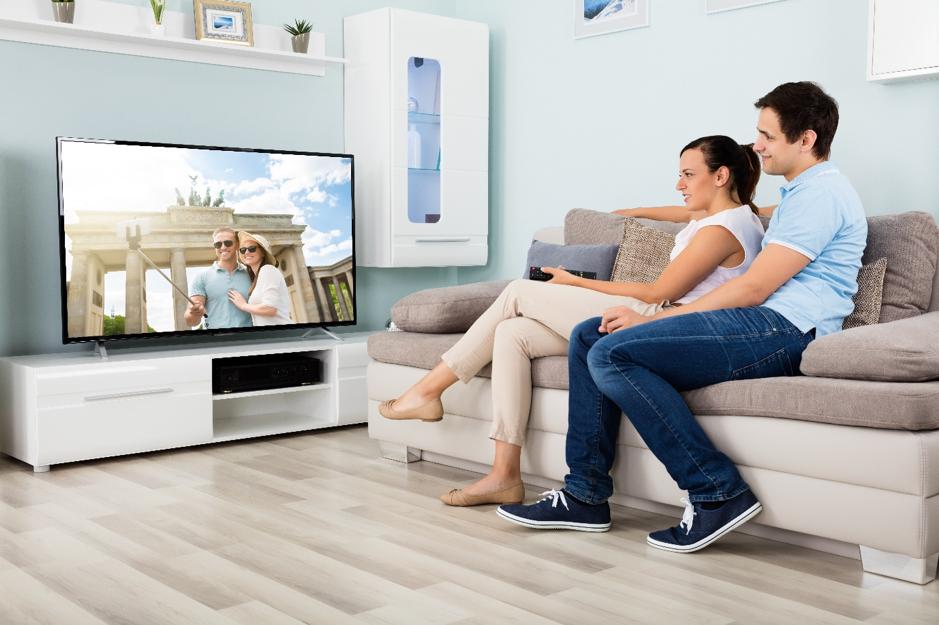
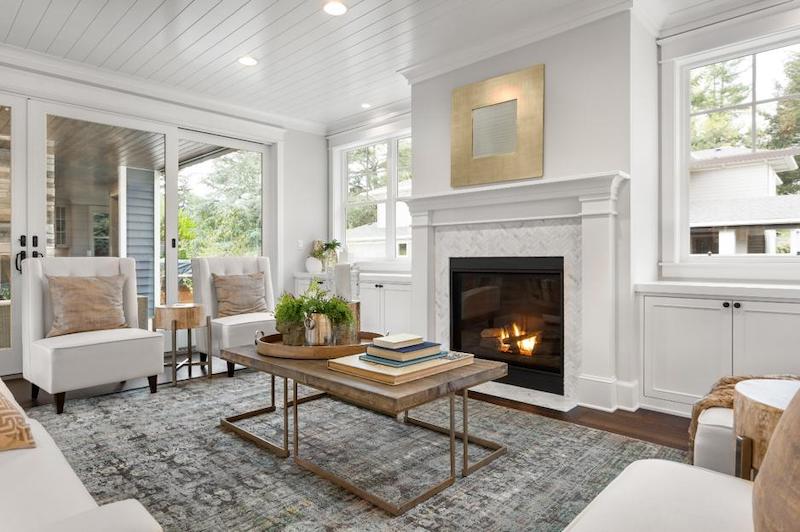
As you’re designing your rooms, think about where you want people to look as they enter & circulate through your home. It’s called “focal points” or the “line of sight” – where you direct people’s attention as they enter a room. No one wants to see your rubbish bin when they first walk into your kitchen or see your TV when entering your lounge room. Instead direct their attention to things like a beautiful fireplace, a large painting on a wall, a mirror at the end of a hallway. Creating focal points in your home is also a useful way to distract people’s attention away from things you don’t want them to see.
Take focal points into consideration when doing your floor plans.
Now the beauty of doing a floorplan right up front is that it also tells you dead practical stuff, like where all your power points & light switches should go. That way you avoid things like unsightly electrical cords dangling from your wall-hung TV or electrical extension cords across your lounge room floor to get your new floor lamp powered on.
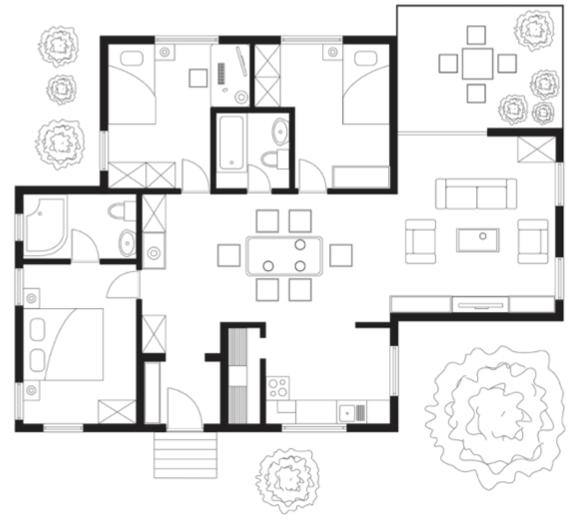
THE ZONES WITHIN A HOME
You’ll love this – a basic, common sense design principle, not always done in the world of architecture & interior design ….
Think of any modern home as having 4 distinct zones:
First, there’s the sleeping zone, where all your bedrooms are clustered together, normally at the front of your house, pushed away from the main communal areas of your home such as your lounge room. These rooms are the “quiet” part of your home.
Then there’s the service zone, which typically contains your bathroom, laundry & guest toilet, tucked away in the centre of your home. These rooms focus moreso on where all your water, gas & electrical lines come into your property in one central location.
Towards the back of your house, is the living zone, containing your open-plan kitchen, living & dining. This part of your home is where people congregate & is therefore the “noisy” part of your home. This zone is deliberately pushed away from your sleeping zone for obvious reasons.
Finally, there’s the entertaining zone which is any outdoor alfresco areas & your backyard that ideally, naturally transitions straight off your indoor living zone to your outdoor areas.
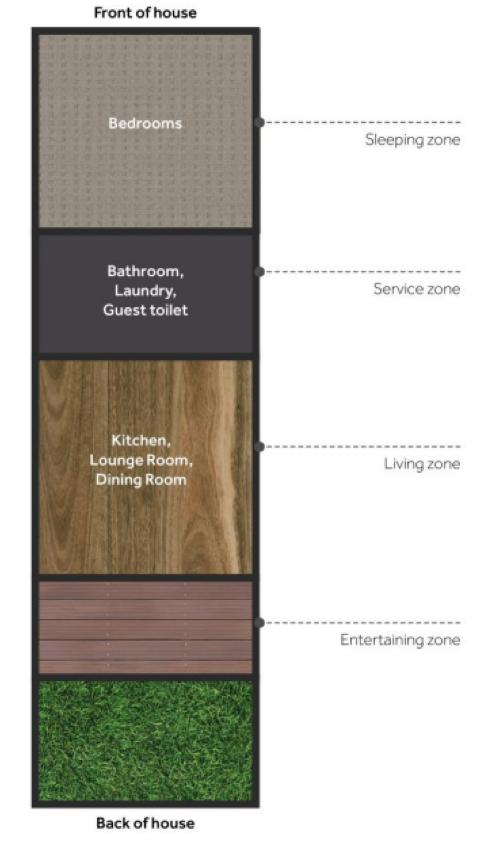
The idea here with these 4 zones is that your house effectively becomes 2 halves – “quiet” versus “noisy” areas, pushed as far apart as possible. On a 2-storey house, this is often achieved by having the noisy areas on the ground floor with the quieter bedroom areas on the 2nd floor. Many older homes don’t follow this principle, causing those floorplans to be less than ideal for the way people live today.
SIMPLE FLOORPLAN IDEAS
To inch yourself one step closer to a fabulous floorplan, consider the following:
- Can you remove a wall or walls between rooms to create a more open plan space? If you’re going to do this, you’ll need to determine if any walls are load bearing or not first.
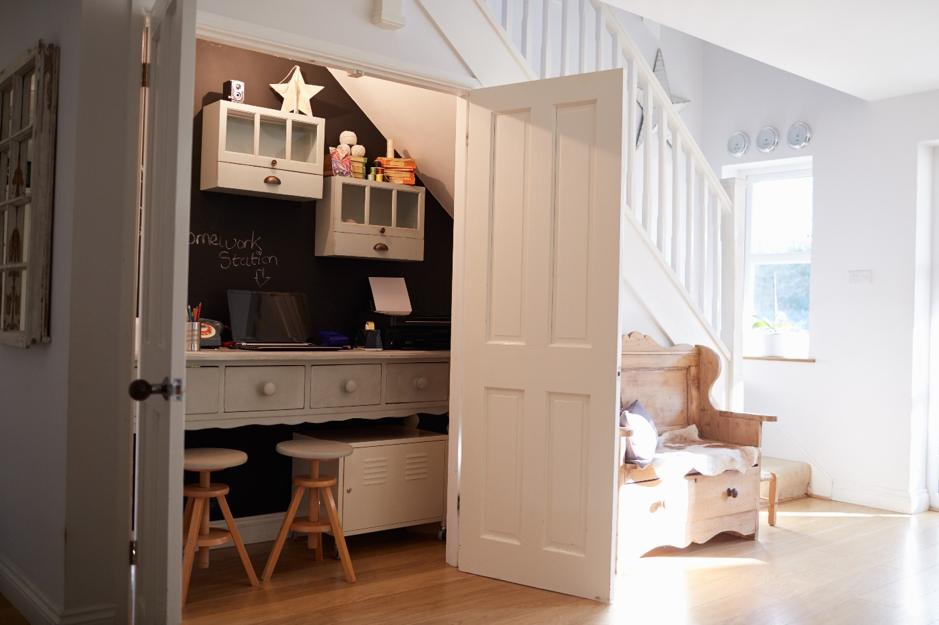
- Look for dead spaces within your home that can be turned into useable space. A good example in older houses is that space under your stairs, perfect for your new home office, bookshelves or just extra storage.
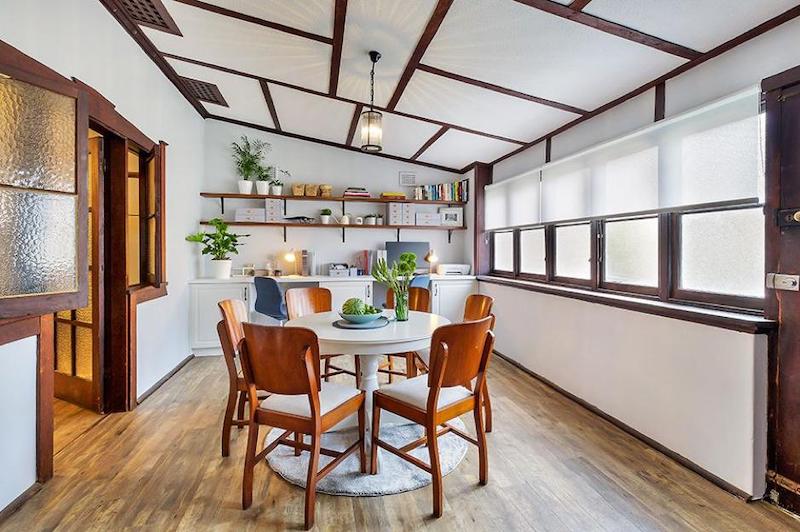
3. Think about vertical space, not just your floor space. You can never have too much storage in your home, so ask yourself … is there a wall you can install extra cupboards or open style shelving?
Simple shelves increase the amount of storage in this home.
4. Can rooms be reduced in size? For example, if you have an older oversized laundry (which many older homes do), can you cut it in half & use the remainder of the space for a walk-in pantry or a mudroom?
So… now you know why you need a floorplan & the benefits of it, let’s look at how you go about creating one which can be a fun exercise, in itself!
HOW TO CREATE A BASIC FLOORPLAN
To start, think first about a few key design elements These include:
- Room size – is it a big or small space?
- Room shape – is it a regular shape, like a rectangle or does it have some awkward angles in the room?
- Wall locations – do you have 1 long wall you can use as your design anchor or is the space made up of lots of small walls, broken up by doors & windows?
- Window locations –where does natural light come into the room, is there an outlook you don’t want to block? Are the windows floor to ceiling or mid height where you can still place a sofa under the window?
- Door locations – in terms of flow of traffic & where you place furniture in that room, the door openings are pivotal to your layout working properly …
- Flow to other areas of your property – are you designing a stand-alone room, like a bedroom or a bathroom that’s enclosed with a door? Or are you designing a free-flowing space that connects to other areas of your home so the rooms are visually connected?
- Ceiling height – a high ceiling is going to give you a much greater sense of space than a low one. In this latter case, you’ll need to scale your furnishings accordingly to give the illusion of a higher ceiling.
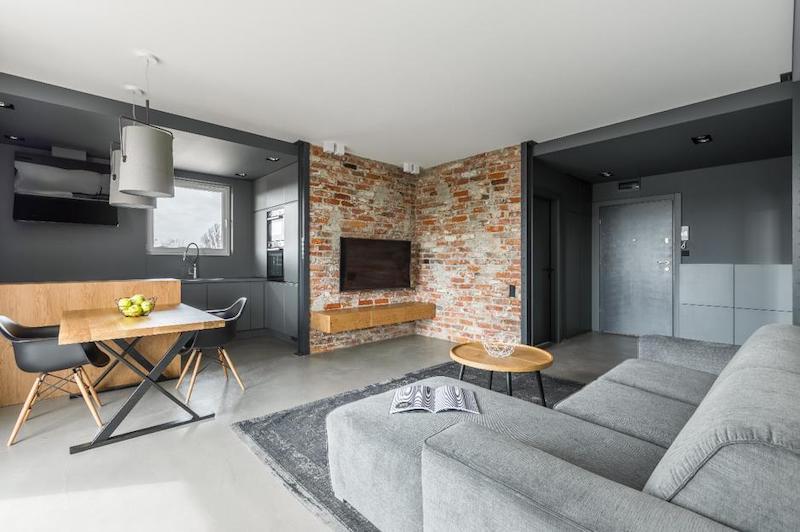
Slimline furniture works well for properties with standard or lower ceiling heights.
Next up, break out your measuring tape. Accurate measurements are critical to your floorplan. For each room you’re making over, you’ll need:
- Total width of each wall;
- Ceiling height;
- Dimensions between all your windows, doors or other openings in the room.
Once you have all your measurements, you can start designing your floorplan. To begin with, I’d recommend you start, old school style … with graph paper, pencil, ruler & rubber.
Draw your floorplan up first with all your external walls, internal walls, door openings, windows in their correct position. Don’t forget to note the direction your doors open, just like they show on real estate agent’s brochures.

Now cut out your own furniture cut-outs exactly to scale – in a living room this would be things like your sofa, chairs, rug, coffee table, entertainment unit, etc. You might choose a scale of say 1:20 – so one little graph paper square equals 100mm in real life.
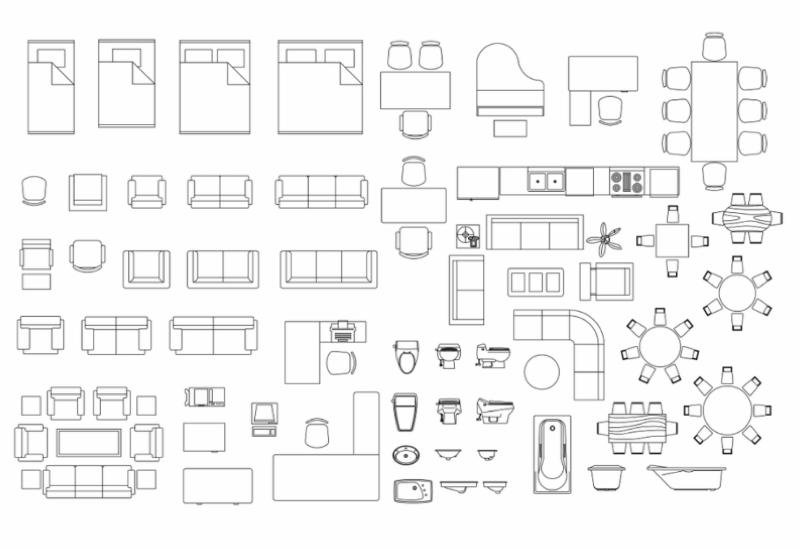
Now start placing those furniture cut-outs into your room design. Place the largest pieces of furniture first, such as the sofa in your living room or the bed in your bedroom. That’s your anchor. Then start adding in the smaller pieces of furniture & begin moving them around to test different configurations. Look out for things that open, like doors, a chest of drawers, wardrobe or cupboard doors, allowing enough clearance space for them.
In your living areas, consider how many people will normally use the room … that will be a good guide as to how much seating you’ll need. When arranging your furniture, try to make sure that sofas & chairs face each other to some degree, so people can easily chat to each other without craning their necks or yelling across the room. And make sure you direct traffic “around” your seating, not straight through the middle of it!
And here’s an interior design no-no. Unless your room is especially small, avoid pushing all your furniture right up against your walls. Pull your sofa out from the wall & you’ll find your room will instantly feel bigger.
As you start playing around with your furniture cut-outs, it’ll soon become obvious if the furniture placement you originally had in mind, will actually work in real life. You might suddenly realise you need to buy a 2.5-seater sofa instead of the 3-seater one.
Draw arrows that mark the flow of traffic from door openings and around the room. Does it flow smoothly & logically in arcs not sharp turns?
Think about focal points – that line of sight I mentioned earlier. What’s the first thing people are going to see when they walk into your room? Hmmm, you might want to rethink about where you’ve planning to place that huge wall-hung TV.
When your “paper” layout begins to take shape, you might want to stay with just that or you can go next level with an online floor planner. There’s loads to choose from: just Google “free floor planner” & you’ll see what I mean. Some of the more popular floor planner sites are www.floorplanner.com & www.roomsketcher.com
Most of these sites offer a basic aerial view – or 1D floor plan for free. If you want anything more, you might need to pay a fee.
FINAL FLOORPLAN TIPS
Okay, to finish up with, here’s some extra’s you might want to consider:
One… road-test your ideas – if you’re someone who likes to leave no stone unturned, you can stick masking tape on your floor where you’re planning to place big items like a wardrobe, sofa or a dining table & chairs. You can also stack boxes up to replicate their height. Stand back & see how much room that piece takes up in the room.
Two… think about inventive ways to break up big spaces. In an open plan living area, room dividers can be something as simple as a timber bookshelf, with hanging greenery & lots of lovely knick-knacks. In a master bedroom I once renovated, I got my tradies to knock up a freestanding partition wall in front of my wardrobe. It was a simple way to get a wall mounted TV on one side & a floor to ceiling shoe rack on the other side.
Three… Do some research around recommended spaces to leave for walkways & around furniture. Interior designers have quite fixed ideas about how many centimetres to leave between this & that. A simple google search can help you get these answers.
For further information, listen to podcast #4 – How to create logical layouts.
Much love,
Cherie x


Great article. Points out pretty much the basis of renos and developments. A shift of focus is in order methinks. Thanks for the article.
Your welcome & thank you for your feedback, Cherie Crew x
Wow, never thought of it in that perspective. This is a great read, will be rethinking some projects. Thanks Cherie 😉
Glad you enjoyed the read Suzanne, Cherie Crew x
Loved the article, very true and concise. A builder carpenter, who studied engineering, who loves design, as long as it works, some times not practical.
I love sitting with my clients and achieving their precise dreams into reality, if practical. love working with Designers, drafty’s and especially architects.
Love the information, keep it up please.
Kind regards . John Randich
Thanks John for your lovely feedback, have a fantastic weekend. Cherie Crew x
Sometimes the Old ways are still the best! Graph paper and cuts out work really well and you can move them all around and between rooms, super quick.
Absolutely Sami, couldn’t agree more. Cherie Crew x
I am in the middle of this process now. It is how I was able to expand my ensuite and create a walk-through robe next to it. I still have to do the cutouts for my bedroom then go on to design the main bathroom and a corridor laundry. Thanks for organising my thoughts.
You’re welcome Jenny, sounds like you have this under control. Cherie Crew x