


How To Renovate Your Master Bedroom
Mention the word “renovating” & most people start to feel anxious. The thought of renovating your whole house all at once, is a daunting, somewhat scary concept for many people. A national shortage of tradies makes the task more difficult, as does material shortages around the country, thanks to Covid.
In the current climate, it can be a more sensible move to tackle your home, one room at a time. It prompted me to develop a new regular web series called “Renovate My Room” with today’s blog kicking off Episode 1.
A BEDROOM BLITZ
Nothing screams 80’s chic like apricot & sage green walls… except maybe a band of frilly wallpaper frieze. But just like big hairdo’s & shoulder pads, these hits of the 1980’s have had their day!
Whilst the bedroom looks comfortable & surely is a similar one to millions around the country, it’s fair to say, it looks like it’s stuck in a time warp.
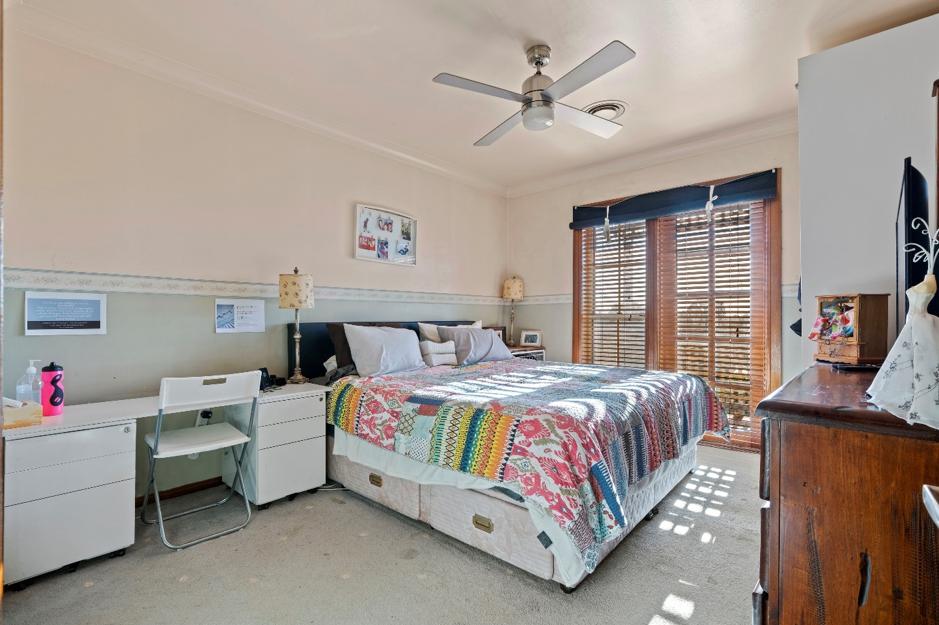
Let’s first assess what’s wrong with this room visually? The apricot-coloured ceiling provides no contrast against the apricot-coloured walls. The apricot & green half-height wall colour with the wallpaper frieze dates the room. The carpet has unquestionably seen better days. The dark brown door frames visually dominates the room. None of the furniture matches. In some places, the furniture isn’t even real furniture, as evidenced by the 2 white office drawers to the side of the bed, with a makeshift piece of laminate put on top to create an informal study desk. Genius, yes! Good looking, no! Lack lustre lighting makes the room dark at night & the impractical blind is troublesome to get up & down each day.
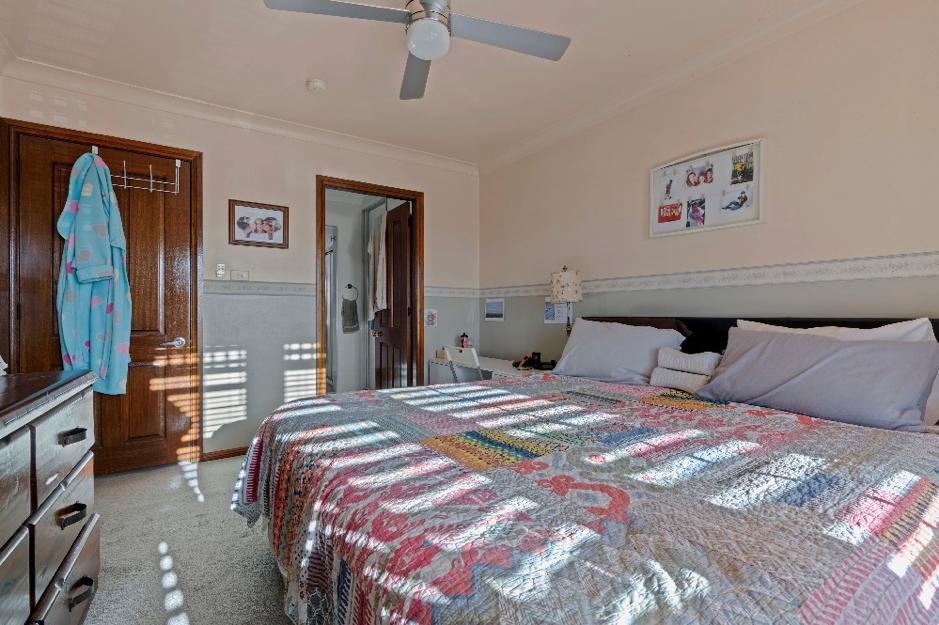
Let’s now work out what’s good in the room? It’s a great shape with no weird angles. It’s a decent size – 3.9 metres wide x 3.32 metres in depth, a common size for many master bedrooms in Australia. There is a separate walk-in robe with ensuite that adjoins the room, requiring no further renovation & providing ample storage for clothes. The room gets a decent amount of natural sunlight streaming in through the balcony doorway.
THE RENOVATION BEGINS
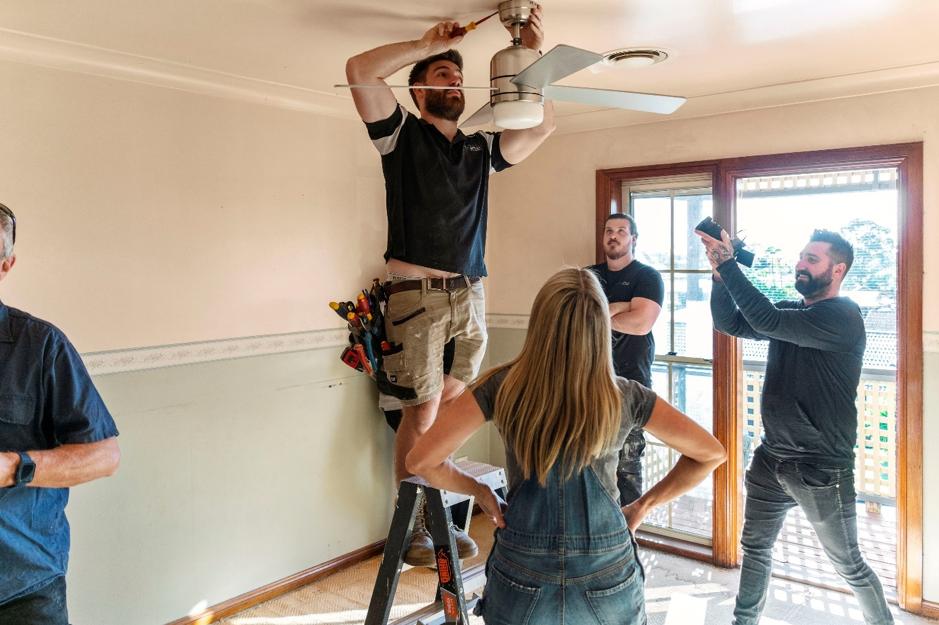
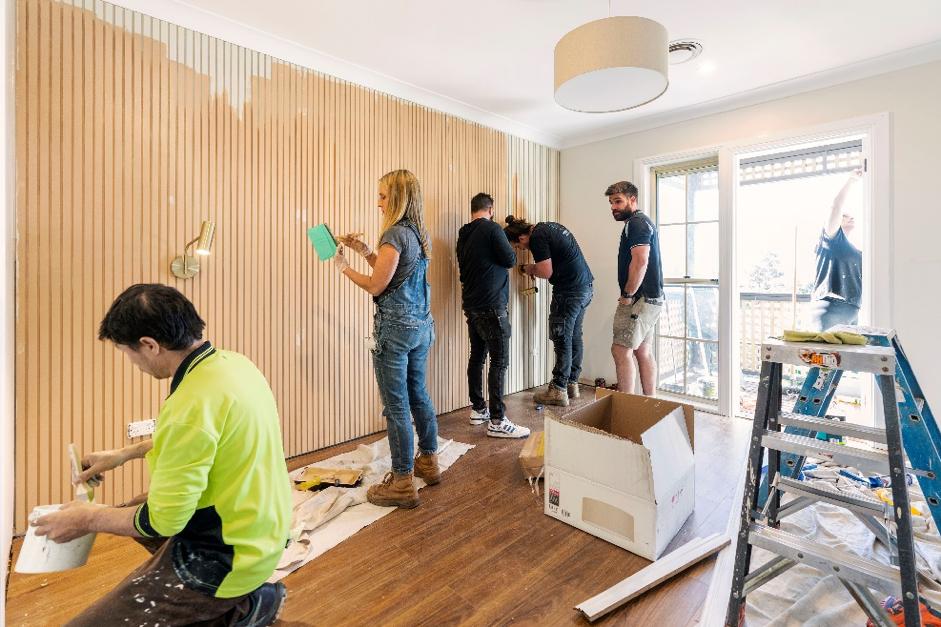
When you’re filming any renovation for the public to see, you need to move fast as camera & production people don’t come cheap. With just 8 hours last Saturday to complete the task, I rounded up my team of tradies to help give this old timer room, some 2022 glamour.
Whilst I pulled in, more tradies than you can poke a stick at, the good news is … you can do most of it yourself, if you’re handy. If you’re not, a good chippie & sparkie will be all you need, if you do the other bits like painting which you can do over the course of a few weekends. The more you do yourself, the less money you’ll spend on tradies.
THE STRIP OUT
To renovate a room, you normally strip everything out first. In the world of construction, that’s called your “demo / strip out” phase.
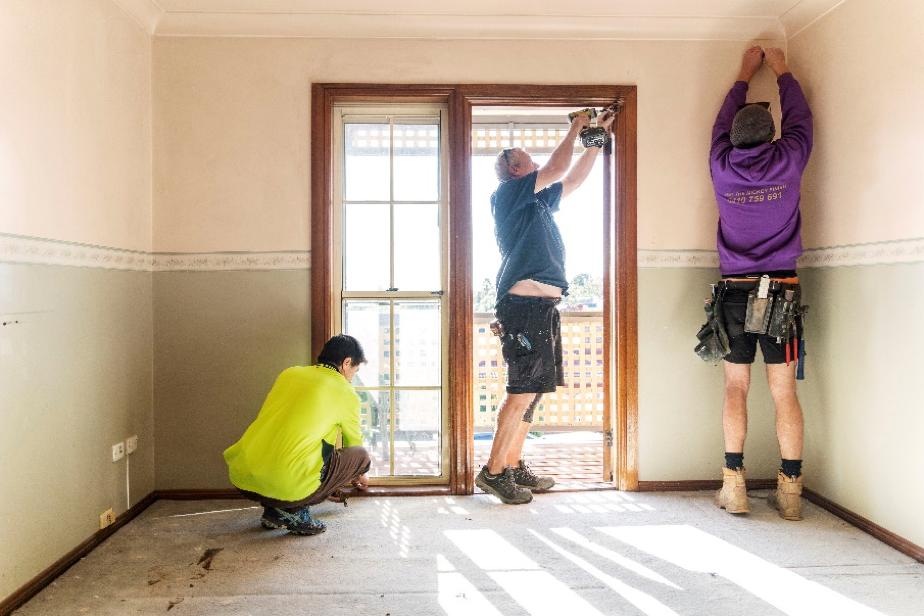
Out went all the old furniture (except the bed mattress which was retained), the carpet, blinds & random wall hooks were removed as well. The skirting boards were removed (for new flooring to be installed) but retained to be re-installed. Why throw out something that’s perfectly good?
START FROM THE FLOOR UP
The dowdy carpet was well past its use by date so the decision to install water resistant laminate flooring was a bit of a no brainer, especially given the hallway outside the room, featured floating floorboards. I colour matched these, choosing a tongue & groove Spotted Gum board that my carpenter installed. If you’re a competent DIYer, you can tackle this yourself. Simply cut the bottoms of your door architraves off so your new flooring slides in underneath.
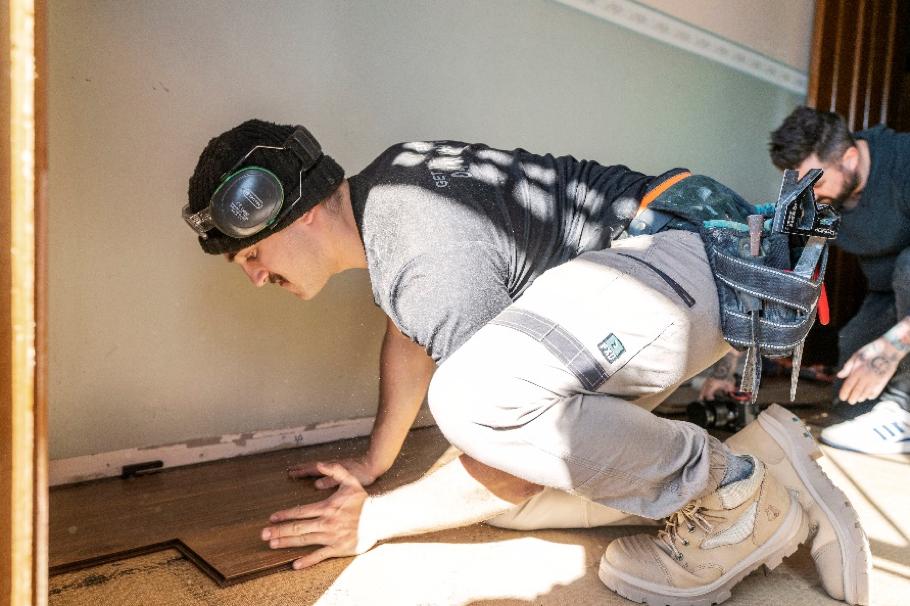
When laying new floating floorboards, always remember to leave a 10mm expansion gap around each side of your room so your floorboards have room to naturally “expand & contract”. If you fail to do this, there’s no room for your boards to move which may result in them “cupping” or buckling as many people call it. Once your skirting boards are put back on, they conceal the 10mm gap.

GET YOUR ELECTRICALS RIGHT
The electricals in this room were a bit all over the shop. The home has ducted air conditioning & heating throughout, switched on separate zones so it didn’t quite make sense to have an additional ceiling fan & another portable air con unit anchored onto one of the bedroom walls. Out they went, especially as the homeowner wasn’t so keen on the overhead ceiling fan.
2 old telephone sockets were also on the walls in random places, that hadn’t been used in years. They were electrically terminated & removed & the holes in the wall patched up with a DIY gyprock repair kit from Bunnings. The most challenging part of that job was getting the plaster to dry in time. Nothing your hairdryer can’t fix! Sometimes when renovating, you need to get creative.
CREATE A FEATURE WALL
Who wants a boring bedroom? Not us, we all say! Bedrooms are everyone’s own personal space & the one room in your home where you can inject real personality. That means you can get adventurous with colour if you want (but not too crazy that it looks wacky).
Whilst the old room featured apricot, it was a colour the homeowner actually liked. So, instead of instantly saying “no way!”, I incorporated it back into the room in a more modern way.
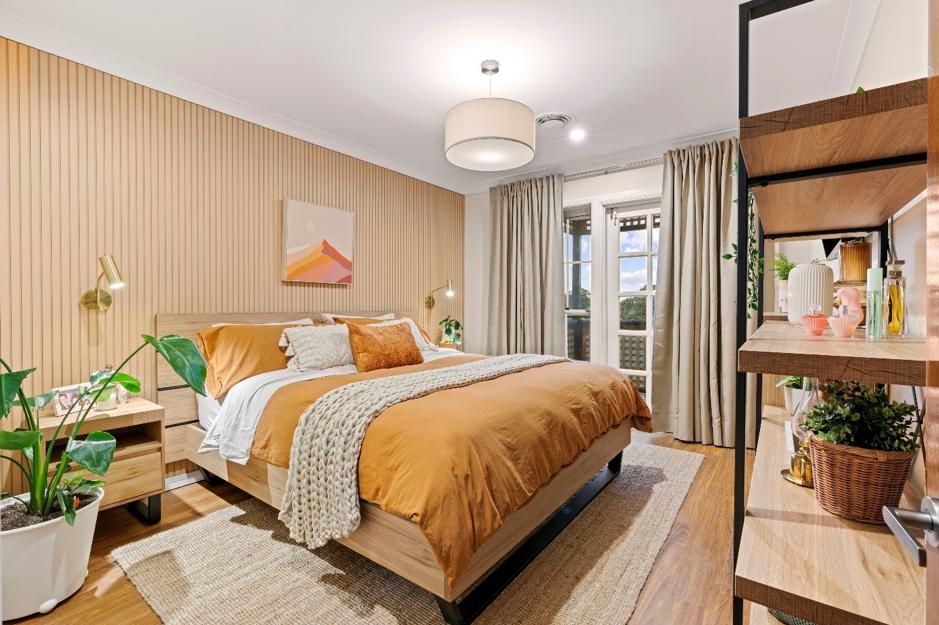
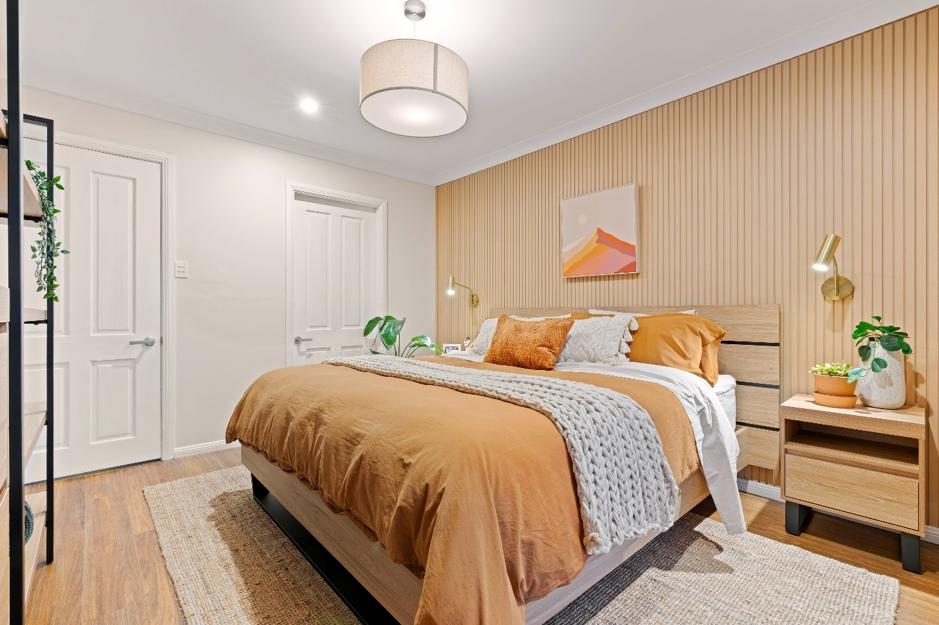
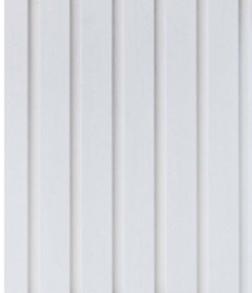
To make this somewhat sterile room look far more interesting, we installed one of my favourite building materials – VJ Wall Panelling. I opted for a relatively new product from Easycraft called the Channel 25 panel. It comes pre-primed (undercoated) in a range of sheet widths & heights to suit almost any room. Again, if you’re handy, it’s a very easy product to install & if you’re not, a good carpenter can do a whole wall in about 2 hours typically.
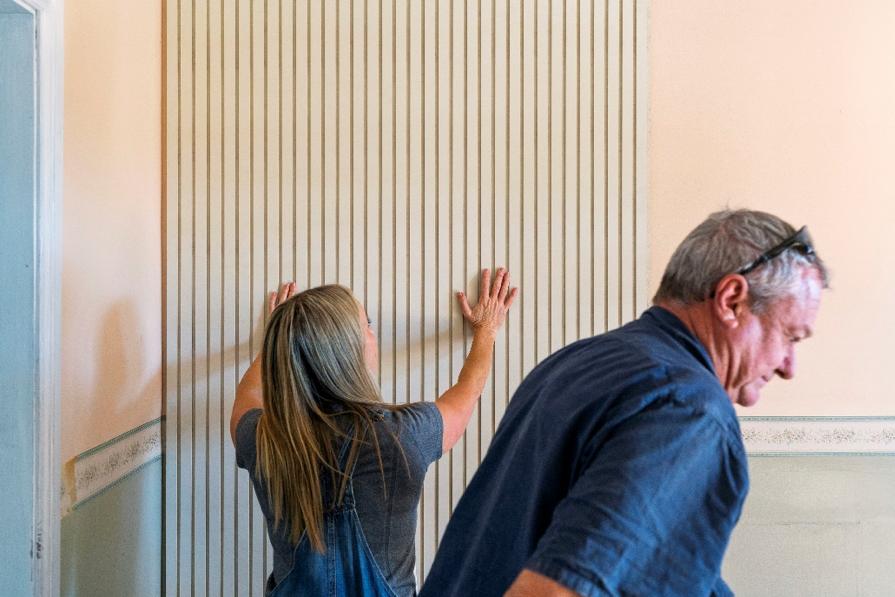
Should you install this panelling on every wall or just 1 main wall? This panel is architecturally beautiful, it adds a lot of texture & visual interest to a room but it’s one you could definitely say was on the “busier” side. Installing this panel on anything more than 1 wall in this room, would have been overkill so it was installed on the wall you want to direct someone’s eyes, straight to, when they walk into a room, the bedhead wall.
PAINT PERFECTION
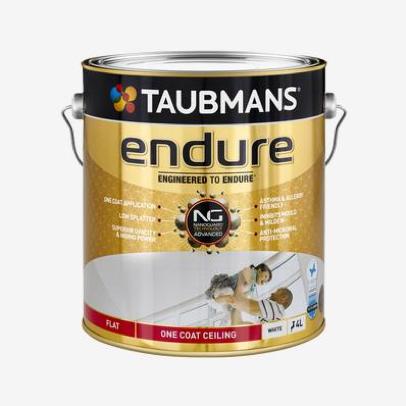
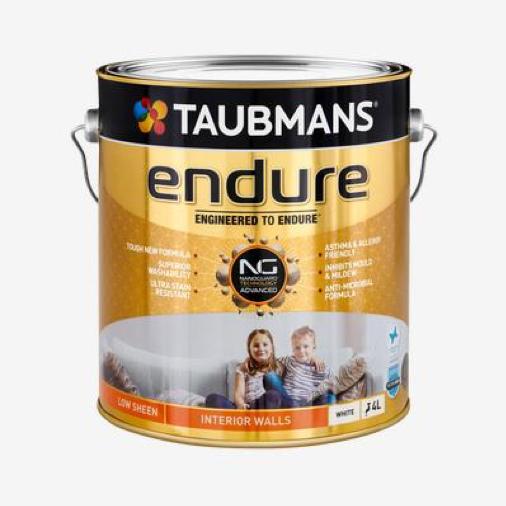
With the flooring complete, it was time for painting to begin. The apricot gloss ceiling was painted in Taubmans Endure 1 Coat Ceiling Paint in a matt finish in “Crisp White” colour.
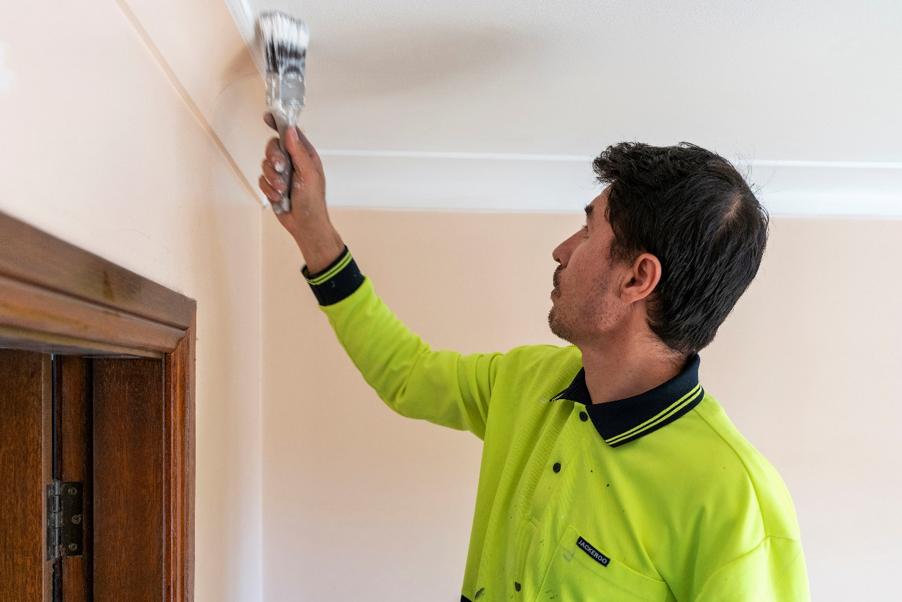
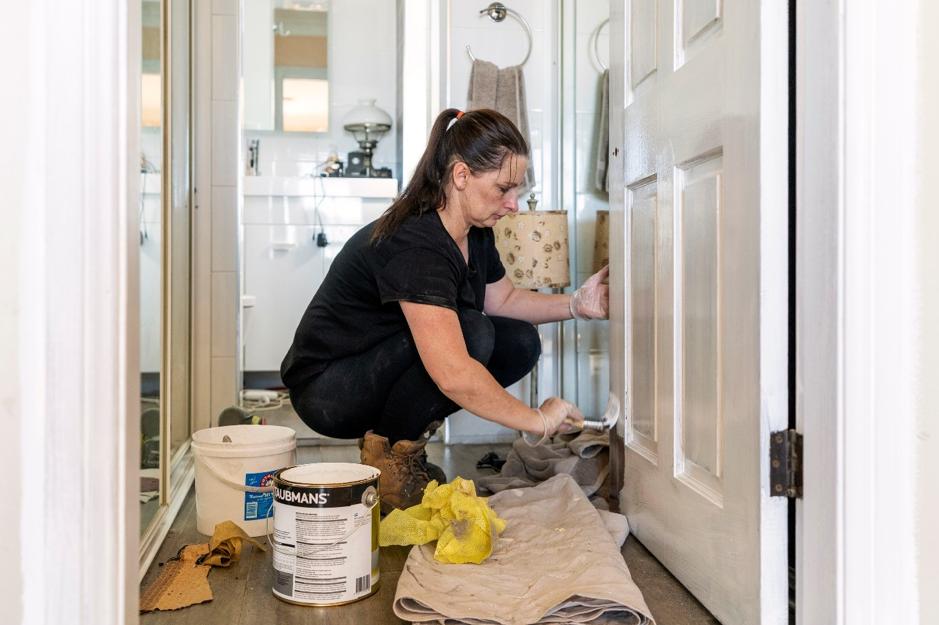
Taubmans “Cotton Sheets” was used on all the window & door trims and skirting boards, instantly ridding the room of those dark brown colours that visually dominated the room.
As the homeowner still loved apricot as a colour, I painted the new feature wall in Taubmans Endure Interior Wall Paint in the colour of “Covered Wagon” which is a few shades down from the quilt cover that I ultimately installed in the room.

For the rest of the walls in the room, I used the Taubmans Coloursmith App which enabled me to colour match my linen sheet colour so it became the main wall colour.
If you haven’t used this mobile app before, it’s pretty genius. Simply use your smart phone camera to take a picture of any colour you like, on anything. Just search “Coloursmith App”, download it to your phone & away you go! You’ll be snapping every favourite colour you see from here on in. Taubmans “Diamond Mine” is the closest wall colour for those of you who don’t have a smart phone.
GET YOUR PRIORITIES RIGHT
What do you do when you’re waiting for your coats of paint to dry? Eat lunch!
As a renovator, I’m big on treating my tradies well as I’m smart enough to know that my renovations don’t happen without them. I always buy my tradies lunch when my budget allows, but doing it every day, can quickly add up to a massive expense, especially if your reno is happening over the course of weeks or months. The odd shout for lunch, once a week or fortnight, is all that’s needed for your tradies to know you appreciate them.

I’m also big on paying my tradies right away. If a tradie comes to your home, does what you asked them to do, the least you can do is pay them on time. As soon as my tradies email me their invoice, it’s normally paid within half an hour tops! Get into the habit of doing this & you’ll be surprised how willing tradies are to be of service, next time you call them.
IN WITH THE BIG PIECES
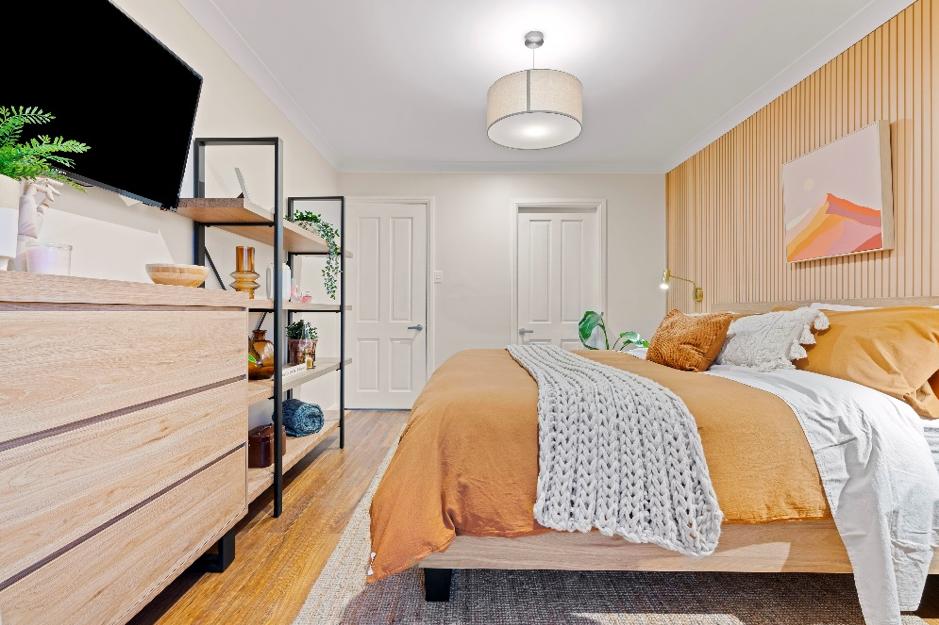
As a renovator who rarely ever has big budgets to work with, I always find myself looking for decent quality materials at an affordable price. I was pretty stoked to find the new “Bridge” range from Fantastic Furniture which provides an on-trend stylish bedroom package that includes a queen size bed frame with bedhead, 2 bedside tables & a large tallboy for just $1,169 – bargain!

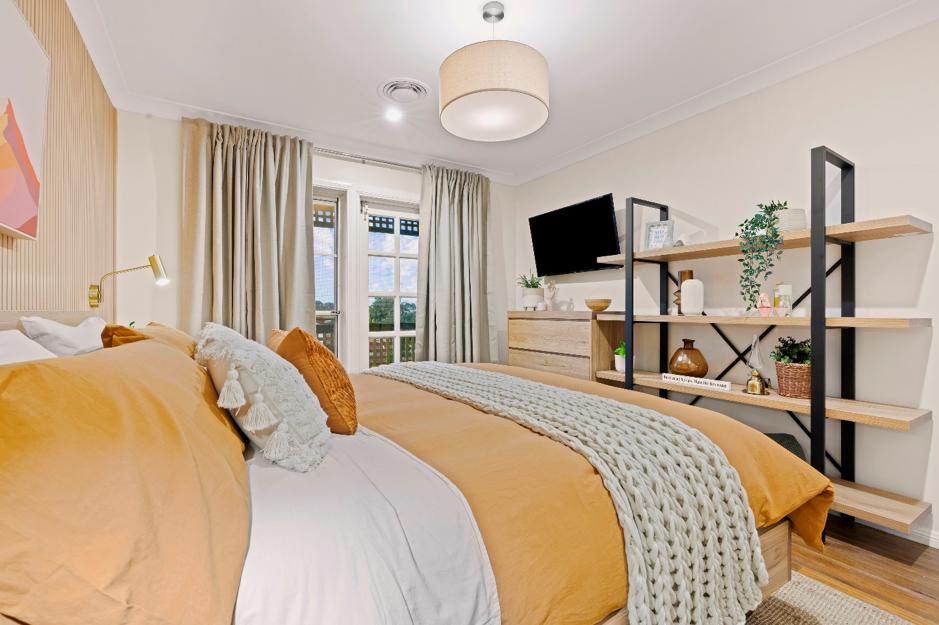
To extend the storage in this room, I also purchased their matching “Bridge Bookcase” for $399 so the homeowner has additional storage shelving in her room for ornaments, books & whatever else takes her fancy.
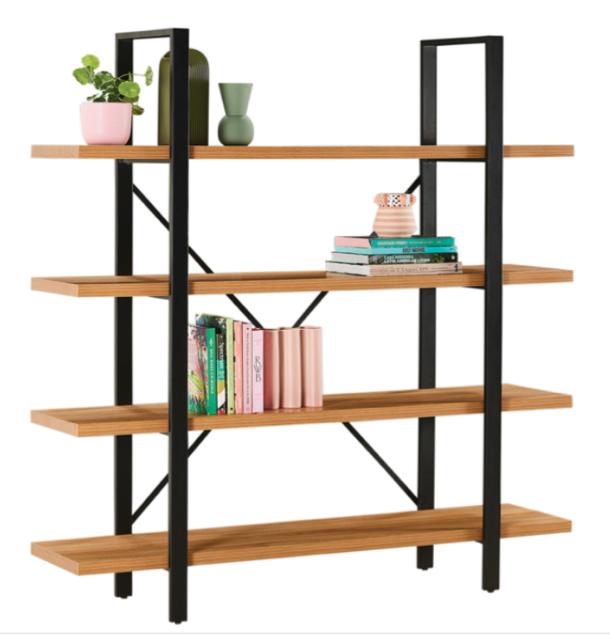
The contrasting black trim against the oak furniture makes it look designer, without the designer price tag. And if you want your room to appear larger, always choose “floating” furniture – that is, furnishings that are raised up off the ground. This creates visual air space under your bed & other pieces, making your room appear less closed in.
THE FINER DETAILS
A master bedroom is a space you can really go all out with your styling but again, your items don’t necessarily need to be expensive. I picked up a natural jute rug & some off-the-shelf curtains from IKEA for $100 per pack.

I sourced a beautiful drum ceiling pendant in a matching linen colour (that matched the colours of the walls) from Beacon Lighting. New wall lights, also from Beacon Lighting, provide task lighting on both sides of the bed which free up precious room on your bedside tables.
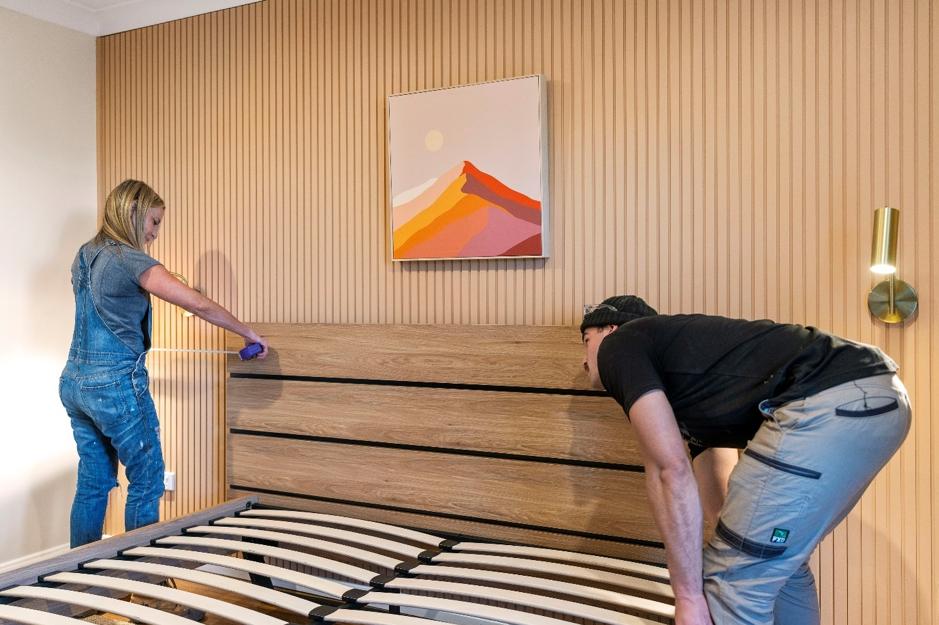
The homeowner’s bed mattress was retained & her bed decked out with the gorgeous Stonewashed Cotton Ginger Quilt Cover from Adairs. In fact, I modelled everything in this room around the colour of the quilt which the homeowner loved.
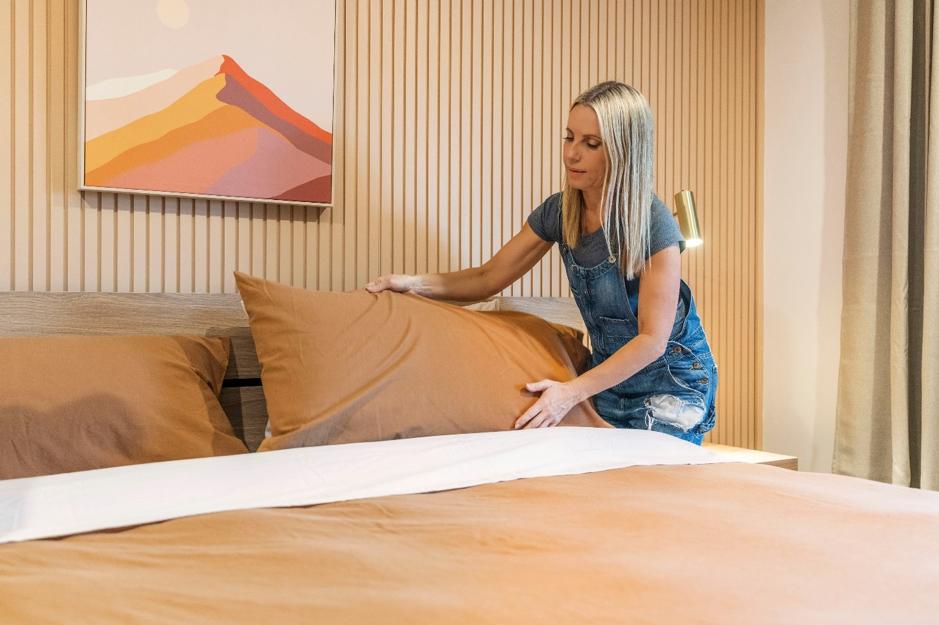
A chunky knit throw & complementary & contrasting cushions, also from Adairs, give the bedroom that final touch of luxe.
This reno will surely stir up some talk, amongst you all. Some will love the 21st century take on the colour apricot, while I’m sure some of you will say its best left in the past. Would be keen to hear your thoughts!
Oh & before I go … don’t forget our EOFY year sale ends today (22/6/22) at midnight (AEST). It’s your last chance to get a massive 30% off all our online property courses including our main flagship course: Cosmetic Renovations For Profit that will teach you how to do renovations, just like this one.
Much love,
Cherie x

SHOP THE LOOK
If you’d like to renovate your room in this look (in whole or in part), simply view the links below:
 |
Feature Wall:
Product: Channel 25 VJ Wall Panelling. Supplier: Easycraft Product Link: CLICK HERE |
 |
Bridge 4 Piece Queen Bedroom Package
Price: $1,169.00 Supplier: Fantastic Furniture Product Link: CLICK HERE |
 |
Bridge Bookcase
Price: $ 399.00 Supplier: Fantastic Furniture Product Link: CLICK HERE |
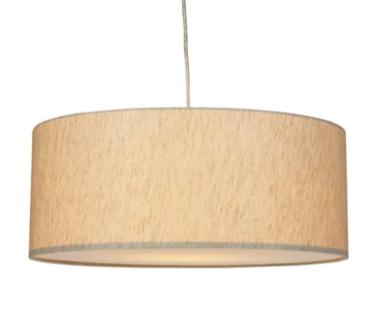 |
Mara II 500mm Drum Pendant
Colour: Linen Sku: 010538 Price: $ 139.00 Supplier: Beacon Lighting Product Link: CLICK HERE |
 |
Nevada 1 Light Swing Arm Wall Bracket
Colour: Brass Sku: 309112 Price: $ 159.00 each Supplier: Beacon Lighting Product Link: CLICK HERE |
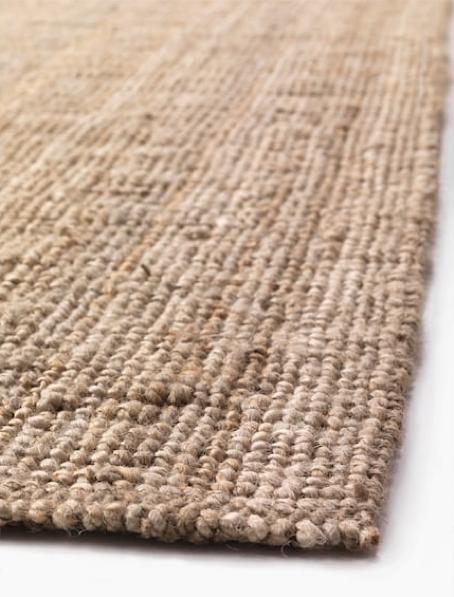 |
Lohals Jute Floor Rug
Size: 200cm x 300cm Price: $ 199.00 Supplier: Ikea Product Link: CLICK HERE |
 |
ANNAKAJSA Room Darkening Curtains
Colour: Beige Price: $ 99.00 per pair. Supplier: Ikea Product Link: CLICK HERE |
 |
Home Republic Newport Chunky Knit Throw Colour: Natural Product Code: 45533 Price: $199.99 Supplier: Adairs Product Link: CLICK HERE |
|
|
Stonewashed Cotton Ginger Quilt Cover
Colour: Rust / Ochre Supplier: Adairs Product Link: CLICK HERE |

 |
Loreto Brown Sugar Velvet Cushion
Colour: Natural Product Code: 52935 Price: $59.99 Supplier: Adairs Product Link: CLICK HERE |
 |
Cove Natural Tuffed Cushion
Colour: Natural Product Code: 52536 Price: $59.99 Supplier: Adairs Product Link: CLICK HERE |
 |
Maus Haus Pink Mountain Canvas
Product Code: 53335 Price: $139.99 Supplier: Adairs Product Link: CLICK HERE |
MASTER BEDROOM – PAINT COLOUR SCHEME
 |
CEILINGS:
Taubmans Endure 1 Coat Ceiling Paint Colour: “Crisp White” Finish: Flat |
 |
FEATURE WALL:
Taubmans Endure Interior Wall Paint Colour: “Covered Wagon” Finish: Low Sheen
MAIN WALLS: Taubmans Endure Interior Wall Paint Colour: “Diamond Mine” Finish: Low Sheen |
 |
DOOR & WINDOW ARCHITRAVES
& SKIRTING BOARDS Colour: “Cotton Sheets” Finish: Semi-Gloss |


You do amazing job Cherie transforming dull and boring into fresh and modern in a short time and at affordable pricing. Love your work.
Thank you so much Sylvia for your lovely feedback! Cherie Crew x
Hi Cherie,
Thank you for breaking the renovation down into bits, but where is the wardrobe space for hanging clothes? I could only see drawers and a shelving unit?
Cheers,
Jayne
Hi Jayne, there is a walk in robe & ensuite that adjoins the main bedroom which didn’t need renovating & provides plenty of storage so all sorted. You can’t see it in the photos as the robe door was shut. Cherie Crew x
You have done it again Cherie. What a beautiful transformation. Can’t wait to see your next project.
Thank you very much Monica. Really glad you like it. Cherie Crew x
I’m not at all a fan of apricot. However, I would be extremely happy if this was my bedroom 🙂 Everything about it is serenely happy, warm, welcoming and beautiful!
Glad you like it Kerri! Thank you for letting us know. Cherie Crew x
Congratulations Cherie! You have absolutely nailed it right down to providing the links to buy the products to make the room! Absolutely brilliant! As a student I love it! As a retail outlet they will all be absolutely over the moon to have their product marketed in such a fantastic way for targeted purchases. You can charge for that one later! More importantly it’s doable, it’s cost effective and it’s beautiful! Take a bow as the renovation queen!!! Thank you so much and keep those fantastic ideas coming! More please! And if you ever do a Victorian cottage in Ballarat pick me!!!! Regards , Linda 🙂
Thank you Linda for your very kind words, much appreciated. Cherie x
Yes I agree, that is one amazing job and looks so much better than the dated bedroom, you give me so much inspiration!
Awesome to hear Lucy. Thanks so much! Cherie x
Wow, what a transformation!
Did you leave the carpet underlay in place and re-use it as the laminate underlay?
Hi Jodie, sometimes you can use the underlay & sometimes you can’t depending on the acoustic requirements. In this instance we were able to as acoustics weren’t a problem. The performance of your board specifications will determine this, Cherie Crew x
Love your transformations. Is the flooring from Bunnings? Have you had long term results with the laminated timber flooring planks?
Hi Donna, we don’t recommend laminate flooring, only water resistant laminate as a minimum or hybrid flooring if your budget allows. Cherie Crew x
I love this! I thought of selling while prices are through the roof,the work involved in staging has left me anxious! I would like to do your course..i’ll check the details Cherie.
Thanks so much for your lovely feedback Kathy. Feel free to reach out if you have any questions about the courses & have a great day! Cherie Crew x