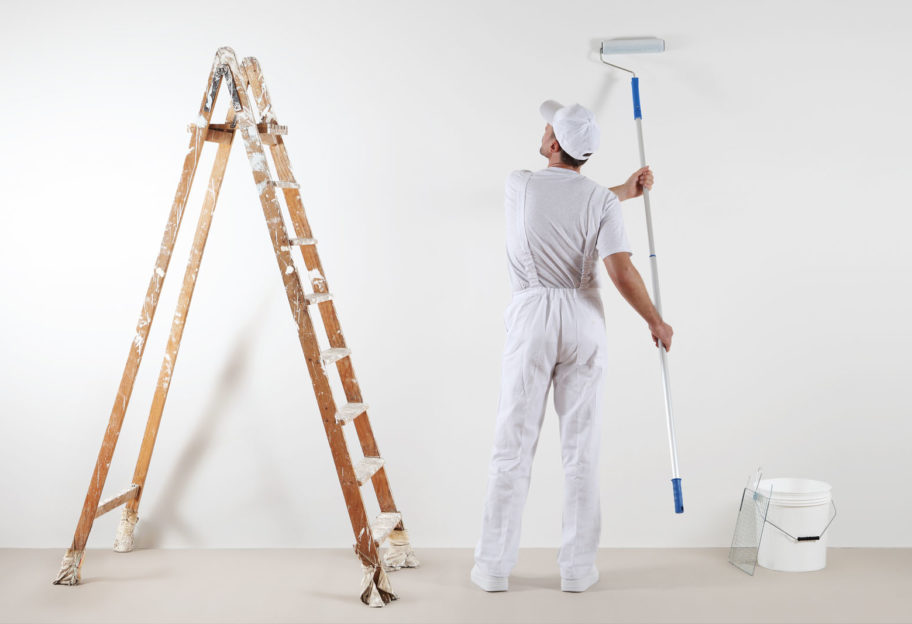
Paint like a pro
Cherie shows you the secrets of a flawless professional paint finish that you don’t want to miss.
[Transcript]
Now you might think painting is one of those easy DIY jobs that anybody can do. Well, let me tell you I’ve seen a lot of shoddy painting jobs over the years and you come to appreciate one that has been done professionally.
There is a world of difference between professional painting and DIY painting. You don’t want lumps bumps colours bleeding through. So in this video I’m going to show you how to get that flawless finish like the professionals. And here’s the secret.
It’s nearly all in the preparation. Cut corners in your prep work and your perfect finished is doomed.
Okay here’s what you need to get started:
- canvas drop sheets
- sugar soap for cleaning old walls grease and dirt
- sanding blocks sanding paper in different grades
- disposable respirators
- patching compound
- a filler knife
- primer and or undercoat
- good quality paint brushes roller and naps
- an extension pole or a paint tray
- masking tape is optional
I’m a professional painter, and I want to give you a couple of tips to help you get that professional finish. The biggest mistake I see people making is that they go and buy quality paint. They buy a pack of throw-away rollers and cheap brushes and think because I don’t want to wash them they’ll be okay. Huge mistake, brushes will lose their shape if you don’t wash them. A quality paint brush will hold its shape and help provide you with a super smooth surface, giving you the opportunity of getting a finish like a professional painter. Painters use quality brushes before you use your paint brush. Don’t put it drawing in paint lubricated. So what do we mean if we use a Waterboys pipe sagebrush in about an inch of water and leave it in the air for at least 10 minutes? If it’s oil based, when you take it out of the water, you can see beautifully how the quality brush holds its shape right down to that point you squeeze the excess water out. Now it’s lubricated and moist and you’ll get a better result.
Then we move on guys to paint rolls. You should know that any roll that’s got this pink fabric on it is old-fashioned fabric and has no quality control. All it does is two things; it wobbles up and down the wall and when you go to paint you get fluff all over the wall from the cheap fabric. Don’t use them. What I suggest you do is go and buy a quality fabric like microfiber or even like this one which is a Drislane fabric. Guess what it does. It picks up quite easily, it puts it on beautifully, and there is no fluff anywhere. But we still have a tip for you before you start with your roller. Give it a wash evenly using oil based or water based cleaners. Just wash it in the laundry for about a minute. Bring your hand around it and squeeze as much water out of the roller as you can. Then get your quality roller frame, that’s not going to bend and buckle. Put your roller on the roller frame walk up to a wall or a door and seriously spin it down the wall or the door to 15 turns until no water flows out of the roll. You then have a brush and a roller that’s going to help you paint like a pro.
Most people these days choose water-based acrylic paints as you can use water to clean up your brushes and spills. Enamel or oil-based paints require Mineral Turps for cleanup. But they are still popular as a hardworking option for woodwork trims like architraves window frames door frames and skirting boards. If you decide to use acrylic paint for the woodwork, then you must make sure the oil-based paint finish underneath is well sanded. It’s also advisable to use a suitable undercoat.
To work out how much paint you’ll need for your job, measure up your walls to see how many total square meters you’ll be covering. You do that by multiplying the width by the height of your walls. Remember to subtract the areas of your doors and windows. You’ll need two coats of paint. So just double your quantity on the side of any tin of paint it will tell you how many square meters that can cover around 14 to 16 square meters per litre. Be sure to buy a little more than you need so you have leftovers for future touch-ups. Major paint supplier sites such as Wattyl have the online paint calculators that you can reference.
There are a lot of specialty paints on the market now that you can buy for specific rooms and purposes. For example, rooms like bathroom and kitchens need a paint with anti-mold properties in high traffic areas like hallways or kids bedrooms. If you want to paint that is easy to wipe and clean of scuff marks, then consider different brands have easy-clean paints. My advice is always buy a quality brand of paint. So make your life easier and pay a bit more to get the good stuff.
Plaster walls on woodwork require very different preparation. So let’s start with woodwork first. This could be things like timber doors, door frames, skirting boards or window frames. Basically, all the timber trims on and around your walls.
Now. Planning would work. If it’s new. No problem with the old stuff. You’ve got a couple of scenarios. If it feels like there’s a lot of paint that’s coming off and flaking sometimes it’s better to strip it off and get a paint stripper, a scraper or you might use a heat gun which can melt the paint a little bit and you still scrape it off. But I don’t like to do this a lot. My favorite is to get yourself white sandpaper. And all you do fold it so you can hold it in your hand and it’s simply a matter of using elbow grease, so it’s nice and smooth. Then water-based undercoat and you can put a water-based enamel over the woodwork it’ll look fantastic.
A lot of old paint contains lead so make sure you wear a mask at all times when you’re removing any old paint. Especially if you’re creating dust that can be inhaled. Make sure you have proper ventilation to reduce paint fumes so open windows wherever you can. You’ll need to apply a sealant to cover any gaps where two materials join such as around old doorframes architraves corners and skirting boards.
Use gap filler which is flexible for your skirting board doorframes, around your windows and where the woodwork meets the wall. However, when you start talking about walls with chips and dents you need to use a ready to use filler which is made for plasterboard. Ready to use means you don’t have to mix it up it’s already done so straight out of the container and you simply put a little bit on a filler blade and place a little bit on the dent or chip on the wall here.
Wipe it off let it dry and it’s always good to have a little bit extra and once dry, sand it smooth. If it needs filling do it again.
A little tip for you with your sandpaper; the white stuff is the best. It’s great. When you use turn it around and you’ll see a number on the back. This once is 120. Whatever you start with first then you can go find the same paper after that. So for this wrap around a block of wood and gently sand. You can feel that it’s nice and smooth and ready to paint with all the gaps filled and sanded.
It’s now time to give all the walls a good clean with a product such as sugar soap which removes dirt and grease well. Rinse and allow to completely dry on both of your woodwork and walls.
Now it’s ready to paint. You’re ready to bring out the paint tins first. Make sure your canvas drop sheet covers all of your floors. Mix paint thoroughly with a paint stirrer in an upwards direction.
What a painter does is, he uses a pot. He doesn’t carry around a full can of paint as it’s heavy and plus it has nowhere to put your brush. What I want you to see is that when you put paint in the pot that my brush is only submerged about half-way the length of the filament.
One of the benefits of that one is that I’m not getting paint all over the brush and secondly the brushes are not carrying too much paint. So what I do. When I go to use it is I actually dip the brush in the paint and instead of wiping it off like everybody does, and you’ve got no paint left, the best way to do it is dip it in the paint. Tap the sides if you can a couple of times. Now that’s carrying less paint and that’s going to help you cut in a fair way but don’t overload the brush all the way up the length.
Now going to show you how to cut in.
Sometimes I get asked do I cut in first with my brush or do I roll first. Which one do I do. My opinion is I always cut in first. Reason being you look at the cutting in and how wide I’ve come out from there. When I roll I actually go in to about here. So what I prefer to do is to roll second so I’m going over my cutting. If you roll first you’ll get to within an inch or so of the wall and then you’ll come in and you’ll end up cutting it too far. Then you’ll see the brush marks there’ll be more pronounced so what will happen is you could get what’s called Picture Framing where it looks like there’s a big frame around the wall you’re better off to cut in first then roll in close and that way you minimise seeing what the brush is doing. When you first get near the wall with the brush when you want to do the top of the wall I don’t want you to go right up to the top. What I want you to do is to put the paint on using the skinny side of the paint brush about half an inch away from where you actually want to paint. There’s a reason for that. The next time I go back with my brush it’s got less paint on. And here’s another tip you want to cut a nice straight line. Here’s the way to do it. Angle your brush on a 45 degree angle.
And what happens here is it’s just the tip or the corner of the brush that’s doing the cutting in, and because you’ve got less paint on your brush and this is a quality Monarch advanced brush, you can cut a straight line, and the brush will just go along with it.
Now people ask me about masking tape; should they use masking tape or not. It’s simple if you feel confident with a quality brush. You don’t need take but if you want to tape up if it helps you keep paint off those surfaces you don’t want it. What I’ll do here I’ve got some masking tape along the skirting board. And I’ve got no tapes so by using my little tip, I put the paint on away from the edge first with my quality brush angling my brush on a 45 degree angle and if you’ve got a nice steady hand you can cut a nice straight line fairly easily. But if you feel more confident with the tape that’s fine but don’t just slap the paint against the tape try and do the same process put it all away from the edge angle your brush and let the tip of the brush do the work. Now here’s the key. Once you finish rolling it and the paint still wet.
Feel the tape away while the paints and guess what. No flaky paint anywhere and you just tape up again for the next. I like to use these roller poles because again they don’t flex and the benefit of a little one like this is that you can extend it enough so that you can reach sealing areas. It works really well and you can put the roller pole down and it’s still high enough to do a standard height. Well I think they are fantastic for about 15 bucks in Bunnings.
Remember that you don’t want to completely fill the tray. Then you can load the roller. We’re just going to touch the paint. And eventually you’ll get it loaded with enough paint to turn it over. And you’ll be good to go. Now because this is a loaded roller, what you don’t want to do is start up the very top of the wall or down the very bottom of the wall because you can’t spray the paint. What you want to do. Is start in the middle of the wall so you can roll up and you can roll down and it’s easier to spray the paint. As a guide a loaded roller on a standard height wall such as this you should be aiming to get around about to roll the weight at a very low. If you don’t you to roll which reload.
When we do a ceiling what I want you to know is this you come in around the edge of the ceiling first and then what I want you to think about is pretend there is a dotted line right up the center of the ceiling. Okay. So with that dotted line in mind, load up your roller, you come in and start this corner and you roll into where that imaginary line is in the middle of the ceiling. Then you load your roller again and you go to the other side. Same deal rolling into the imaginary line. Smooth it over before you reload it if you go to roll to the line.
Here’s another great tip for you. For those people who think they don’t want to use a good roller because I’ve got to wash it out. Painters hate washing out rollers. Simply load the roller and your paintbrush with paint as if you’re going to use it. At the end roll with cling wrap. Wrap up the roller thoroughly. All you gotta do is make sure that your ends are all covered so that somewhere nice and cool overnight. Come back the next day, peel the cling wrap off and you can keep going. What about from weekend the weekend. Same deal guys.
Now it’s time to put our finishing coats on. Once I’ve done my cutting in I swap brushes to a professional brush that is very thick so you get more control and it’s easier to use.
Now we’re ready to roll. Start in the middle of the wall again.
Crawling up and down and effortlessly let the roller do the work for you.
Once I’ve rolled the area, I go over it lightly to smooth it over and make it look even better.
Woodwork should have been prepared by now. Sanded to a smooth finish and clean it of all fine dust. I always recommend using an undercoat because it eliminates patchiness left by all the different paint types underneath and provides better adhesion for your new top coat.
Well, that’s it. Hopefully, we have taught you the basics of how to get that flawless finish. Now good luck when it comes to your painting project.
[End of Transcript]
For more insider tips and tricks, subscribe and join the Renovating For Profit community today!


Excellent video – thanks
Thanks Andrew! Keep your eye out for our next newsletter where you’ll find more great articles and videos! Allison@RFP
Excellent Video and very informative. Would love to see a video on the best way to paint doors.
Looking forward to your next newsletter.
Some great handy hints that we will definitely use on our next painting project. Thanks RFP 🙂
Great video. I’d love some tips on the best way to clean up with turps for rollers and brushes. I always seem to use soooooo much.
Great tips.
Thank you very much
Thank you for sharing. It is very helpful. And I am saving it for future use as well. After reading this post, now I get to know that house painters are so necessary especially those who have got many experiences and have done a great painting job in their past. We’ll have to find out a good interior painter with good references near Boston soon or check Brockton painting company online for our project since we need to change our apartment with a new look. Good luck and Keep Sharing and helpful to others. Thumbs up!
Thank you Thomas for your kind words. Make sure that you get at least 3 quotes for any trades that you are engaging for your reno as this will give you a good indication of what you should be paying. Have a great day, Cherie Crew x
Great tips, thank you. I can see these all will make such a difference in time and finishes, and am very grateful for it. Thank you team RFP.