


A Modern Makeover: From Clutter Chaos To Serene Harmony
Hi ,
Welcome back to another set of room transformations. I hope you’ve been enjoying the weekly blogs I’ve been sending of late for Season 4 of Channel 9’s Space Invaders Show, currently airing every Saturday night at 7.30pm.
Last week’s episode was a big one … 7 rooms for my team & I to renovate in just 18 hours. On top of that, my co-host Peter Walsh had a record amount of 512 boxes to declutter from the same 7 rooms. Talk about pressure for the team!

So, who lived in this home? Husband Paul, wife Kylie & their young daughter Aysha. After a 17 year wait for their miracle baby & the passing of Kylie’s mum a few years prior, Paul & Kylie’s home life had started to spiral out of control. Many of you will scroll through the before pictures and wonder, (maybe judge even), how anyone could let their home get like this in the first place …

What I do know from working on Space Invaders is that clutter often stems from one or more traumatic life experiences, that often leaves deep emotional scars, prompting people to seek comfort and a sense of security in the tangible world around them. This coping mechanism often manifests as an intense attachment to belongings and possessions & items that represent memories, in a world that feels unpredictable & unsafe. Over time, this attachment often leads to the accumulation of objects, and by default, a cluttered and disordered home environment. Recognising this pattern is crucial in understanding the emotional complexities behind clutter & the importance of compassionate support to navigate the healing process.
Now that you all know some of the reasons why people start to gather clutter in the first place, let’s now focus on how I tackled the renovation side of this home. One of my main goals was for each room to have its own clear, designated purpose and to create spaces so the family wouldn’t be embarrassed to have family & friends over, something they’d avoided for years on end.

THE LOUNGE & DINING ROOM AREA
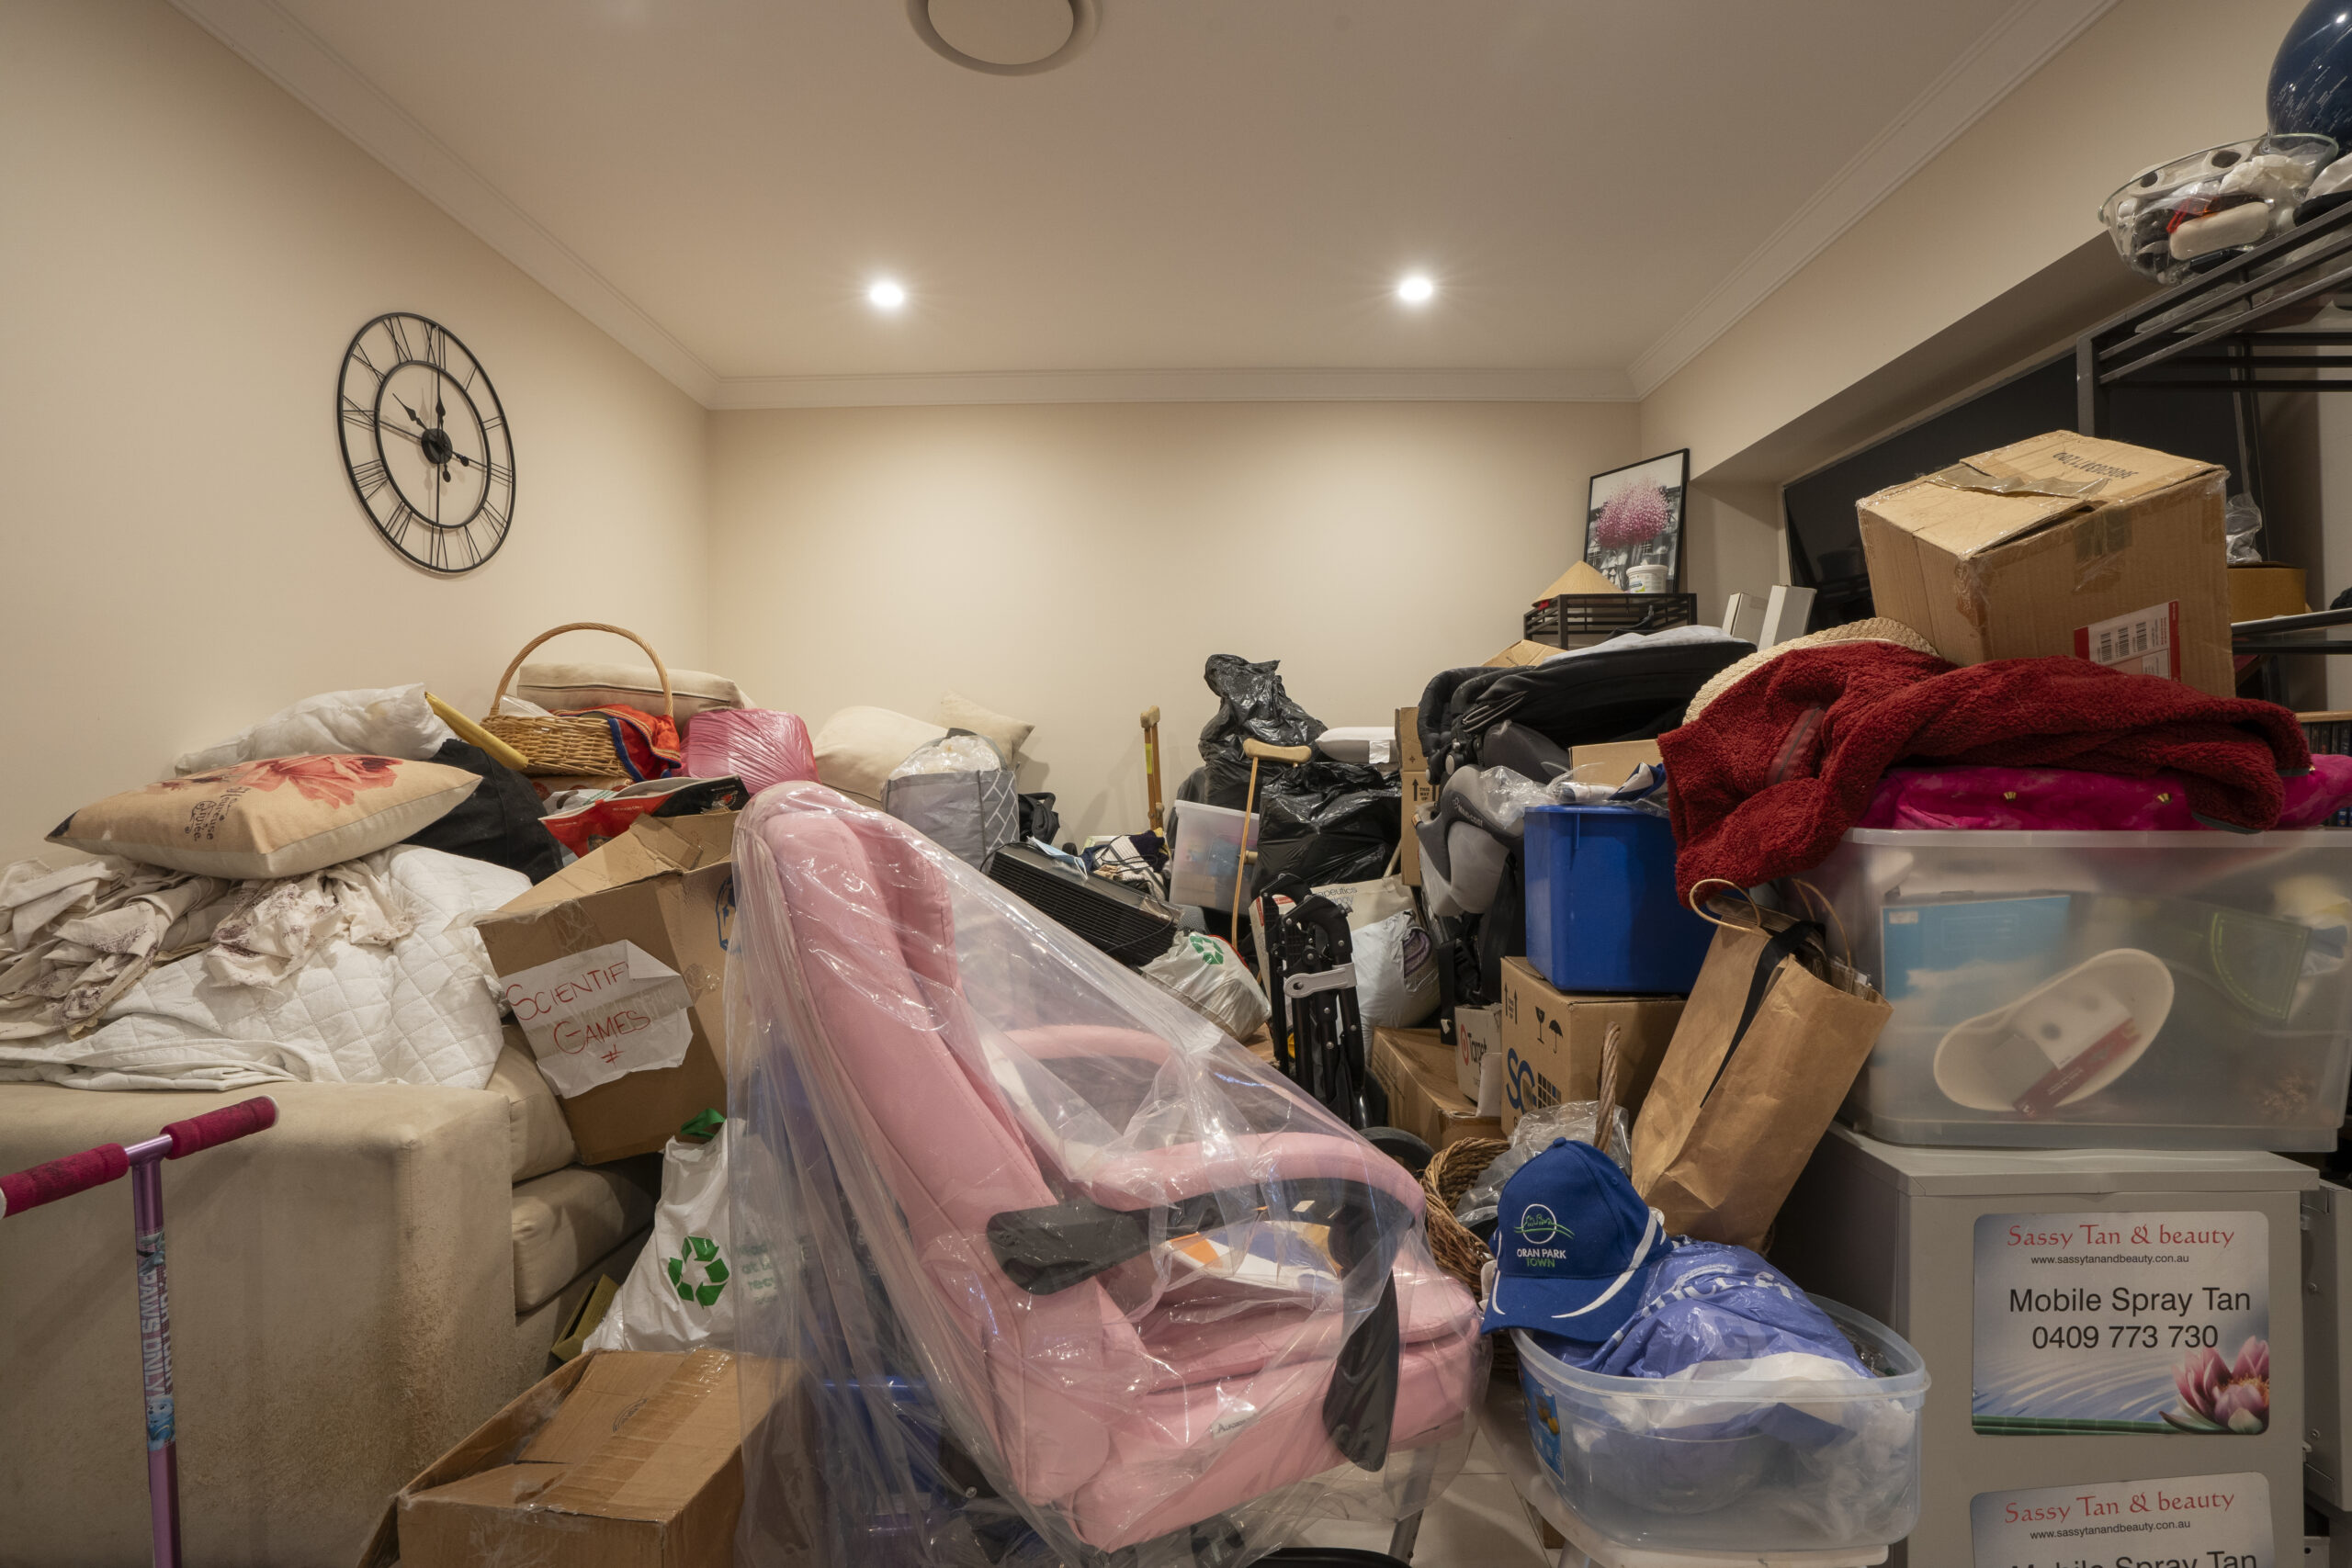
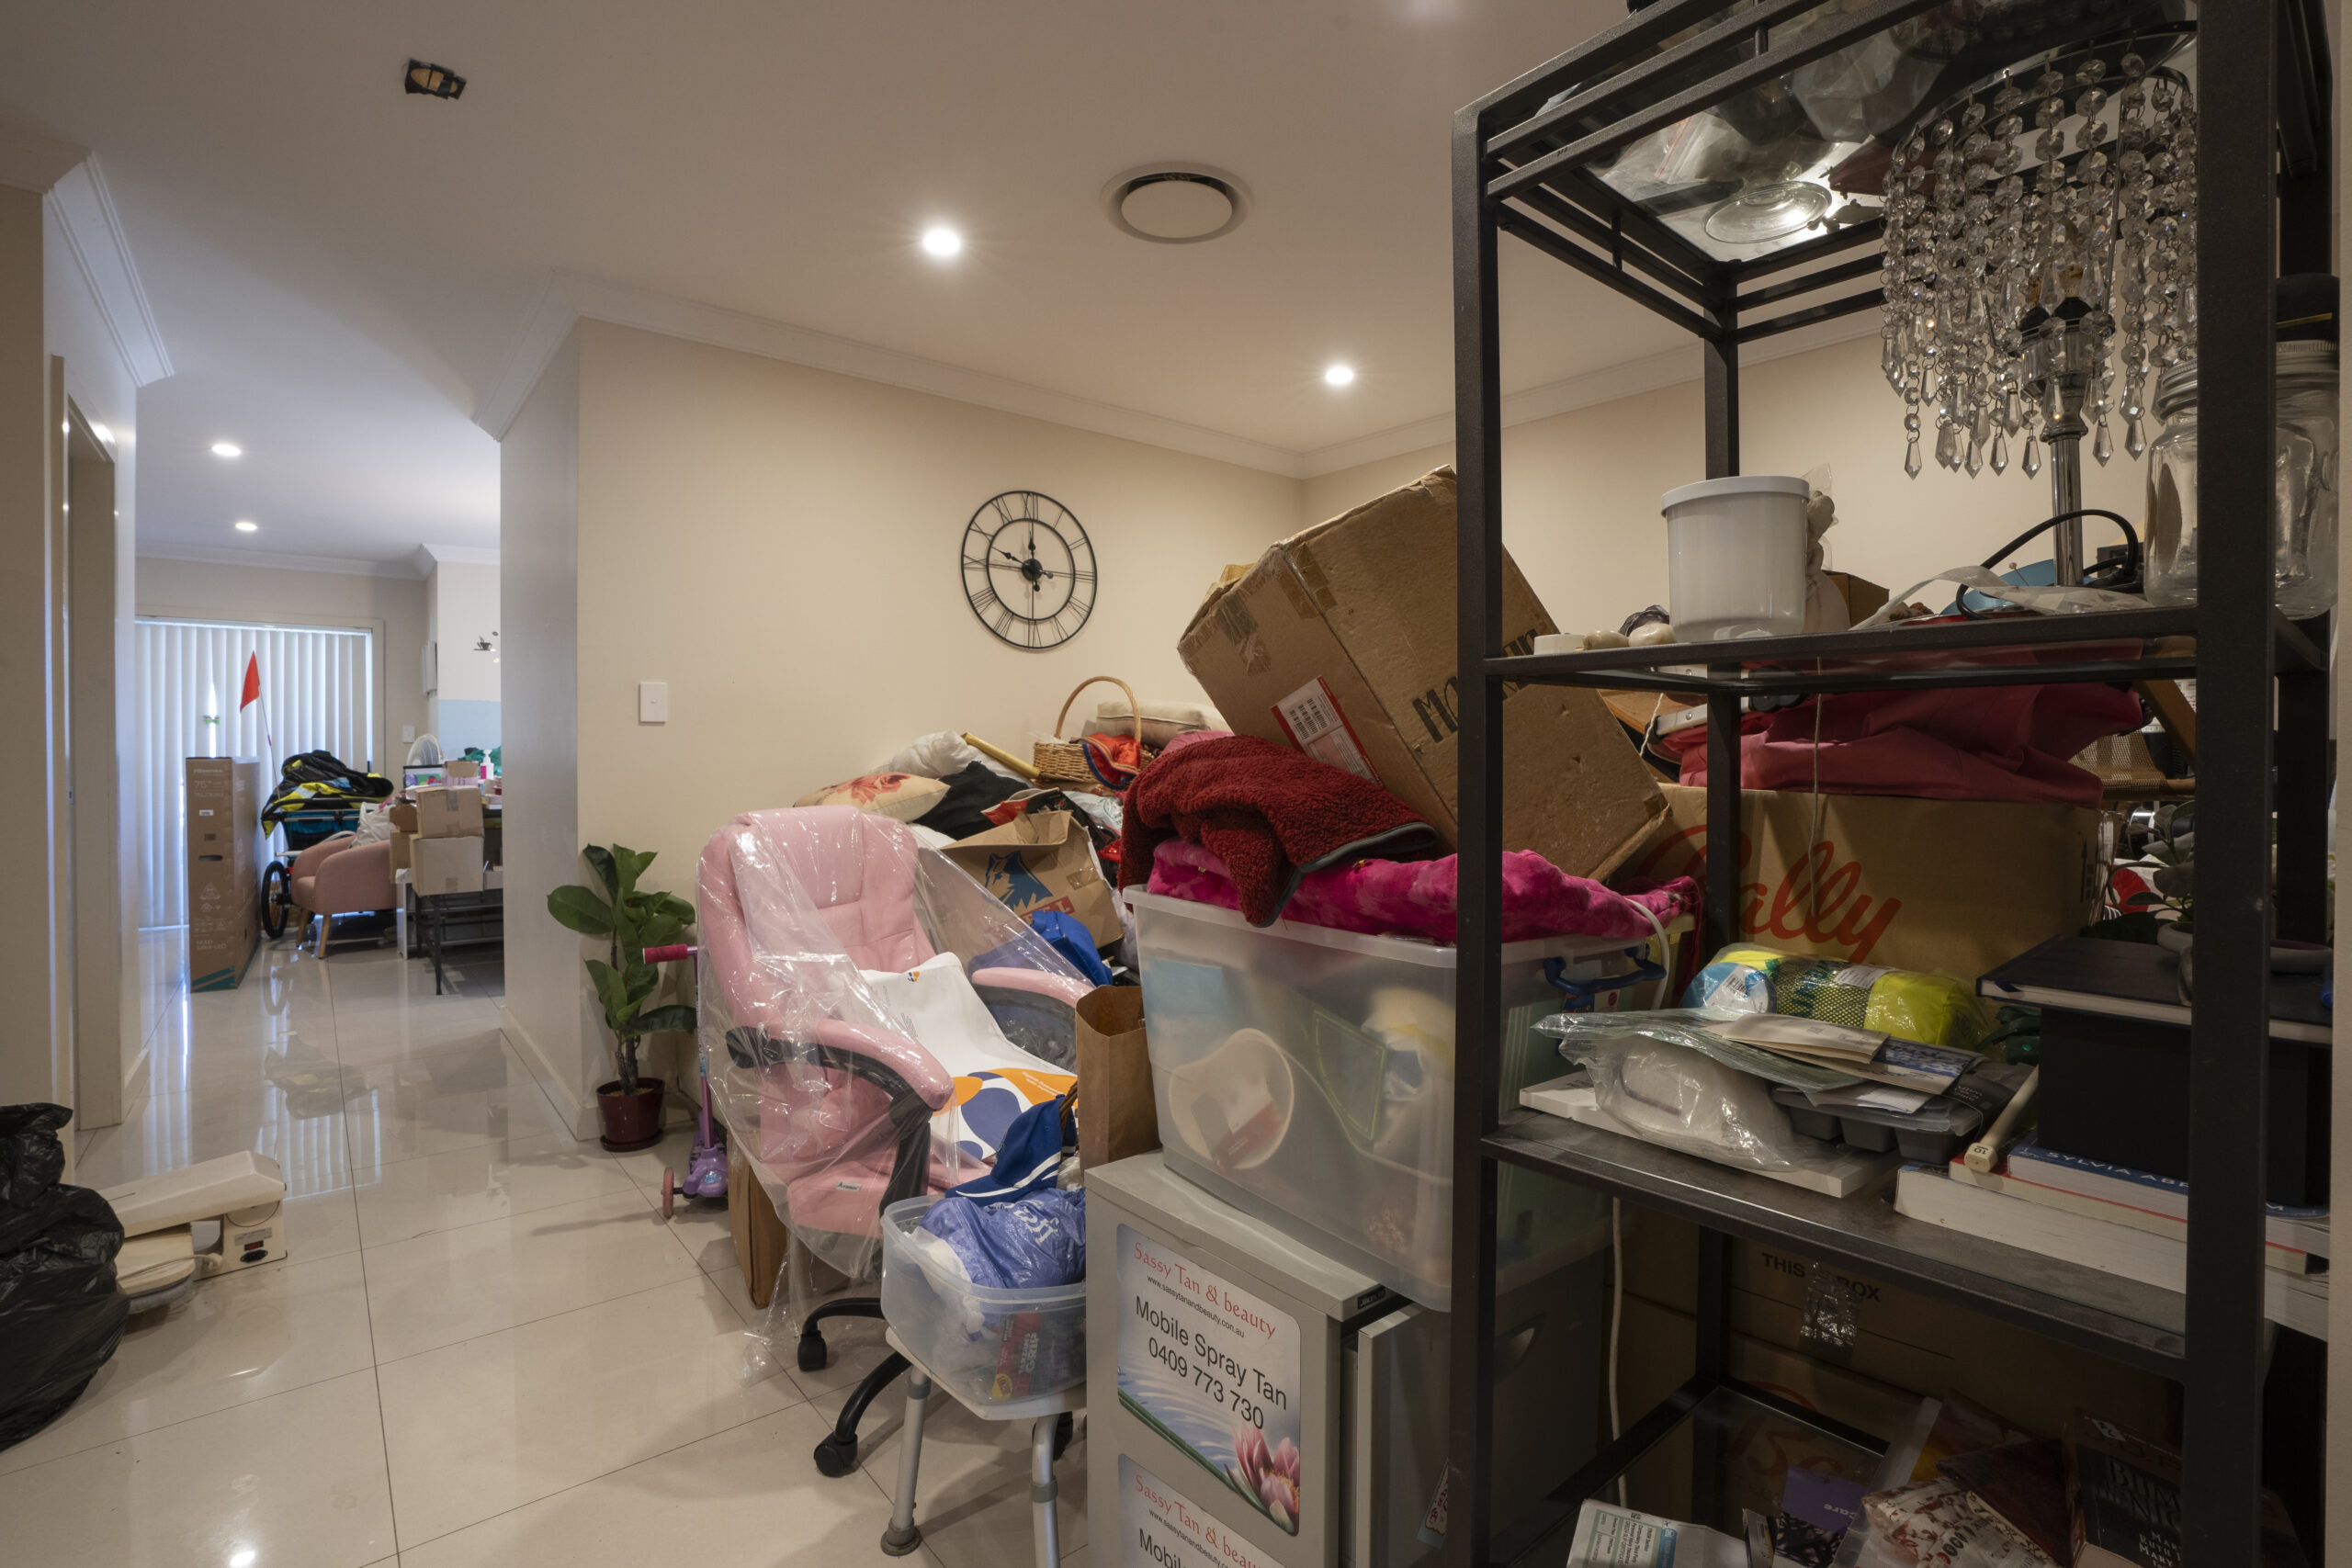
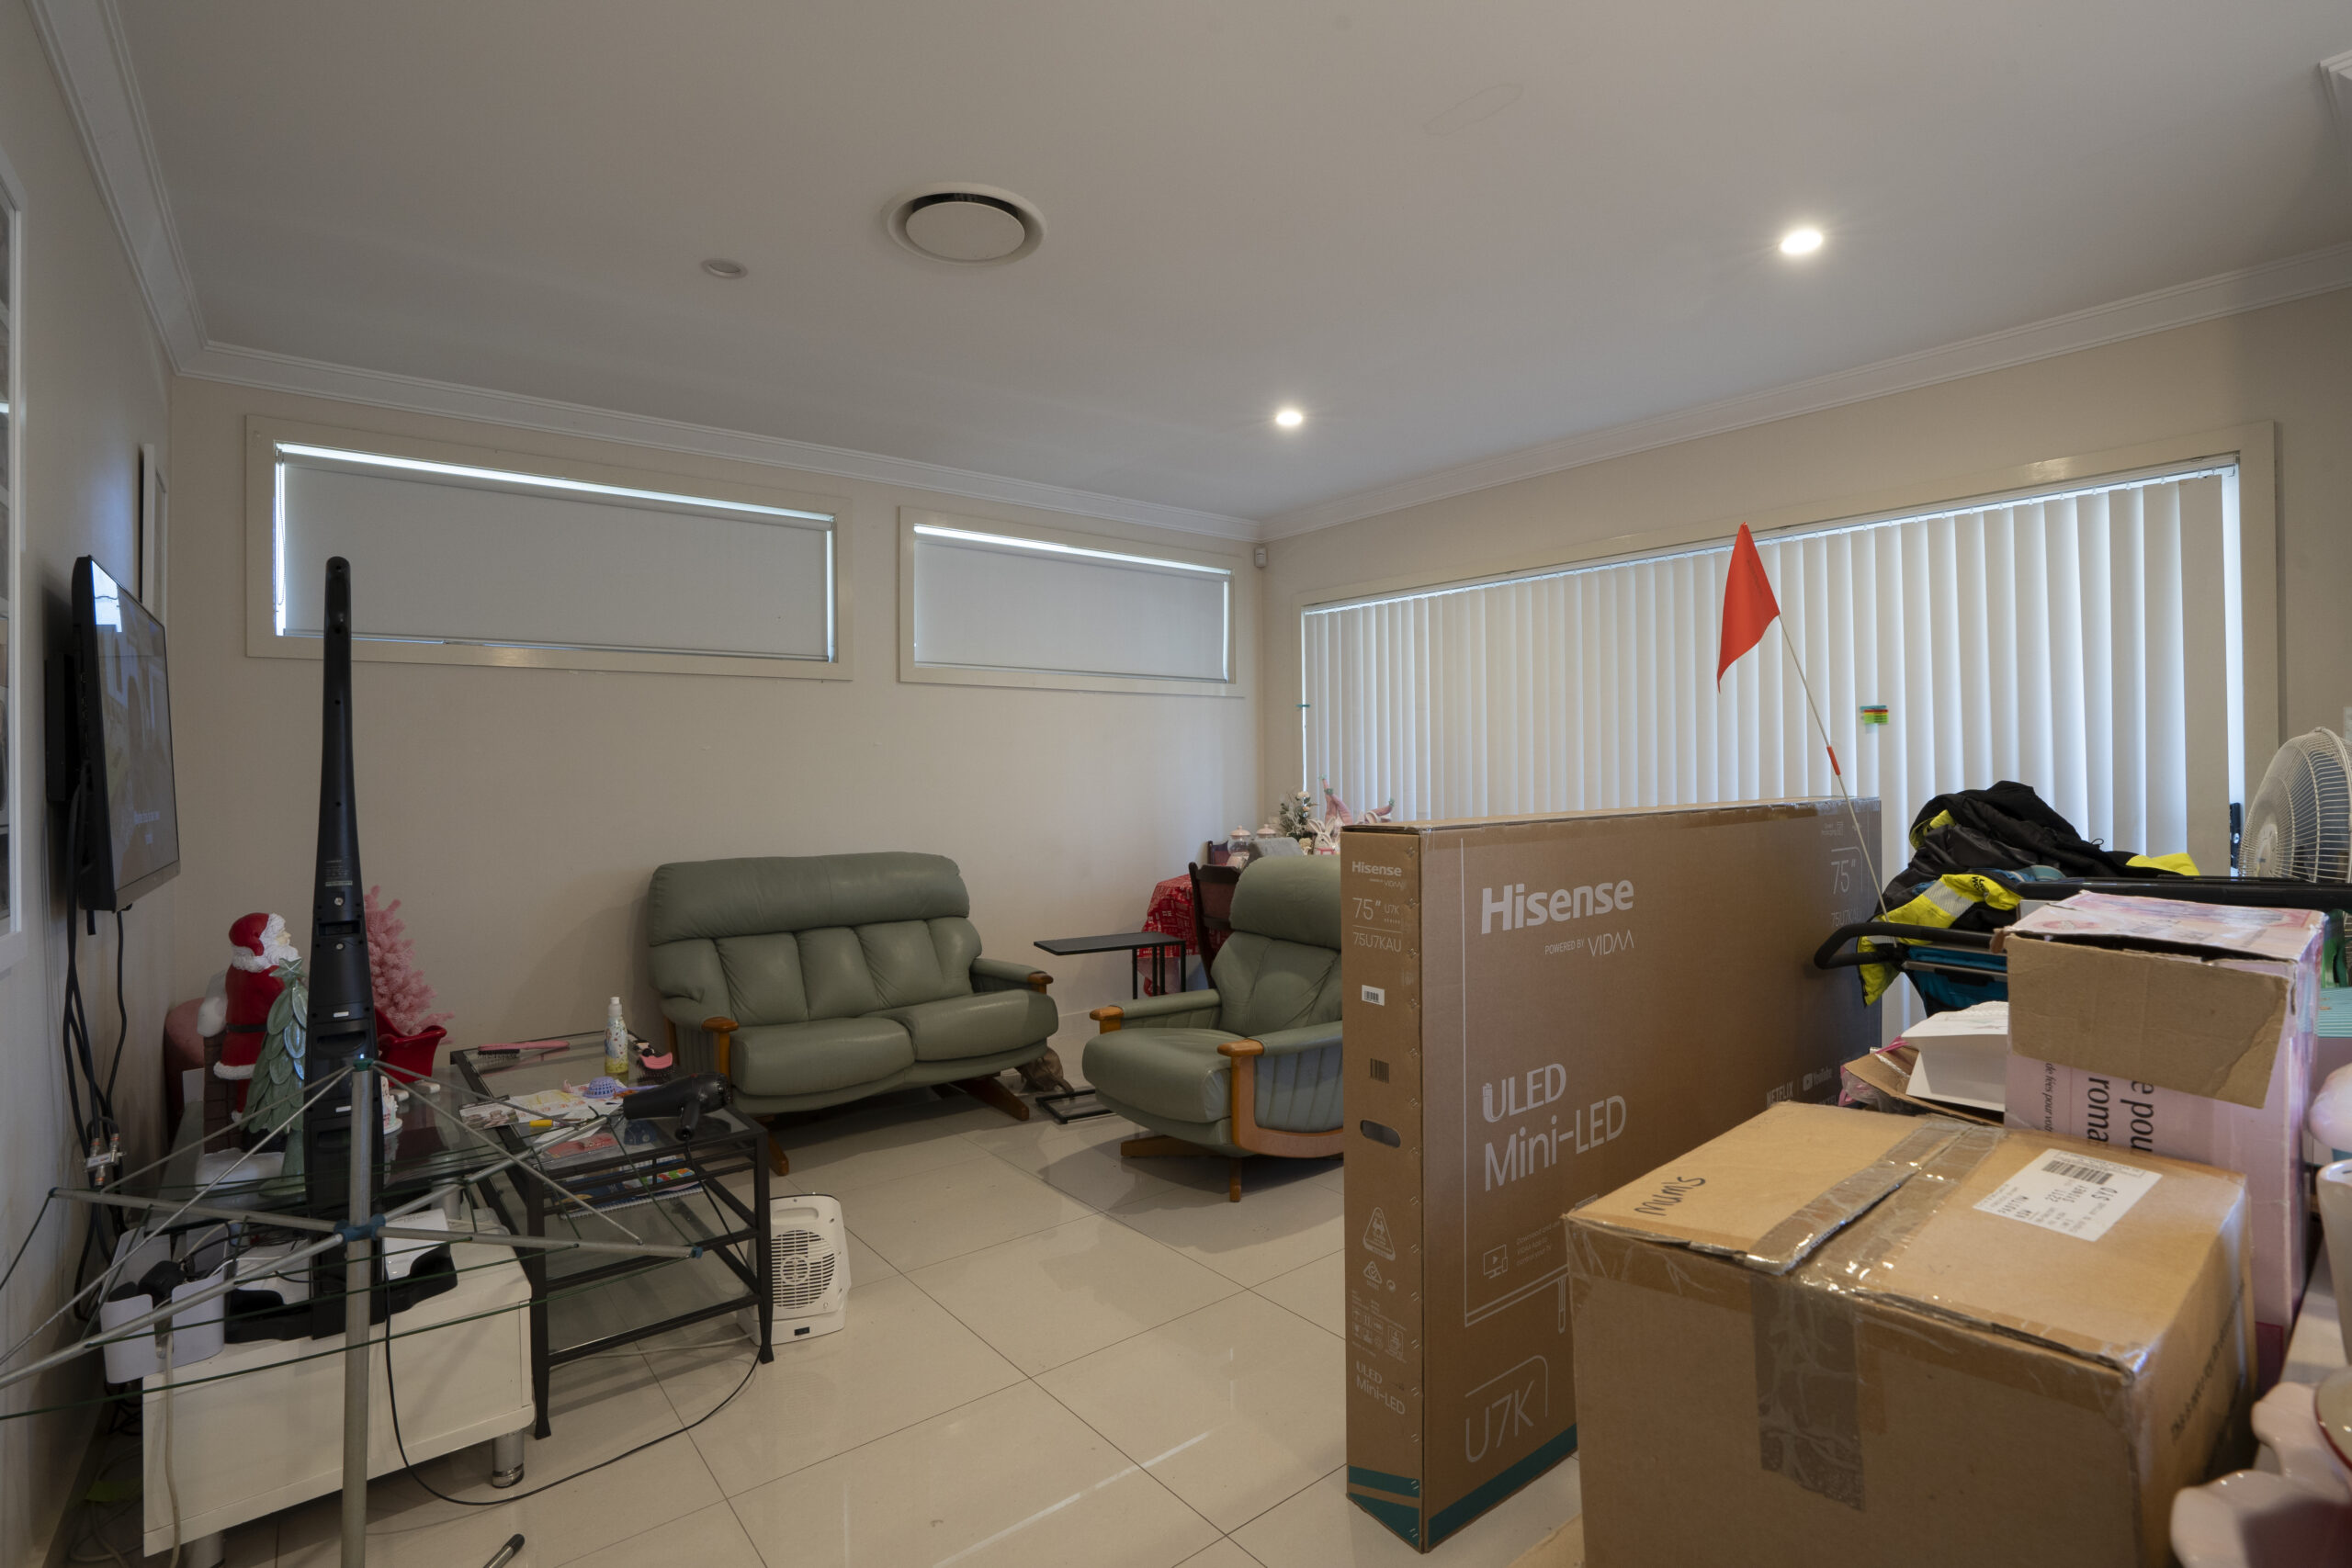
Our reno journey begins in the heart of the home, the lounge and dining rooms which were directly opposite each other & had become nearly impossible to pass, landscapes of clutter. The challenge was not just to clear the space but to infuse it with life, making these rooms a welcoming area for entertaining and relaxation. The transformation started with clearing out the clutter, a task that Peter and his team executed flawlessly, setting the stage for the real magic to begin.
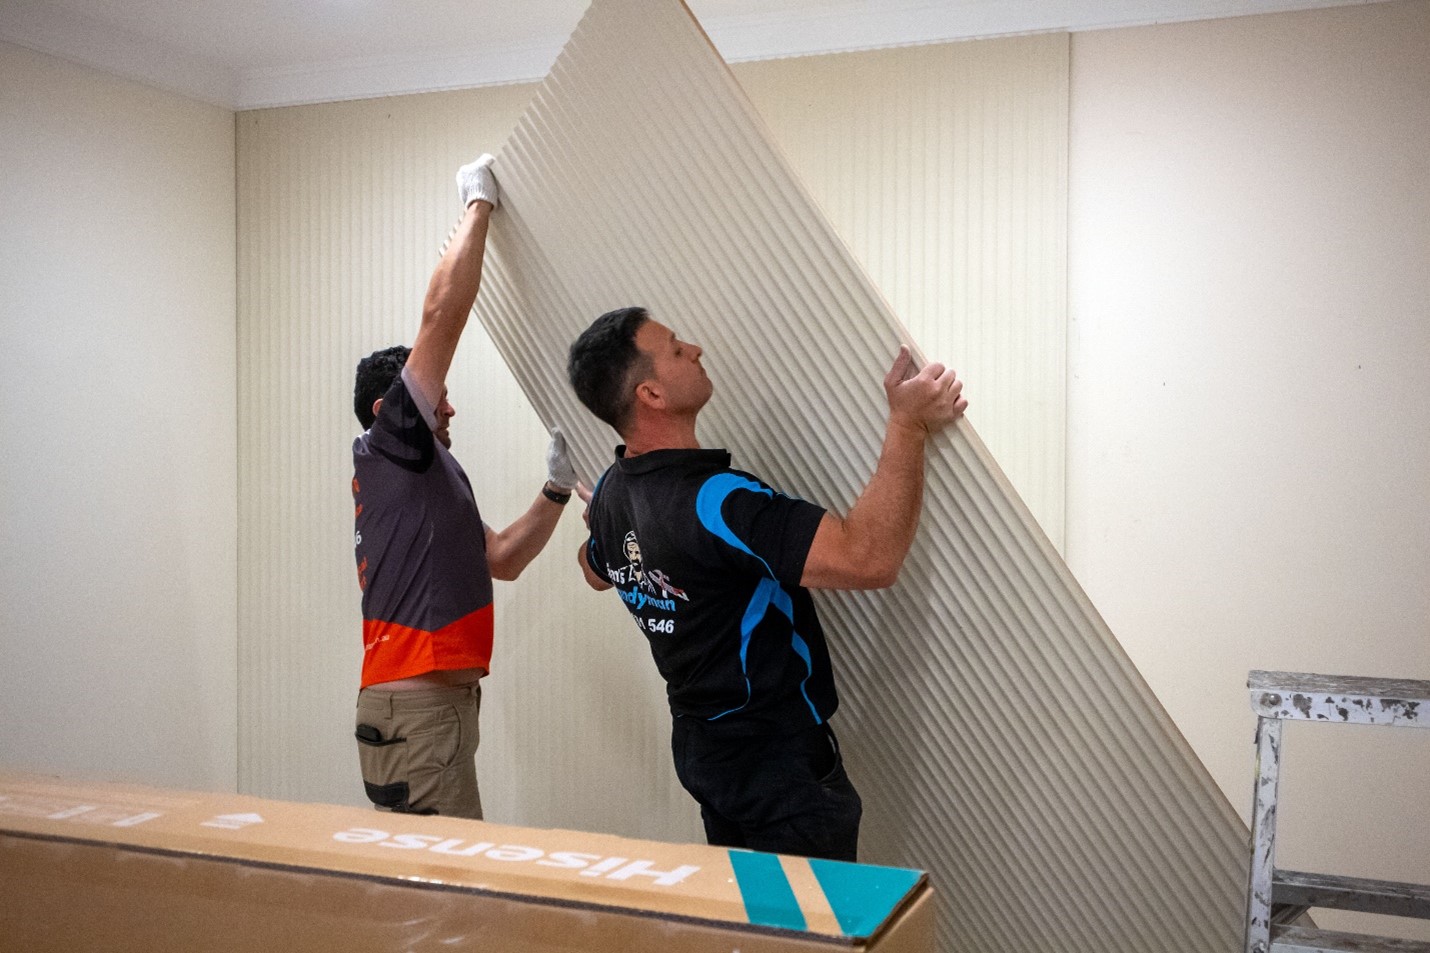
Once the room was cleared out, the home’s potential became so more obvious. Being a 20-year-old project home, everything was in perfect structural condition. There were no rotting, deteriorated or structural fault issues to deal with, which is always a huge bonus for saving money in your renovation budget. The real problem was everything looking dated and bland. To solve this problem, a few important but easy elements were added to the rooms to bring them to life. I introduced textured wall panelling from Easycraft’s Silhouette’s Cove Range to the end / key focal walls in both rooms.
Painted in Taubmans Covered Wagon, the addition of this wall panelling instantly brings warmth and texture, essential for a space to feel inviting. The continuity of the wall finish between the lounge and dining areas creates a visual coherence, seamlessly blending the two spaces together.
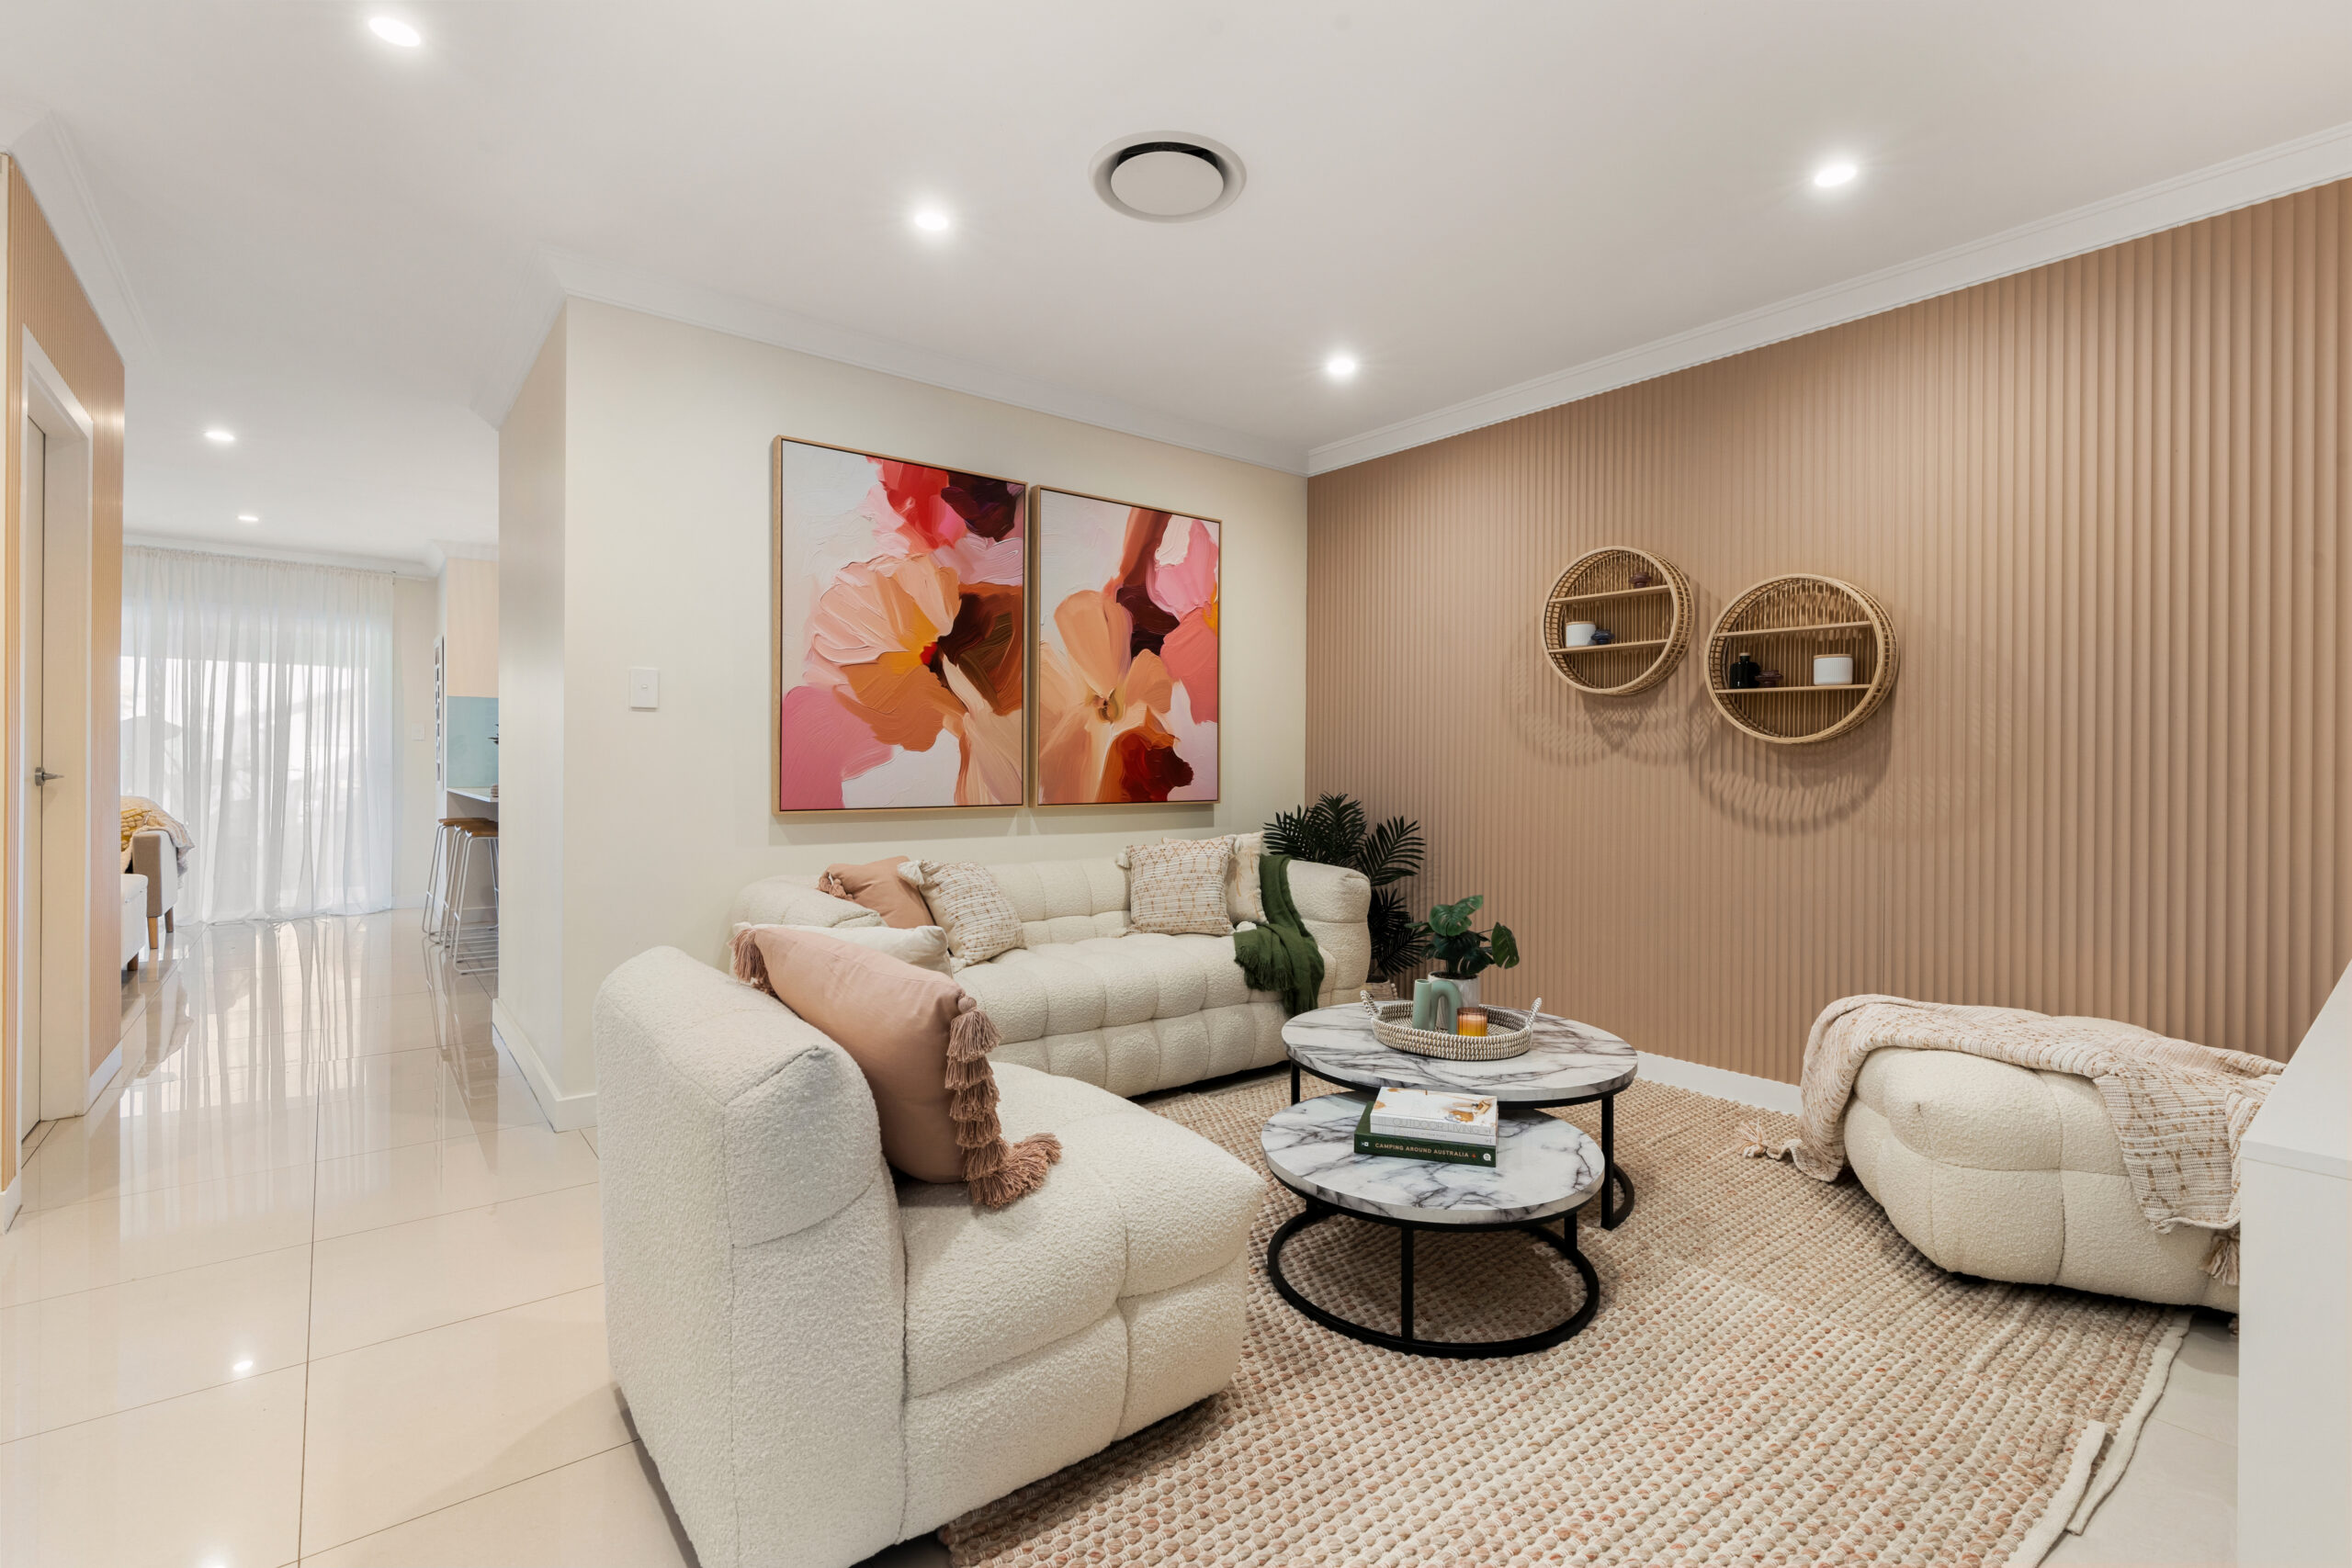
Despite the sound structure of the flooring in these rooms, the cold, sterile tiles detracted from the home’s warmth. The introduction of Kmart’s Dakota rugs add softness underfoot and enhance the room’s acoustic quality. This is crucial in a space dedicated to gatherings, as it encourages conversation and comfort. Storage solutions were elegantly addressed with the stylish Erick Sideboard from Luxo Living, offering a chic hideaway for electronics and miscellaneous items, proving that functionality and design can co-exist beautifully. The vibrant colours in the Petals artworks from Urban Road really brings the room to life.
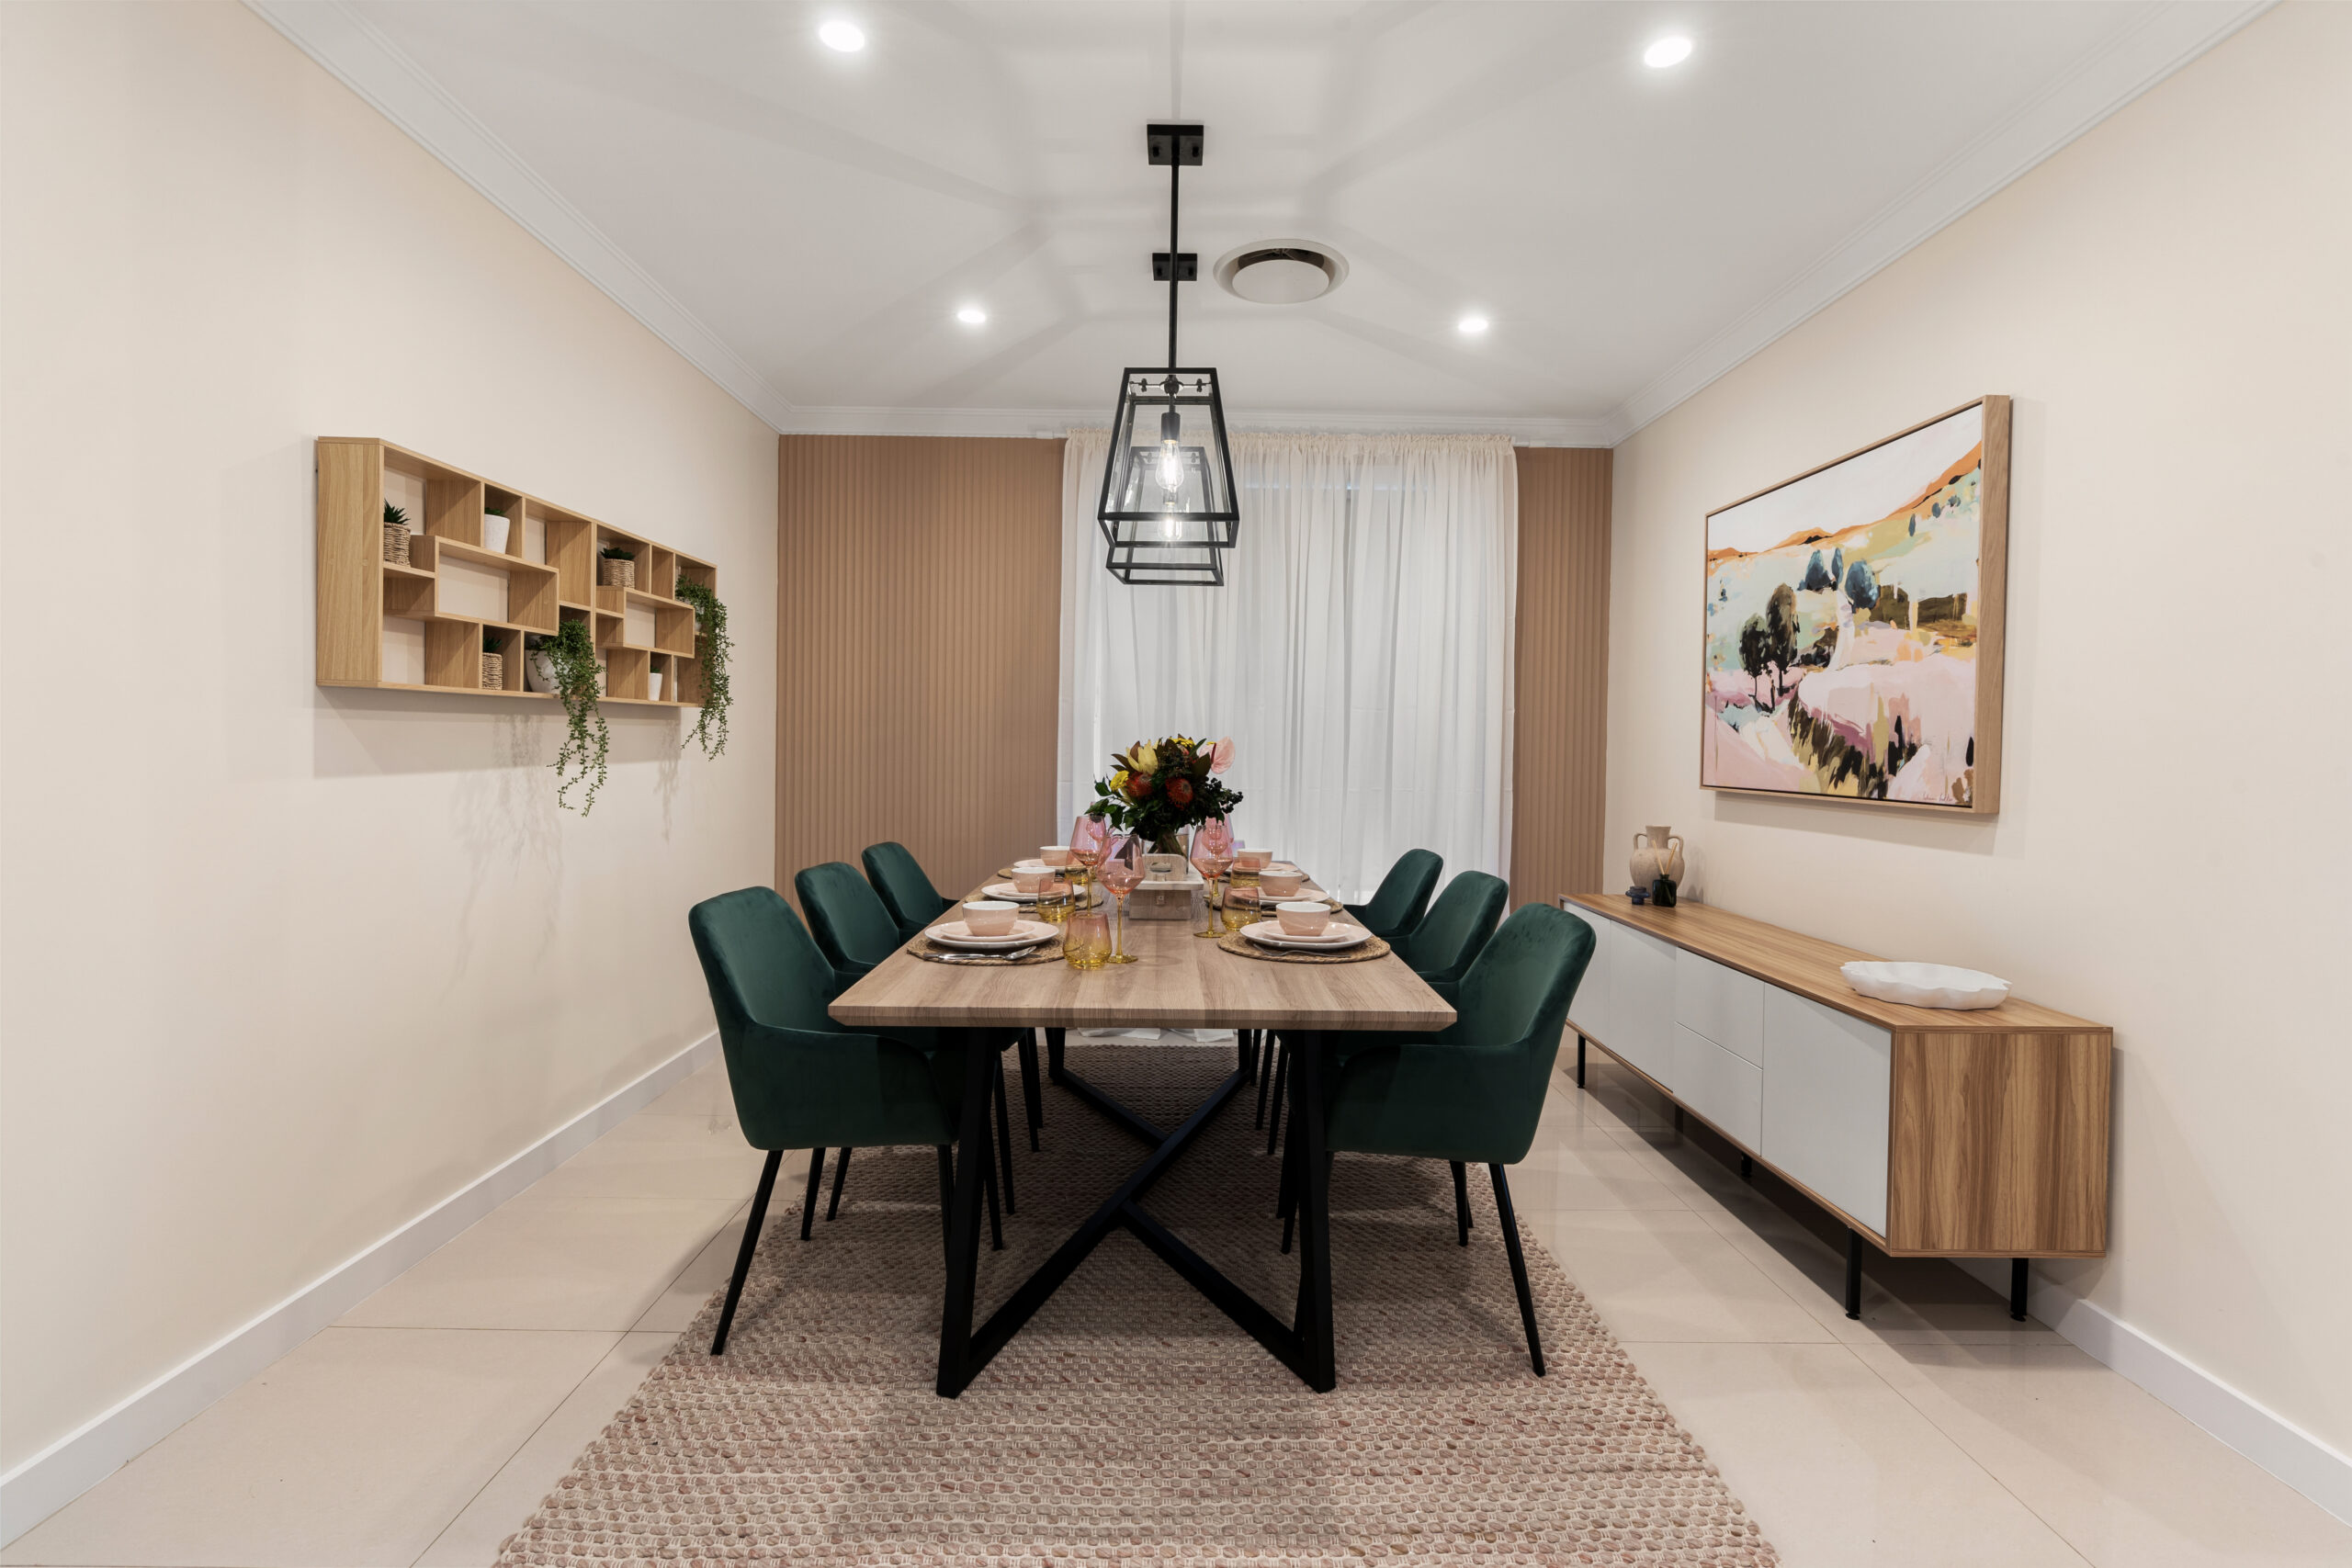
In the dining room, the same textured wall panelling was installed at the end of the room, tying it visually to the lounge room opposite. A number of very simple but effective styling items were added to the room such as the large oak dining table and deep green velvet dining chairs from Luxo Living that now add depth and character to the space.
Art from Urban Road adds a vibrant focal point and in a canvas print, doesn’t throw off any glass reflections. Two identical Southhampton pendant lights from Beacon Lighting in their solid black frames, tie beautifully with the black dining chair legs, and being clear glass, radiate light out in all directions of the room. 2 decorative oak wall shelves from Kmart at just $25 each, offer a very inexpensive wall feature, and beautiful Kmart styling items & gorgeous flowers from Interflora, make this room ready for a long overdue dinner party.
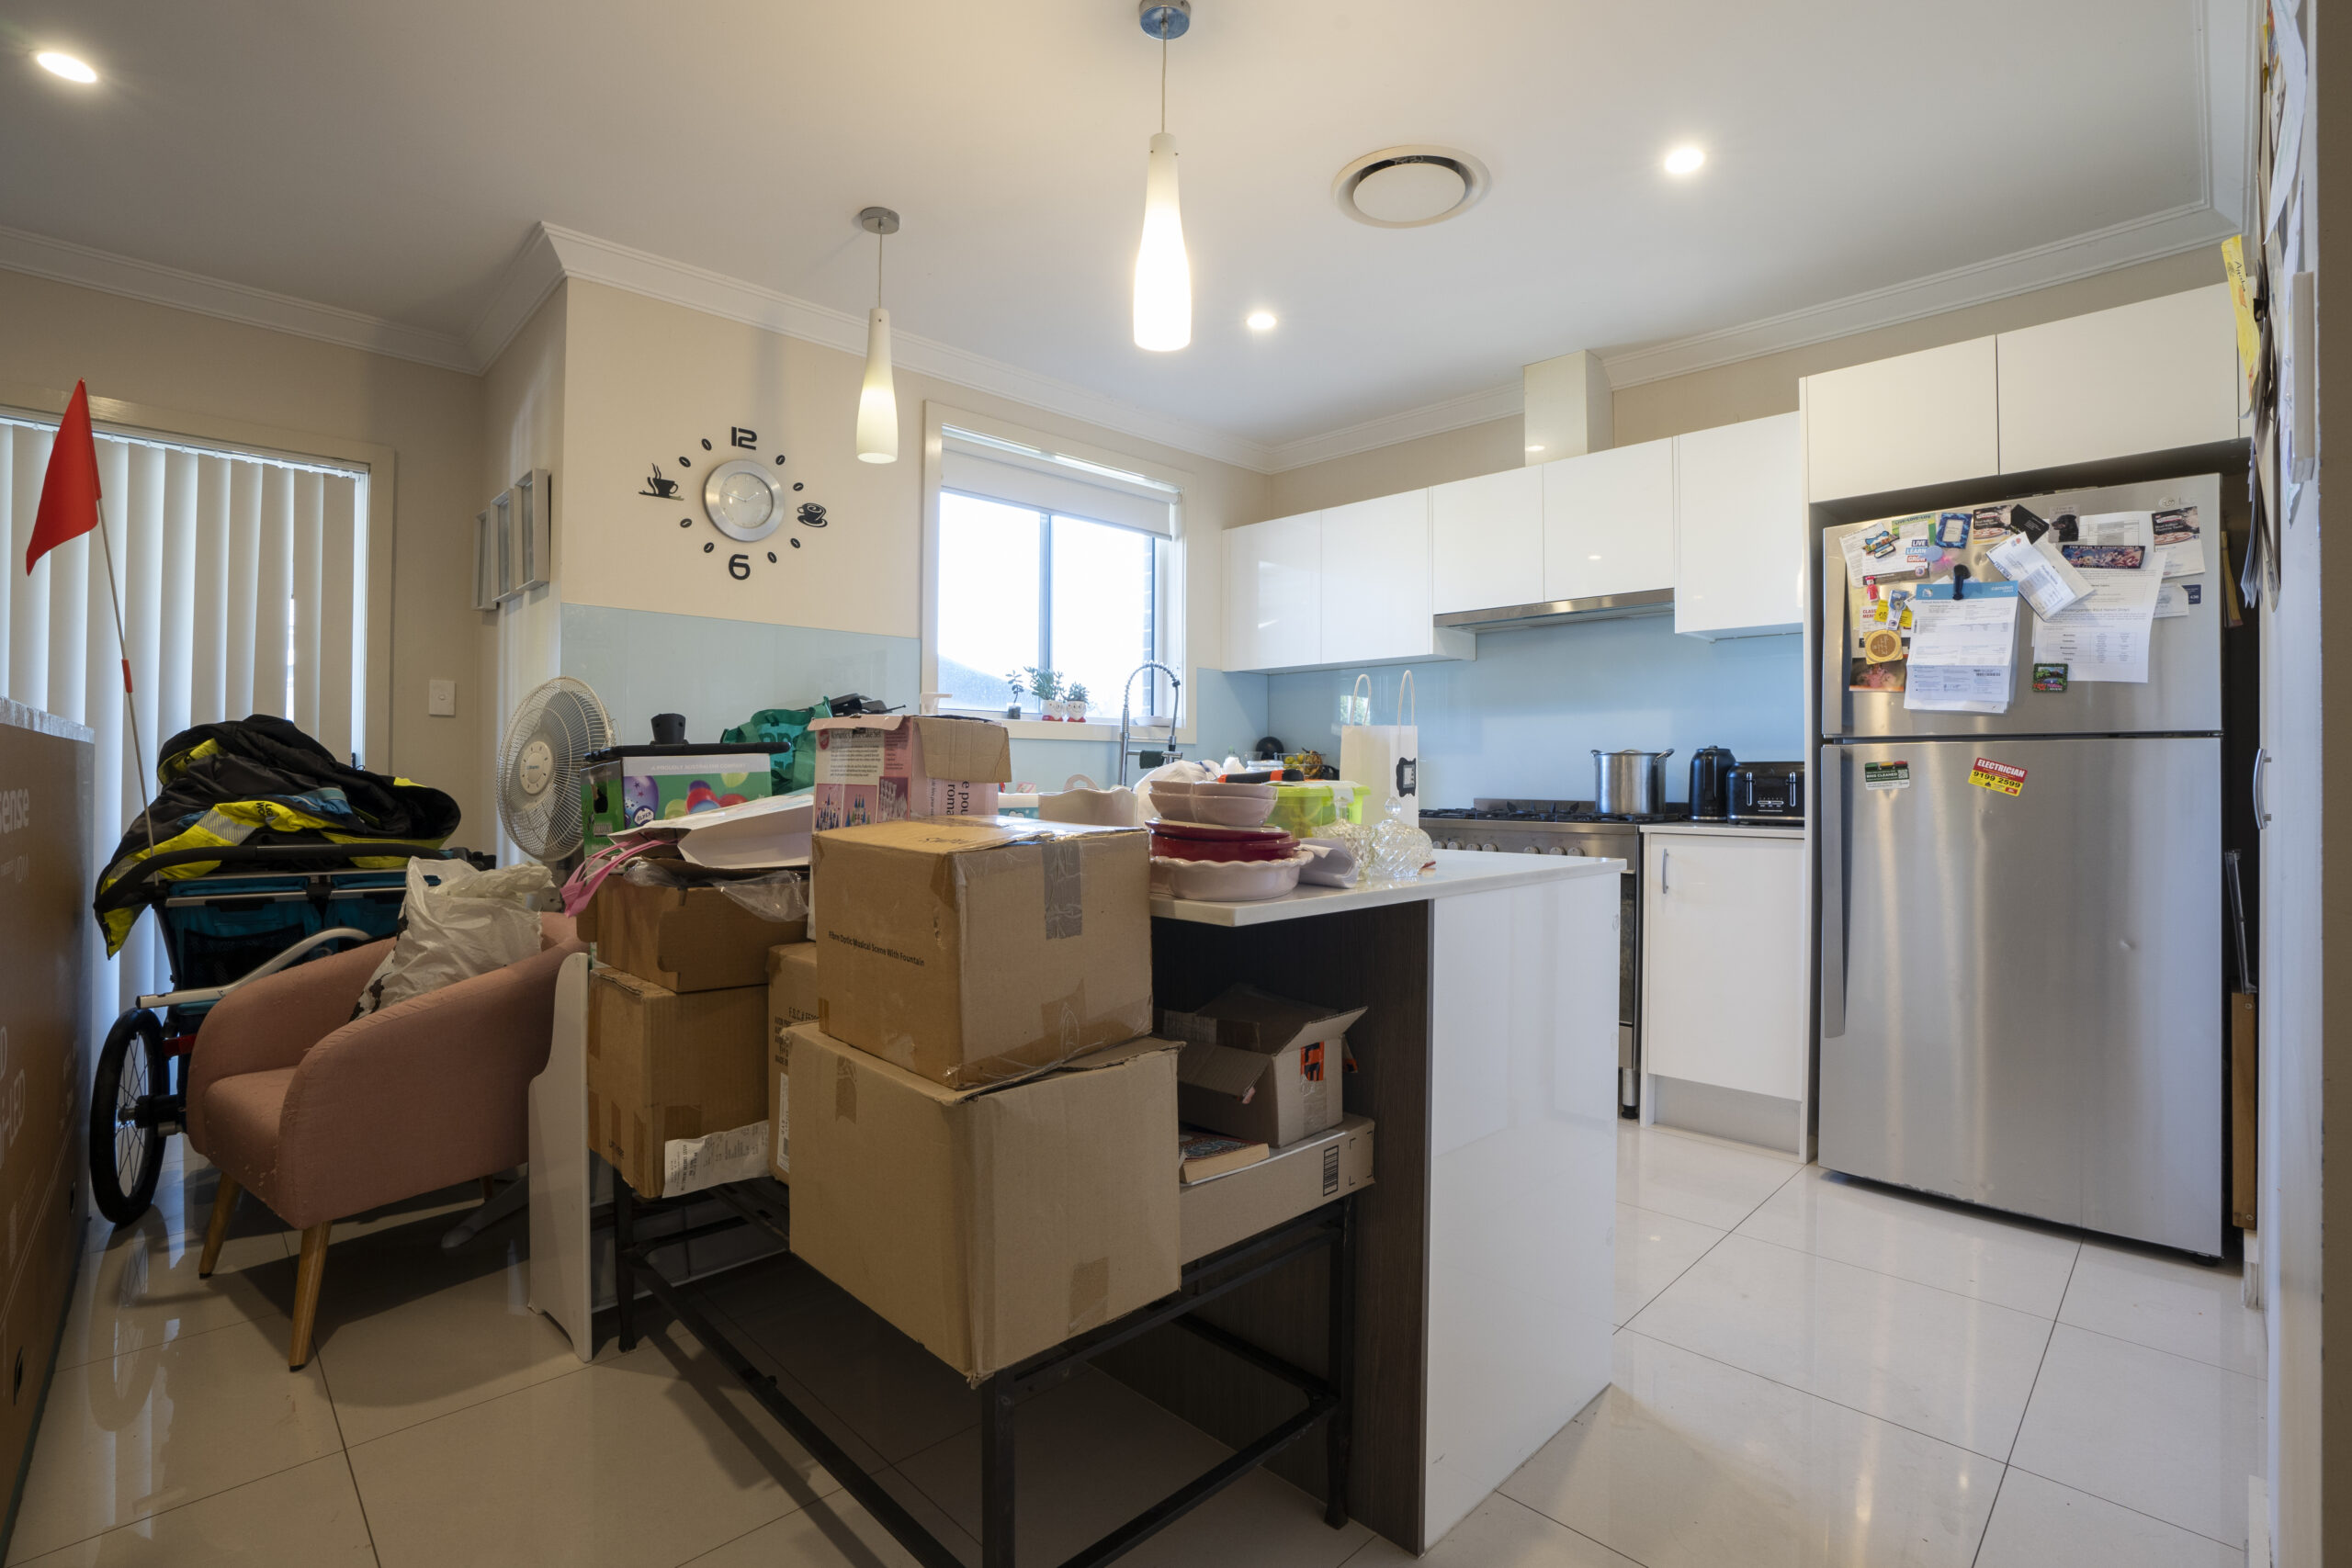
THE LIVING ROOM & KITCHEN
Next, we turned our attention to the kitchen and living room, the area of the home that this family use the most for normal, daily family life. Again, this room was in perfect structural condition which always makes my job so much easier as a renovator.
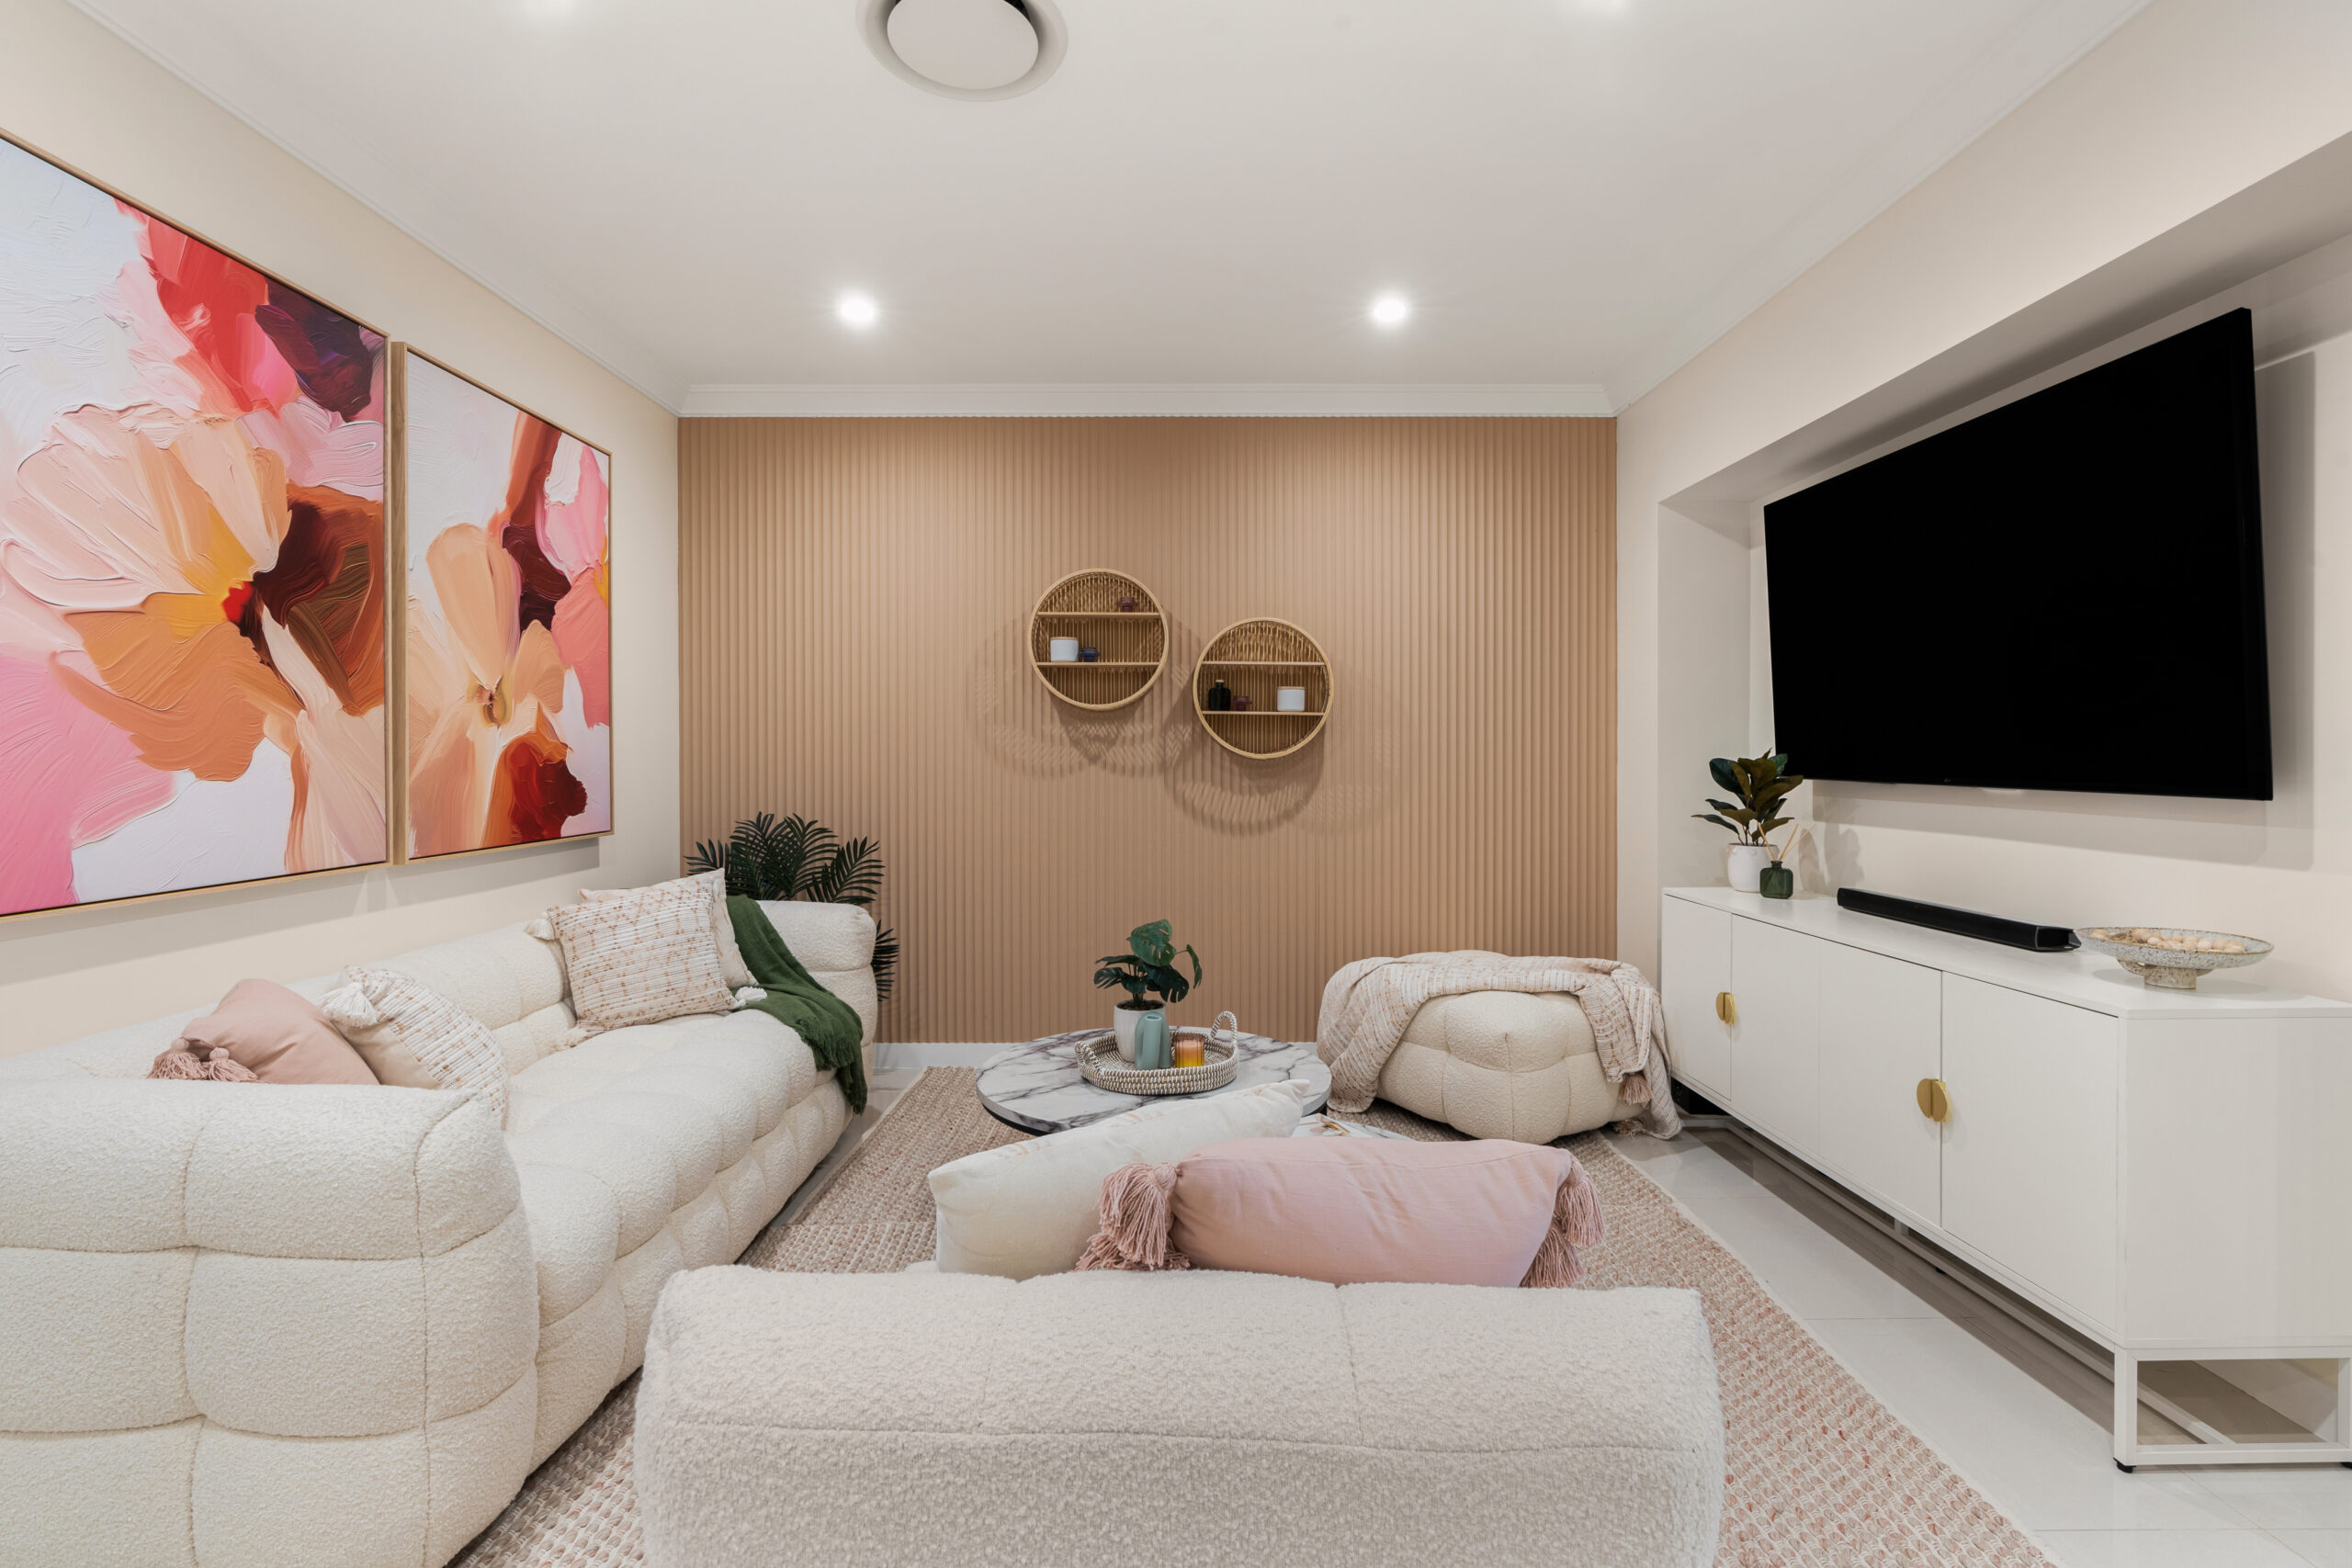
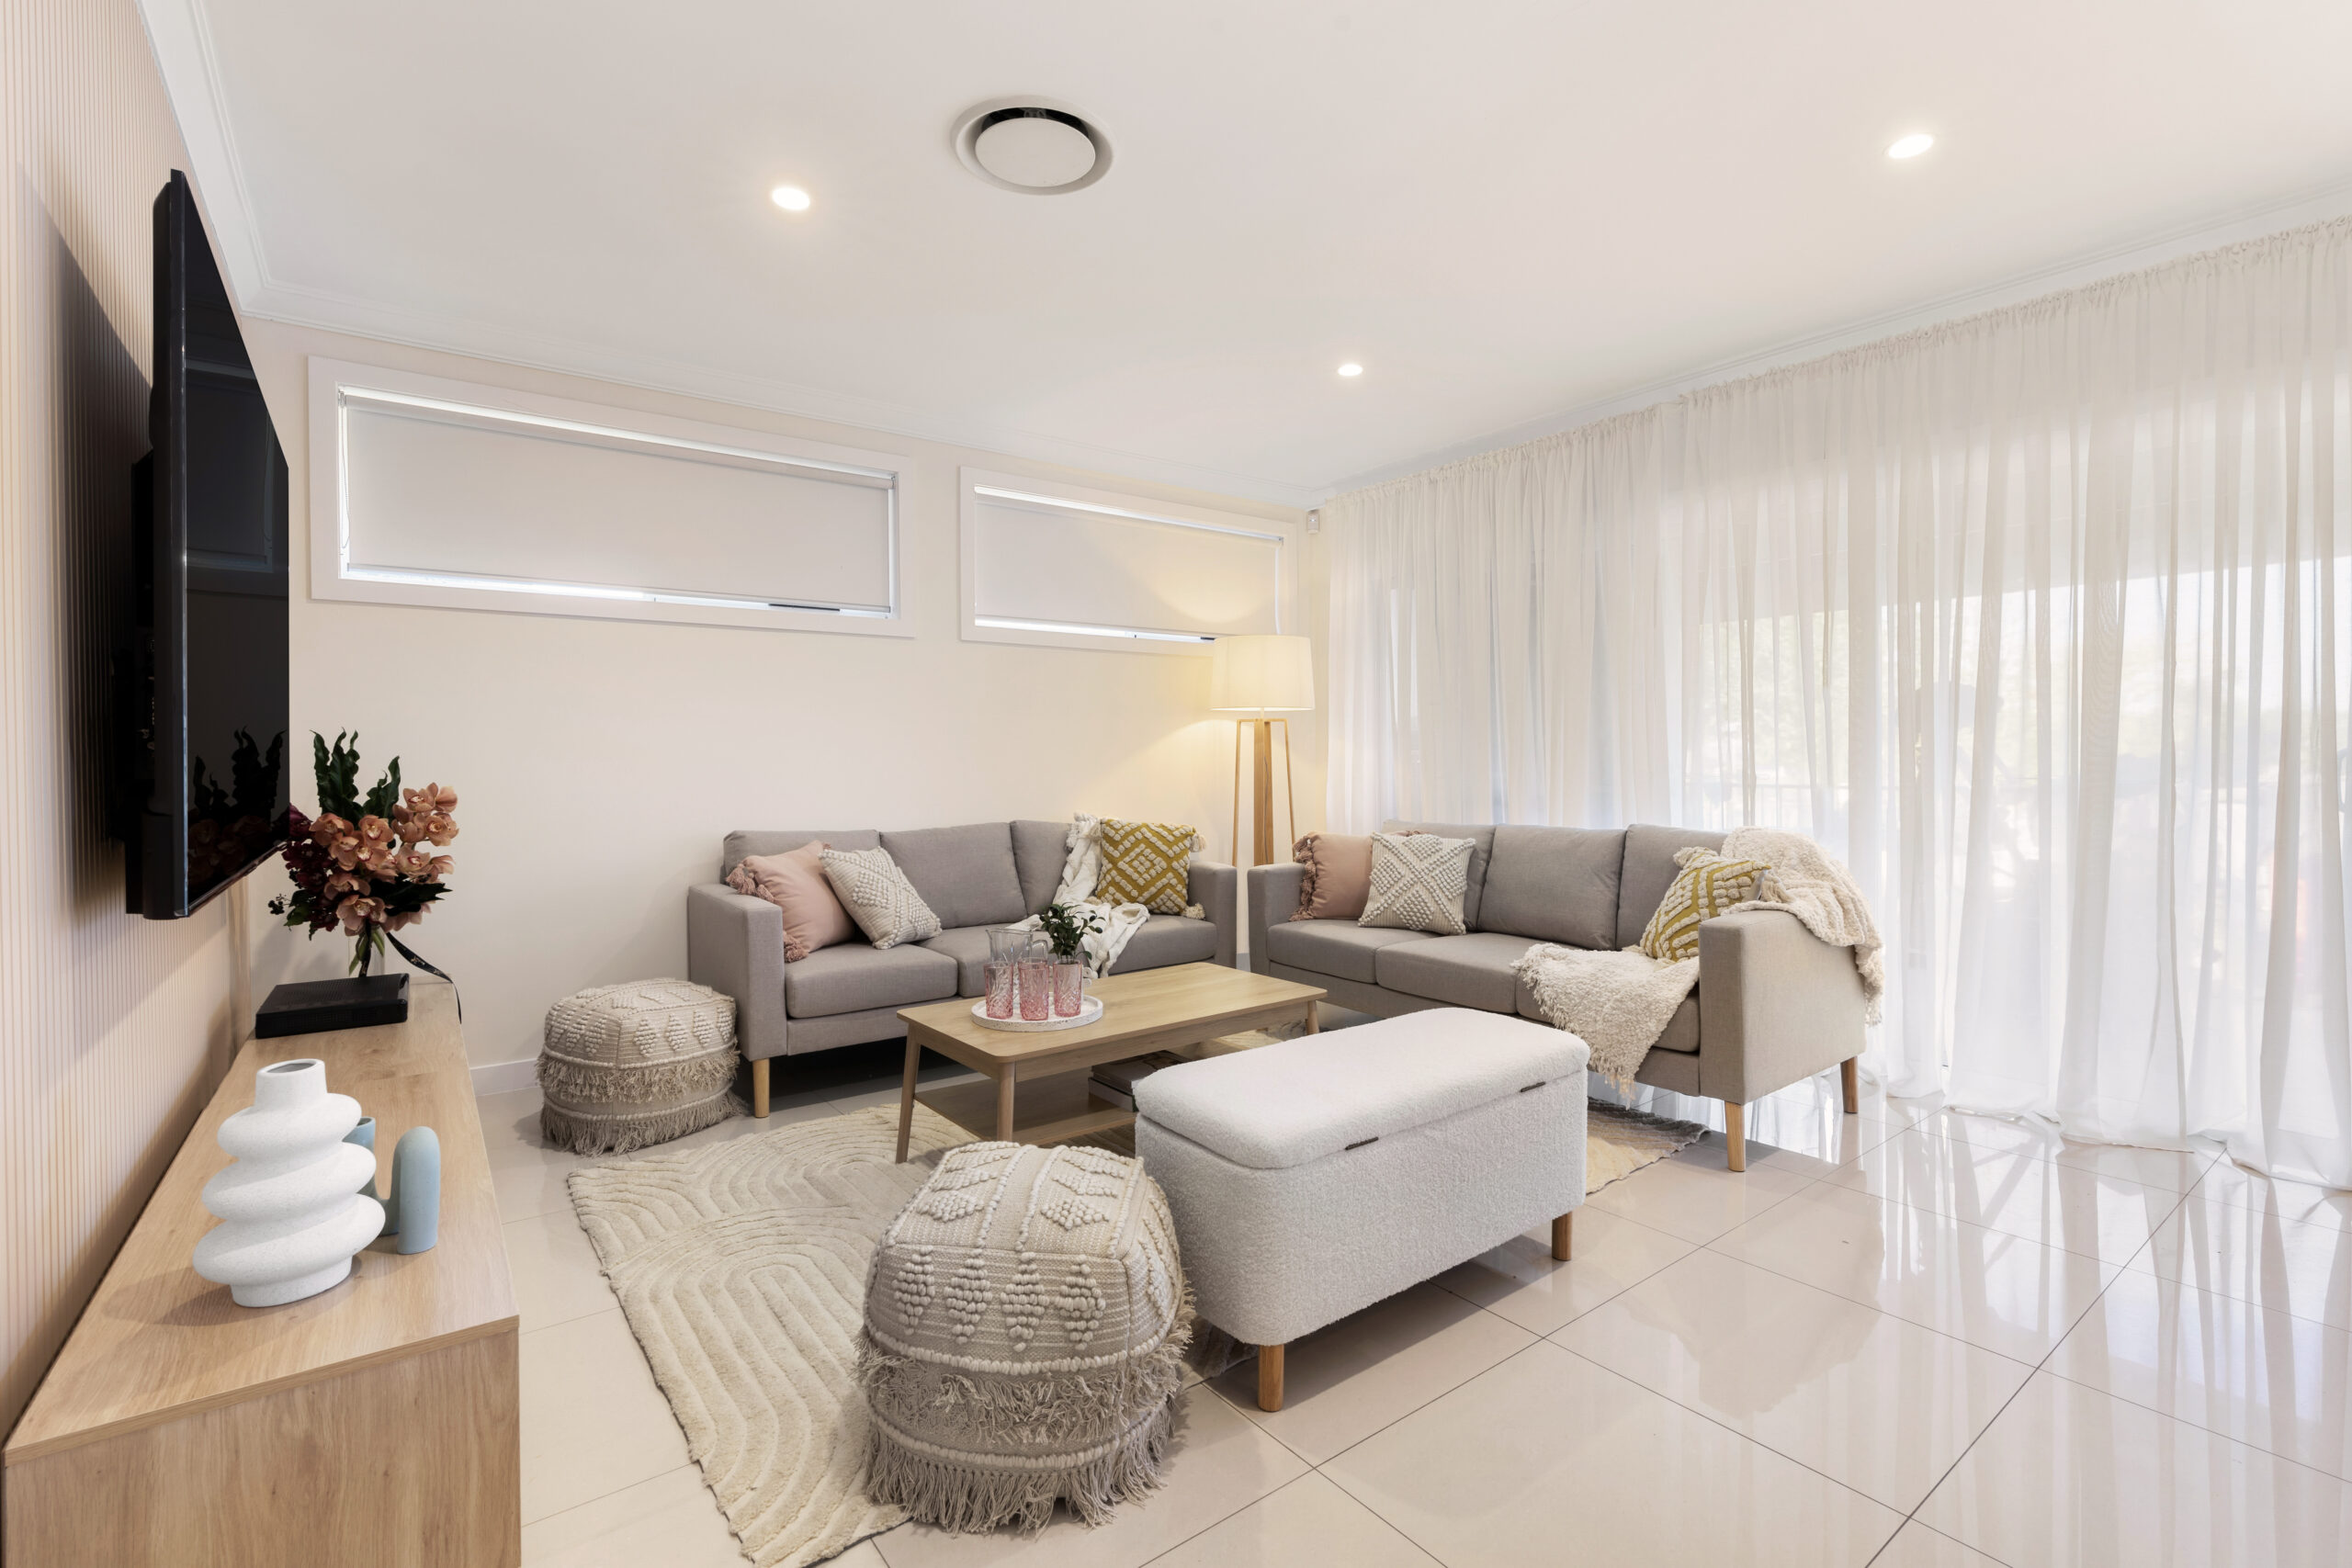
In the living room, I wanted this to be a practical area for the family to relax & chill together so deliberately went for a more casual look. One coat of paint on the ceiling and walls instantly freshened the room up. The old green sofas, whilst very comfortable, looked dated. They were donated to charity and substituted with 2 larger couches from Kmart, supplemented by versatile ottomans and a storage bench seat that opens up for extra storage space.
In all my years as a renovator, I’ve never met anyone who loves vertical drapes so I ditched those and replaced them with ceiling-high white sheer curtains from Ikea. These help create a soft, diffused light in the room and taking them to the ceiling, makes the room feel larger.
This living room also had the same problems as the lounge & dining rooms in that there were too many hard surfaces. Layering rugs, cushions and throws from Kmart was an easy and affordable way to add cosiness and warmth to the room, instantly and cost effectively.
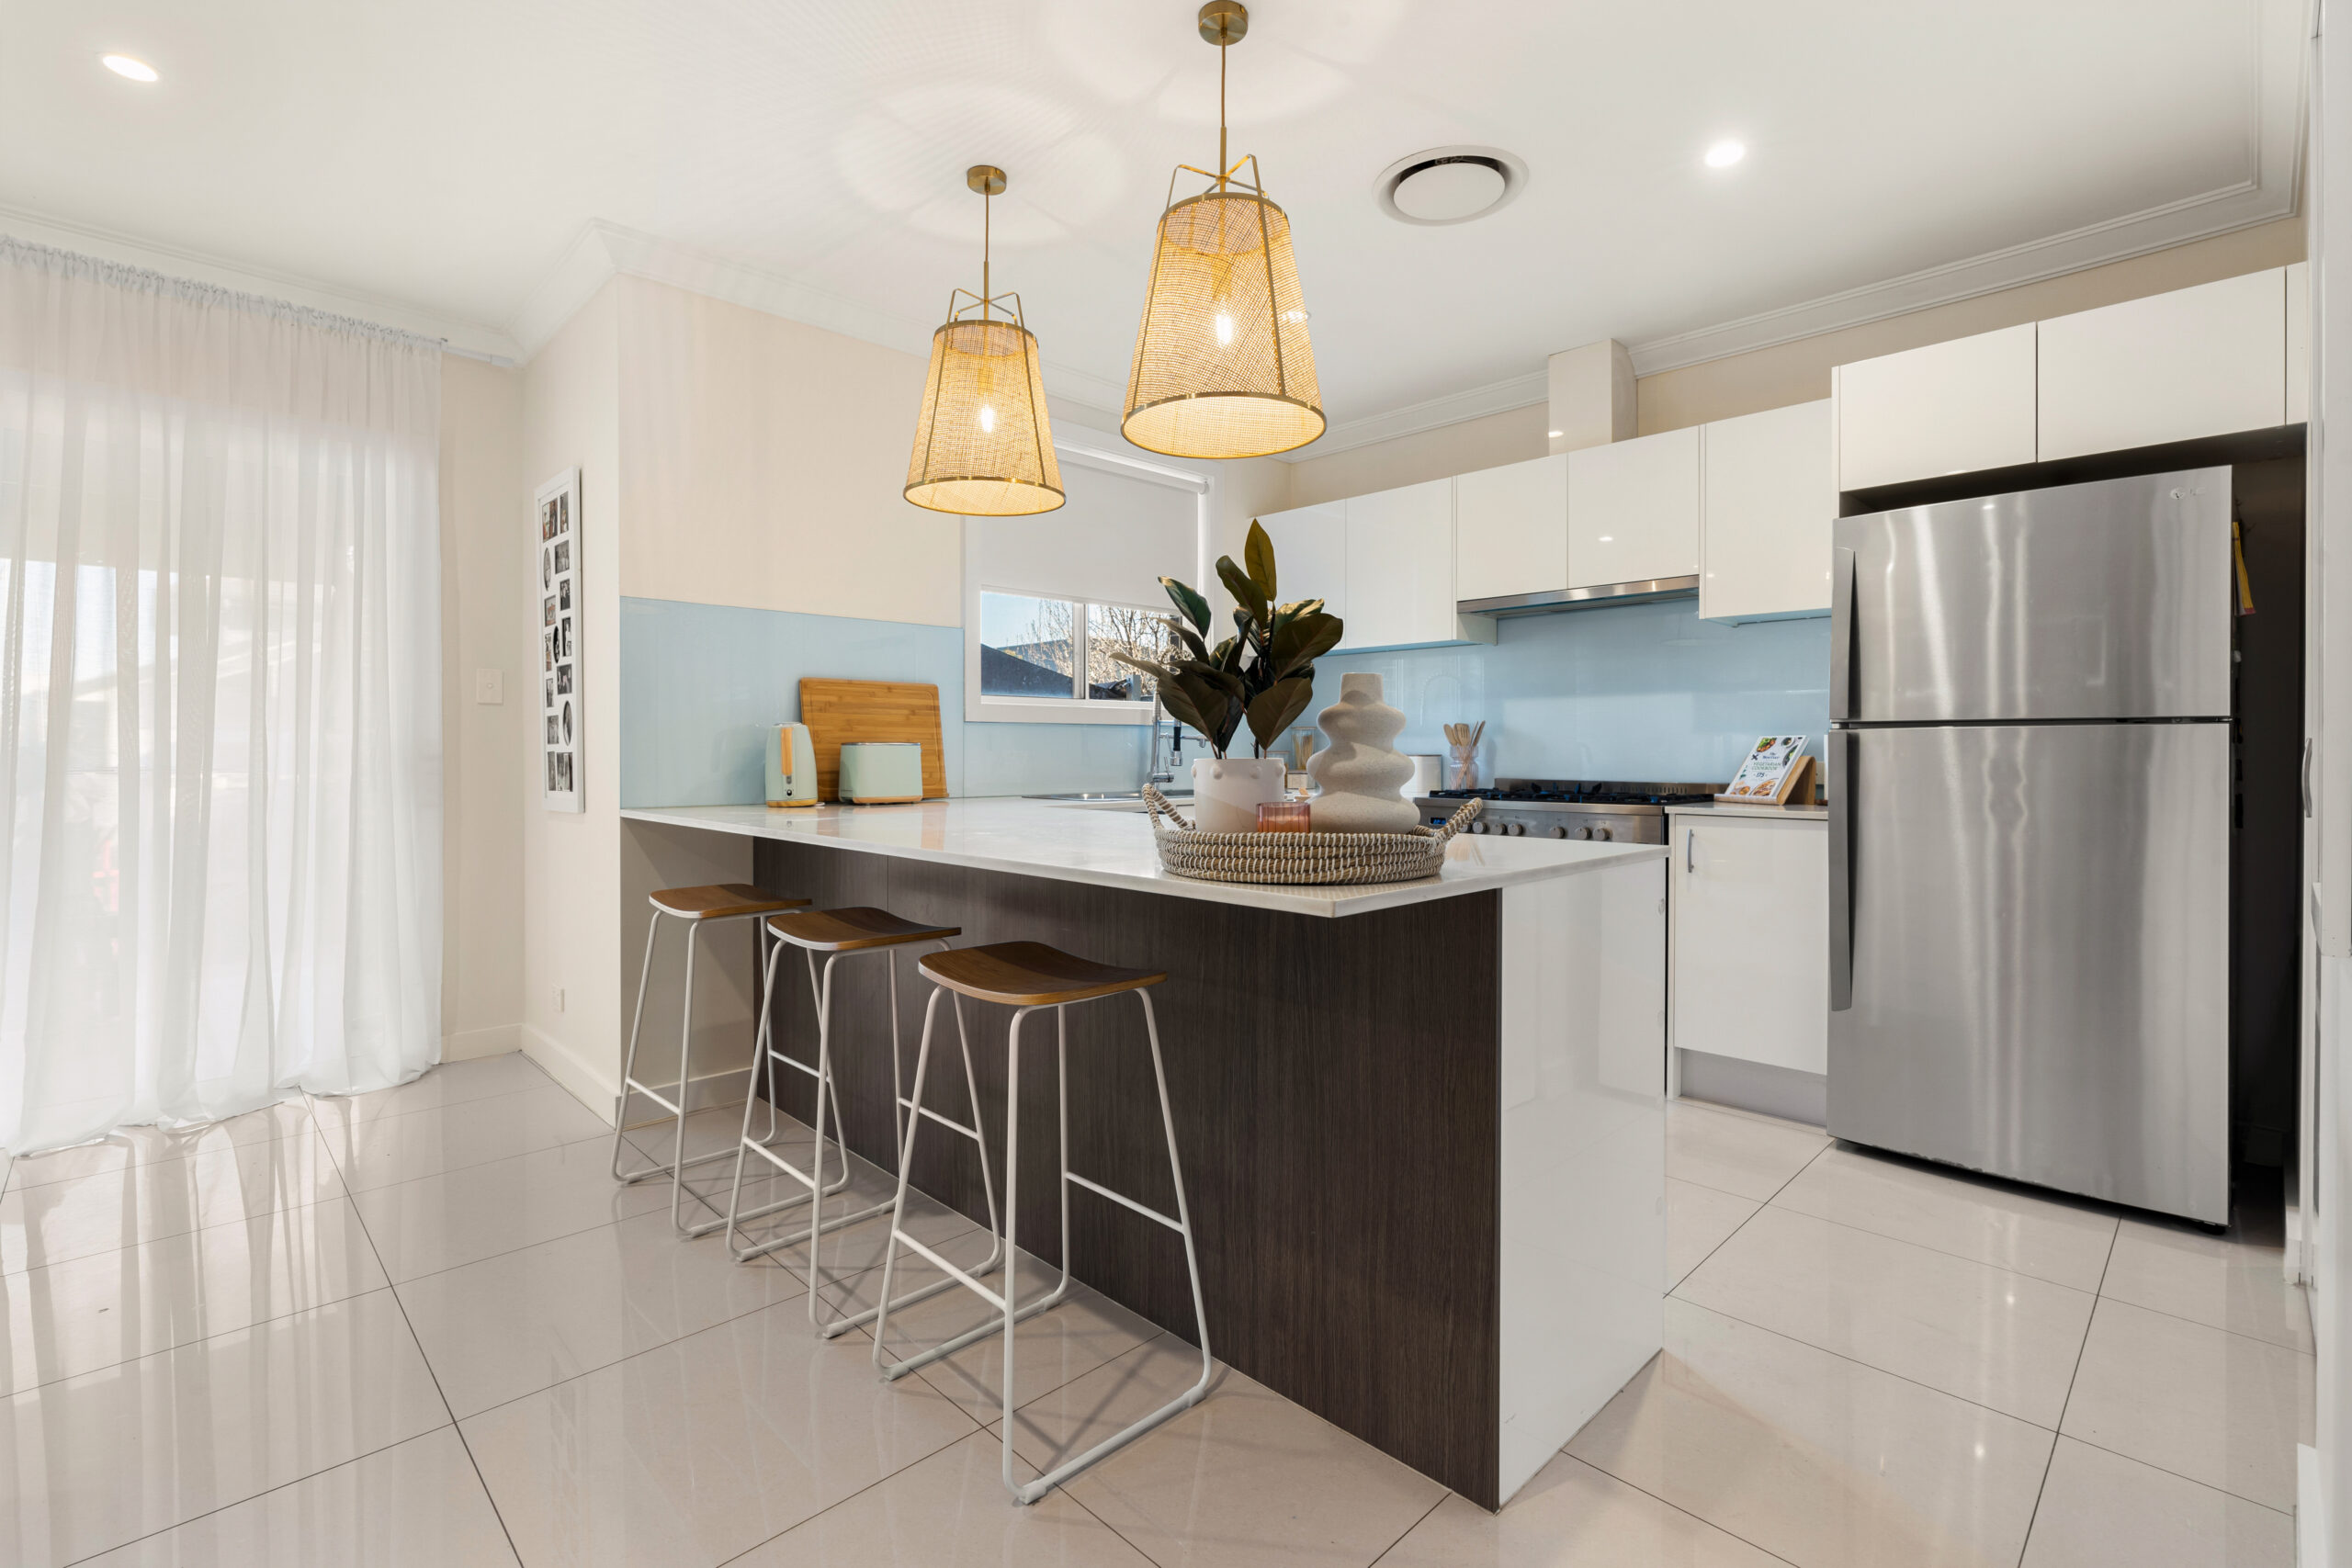
In terms of transforming the kitchen, I only had to do 3 very minor things – a fresh coat of paint on the ceiling and walls & the addition of 3 Kmart stools and the Hayes pendant lights over the kitchen island bench, instantly revitalising the space with a contemporary flair. This minimalist approach just reinforces the power of subtle changes; showcasing that often, less is more. The updated look is a testament to the fact that significant visual impact can be achieved with just a few well-considered modifications.
THE MASTER BEDROOM
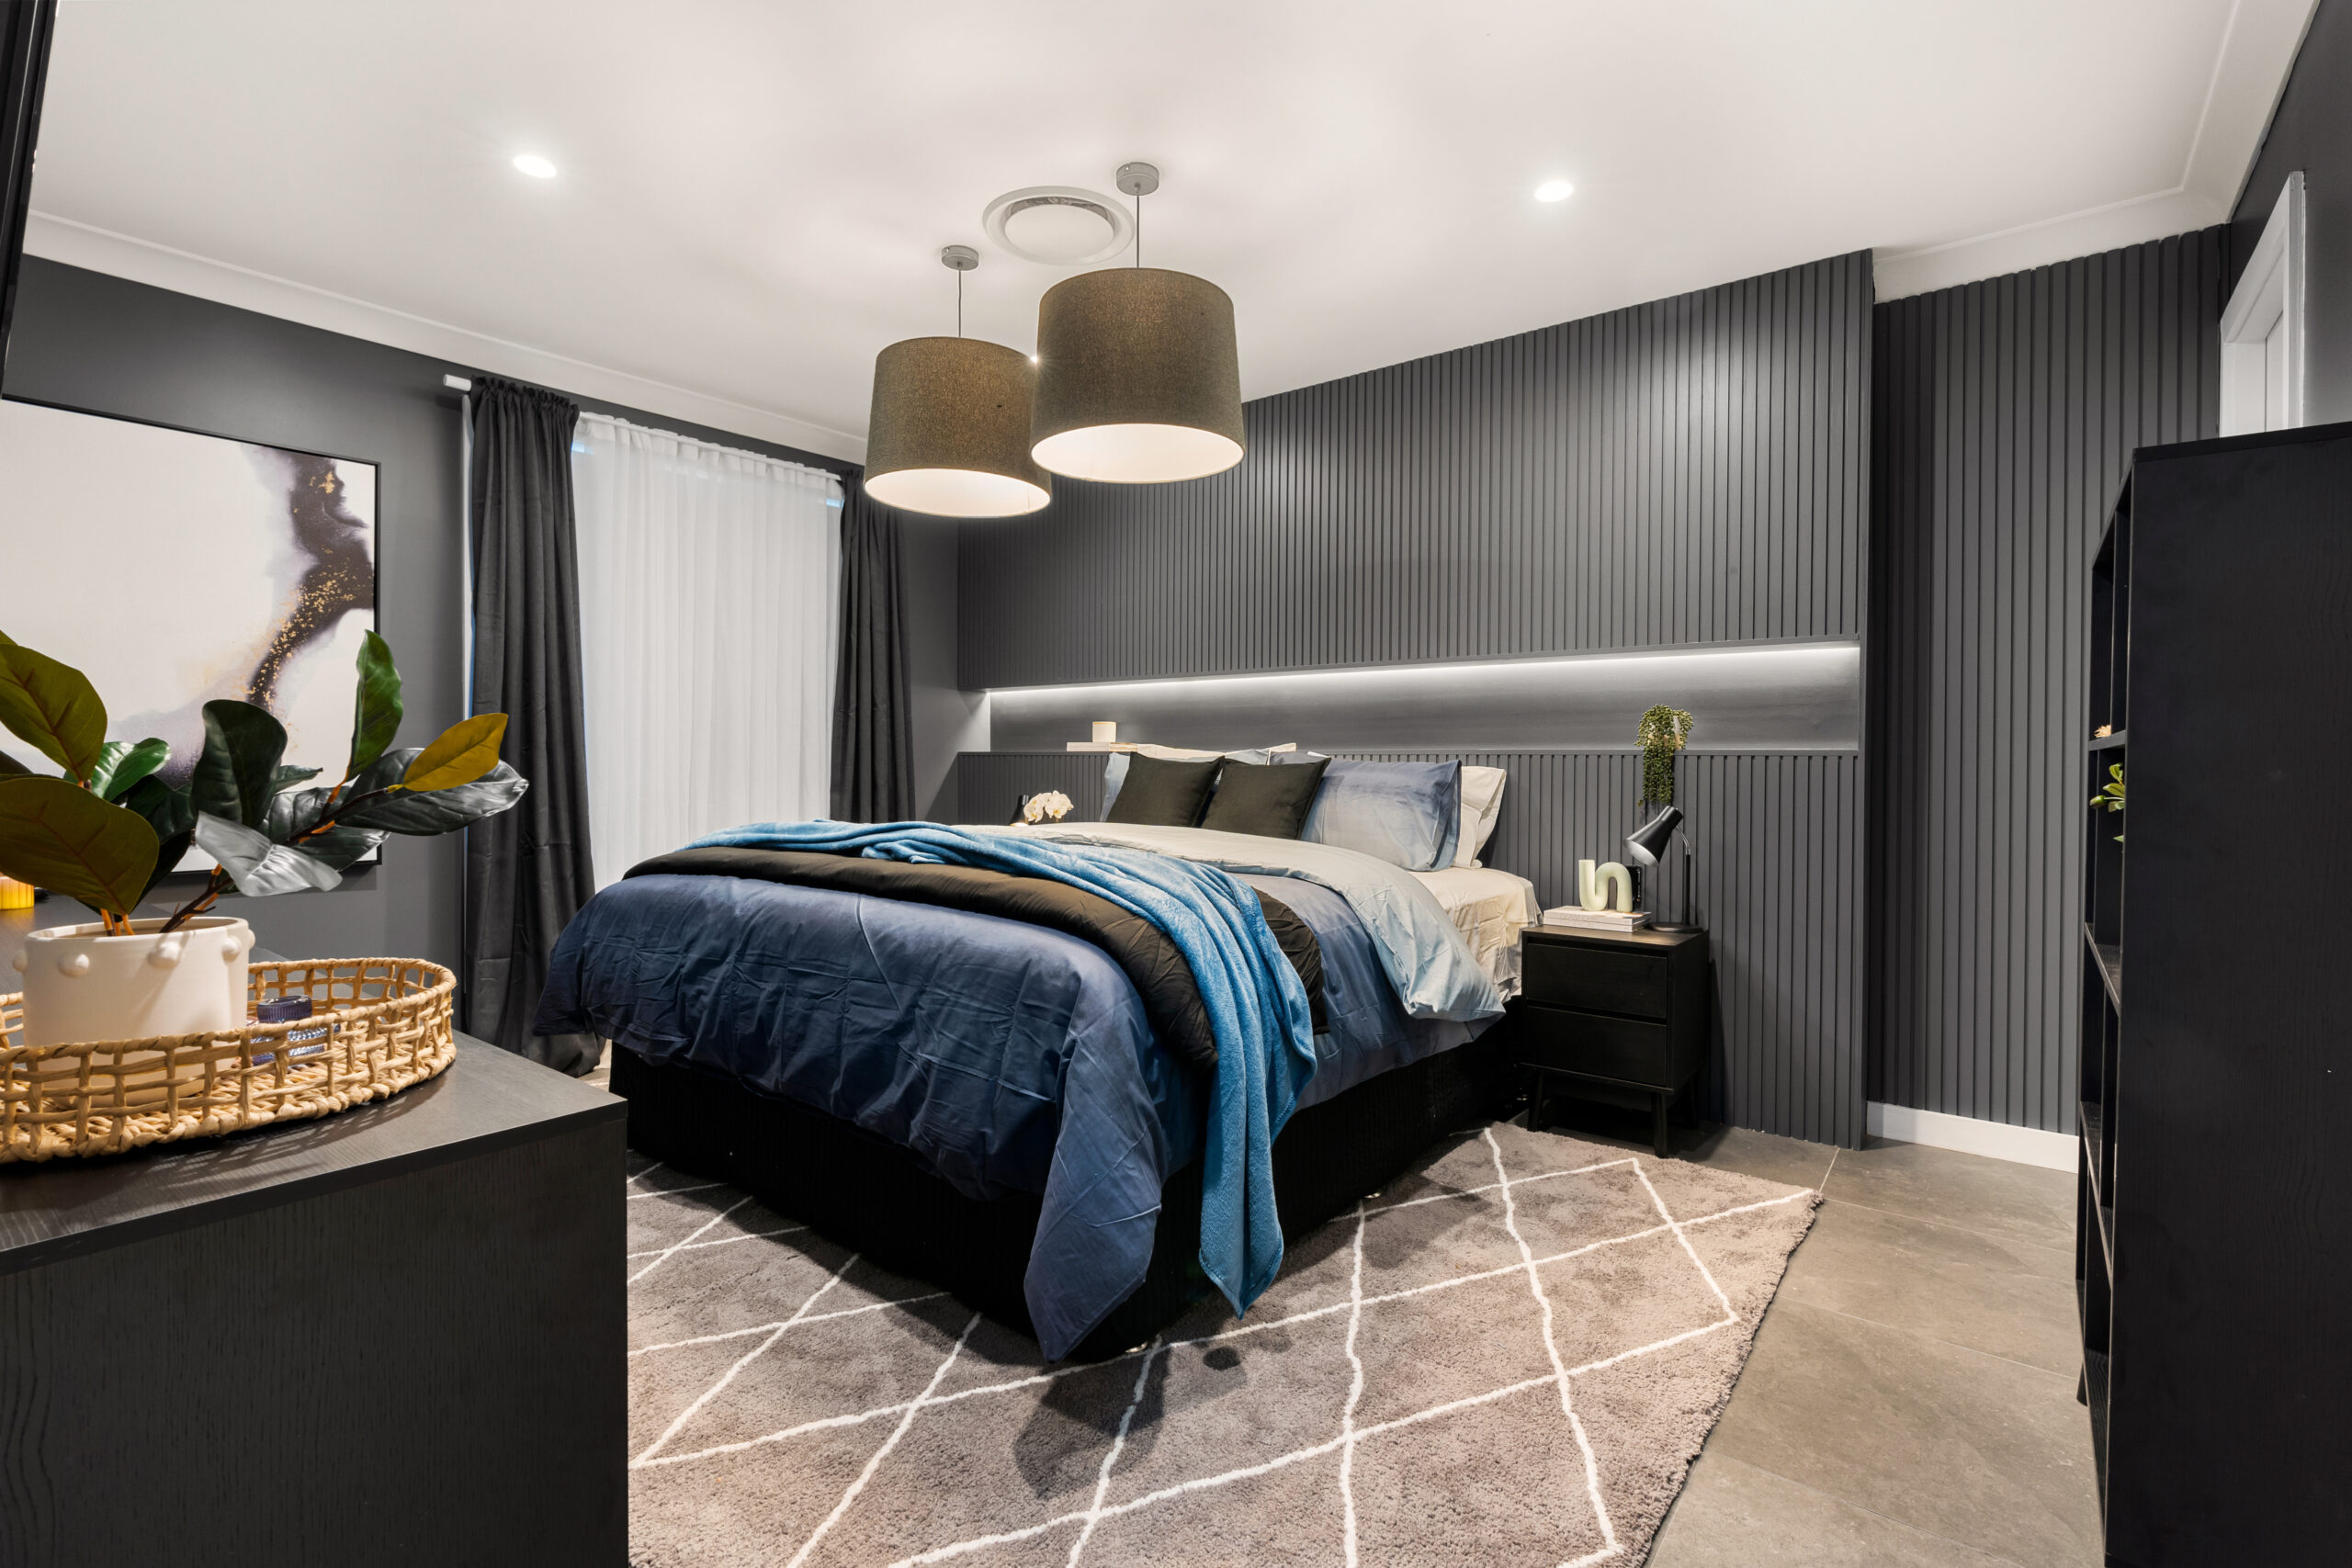
Now, when it comes to the master bedroom, this is where we spent quite a bit of time. You spend one third of your life in bed so I wanted this room to be special for Kylie & Paul (and bring a bit of romance back too 😉). A luxe hotel vibe was the look I wanted to achieve.
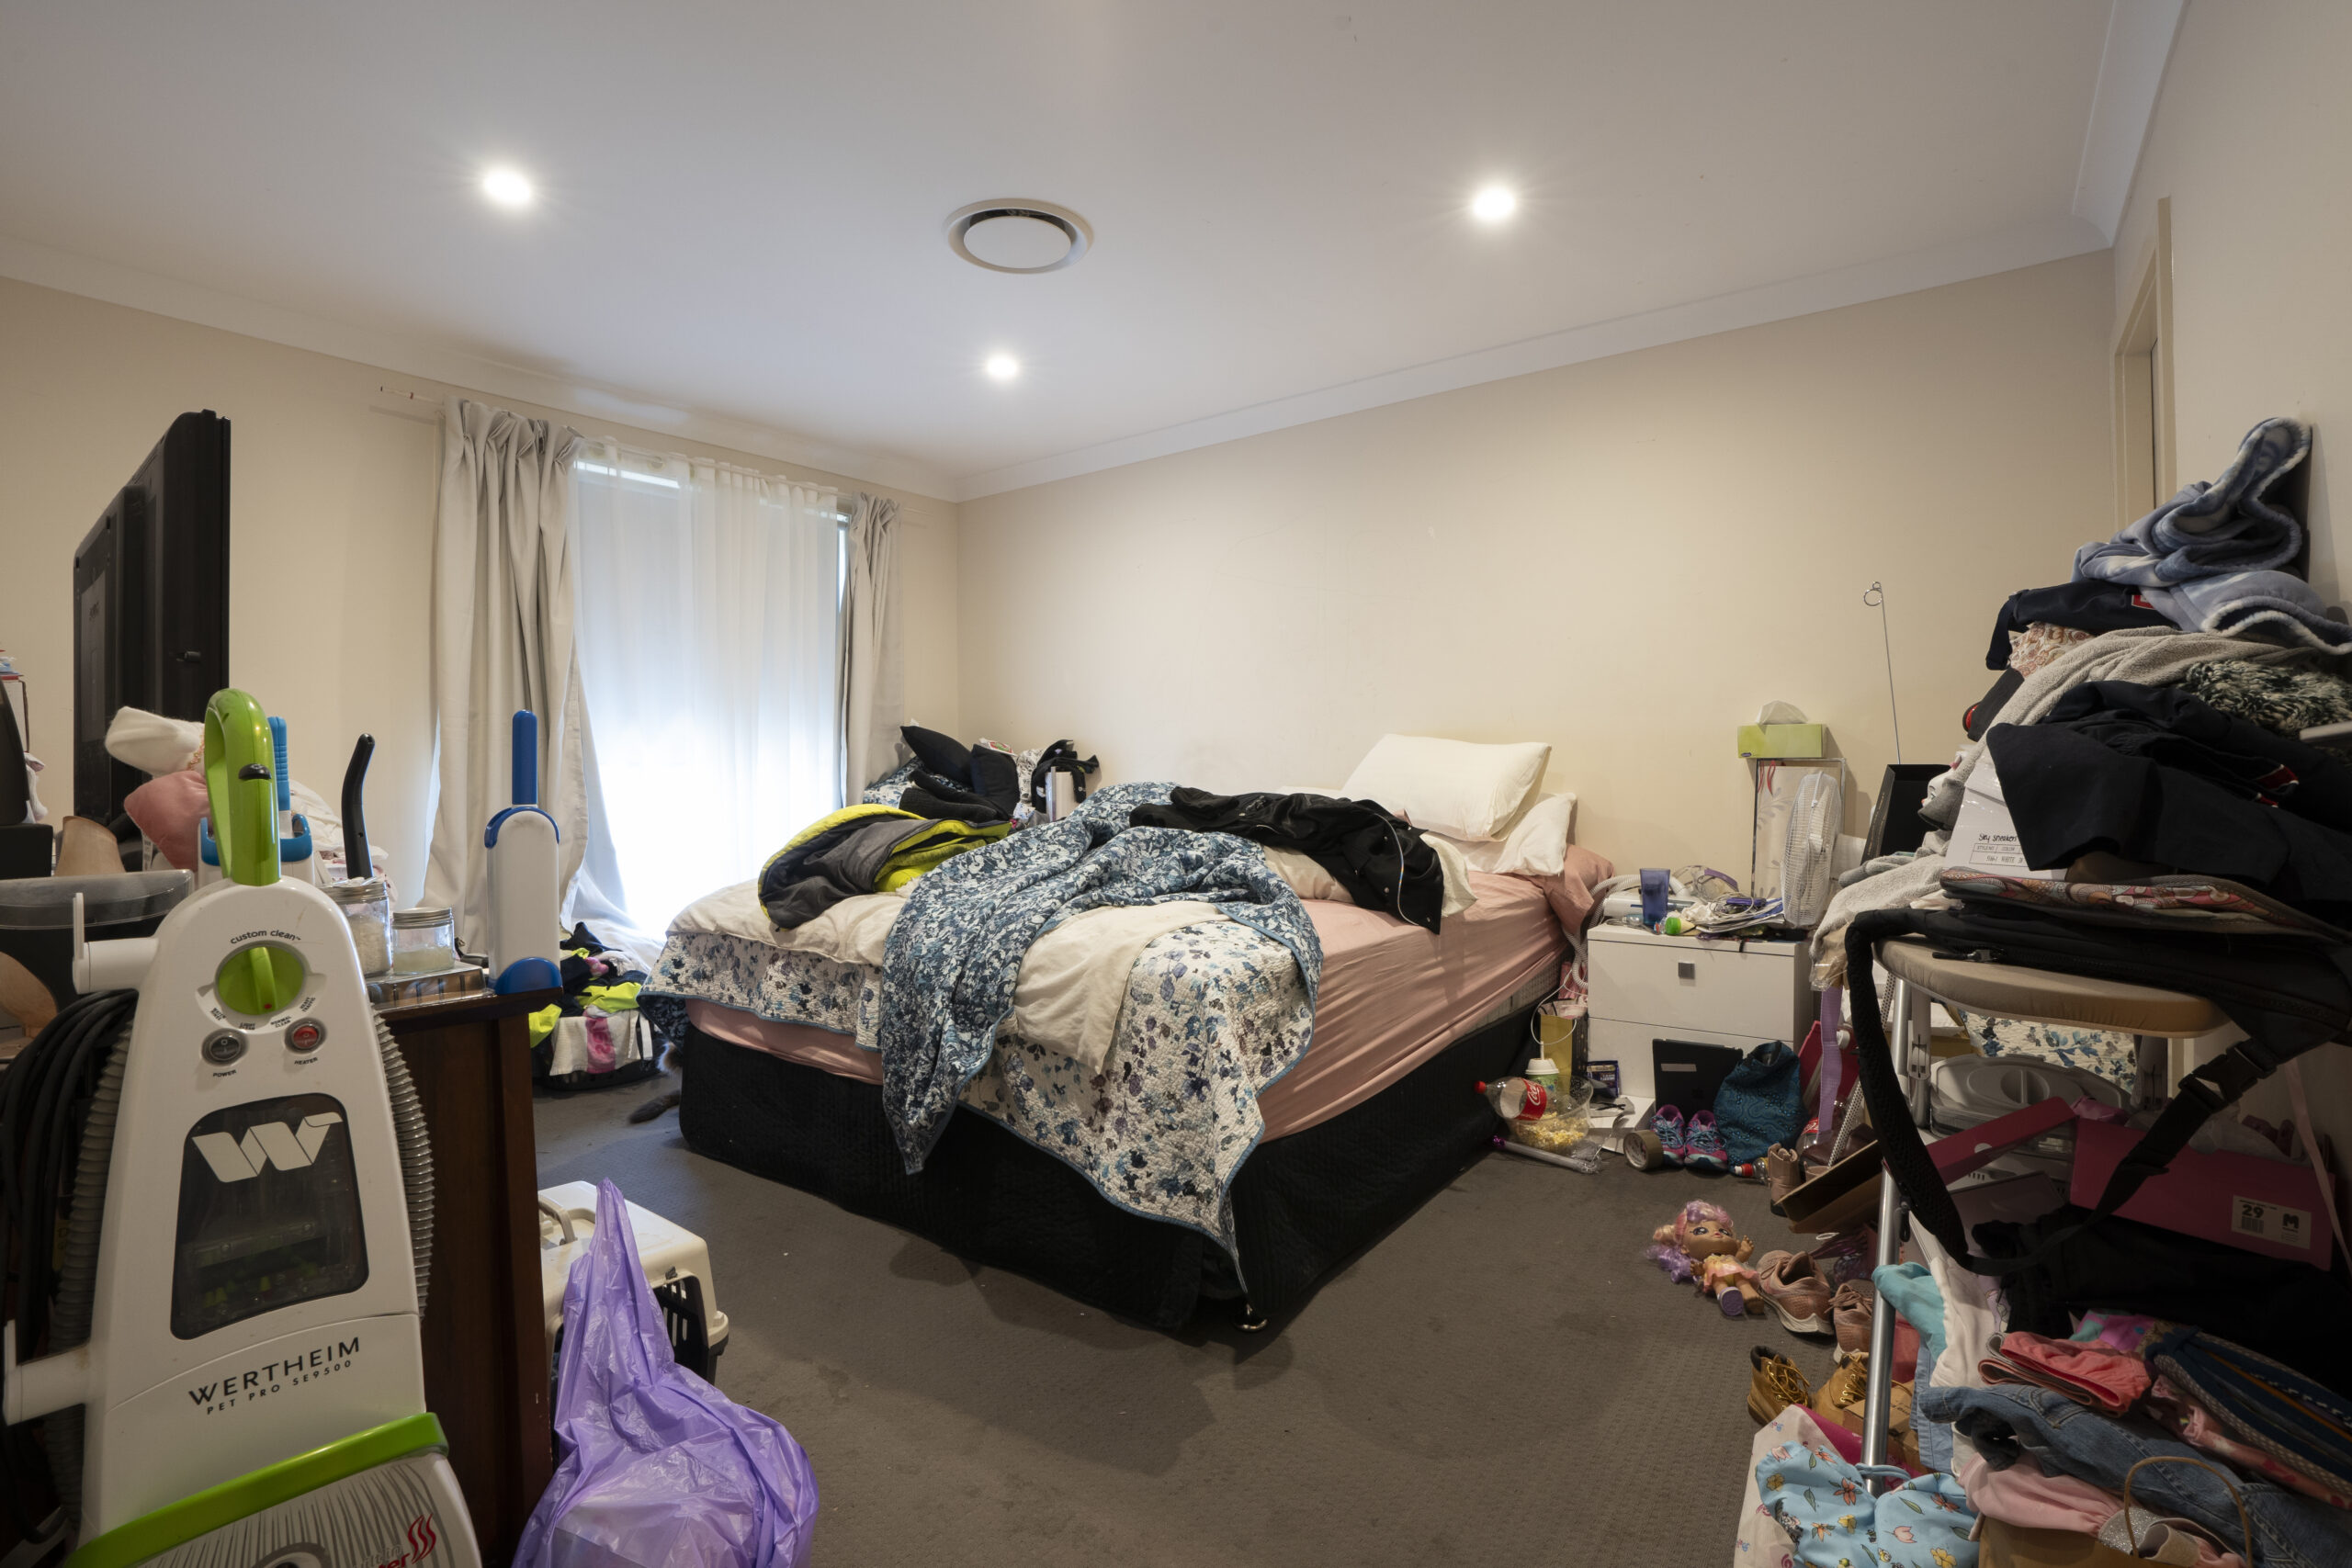
To create a real difference in this room, I ripped up the carpet that was worn in many parts and replaced that with large format tiles that give the room a more sophisticated look. To be honest, it was a bit of effort to do this but the tiles really create a greater sense of space in the room, as carpet does have a tendency to make rooms look smaller.
To get that luxe hotel vibe, I got my carpenters to build a bedhead wall. They erected a timber stud wall about 200mm off the wall then once again, lined the timber frame with Easycraft’s Channel 25 wall cladding. My electrician chased in all the electricals before the wall lining went on and once installed, the room was painted in Taubmans Oil Shale for dramatic effect. These darker walls add depth and contrast, while the coordinated bedding and the plush area rug introduce texture and warmth. The addition of two drum shade ceiling lights offers a soft, diffused light that now complements the room’s moody ambiance.
THE PLAYROOM
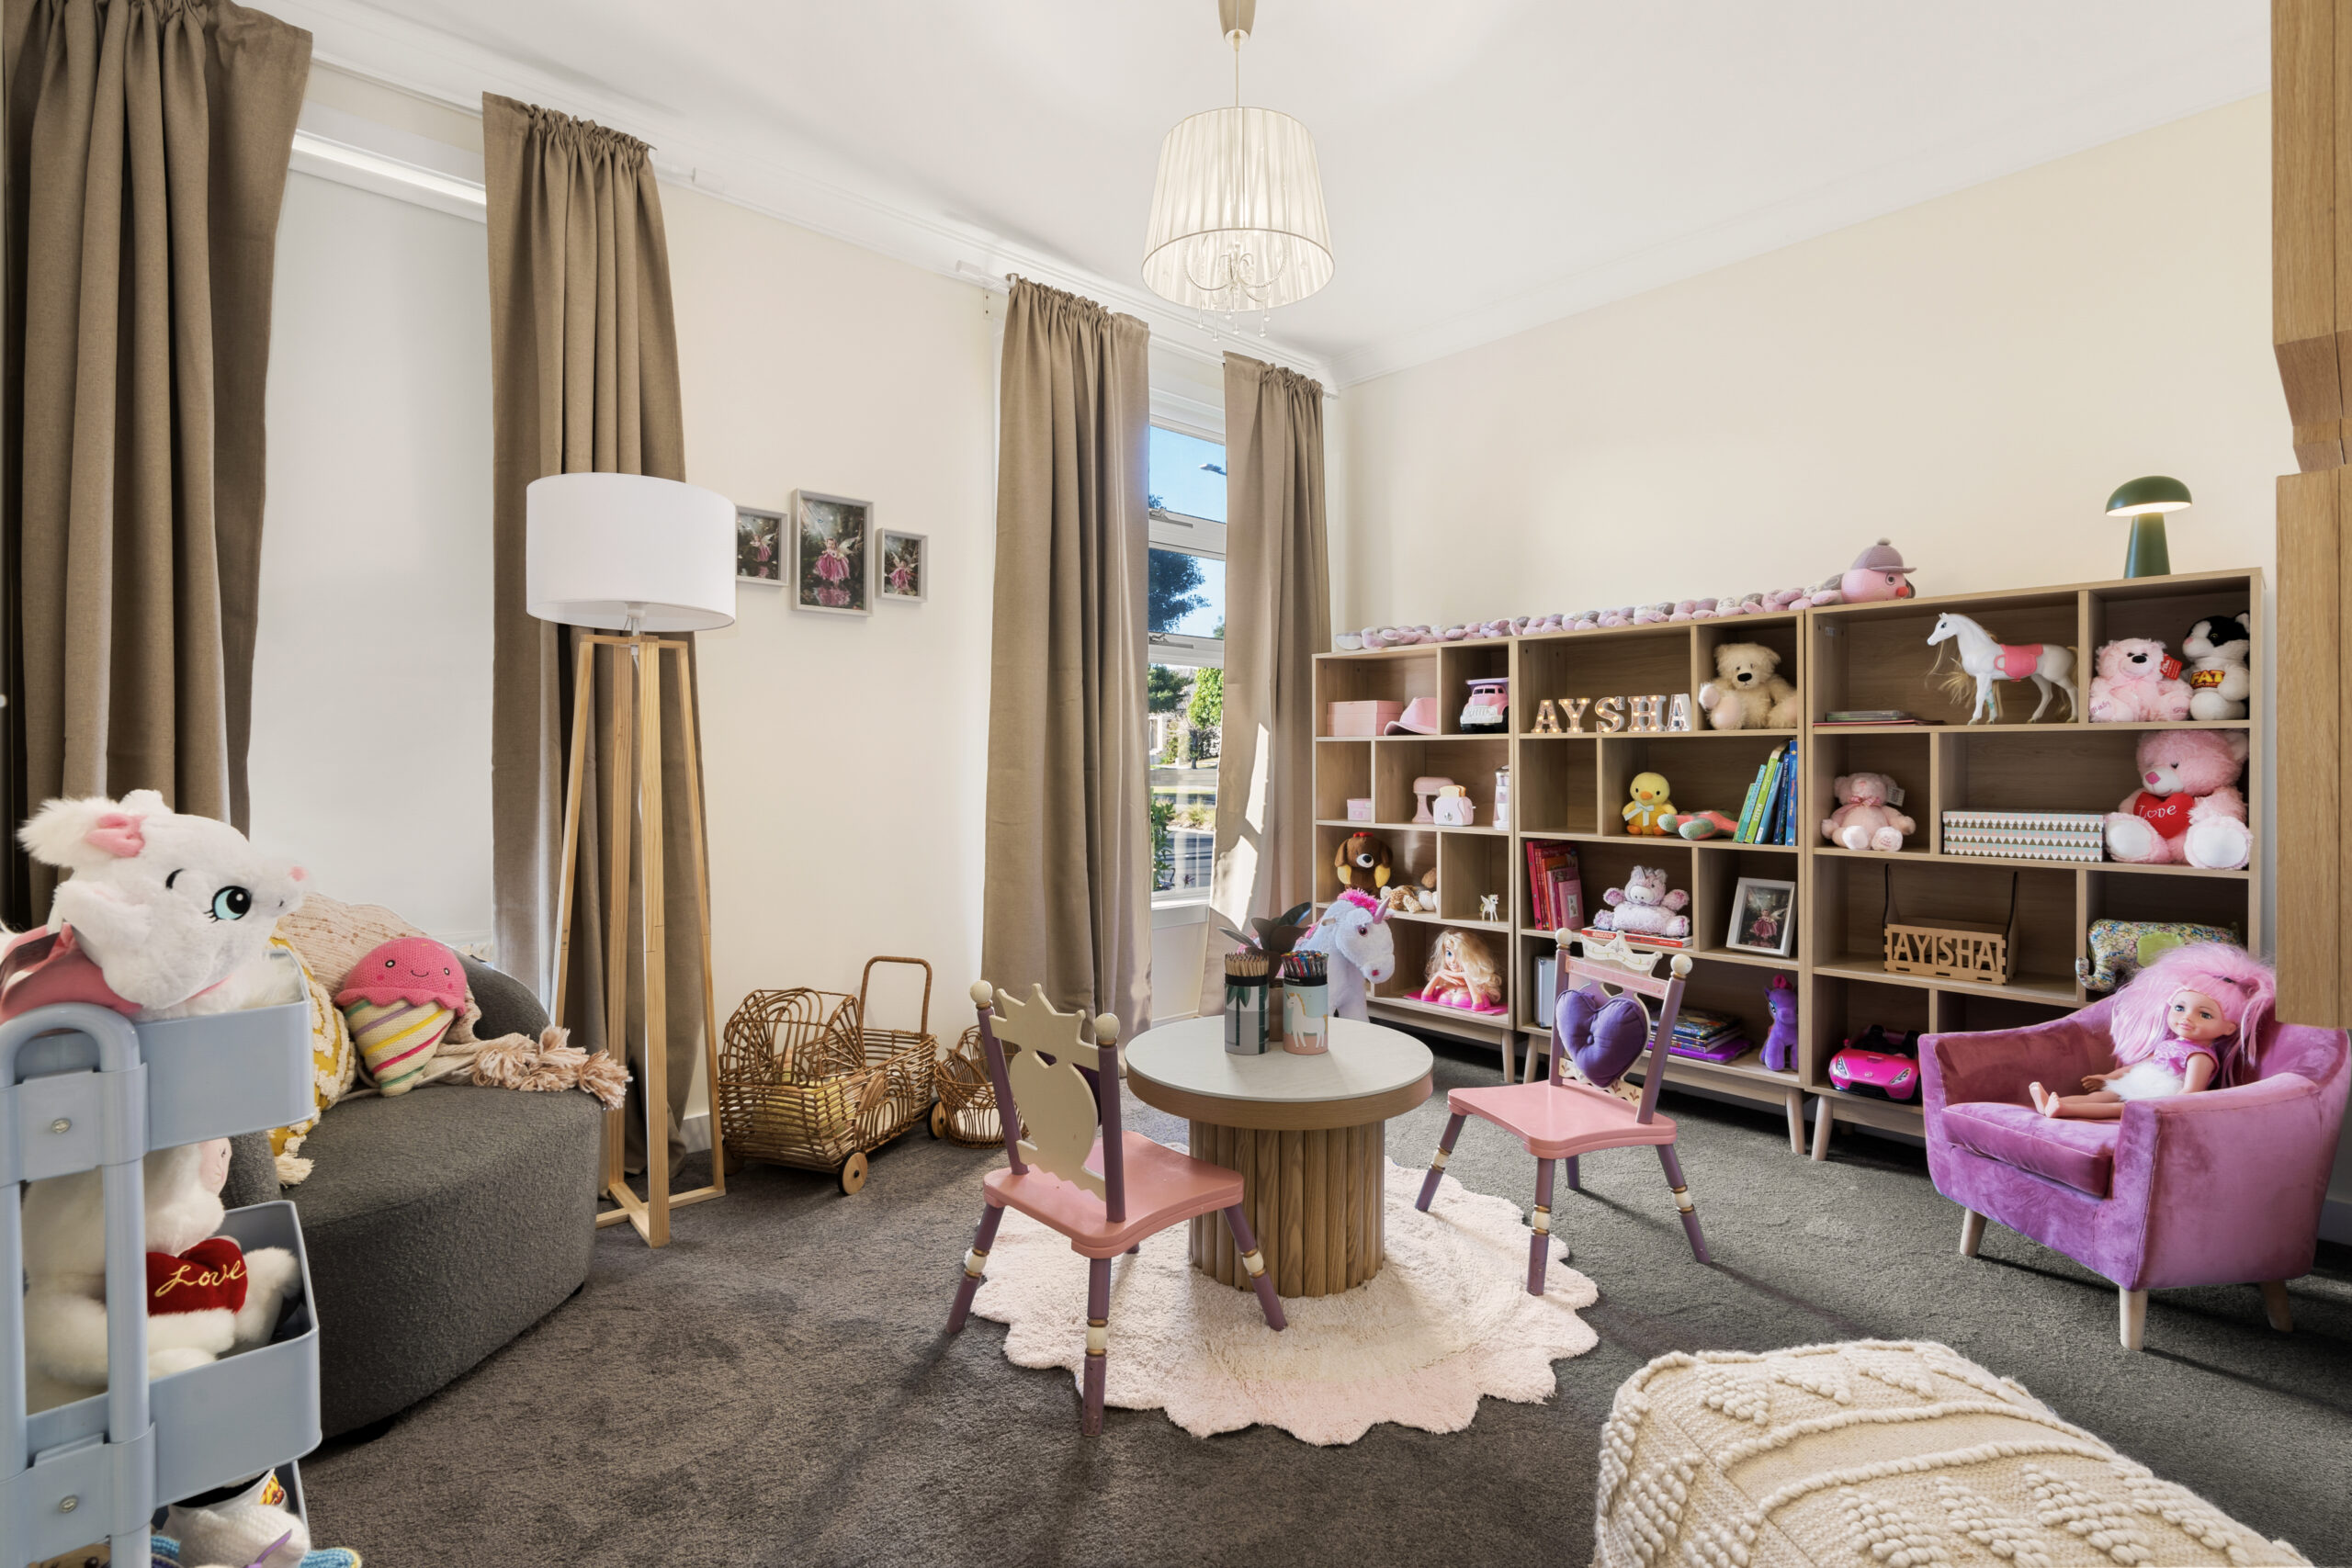
Onto the kid’s playroom …Once a spare bedroom, my focus was to create a designated space for Aysha to have her little friends over so they can all collectively, get creative.

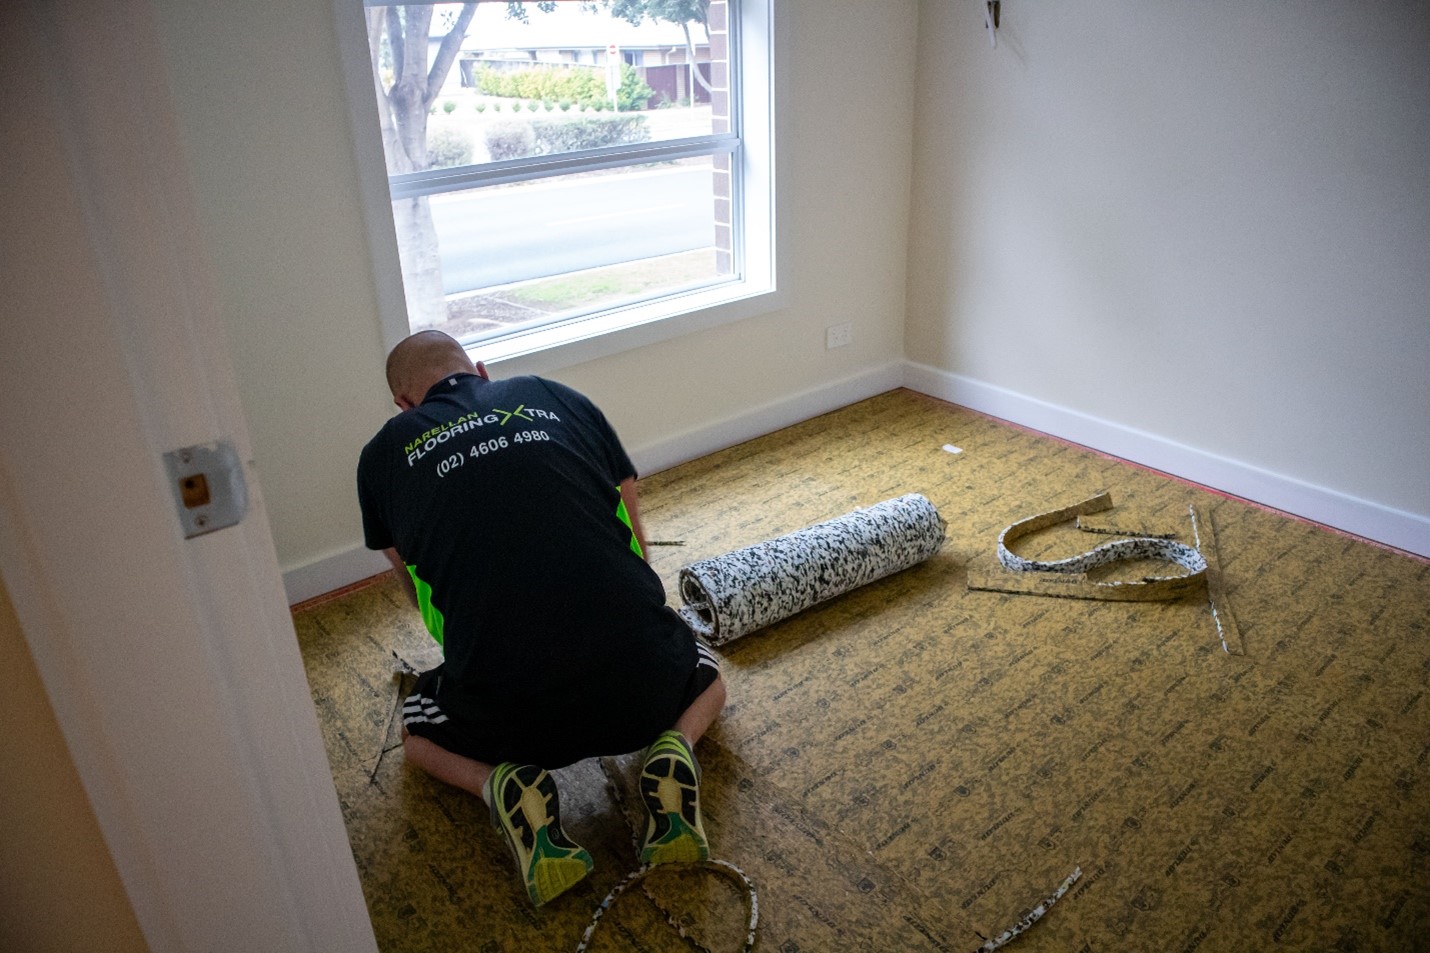
First up, the ceiling and walls were given a fresh coat of paint. As a renovator, I’m such a big advocate of paint because it has the power to totally transform rooms at minimal cost. Once the painting was complete, the heavily stained carpet was removed and replaced with a new modern carpet from Flooring Xtra, providing a fresh new base for everything else to be placed upon.
The lighting in this room was already pretty good but I did steal the old ceiling light from the sewing room & re-installed it in this room to save me having to buy one more fixture & fitting. For the most part, the rest of this room is just styling. All the bookcases and styling items are from Kmart, and all of Aysha’s existing toys were neatly placed back within. New curtains from Ikea provide an inexpensive window furnishing solution. One innovative addition to this room is the stone on top of the little kids play table. As kids love to scribble on things, I got an offcut piece of Dekton Stone from Cosentino Stone and placed that on top of the Kmart table. Anyone can now scribble and paint on that desktop to their hearts content, without it ever staining.

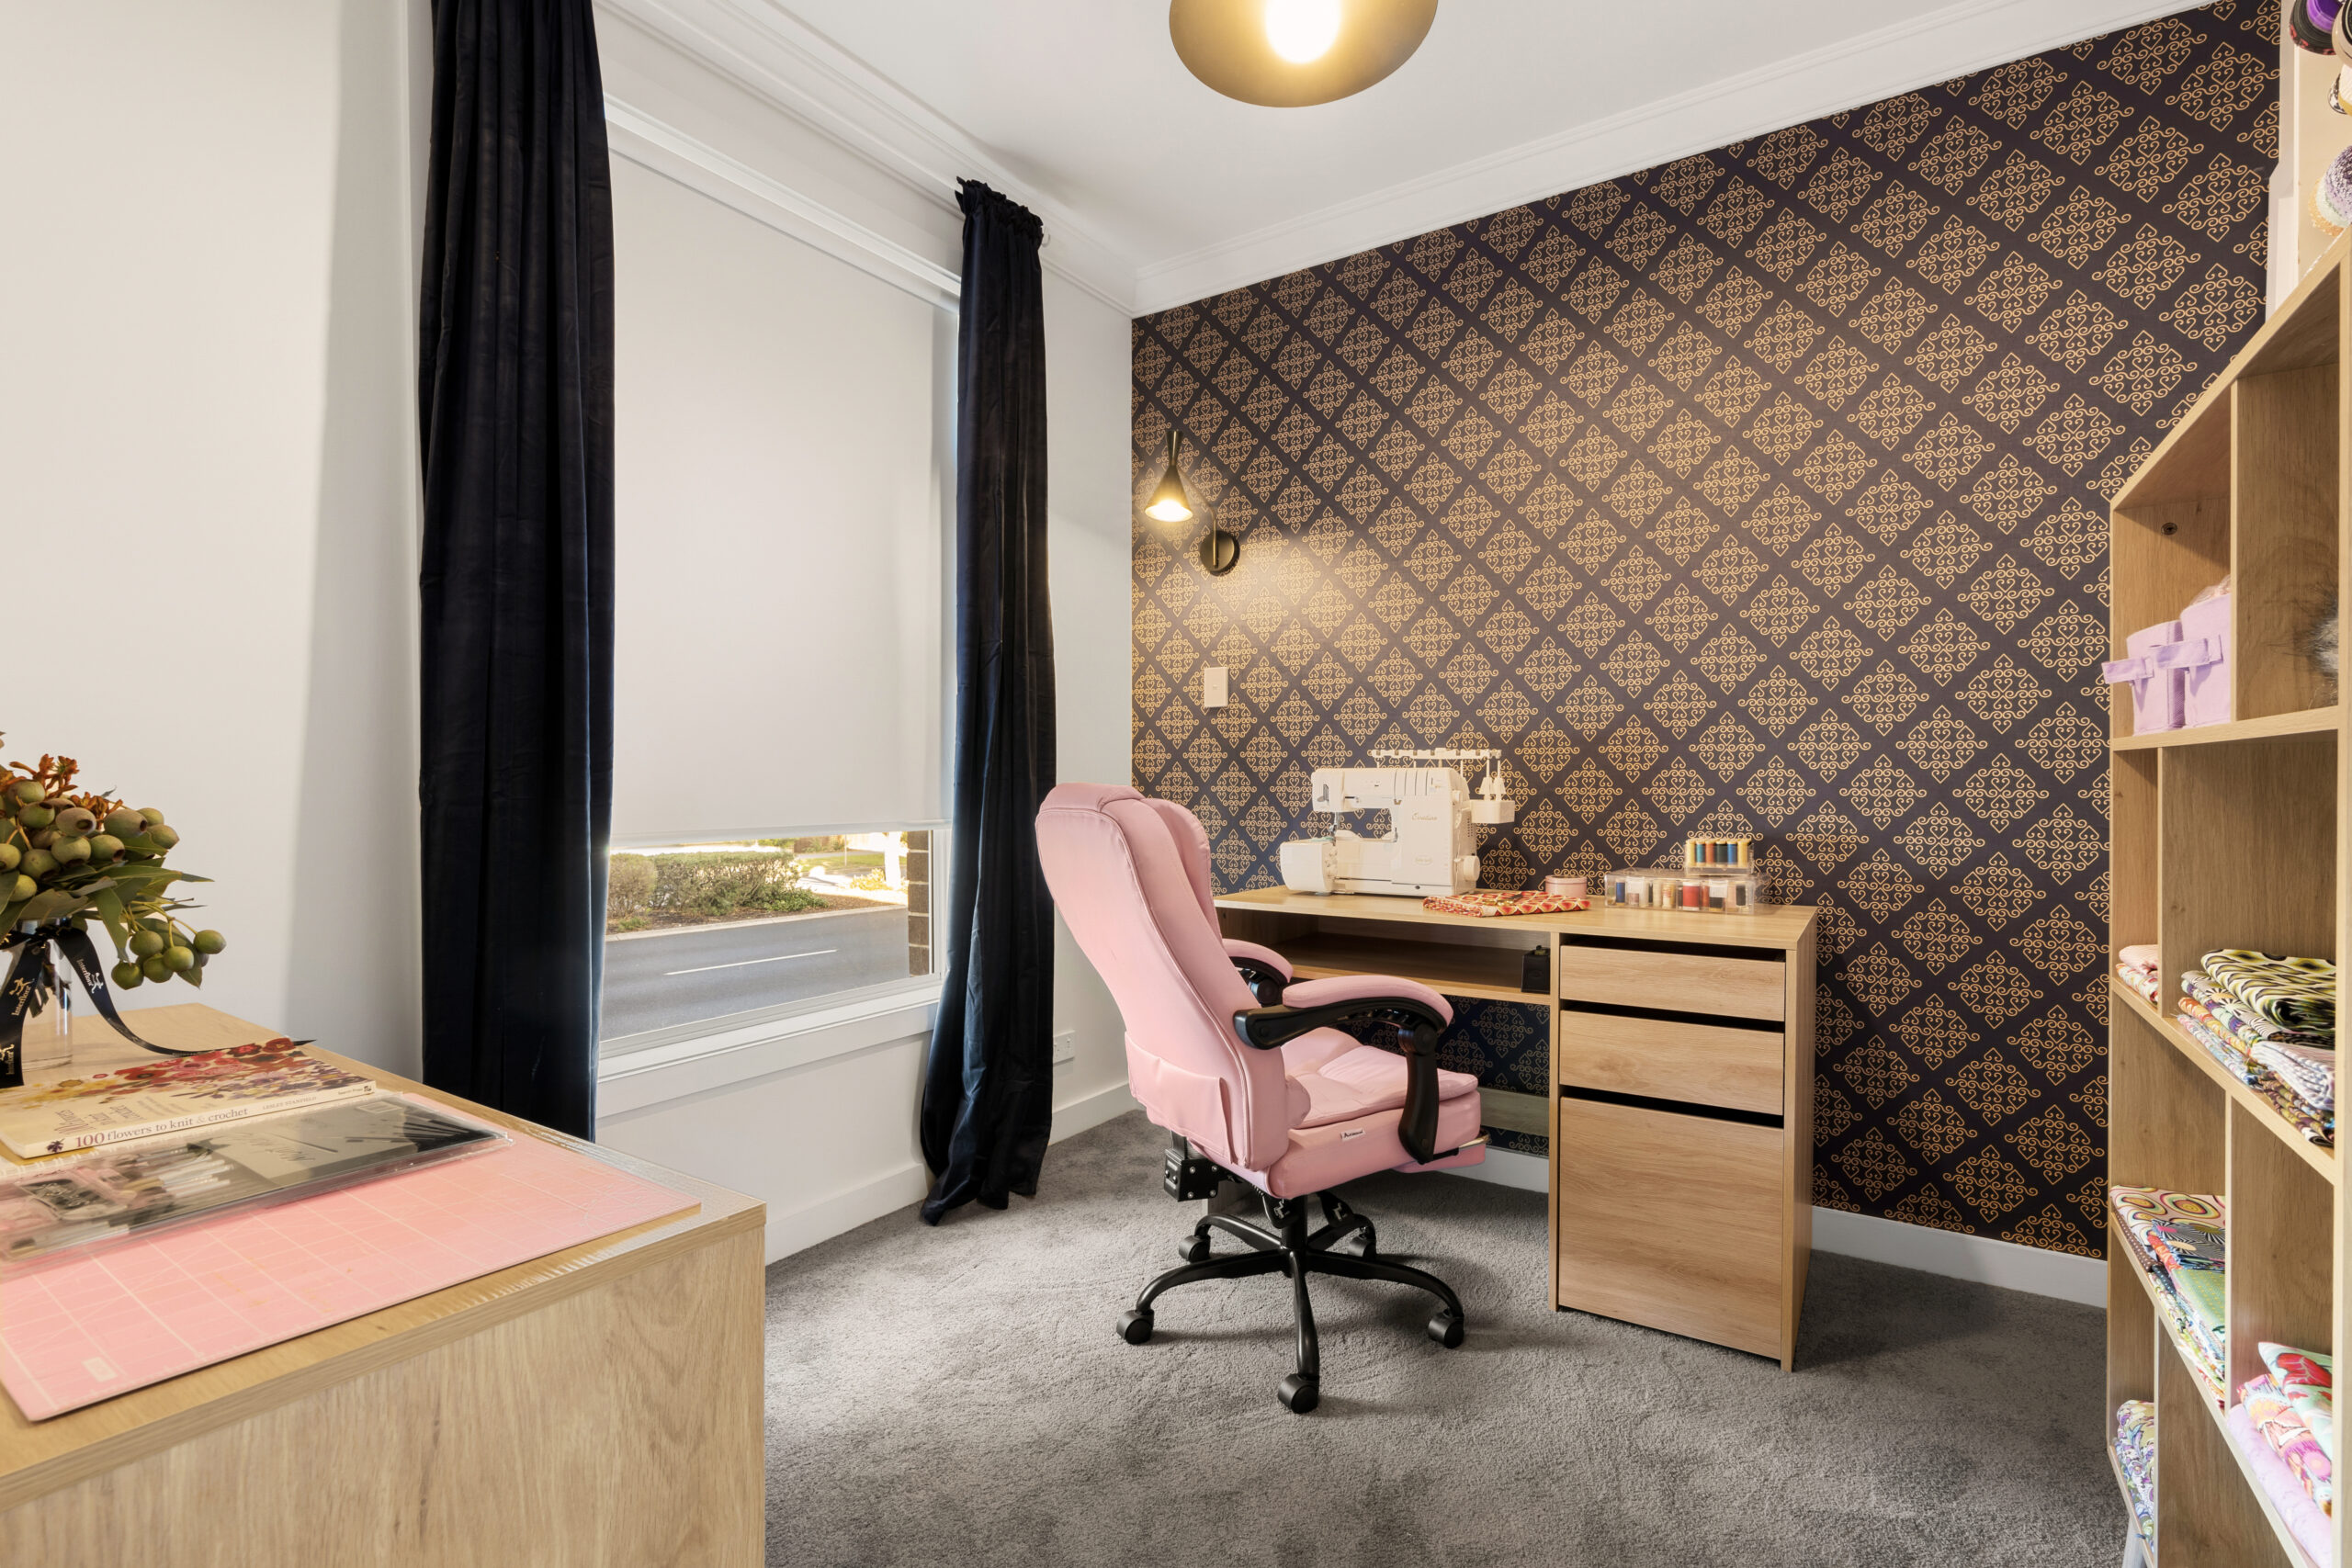
THE SEWING ROOM
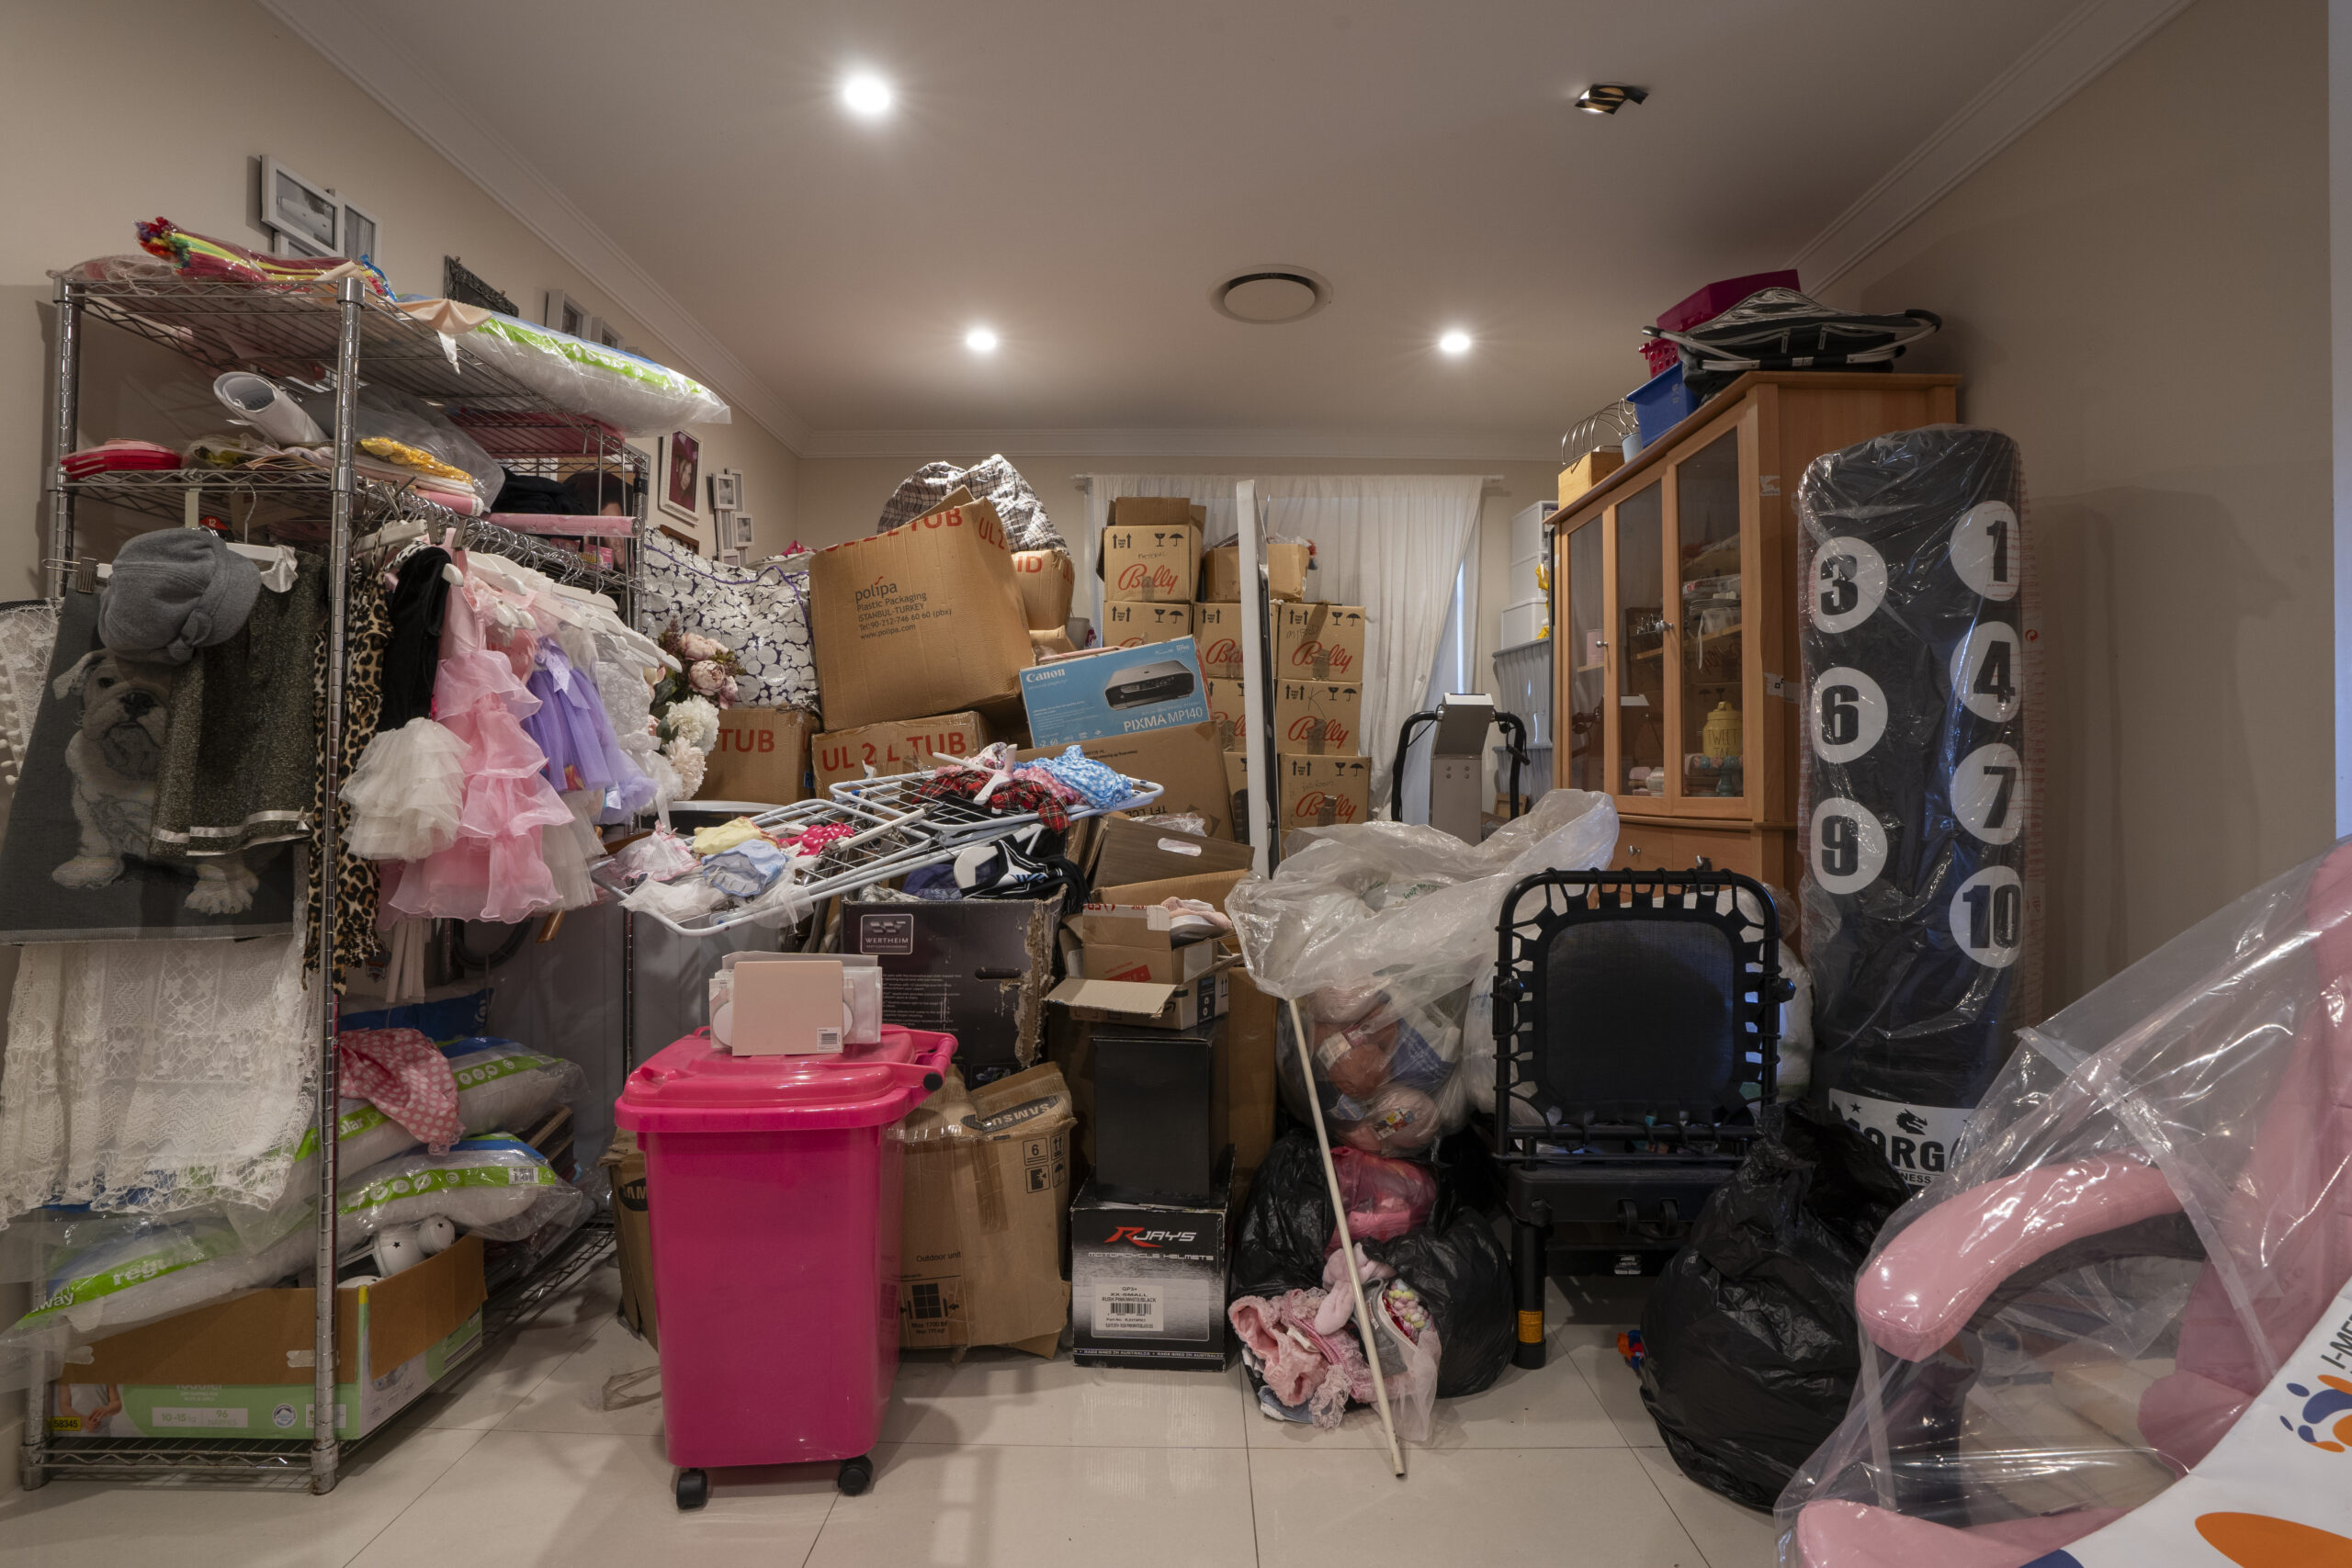
Last but not least was the smallest room in the home, also jammed tight with all sorts of weird and wonderful stuff. Like the rest of the house, this room also lacked personality and served no real purpose.

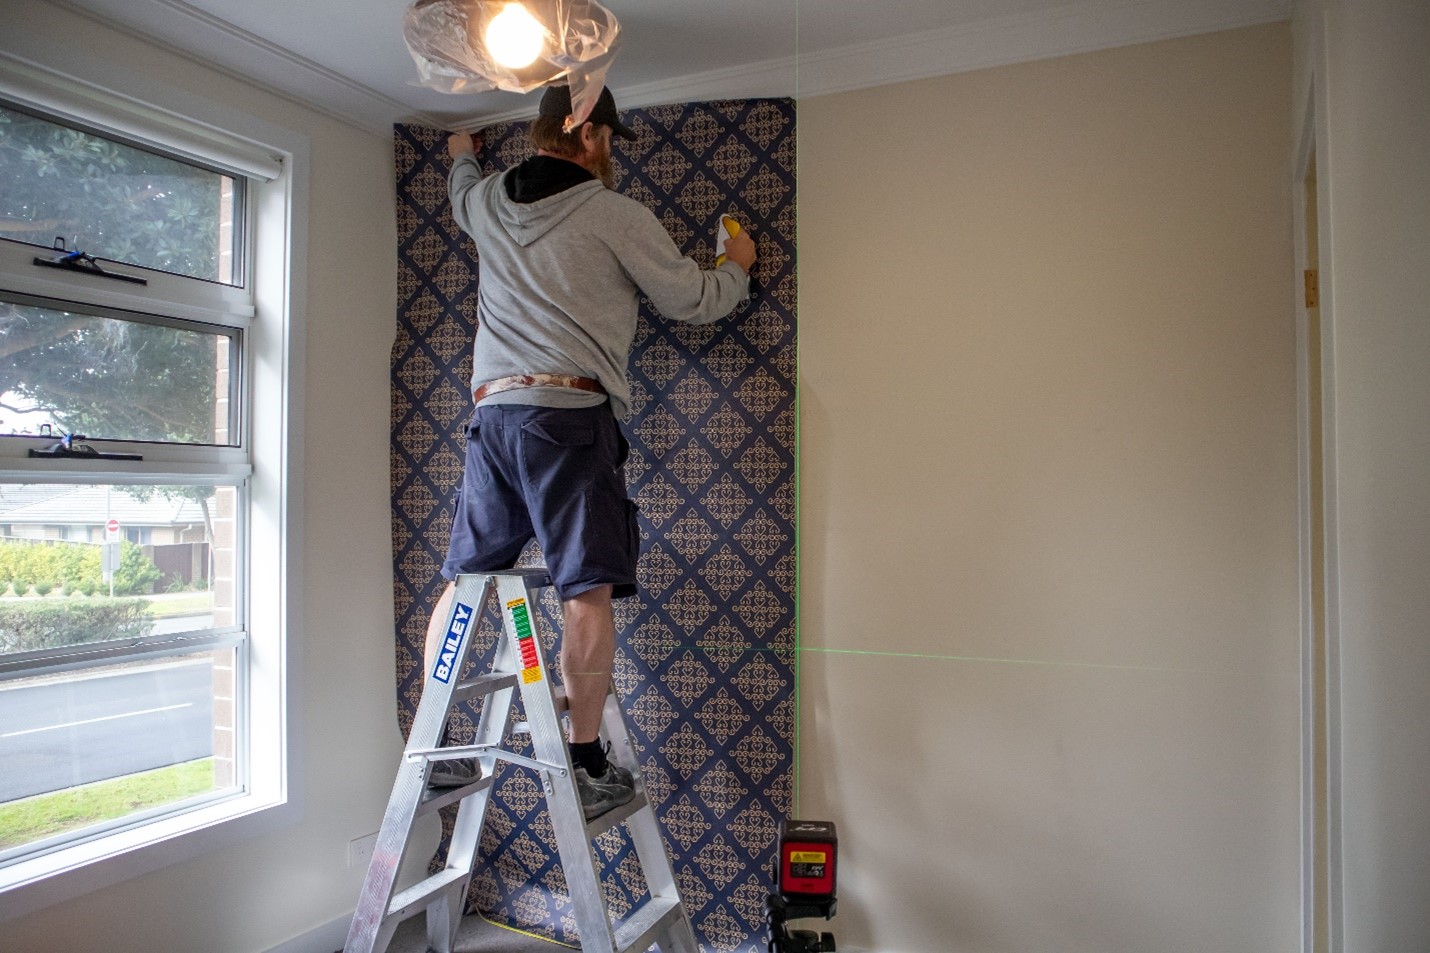
Once again, the ceiling was painted to freshen it up and due to the small size of this room, the walls painted in white to increase the sense of space. To make the room look more interesting, I bought the Luxe Walls team in to install just one wall of their Midnight Luxury Patterned Wallpaper on the wall that you first see, when you enter the room. Being self-adhesive, it’s super easy to install yourself however when you’ve only got 18 hours to transform and style 7 rooms, I’m calling in the professionals! 😊
Again, new curtains and Kmart bookcases provide off the shelf solutions for easy storage at an affordable price. The homeowner’s belongings and her pink office chair were added back in. I was secretly hoping she wouldn’t keep this item as it’s the wrong colour and style for the room but it is, what it is. A black lower lying chair would have looked far better instead but hey, some things are just meant for practicality, not looks 😊
After renovating these 7 rooms in just 2 days, I must admit my team and I were pretty knackered and keen for a good night’s sleep. What I do know is this Space Invaders project was more than a renovation; it was a reimagining of how a family interacts with their space. By assigning a clear, designated purpose to each room, we crafted a home where Kylie, Paul & their daughter Aysha can thrive together and individually. Each room now tells a story of transformation—from cluttered chaos to functional beauty—demonstrating the power of thoughtful design to create a space that truly feels like your own. This family are now renewed and eager to embrace life in every way.
All up, the full retail cost of renovating the 7 rooms in this home including all the trade labour, materials, fixtures, fittings, new furniture, artwork & miscellaneous costs such as rubbish removal came in at $43,883.10 (ex GST). Of this, $12,236 went to all trade labour invoices at normal market rates & $31,647 for the purchase of all construction materials, fixtures & fittings and property styling items.
Broken down a little further, all the new lighting & electrical labour came in at $ 4,868, all carpentry labour & the purchase of carpentry materials such as the wall cladding & general building materials $8,054, floor tiles & tiling labour $5,670, wallpaper supply & installation $913, new carpet including installation $1,800, paint & painting labour was $6,281, new furniture, artworks & all property styling items $ 14,983 & rubbish removal costs $950.
As we close off on this renovation, what we do leave behind is a home transformed and a family empowered to enjoy their newly harmonised space. This reno stands as a testament to the idea that with creativity, expertise, and a bit of hard work, any space can be turned into a sanctuary that meets the needs of its occupants & invites them to make memories together. Join us next week as we continue to transform houses into homes, one space at a time.
As always, if you have any questions on this renovation, be sure to ask them in the comments box below & my team or I will answer them promptly for you.
Much Love,
Cherie x


Awesome! You and your team have done an excellent job again!
Thanks Dee! Cherie Crew x
Hi. I am wondering what happened to all the junk? Thanks
Hi Donna, the homeowners sorted through their possessions and donated to charity what they didn’t want or need the rest went back into their home. Rubbish was recycled wherever possible. Cherie Crew x
What an amazing transformation. I cannot imagine the mental torture the owners went through having to navigate their home as it was. Incredible and life changing. Well done team!!! Very inspiring!
Hi Cherie,
Yet another amazing transformation from you and the team. I love seeing how you completely alter rooms from drab to fabulous…and I come away with ideas to use on our slow but steady reno of our sons house that we rent. Could you please advise the exact colour paint, and brand, you use for freshening up the ceilings, I know it’s a white, but there’s soooo many to choose from and I’m not very good at colour coordination…hence why I follow you lol.
Thanking You, Moira
Hi Moria, try Taubmans Brilliant Flat White. Cherie Crew x
I treasure the data on your web site. Thanks a ton!
Absolutely LOVE what you did with the bedroom. A beautiful luxury feel. Just gorgeous.
Thanks Meggie! Cherie Crew x