


Cherie’s Toongabbie facade reno
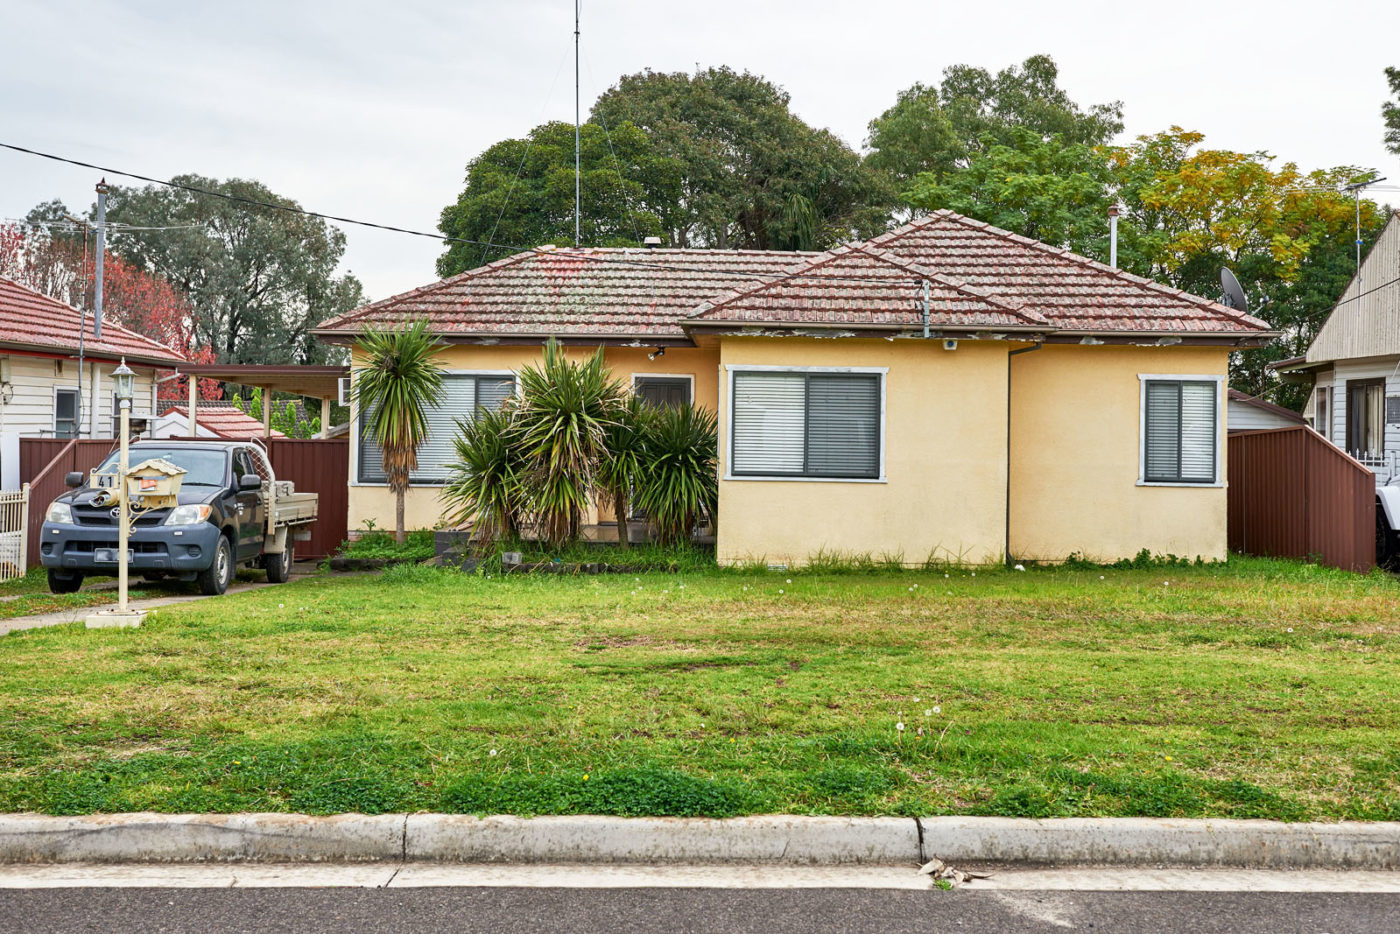
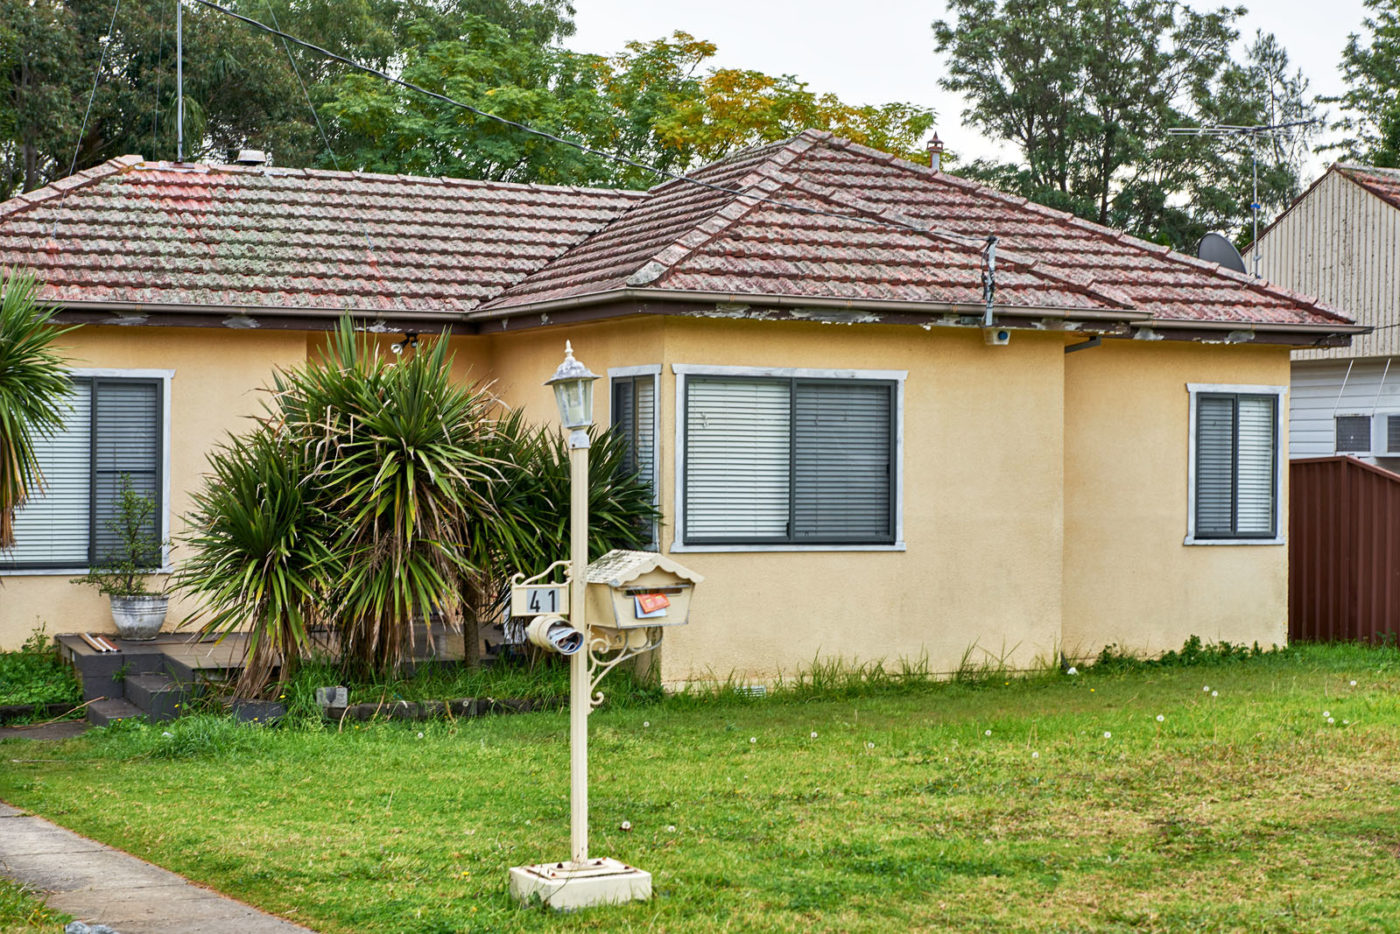
The owners of this humble fibro house in the outer western suburb of Toongabbie were keen to capitalise on the Sydney boom by selling their existing home and upgrading to a new location. The couple, who had owned the property for 15 years, had already partially renovated the interior, but the bland façade was still on their hit list of obligatory upgrades before putting their home on the market.
Good street appeal can be a deal breaker when it comes to attracting buyers, but even with its original exterior, the 3-bedroom house was valued at an impressive $800,000. So armed with a $10,000 budget, I was keen to put my masterplan into action and see what a few pivotal changes could do to take that value even higher – in just three days.
Here’s how I went about it.

Industrial clean
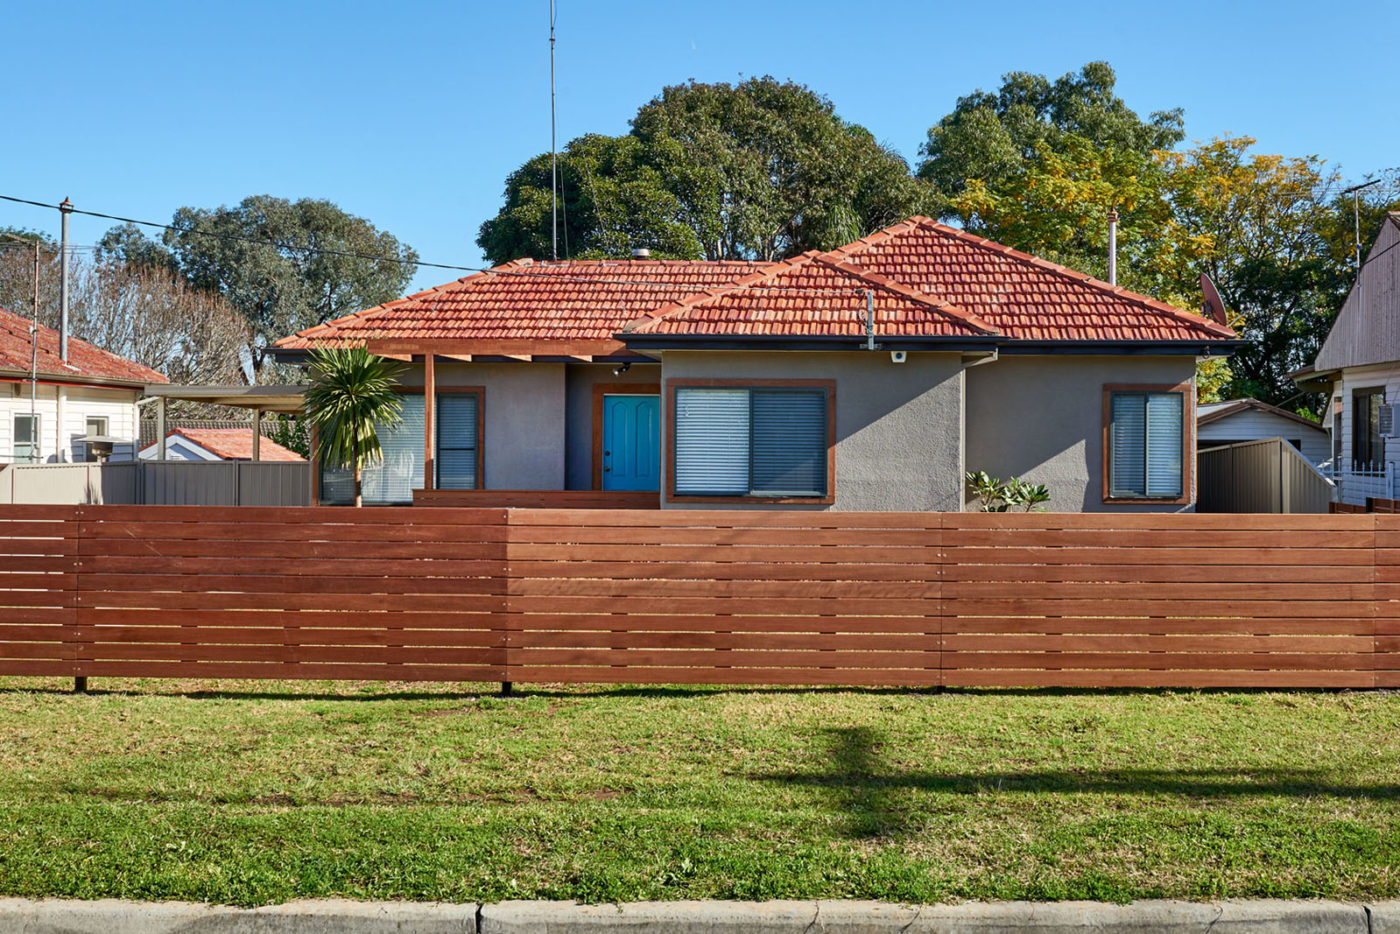
On a low budget, the best starting point is always an industrial clean. It washes away decades of dirt and grime, leaving a clean slate and, if you’re lucky, will deliver an amazing transformation. We used a high pressure hose (gerni) on the tiled terracotta roof and it instantly reverted to its original shiny burnt orange. The gerni stripped the concrete driveway of all the embedded dirt and stains, and cleaned up the exterior fences, ready for painting.
Pop of colour
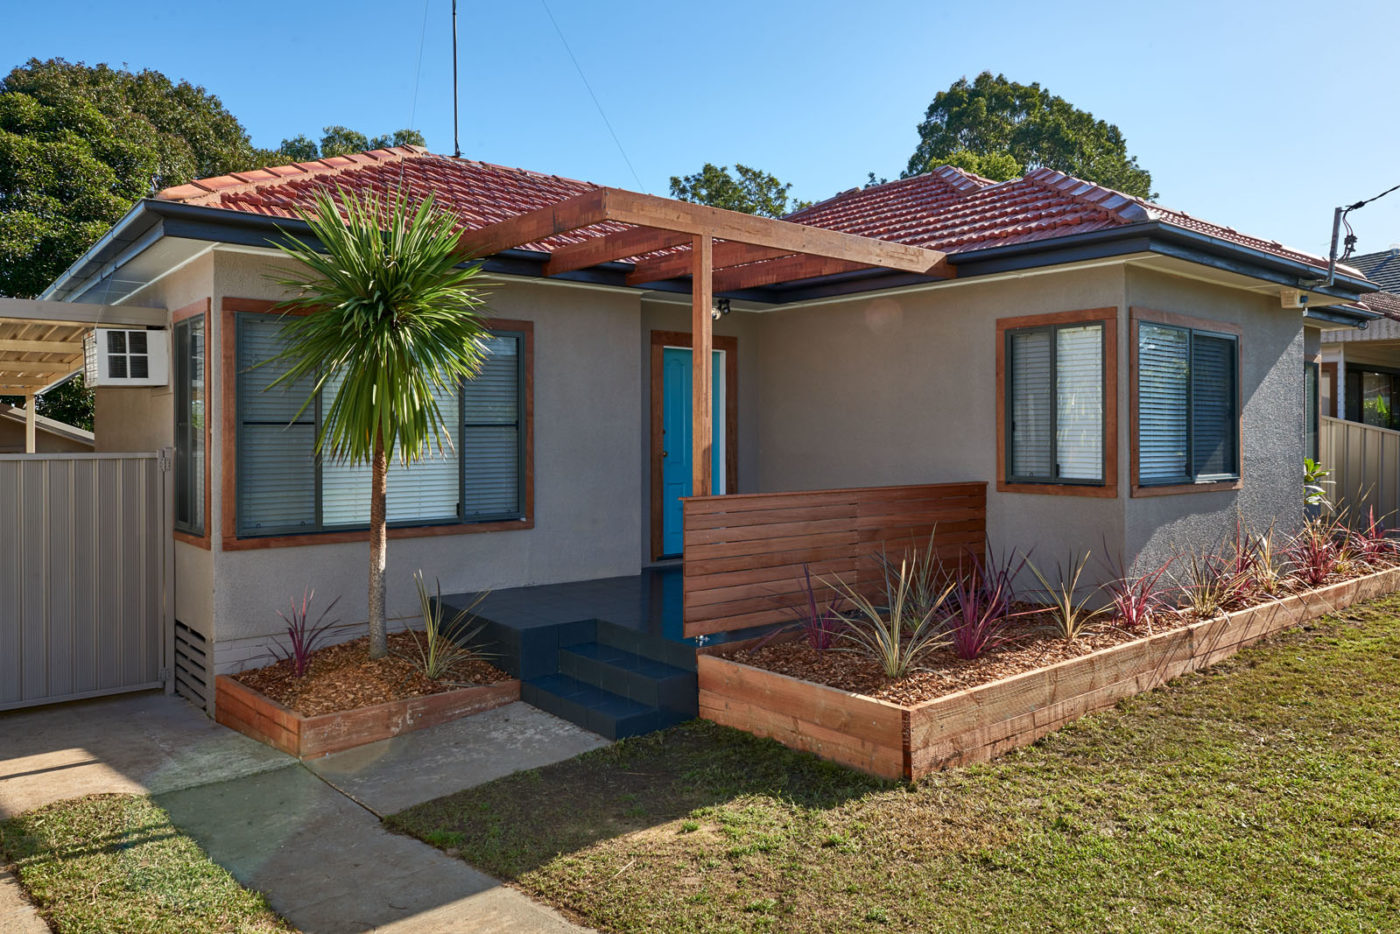
The fact the original fibro had been coated with vermiculite “popcorn” render at some stage actually proved an advantage, as it simply needed a coat of paint to look like a rendered brick house. The only drawback was that I had to find a colour that would work with the glazed terracotta tiled roof. I’d also definitely need a spray gun for that popcorn as it soaks up the paint. Taubmans “Streamwood” was the perfect match for the roof. I used it for the house exterior and all the boundary fences.
Make an entrance
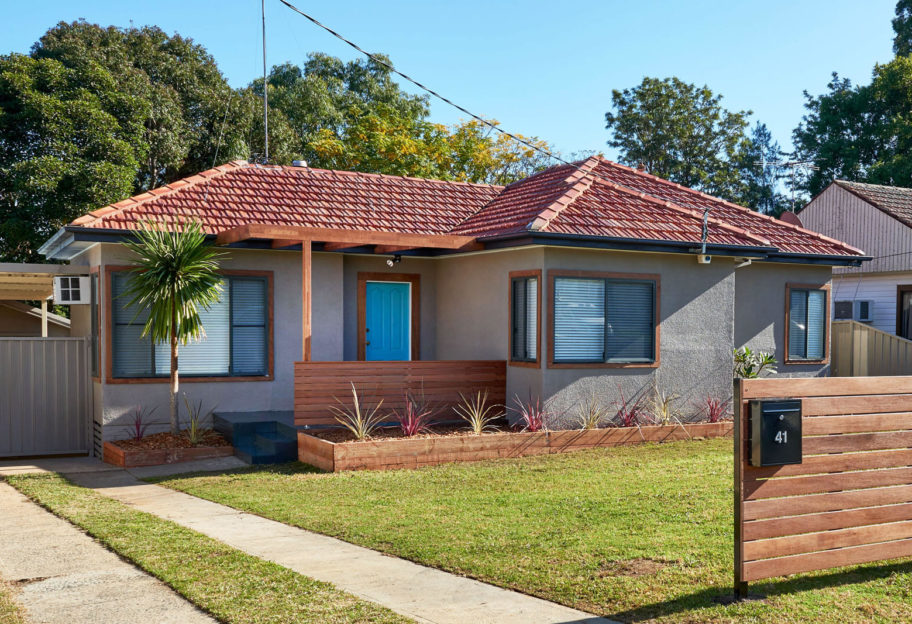
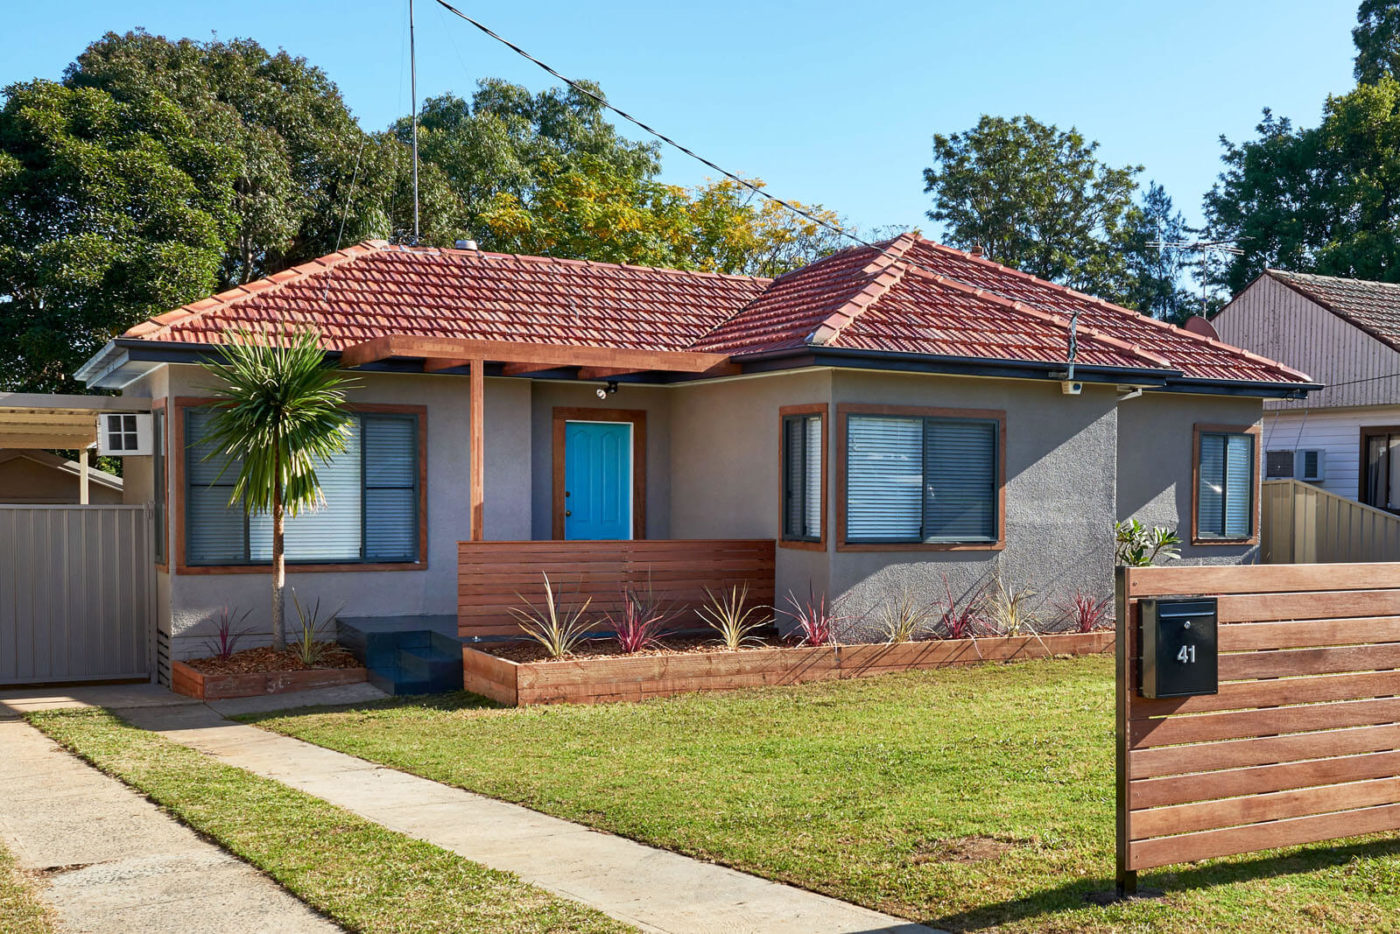
While I’m always loathe to dig up existing greenery, there was a cluster of plants blocking the entry to the house. In order to make an entrance these had to go. I used paving paint for the porch, tinted as closely as possible to Colorbond “Monument”, then the warm tones of merbau to build a front pergola and for timber architraves around the windows and front door.
Putting up a front
The timber tones carried through to a much-needed front fence, which would not only give much-needed privacy and security, but hopefully also be a deterrent to any future tenants tempted to park their cars on the front lawn. Ready-made merbau fence panels made it a relatively easy and slick-looking fix. A new letterbox replaced the eyesore that previously took centre stage.
Firmly planted
Lastly, some simple landscaping was all that was required. Merbau garden beds planted with hardy plants and finished with cypress wood chips blended neatly with the new pergola – and I was even able to retain one of the original plants.
Bottom line
With much of the work, such as the painting done DIY, we were able to keep costs down, but even so, the labour bill still devoured nearly half of the budget – but proved a big time saver. In three days, I not only pulled off the targeted transformation, but raised the value of the property to an astounding $860,000 and delivered the owners a profit of $50,000. It was another terrific testament to the power of street appeal.
FINANCIALS
- Property Value (Before Renovation): $800,000.00
- Renovation Spend: $10,360.00
- Property Value (After Renovation) $860,000.00
- Profit: $49,640.00
TAUBMANS PAINT USED
EXTERIOR WALLS:
Taubmans Endure – “Streamwood” (Low Sheen)
EXTERIOR TRIMS:
Taubmans Endure Water Based – “Soft Velvet” (Low Sheen)
PAVING PAINT:
White Knight Ultra Pave – “Tinted as close as possible to Colorbond Monument”


Great weblog here! Additionally your website loads up fast! What web host are you the use of? Can I get your associate link to your host? I wish my web site loaded up as quickly as yours lol