Before & After: Stunning Home Transformations to Inspire You
Aussies love a good home reno – it’s practically a national sport, right up there with backyard cricket and arguing over the best way to cook a snag. But a makeover isn’t just about making your place look flash; it’s about turning it into a space that actually works for you (and doesn’t make you cringe every time you walk in the door). And let’s be honest, few things are as satisfying as a jaw-dropping “before and after” transformation. So, if you’re dreaming of a fresh new look without selling your soul to the bank, these budget-friendly renos will have you itching to pick up a paintbrush!
1. A Drab Living Room Becomes a Cosy Retreat
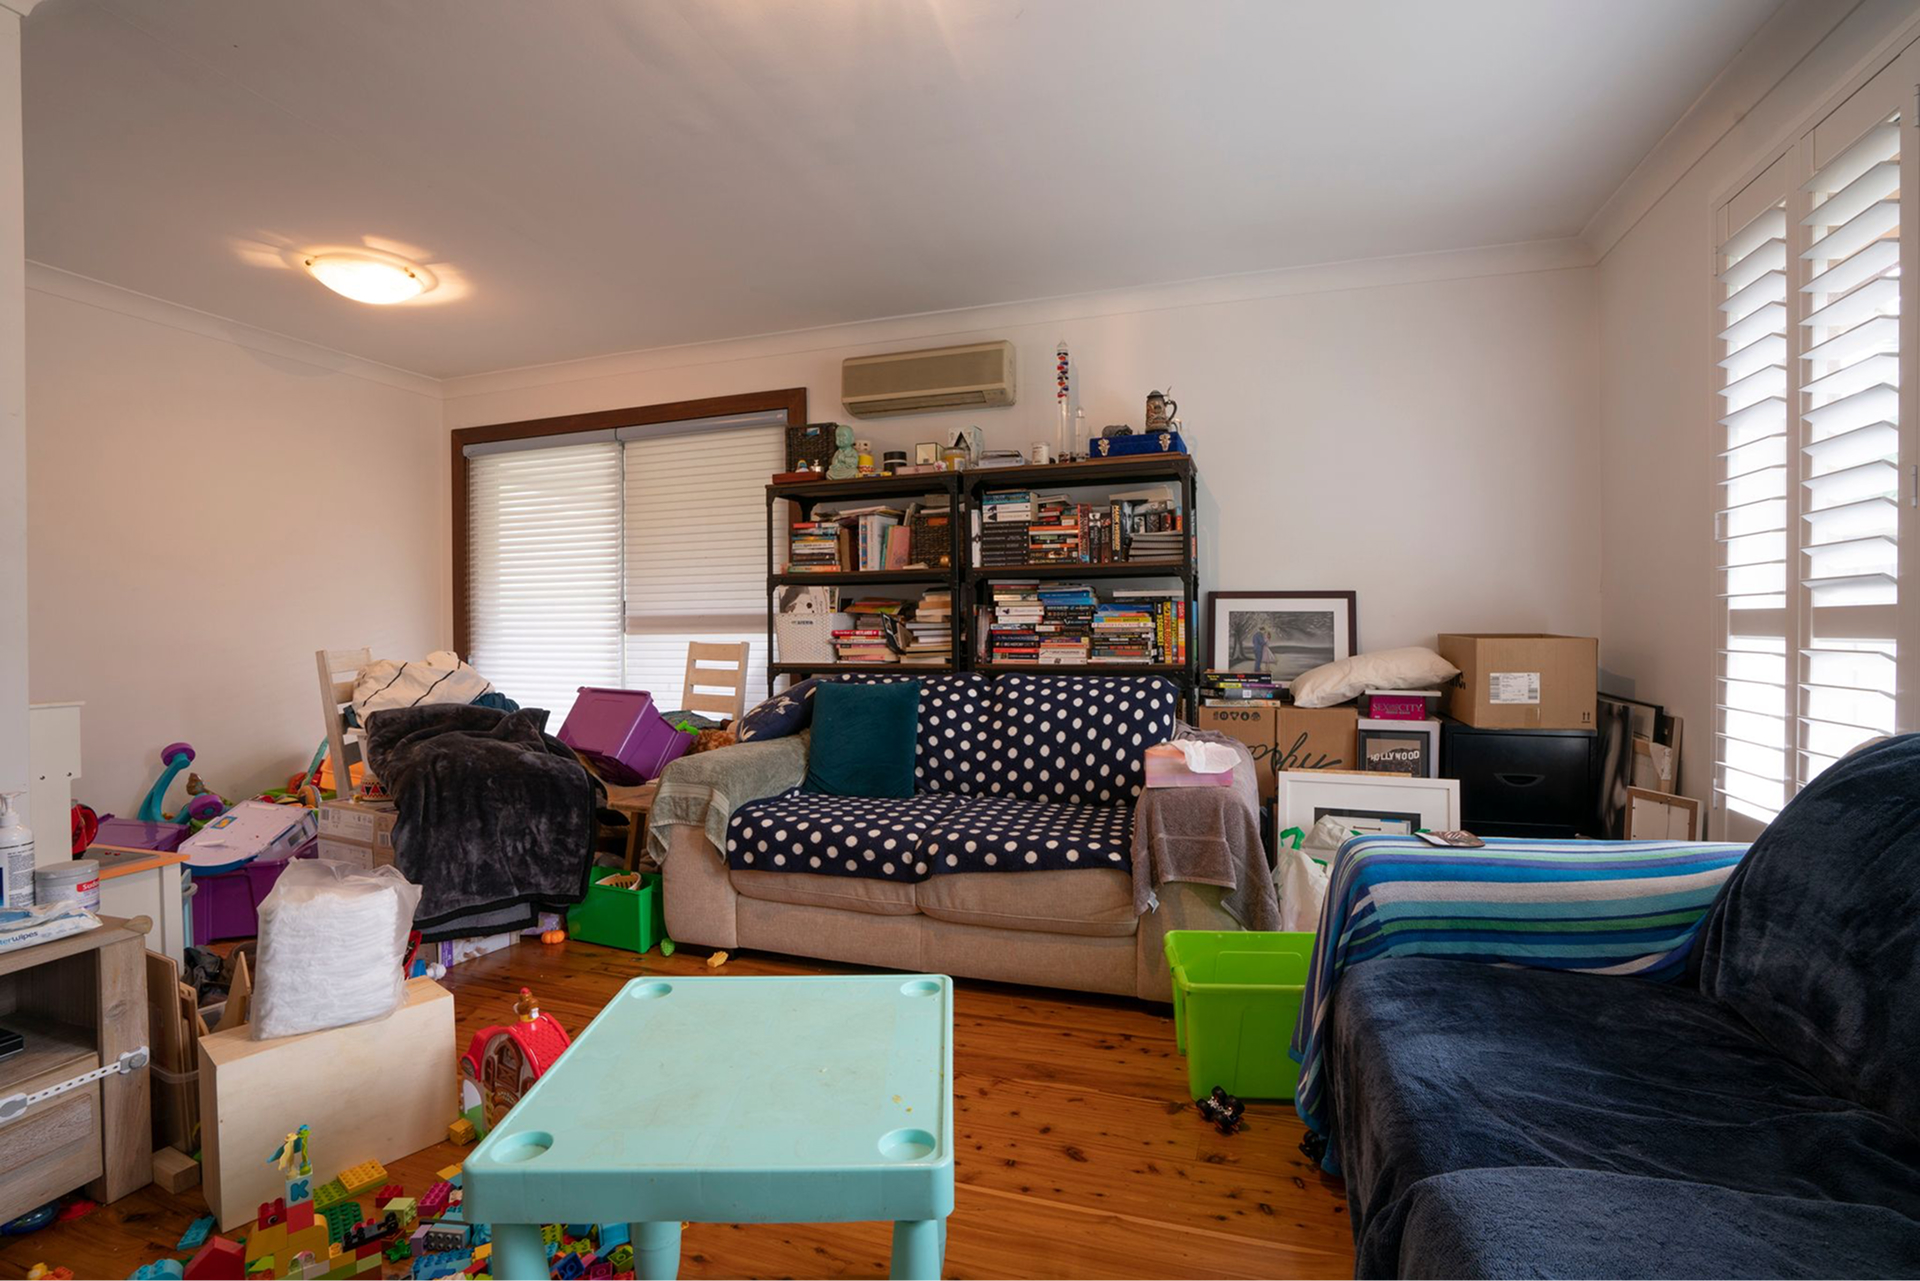
Living Room – Before Renovation
Before: Crikey, could this living room be any duller? With its snooze-worthy colour scheme, a random jumble of mismatched furniture & more clutter than a Sunday market, it’s hardly the kind of place you’d want to kick back in – let alone show off to your mates. Chuck a dinner party? Yeah, nah. But underneath all that drabness, there was a glimmer of hope – just begging for a bit of a cosmetic spruce-up!

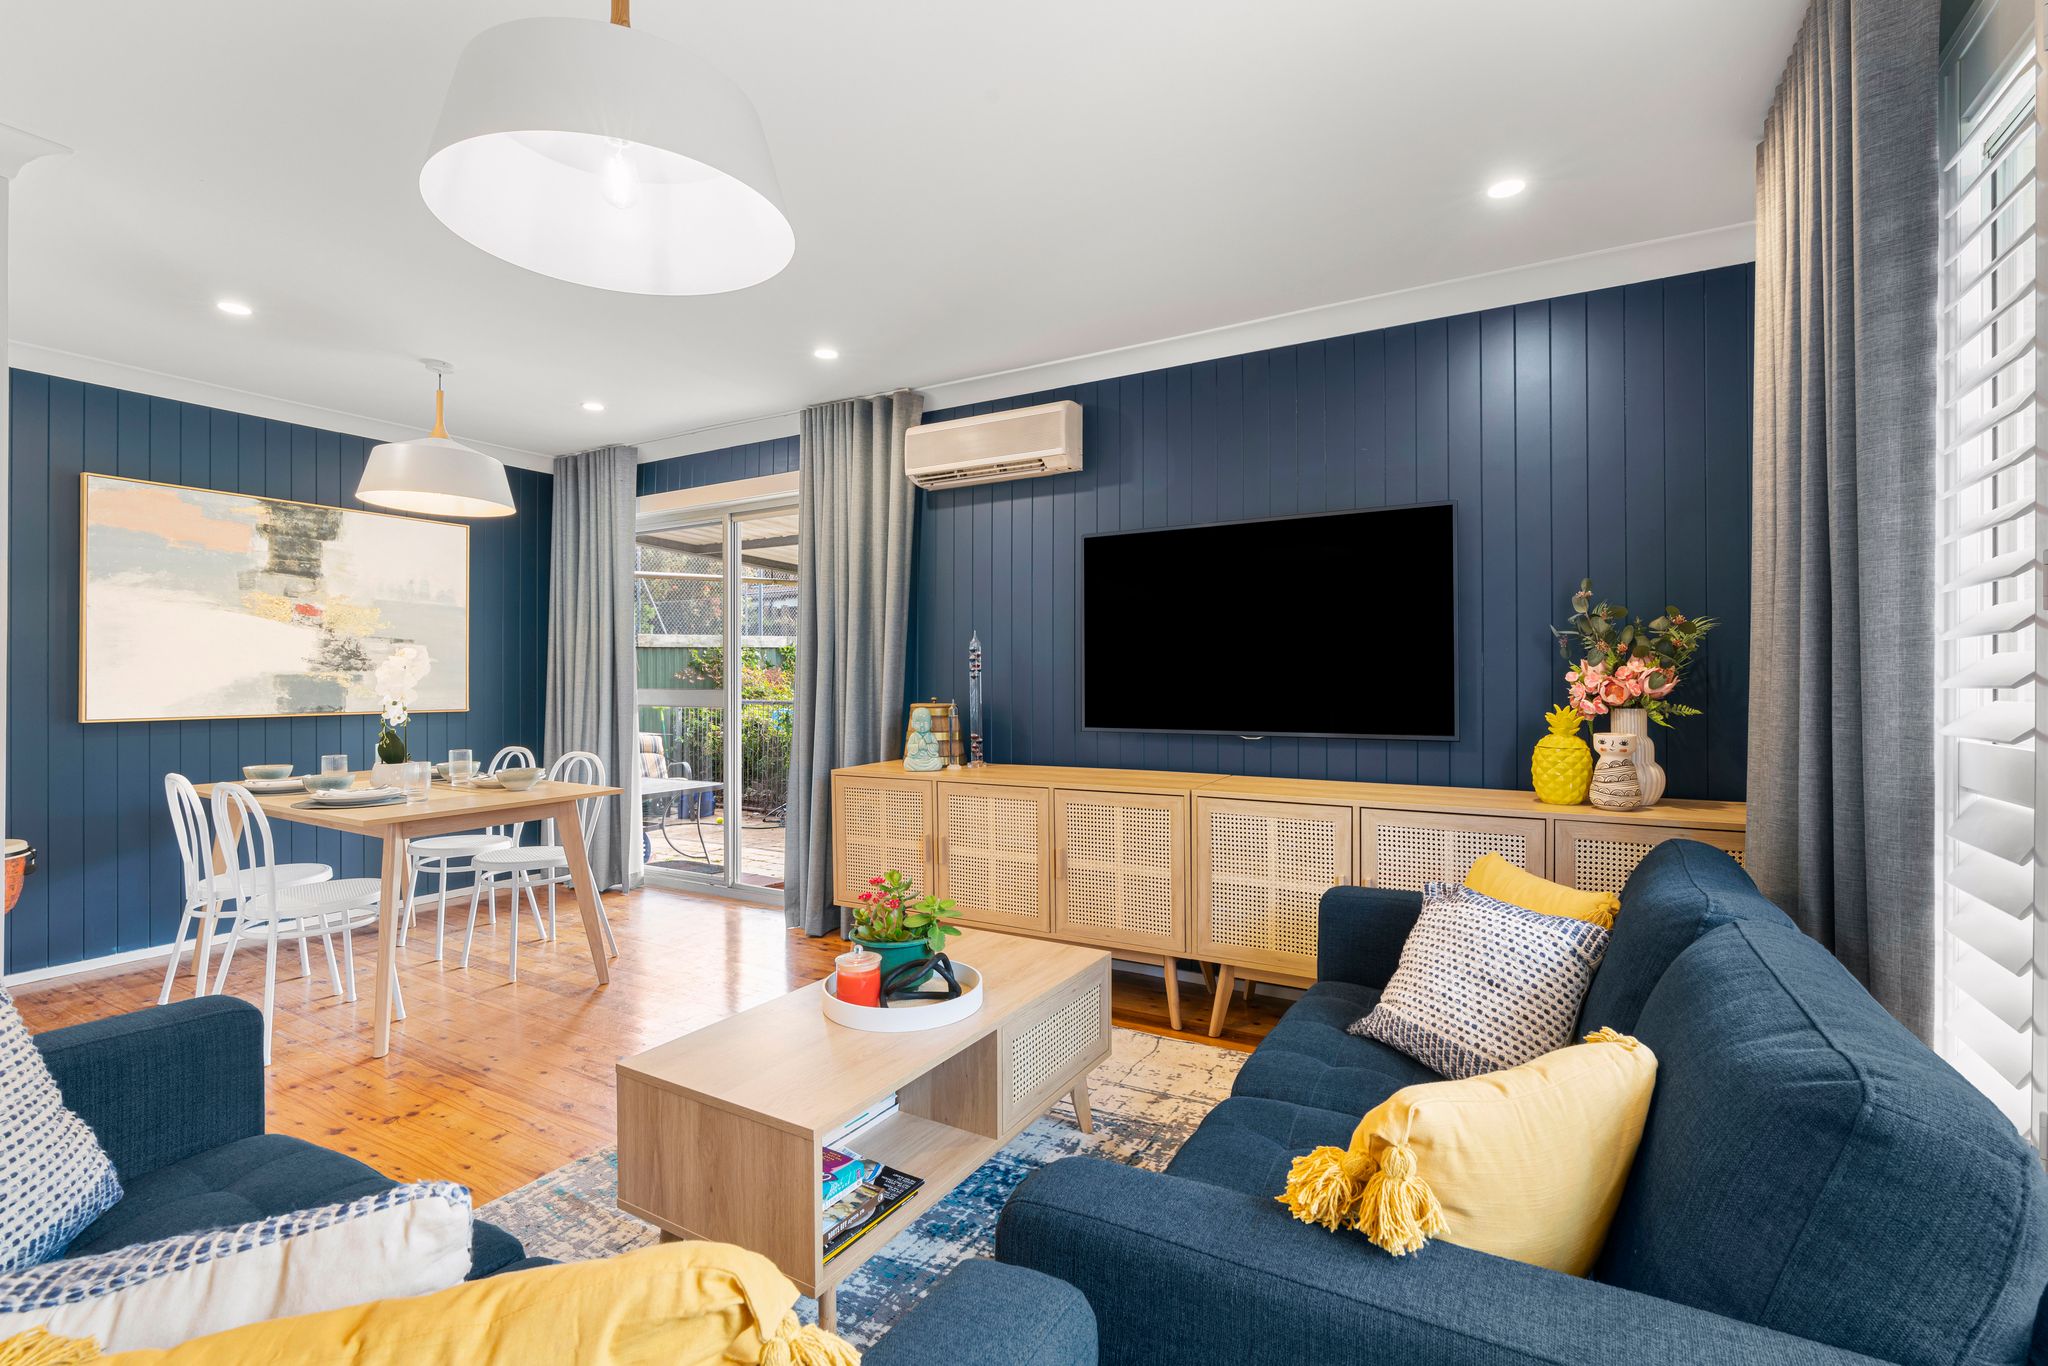
From bland to the bold & the beautiful.
Slide the arrow left to right to see the before & after transition.
After: Easycraft’s VJ100 wall cladding was a real life saver in this living room, adding much needed wall texture, while a few licks of Taubmans Elegant Evening paint injected bold personality into the space. Affordable furniture from Kmart and Fantastic Furniture does a mighty fine job at creating a clear delineation between the living & dining area. Plush sofas, layered textiles & statement lighting create a cosy retreat, perfect for family gatherings.
2. Apricot Attack: An ’80s Kitchen Time Capsule
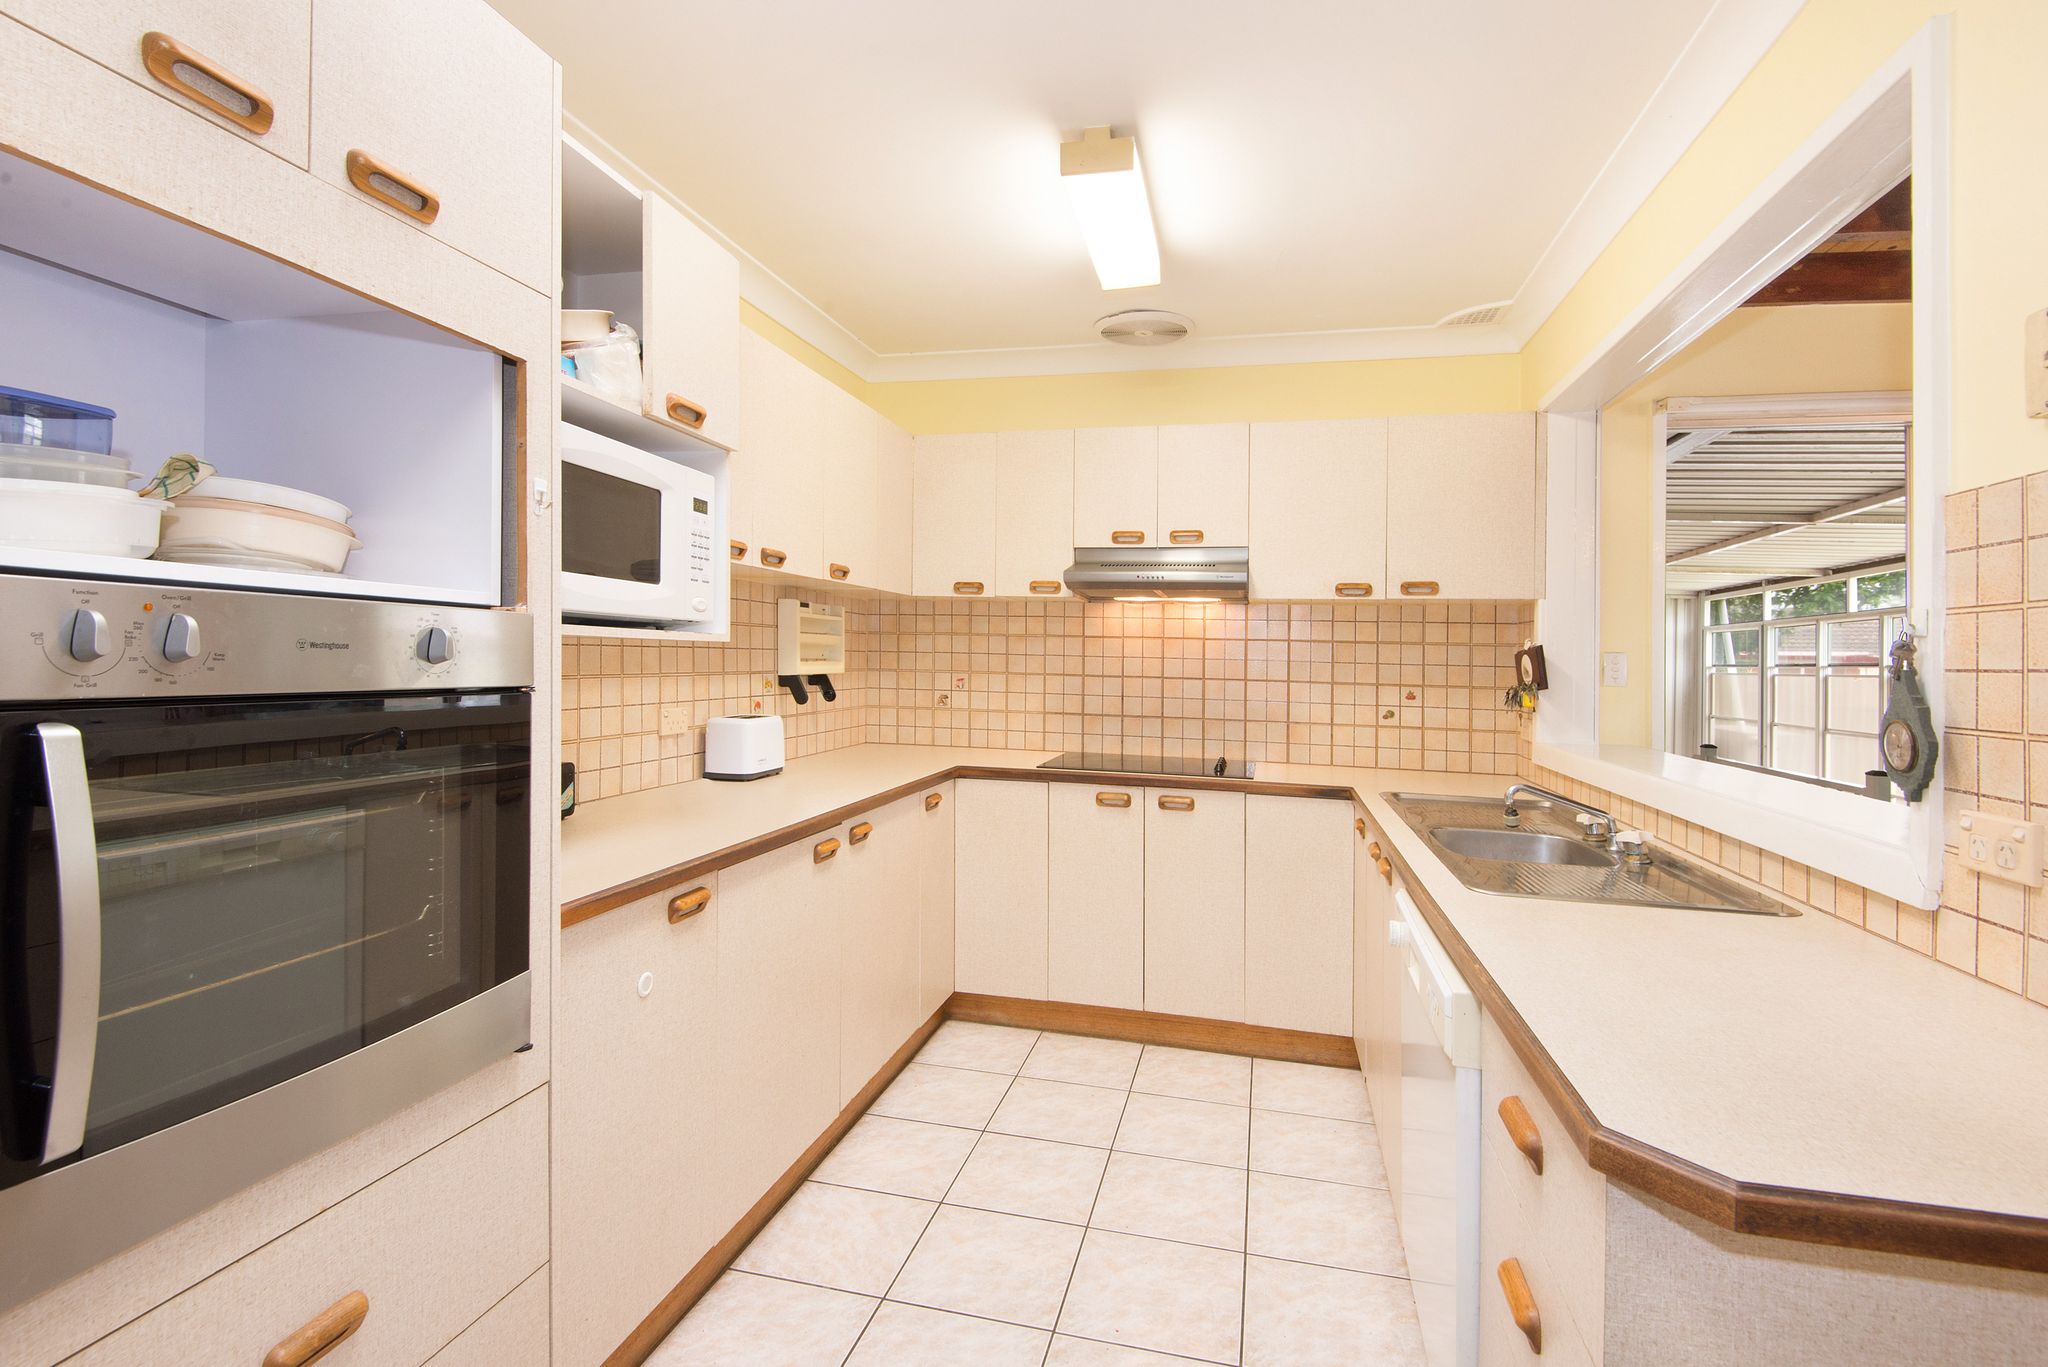
Kitchen – Before Renovation
Before: It’s hard to believe, but back in the ’80s, apricot-coloured everything was all the rage – yep, people actually chose this on purpose! And this kitchen? It had apricot in spades. Sure, it would’ve been the bee’s knees back in the day, but now… well, let’s just say the colour choice is a bit how ya going? That said, we’ve gotta give credit where it’s due – this place has been looked after like a prized vintage Holden, with everything still in mint condition!

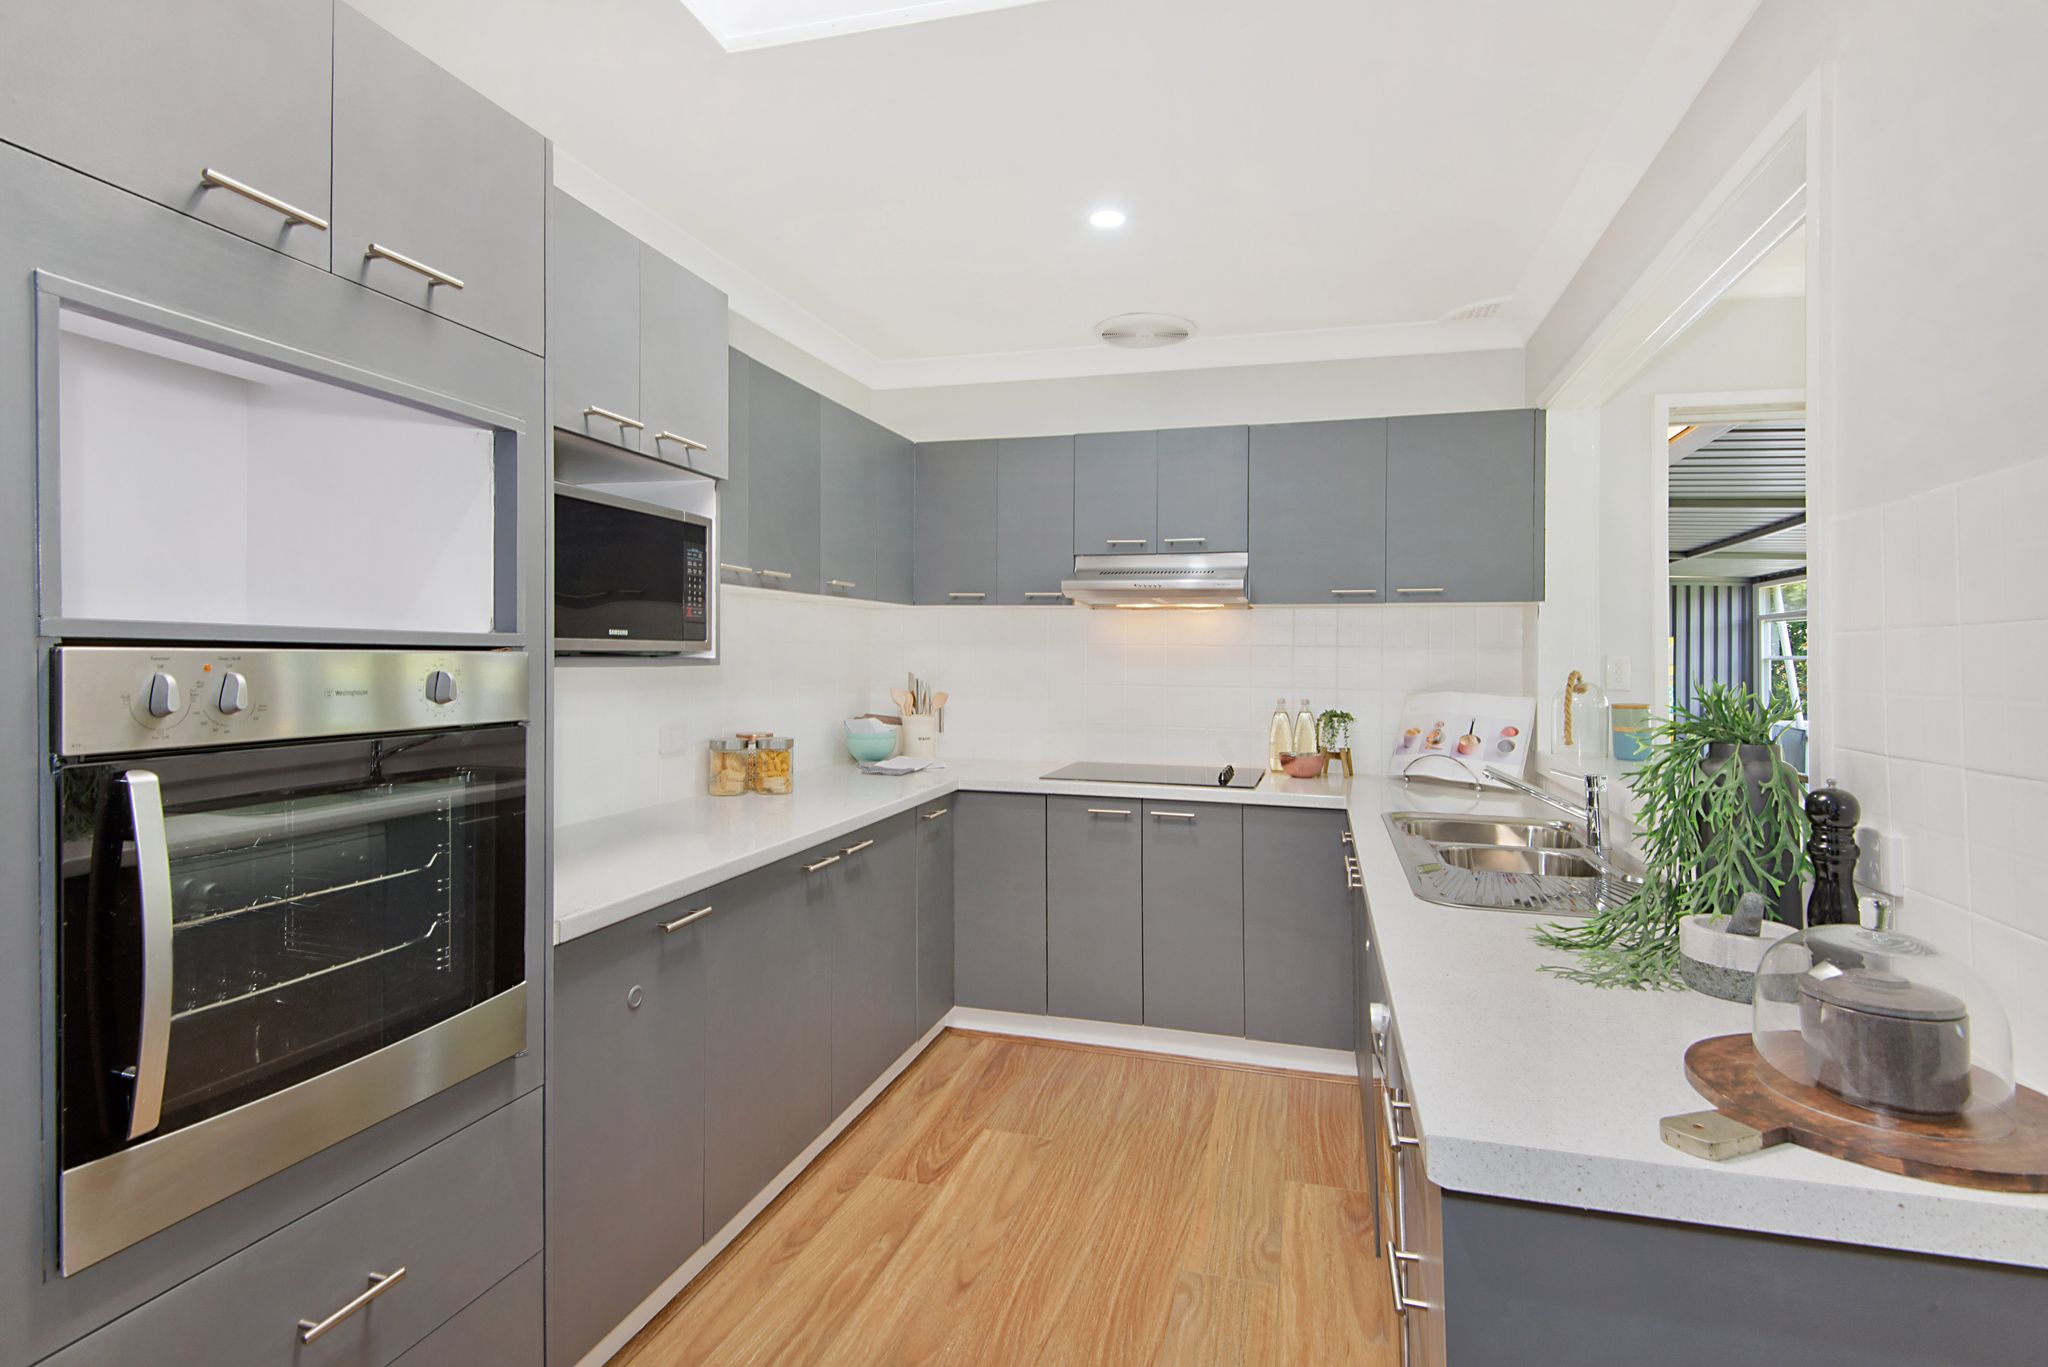
This kitchen went from drab to fab for under $5K.
Slide the arrow left to right to see the before & after transition.
After: For the most part, we kept 90% of this old kitchen. The original cabinets stayed put, but we resurfaced the doors by undercoating them first, followed by 2 coats of White Knight Tile & Laminate Paint (tinted to Taubmans Oil Shale) for an instant facelift. The splashback? Still in top shape, so it also got two coats of Crisp White paint to freshen them up. Those old-school angled benchtops got the boot in favour of a modern laminate benchtop with a stone-look finish & new floating floorboards went straight over the tiles – too easy. We even swapped out the dated wooden handles for something a bit more 21st century. The result? A budget-friendly makeover that’ll keep this kitchen going strong for another decade – plenty of time for the homeowners to save up for their dream kitchen!
3. A Guest Room… Or a Green-Tinged Storage Unit?
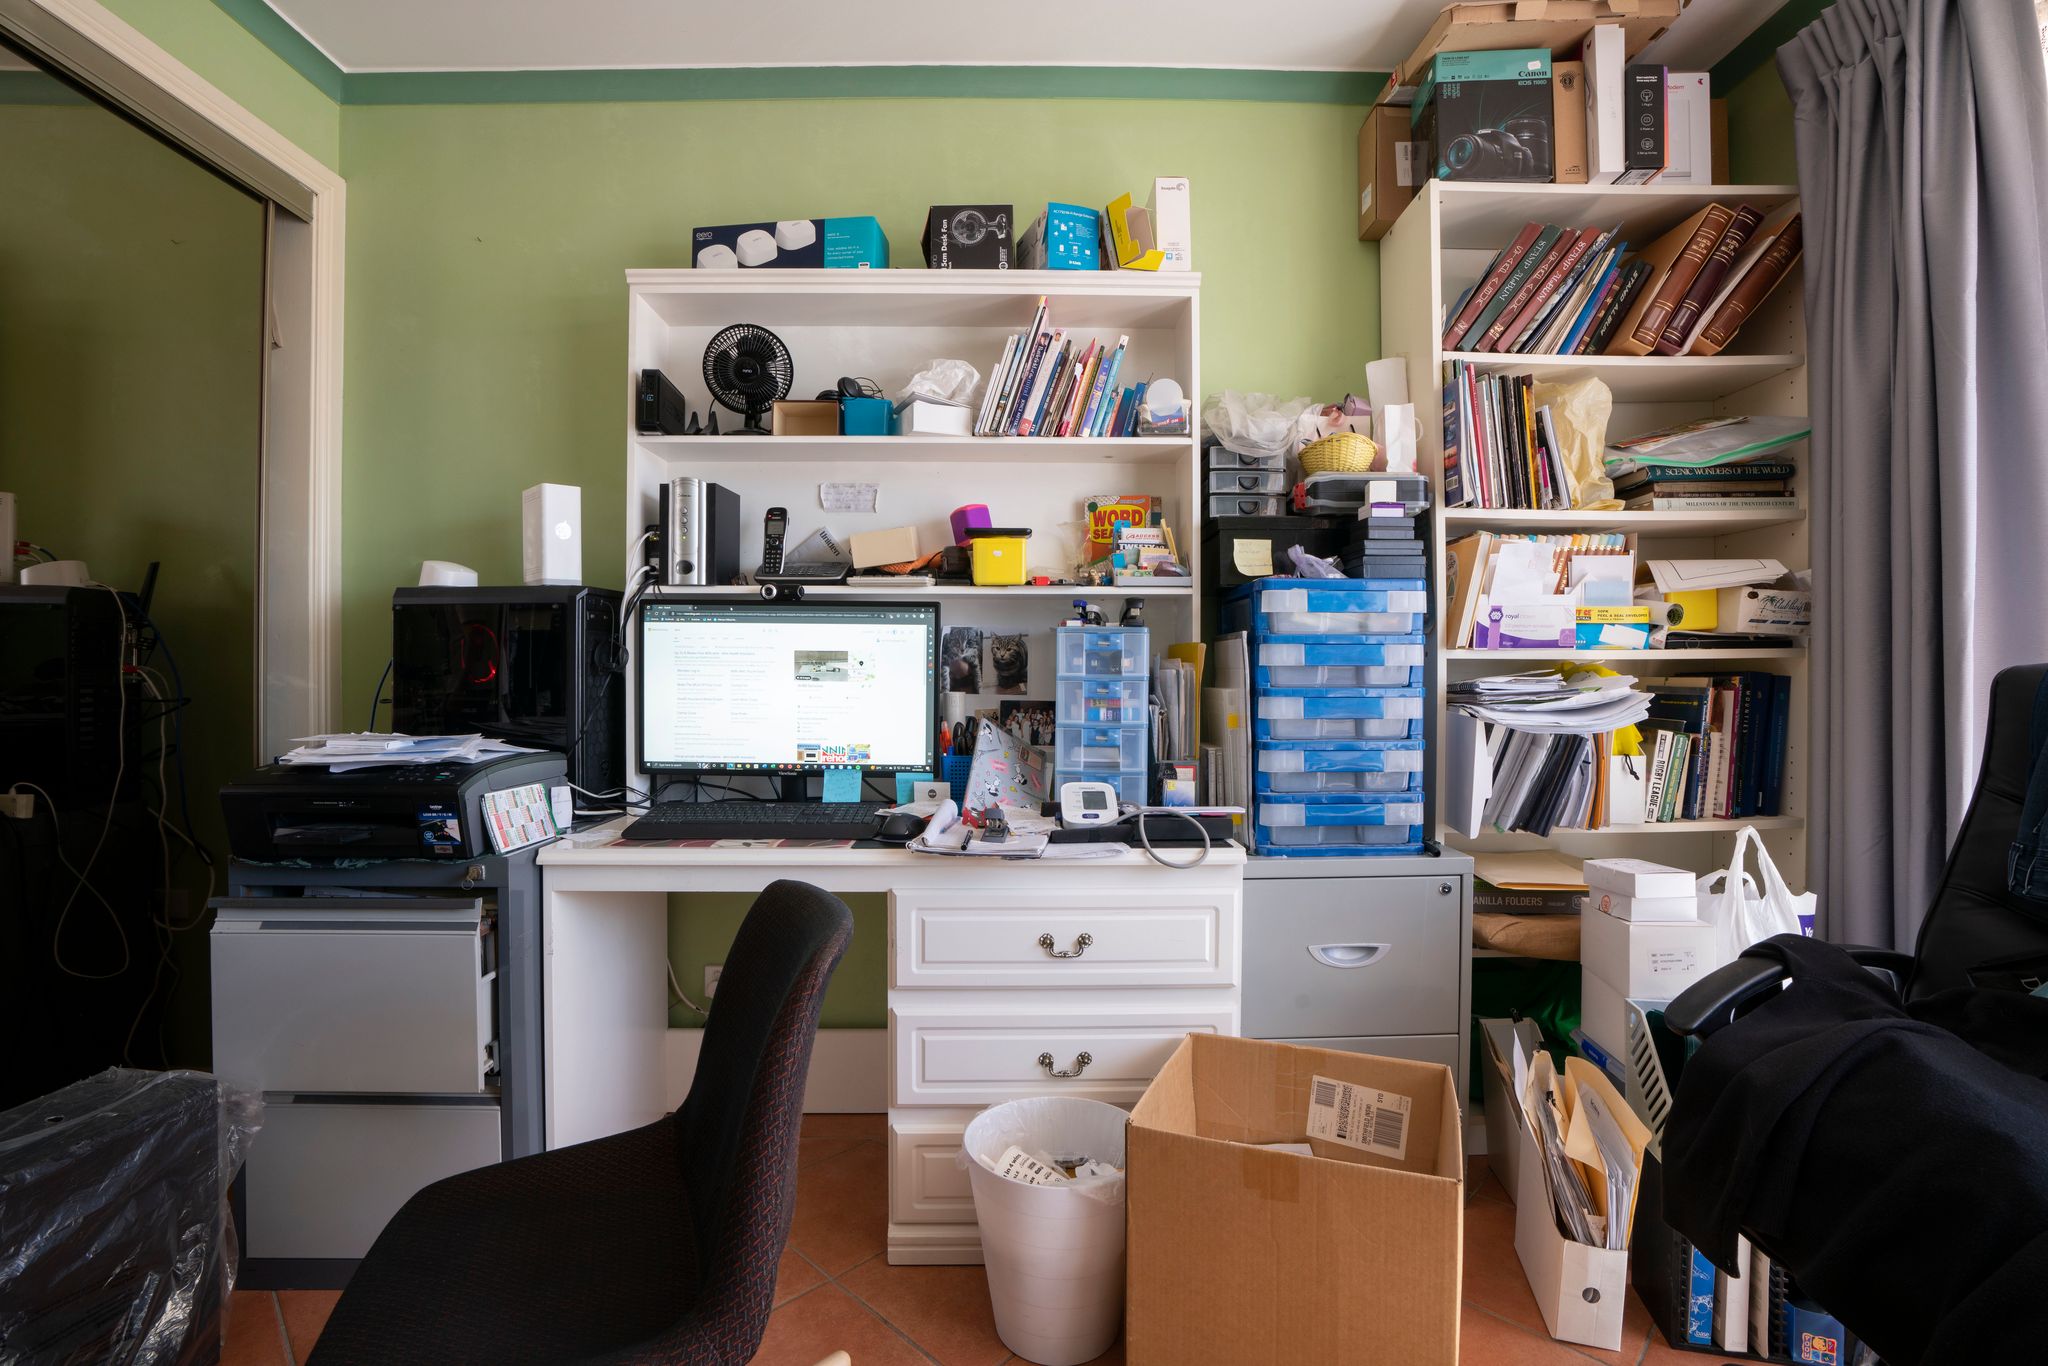
Guest Bedroom – Before Renovation
Before: You gotta love lime green walls with forest green cornices – said no one ever! This so-called guest bedroom had somehow morphed into a half-baked home office, an overflowing library & a dumping ground for who even knows what. Safe to say, it wasn’t exactly the kind of space you’d proudly offer to overnight visitors – unless, of course, you were trying to make sure they never came back!

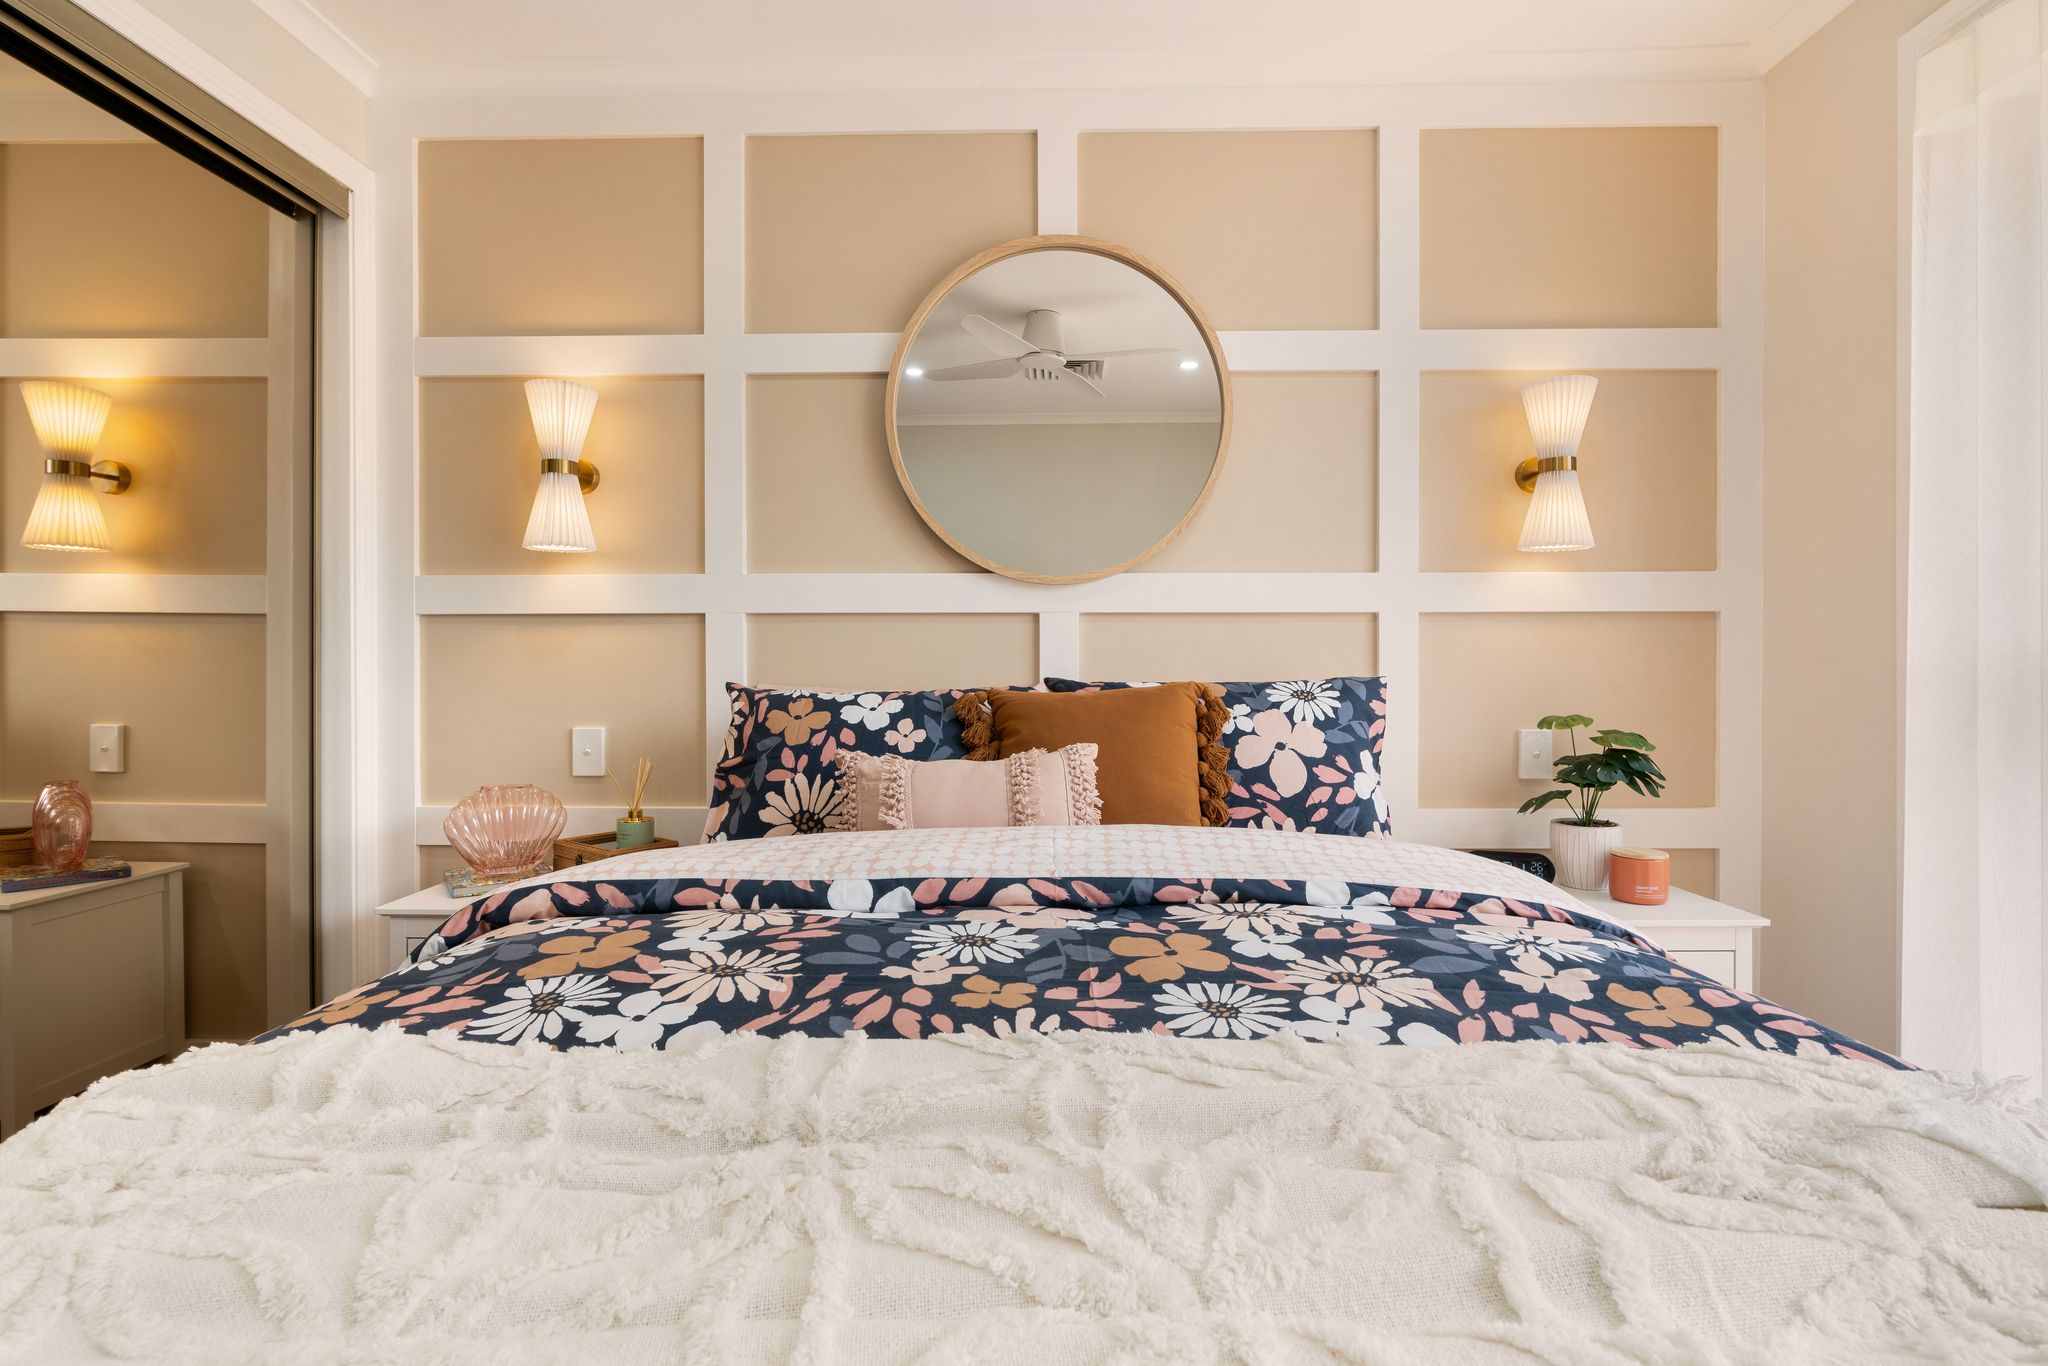
A dreamy bedroom makeover.
Slide the arrow left to right to see the before & after transition.
After: First things first – we cleared out all the home office clutter and (ironically) moved it into the actual home office, which was, funnily enough, right across the hall.
With all that extra floor space freed up, in went a queen-size bed and a stylish feature wall to give the room some wow factor. My DIY magic? I grabbed some 92mm timber architraves from Bunnings, stuck them to the wall with Sikabond Instant Nails, then painted everything in a warm tan colour before finishing the trims in a crisp off-white. A couple of feature lights above the bedside tables add both function and a bit of mood lighting, while some budget-friendly Kmart bed linen tied the whole look together. The best part? This entire makeover came in at around $1K – proof that a stunning transformation doesn’t have to break the bank!
4. A Bathroom in Need of a Little Breathing Room
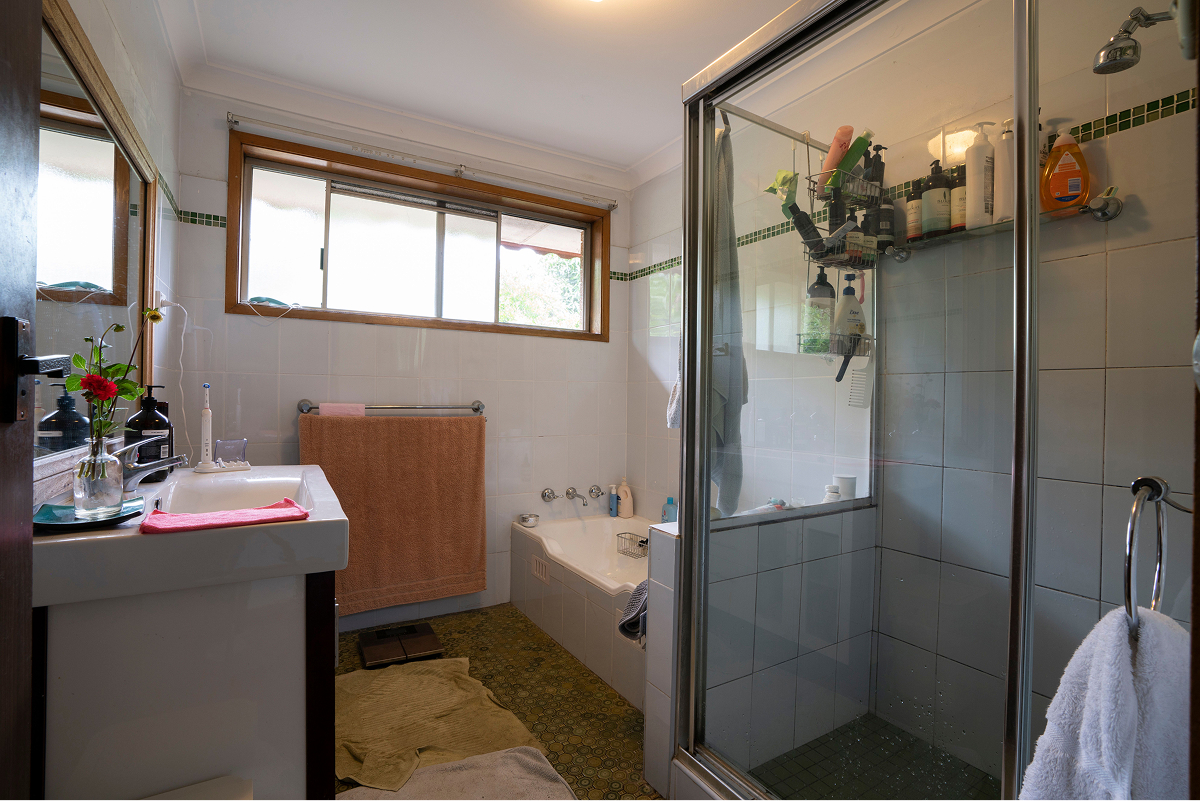
Bathroom – Before Renovation
Before: This tiny bathroom was feeling more cramped than cosy, with plain white tiles and that oh-so-trendy (back in the day) heritage border tile from two decades ago. The brown floor tiles? Dark, dreary and doing this space no favours. And let’s talk about the clutter – because, dear friends, shampoo bottles and spare toilet rolls are not bathroom styling items!

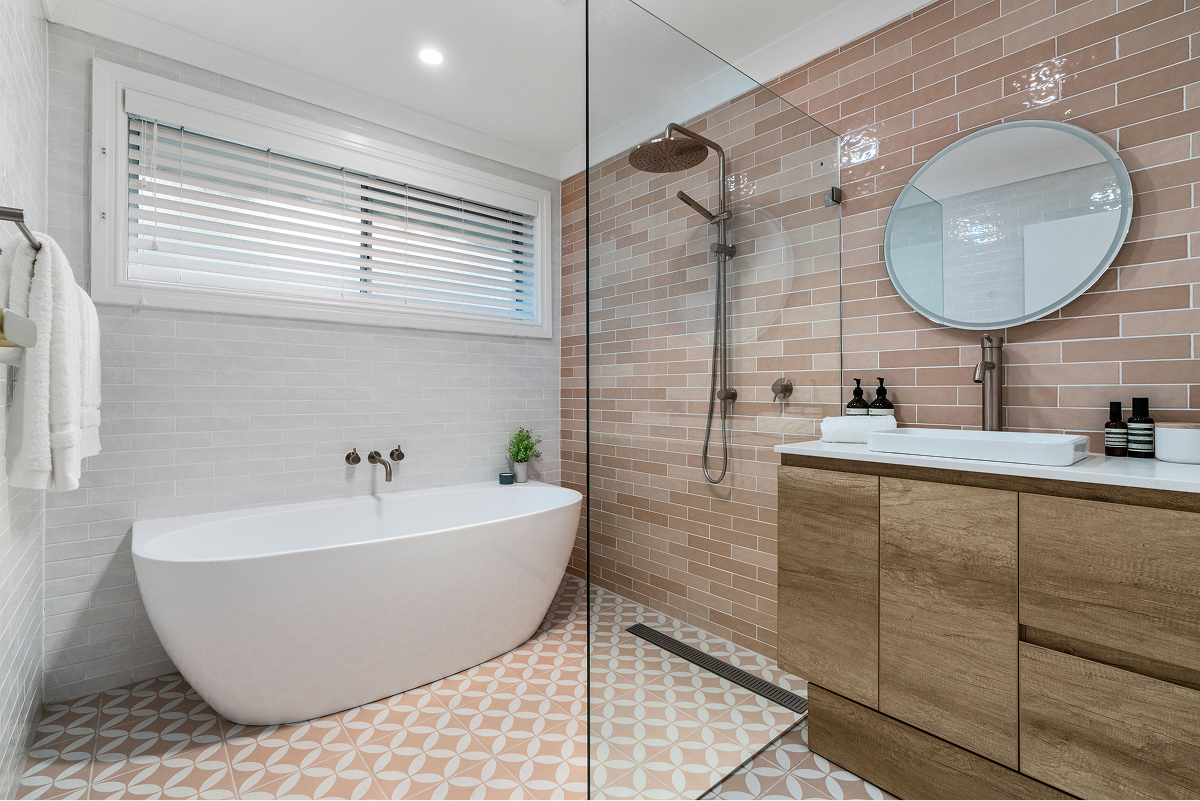
Earthy colours were used in this bathroom renovation.
Slide the arrow left to right to see the before & after transition.
After: This bathroom got the full rip-out-and-start-again treatment, but I kept costs in check by leaving the walls and windows right where they were – no need to mess with what’s already working!
Designed with the older homeowners in mind, the new layout makes hopping in the shower a breeze (Zimmer frames welcome) & the higher bath level means less awkward bending & balancing. The oak cabinetry & clay-pink coloured tiles bring in warm, earthy tones, turning this space into a calming retreat rather than just a functional room. So… who’s up for a soak?
5. The Sub-Floor Spare Room
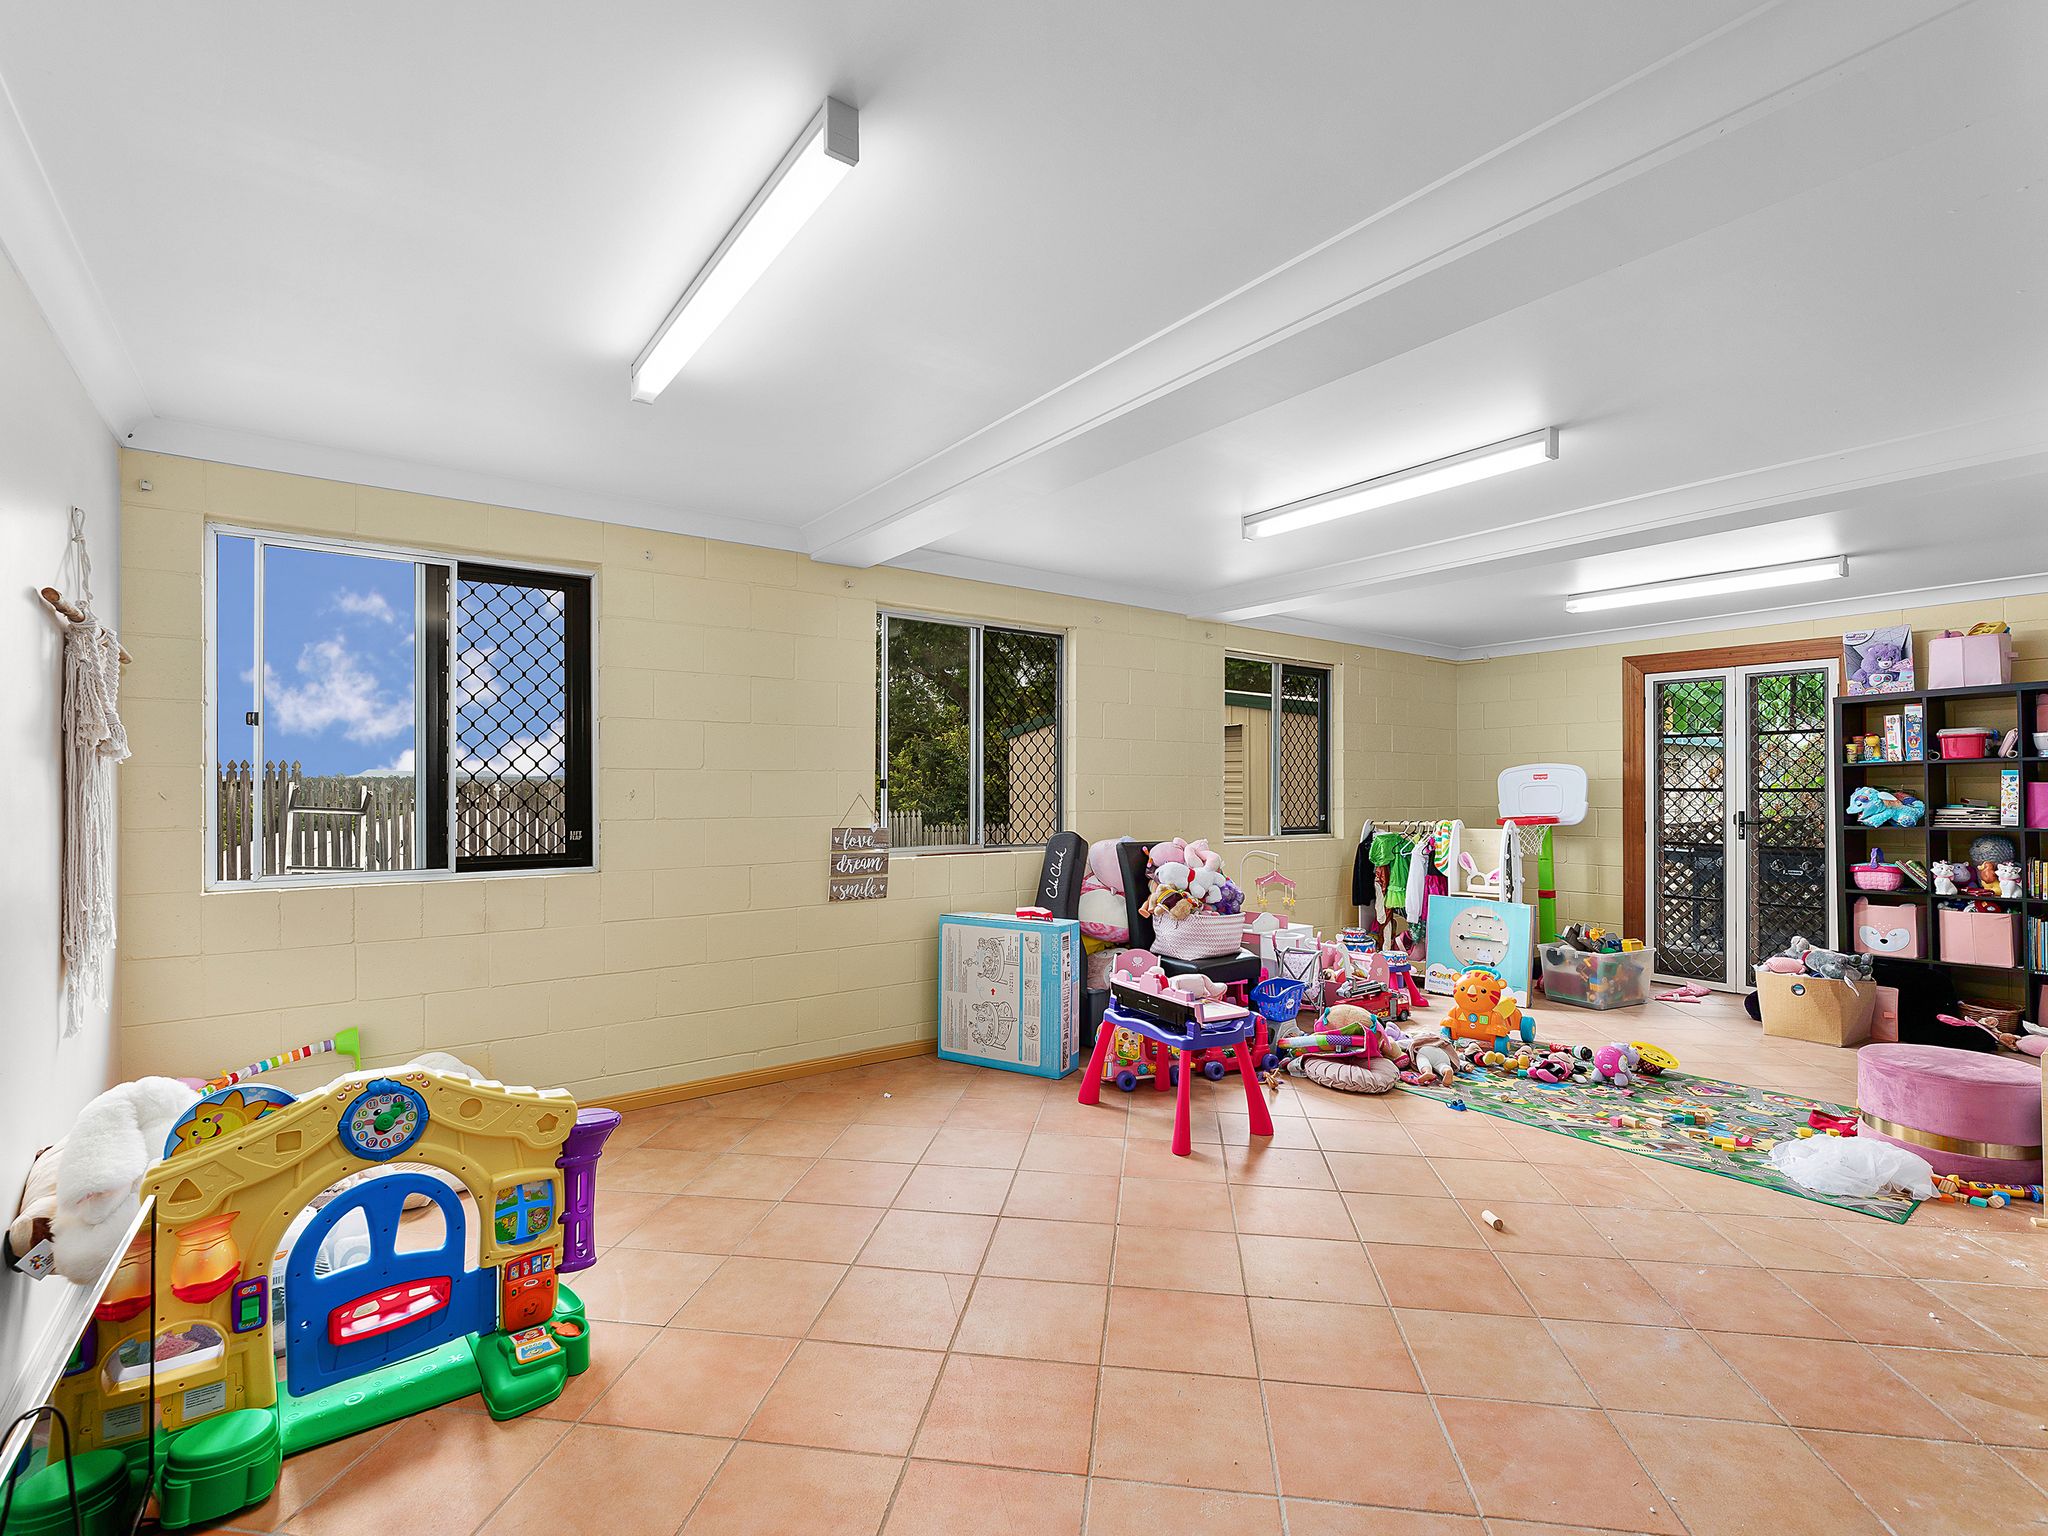
The Spare Room – Before Renovation
Before: Terracotta floor tiles & canary yellow walls – what a combo! This downstairs room had all the potential in the world, but instead of being useful, it was just… there. Meanwhile, upstairs, the homeowners were crammed into a tiny living room, barely big enough to swing a cat & overflowing with kiddies’ toys. Down here, though? It felt like someone had moved out but forgotten to take some of their stuff. Time to turn this wasted space into something worth using!

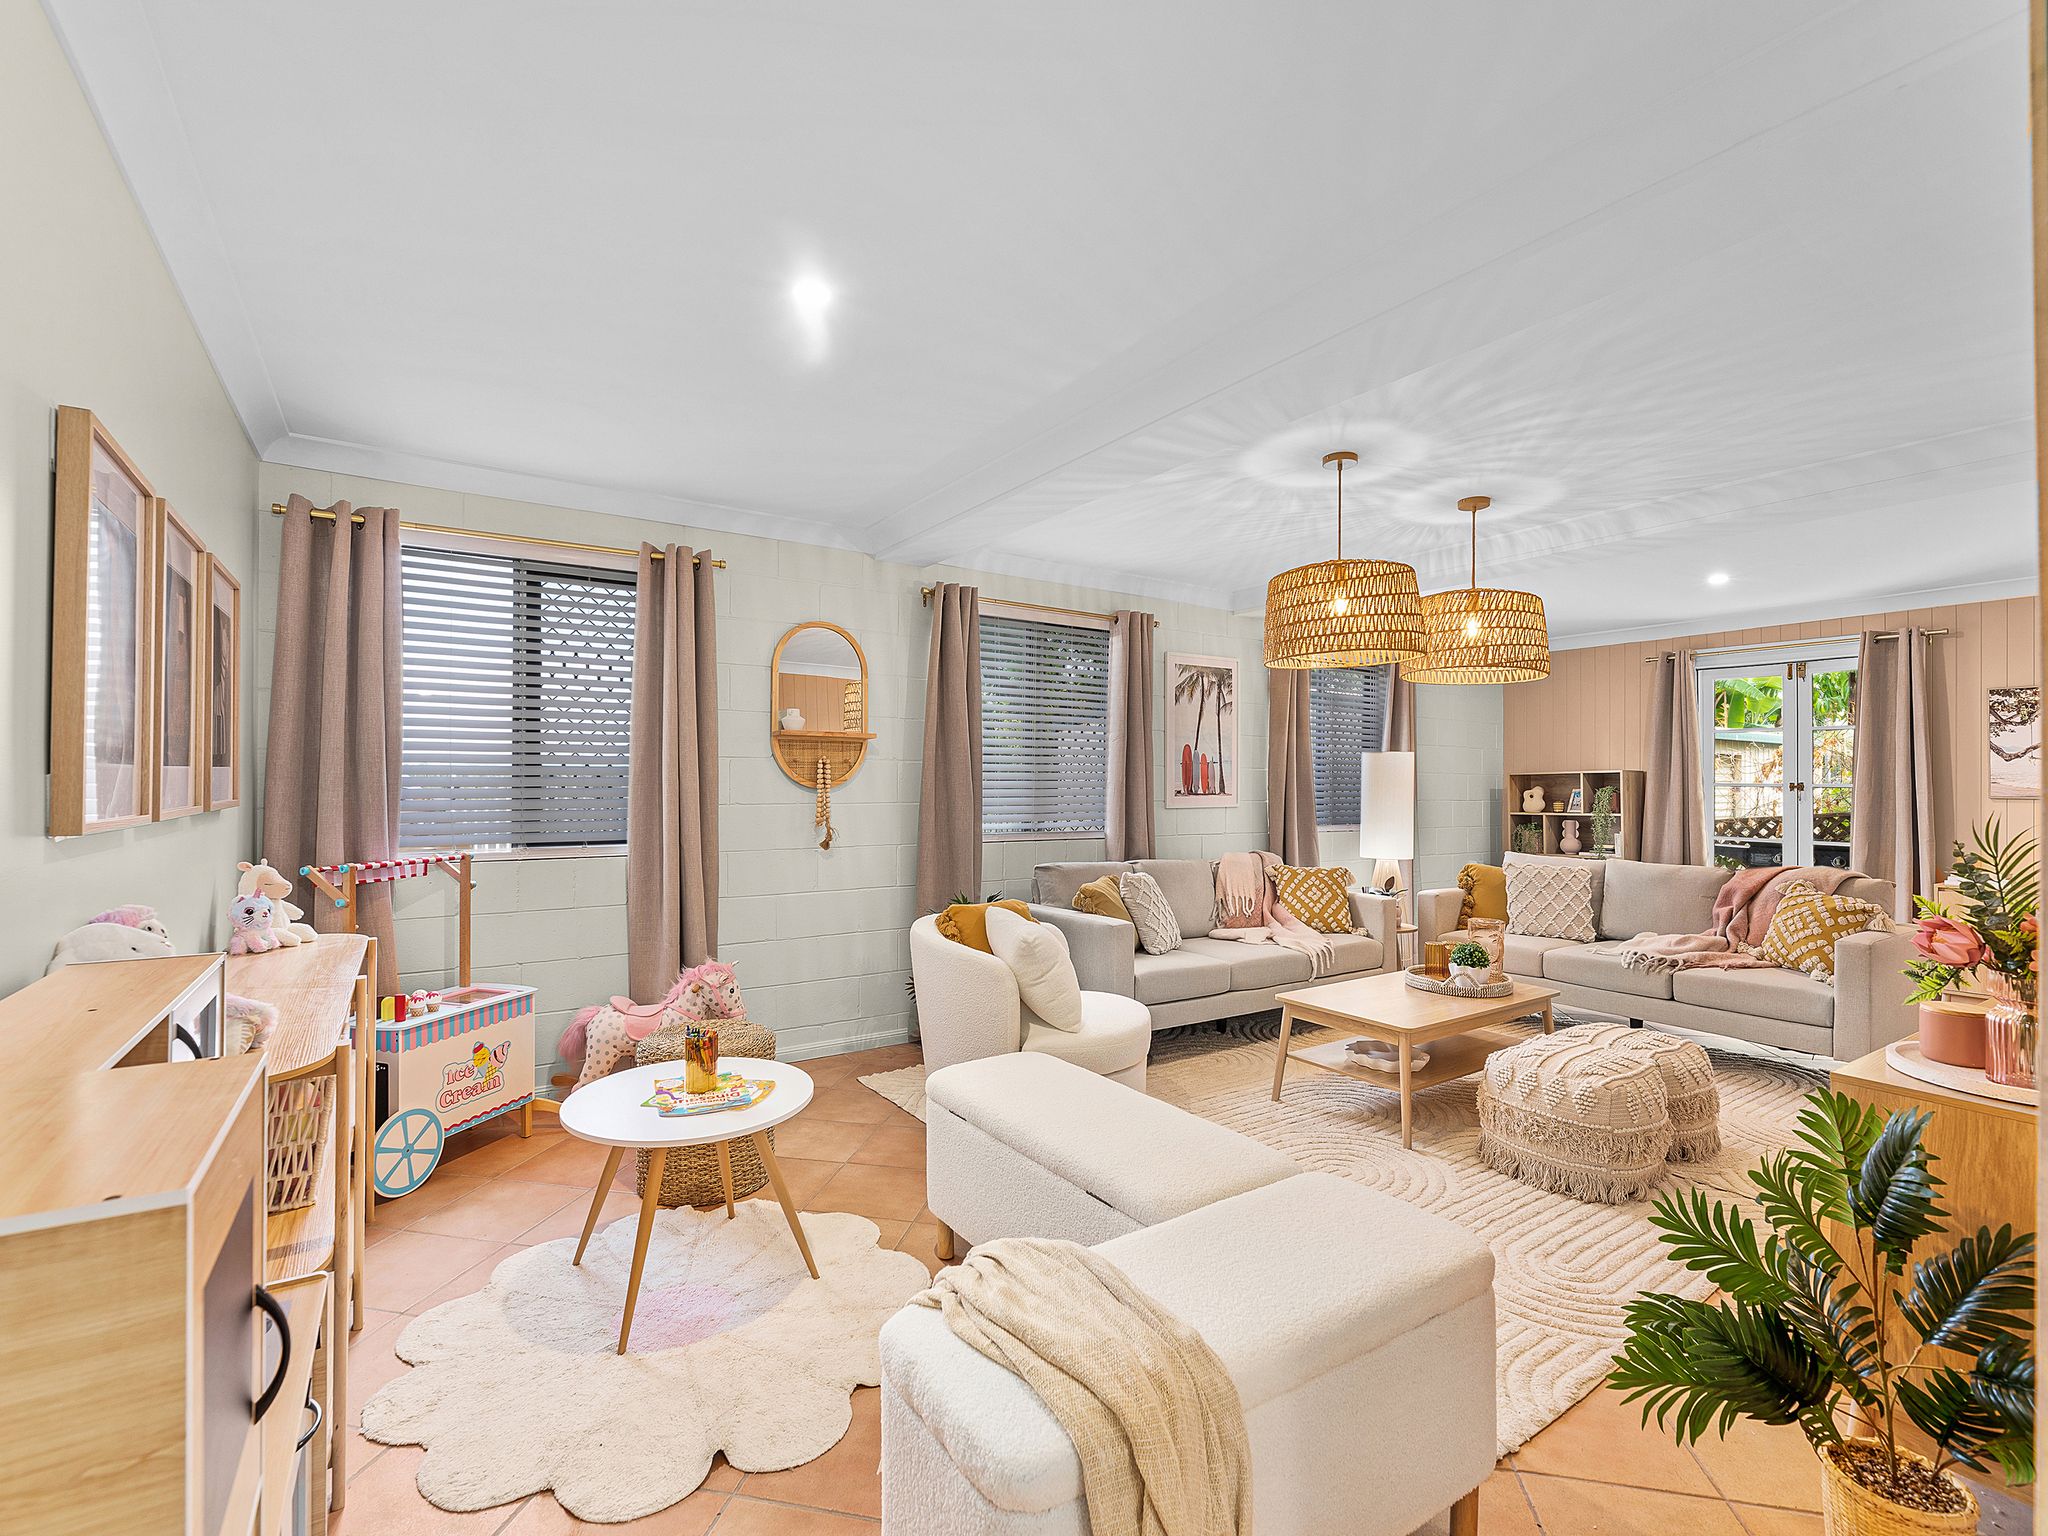
This room now functions as a 2nd living room & kids play area.
Slide the arrow left to right to see the before & after transition.
After: Talk about a whirlwind makeover! In just one day, we turned this forgotten space into a stylish, functional living area – and would you believe 95% of it came from Kmart? Yep, from the furniture to the styling pieces (even the curtains!), this budget-friendly transformation proves you don’t need to spend a fortune to make any space shine. The existing terracotta floor tiles now feel intentional, thanks to a colour-matched feature wall, while oak & cream furniture softens the look and ties in beautifully with the rest of the home. The best part? Mum and Dad finally have a comfy spot to kick back and watch telly, while the little ones play close by. Win-win!
6. Fabulous Facade: Bringing This Queenslander Back to Life!
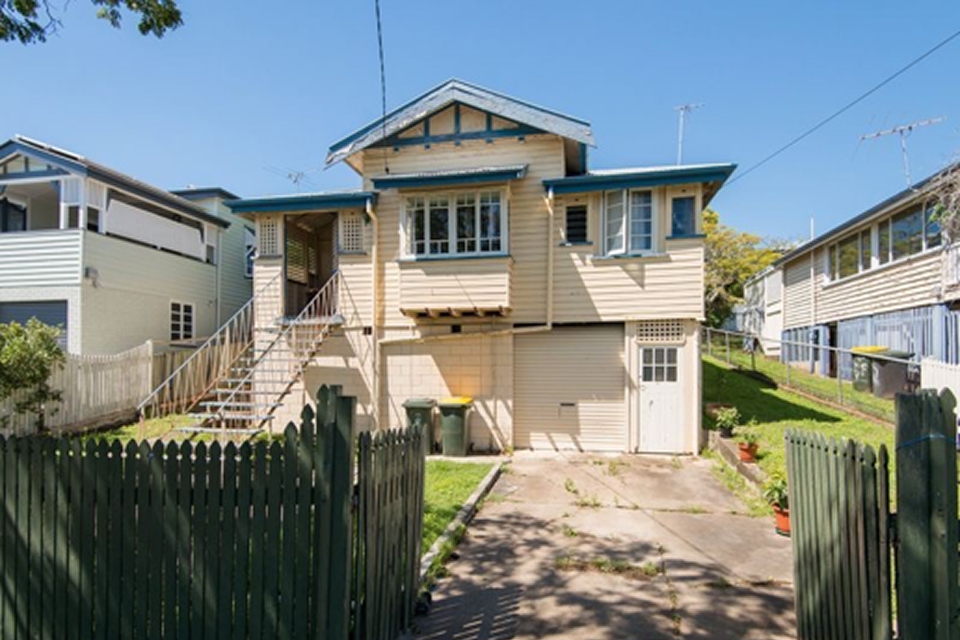
Façade – Before Renovation
Before: It’s hard to find anyone who doesn’t love a good Queenslander – they’ve got charm, character & somehow still manage to look good for their age. But like anything vintage, some need just a little nip and tuck, while others undergo a full-blown facelift. Case in point: the stairs on this place. Let’s just say they were not exactly a stairway to heaven, and that lattice entry? Yep… questionable. Time to give this old beauty the grand entrance it deserves!

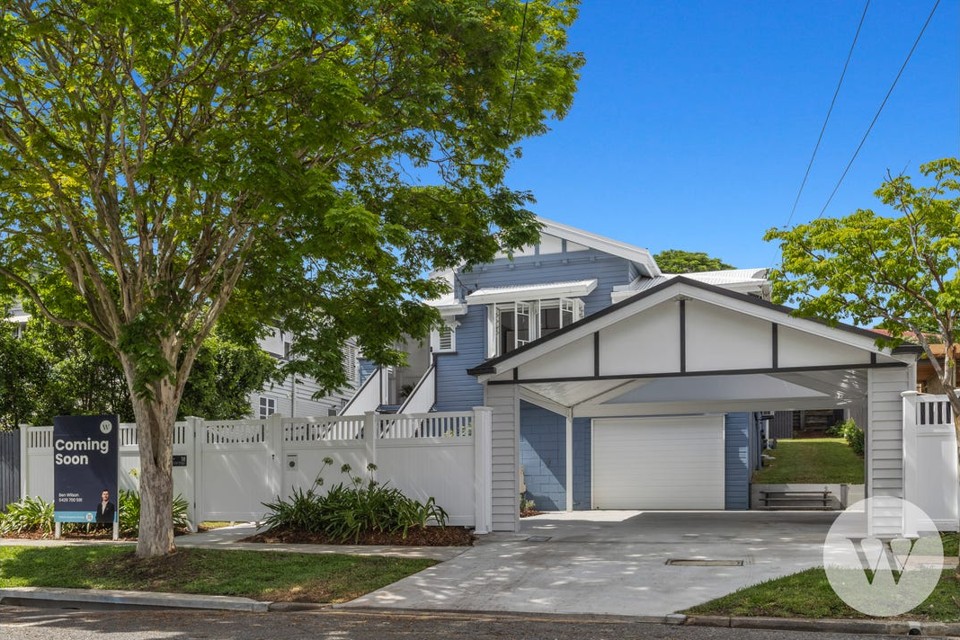
A stunning student transformation to the façade of this home.
Slide the arrow left to right to see the before & after transition.
After: I deliberately saved the best for last here, and let’s just say I’m beyond proud of my students, Anthony & Jo, for absolutely nailing this structural reno! With a brand-new double carport, front fencing & a much grander entry, this Queenslander has had one serious transformation. And that fresh colour scheme? Let’s just say it brings a whole new meaning to Justin Timberlake’s song “I’m bringing sexy back”. Now that it’s on the market, here’s hoping they’ll soon be singing “I’m in the money!” 🎶 💰
Final Thoughts
If these renos & makeovers have taught us anything, it’s that with a bit of vision and some hard work, you can completely transform a space, without breaking your bank account. Whether it’s a full structural overhaul or just a few cosmetic tweaks, the key is making smart updates that add style & function. So, if your home is crying out for a reno or refresh, consider this your sign to get started. Who knows? You might just be bringing sexy back to your own place next!
If you would like to learn how to buy, renovate and sell old homes for a profit, (just like my students Anthony & Jo did), be sure to check out my Cosmetic Renovations For Profit course.
Until next time,
Cherie x
PS: Oh, by the way! Season 5 of Space Invaders returns to our TV screens on Channel 9 – this Saturday night at 7.30pm. Be sure to tune in & watch me cosmetically transform a lounge room, dining room, kitchen, master bedroom & music room!


Love it, wouldn’t think it was the same house.
It is an outstanding renovation. I love the staging, and your colour selection is right on the money. Nothing beats a renovated Queenslander; we did our first one 36 years ago in Carlton Tce Wynnum.
Wow! That’s a long time ago Steve! Cherie Crew x
Would love to know the exterior blue paint colour!
Hi Deborah, thank you for your comment. The exterior blue colour is Dulux Enterprise, white is Dover White and the sills are Monument. Cherie Crew x
Very tasteful reno. You just gave me a couple of ideas. Thanks.
Thanks Ursula. Good luck! Cherie Crew x
Wow how stunningly transformed. Bringing in so much light and space! Best part with minimal expense and the right colour schemes. Great job transformation team!
Glad you liked it Anne Marie. Thank you for letting us know. Cherie Crew x