


Cherie’s Mammoth Reno – 6 Rooms in 9 Days
Howdy,
What happens when someone hires a builder, only to have that builder do the wrong thing, not complete works to a quality standard or within the timeframe promised? A downward spiral for any homeowner.
After a builder abandoned Georgina & Nathan’s planned home reno, their property was left in ruins, causing them to become disheartened by the process, lose focus & motivation. 18 months later, the house still looked like a construction zone with unfinished plasterwork, missing architraves, defective work throughout & a home that wasn’t conducive to ideal family living. So beaten down by the mess around them, this couple struggled to muster up the energy to get their home finished ….
THE MASTER BEDROOM

Let’s ease you in with one of the easier rooms, the master bedroom. This parents’ room was chock a-block full of stuff, making it difficult to physically move around. Whilst a decent size & a large set of windows let plenty of good natural light in, its broken wardrobe & lack lustre decor made the space look dull & depressing.

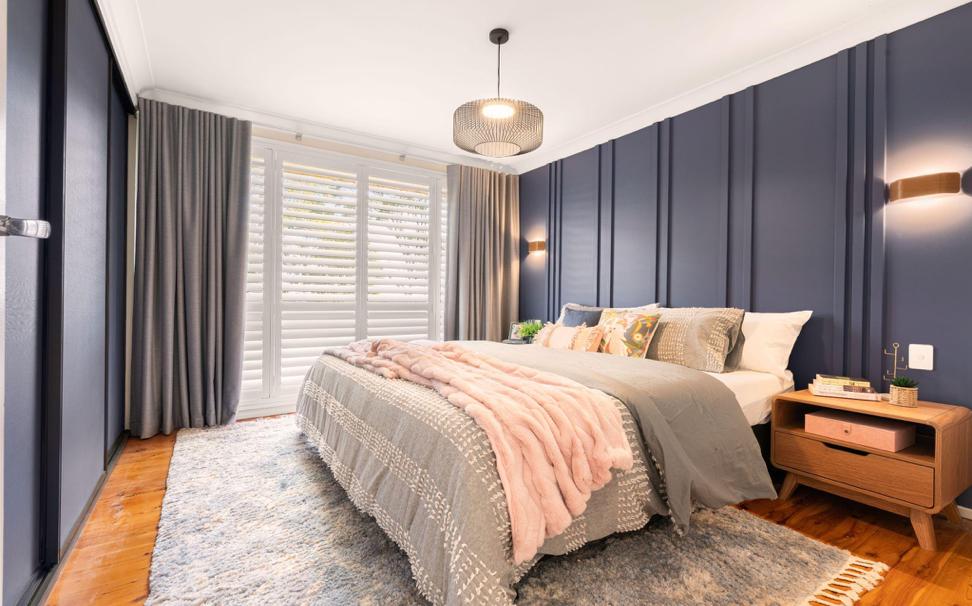
My goal was to create a modern bedroom, using the couple’s favourite colour, blue as my design inspiration. To turn that plain bedhead wall into a more eye-catching feature, I simply added plain timber battons to the wall, then painted everything up in Taubmans “Night Bird”. This budget feature adds a bit of interest & added dimension to an otherwise, flat wall.

New block out curtains from Wynstan provide total darkness when needed & the addition of a modern ceiling pendant & two wall sconces, help modernise the room. New wardrobe doors would have been great but with no budget left in the kitty, were simply repaired & the fronts of the doors painted blue. The old bedhead was donated & new bedside tables from Fantastic Furniture & bedding & styling items from Kmart complete the look.
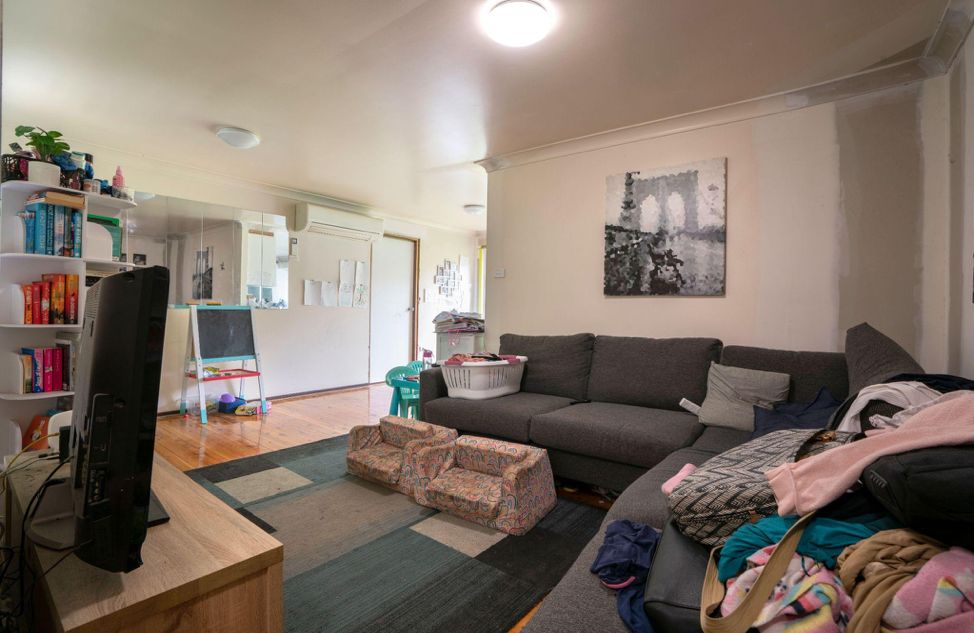
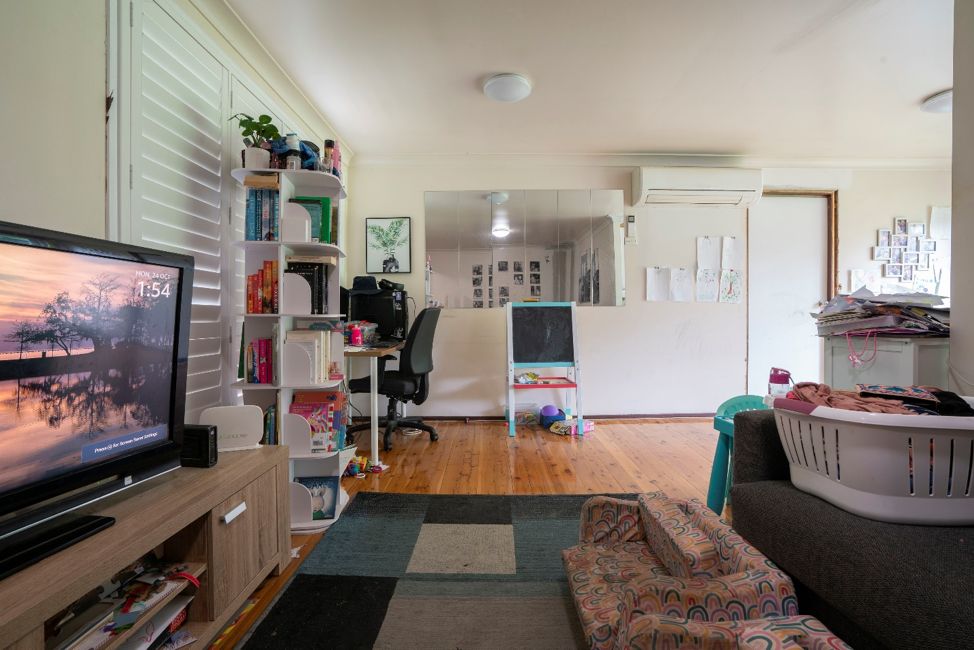
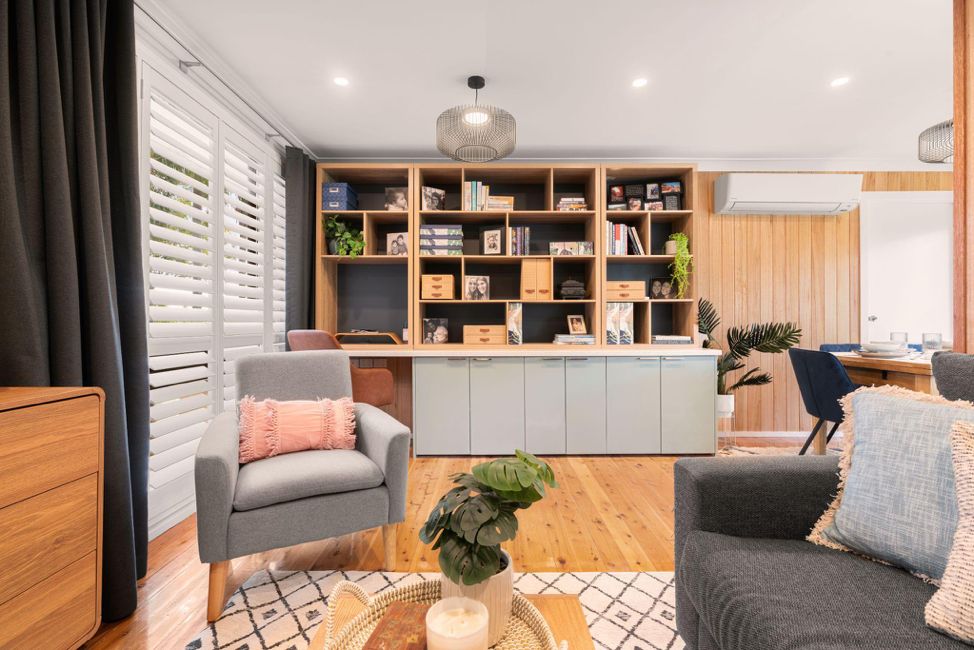
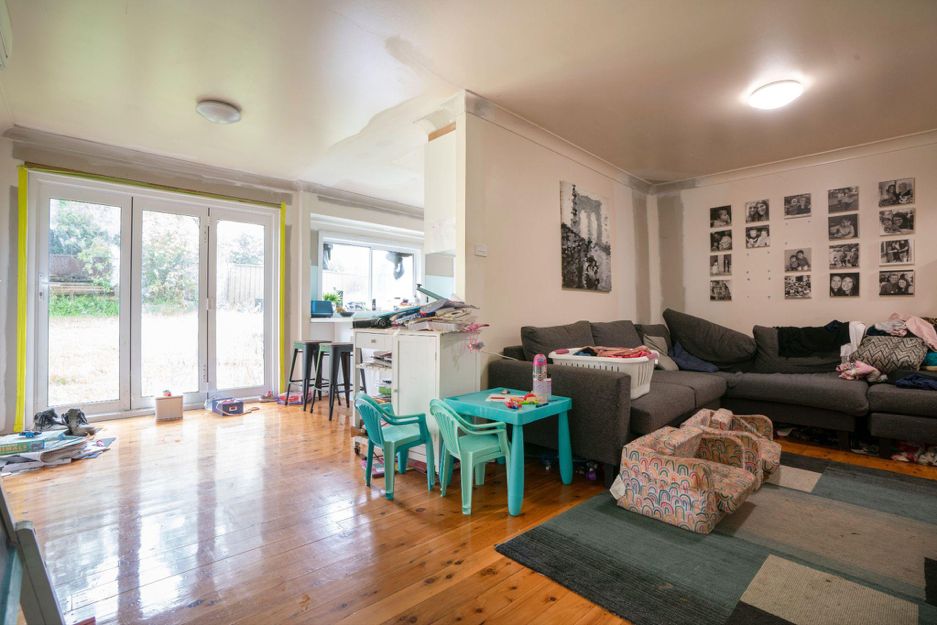
THE LOUNGE ROOM

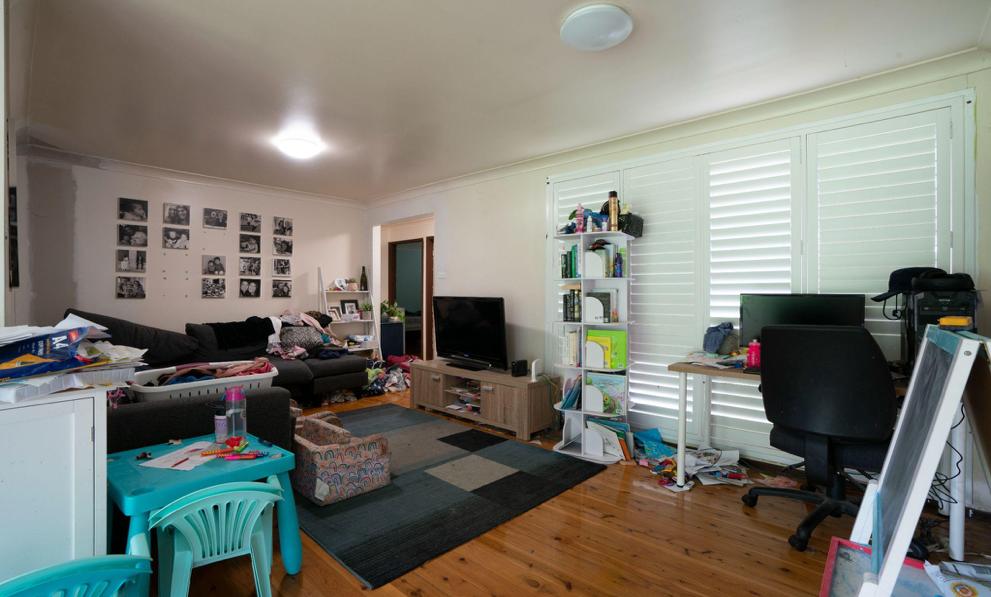
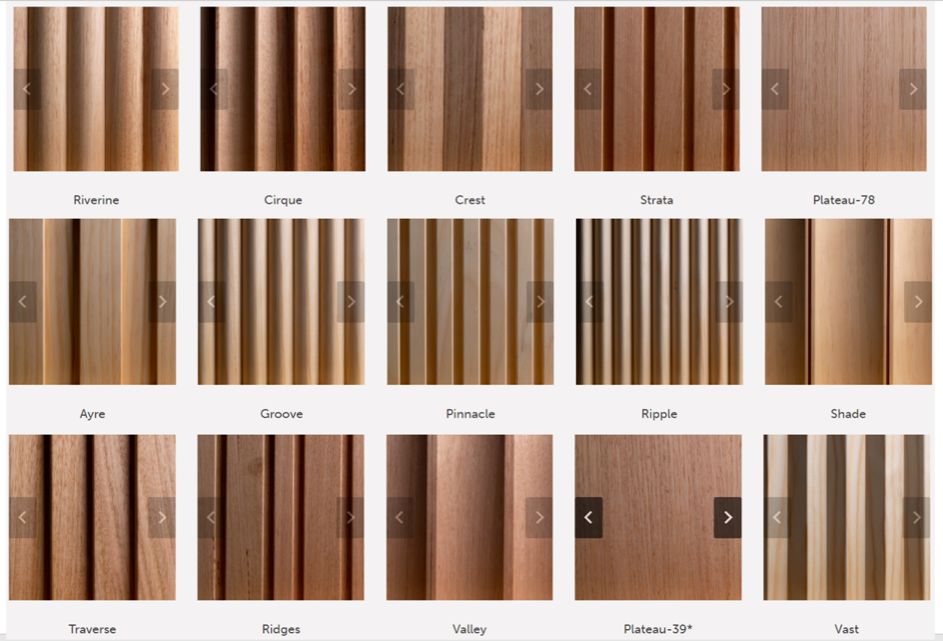
I’m going to be brutally honest, just like the master bedroom, this room was bland & boring with nothing visually interesting to look at. The homeowners wanted a nature inspired renovation so they felt relaxed at home, so the addition of timber VJ panels helped me achieve that look whilst adding much needed texture & warmth to the room. Suppliers such as Porta Mouldings are so great as they offer a huge range of timber panelling products, giving you the ability to create a designer look in any home.
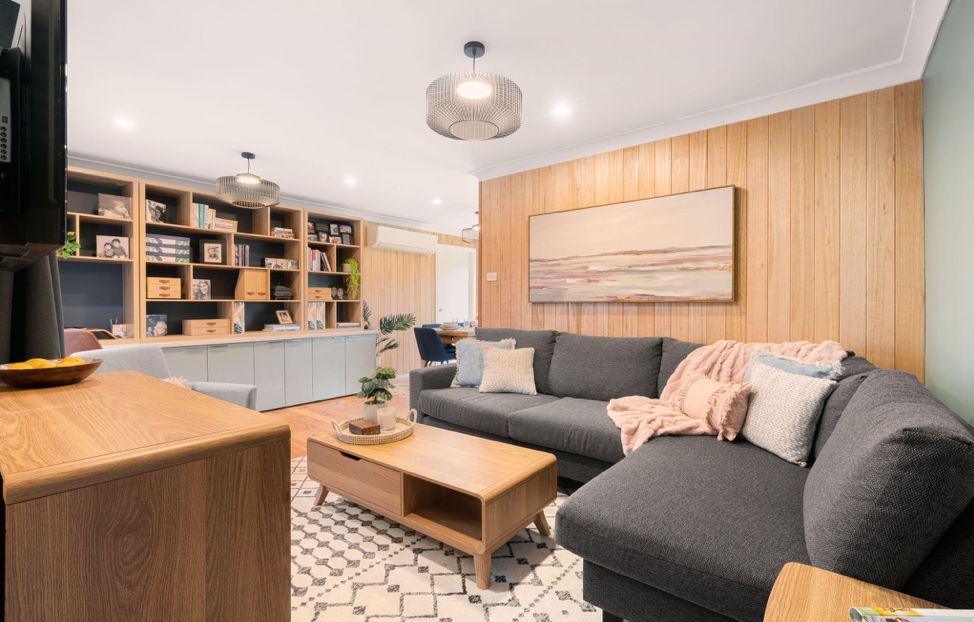
One of the biggest problems with the lounge room was that it desperately needed a clever storage solution for all the family’s bits n pieces. I created a custom storage nook wall, simply by installing a row of Kaboodle flat pack cabinetry in the “paint your own door” range with 3 coats of Taubmans “Sprig of Ivy” on top. I placed a laminate benchtop from Trademaster on top of the Kaboodle cabinets, then painted the wall above in Taubmans Oil Shale. Once dry, I installed 3 Coda Bookshelves from Fantastic Furniture on top of the benchtop. This was a cost-effective way to create a bespoke storage wall, using off the shelf, flat pack cabinetry! It now works as a practical storage & display space.
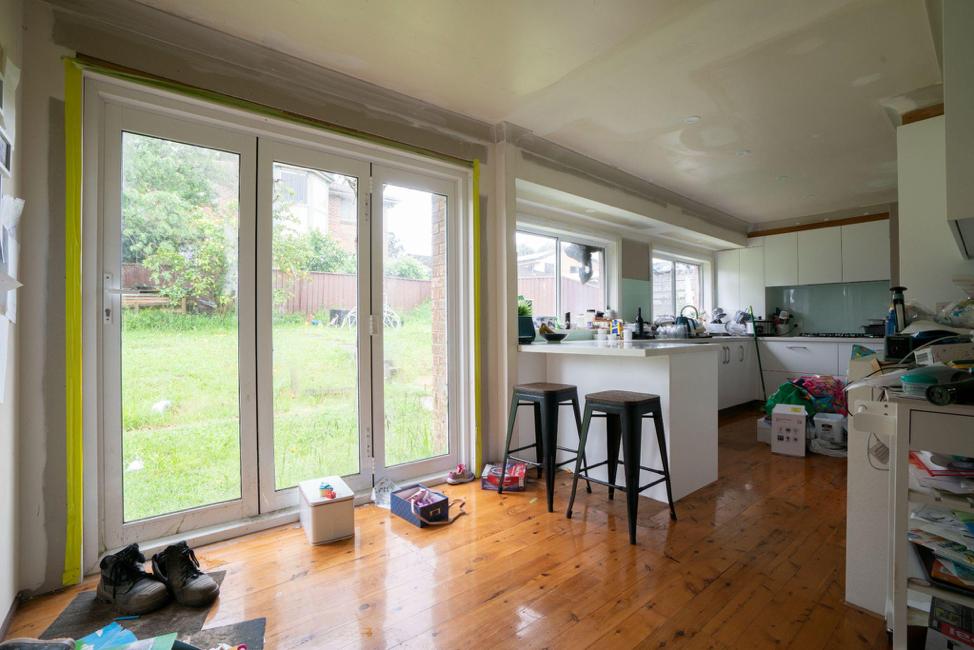
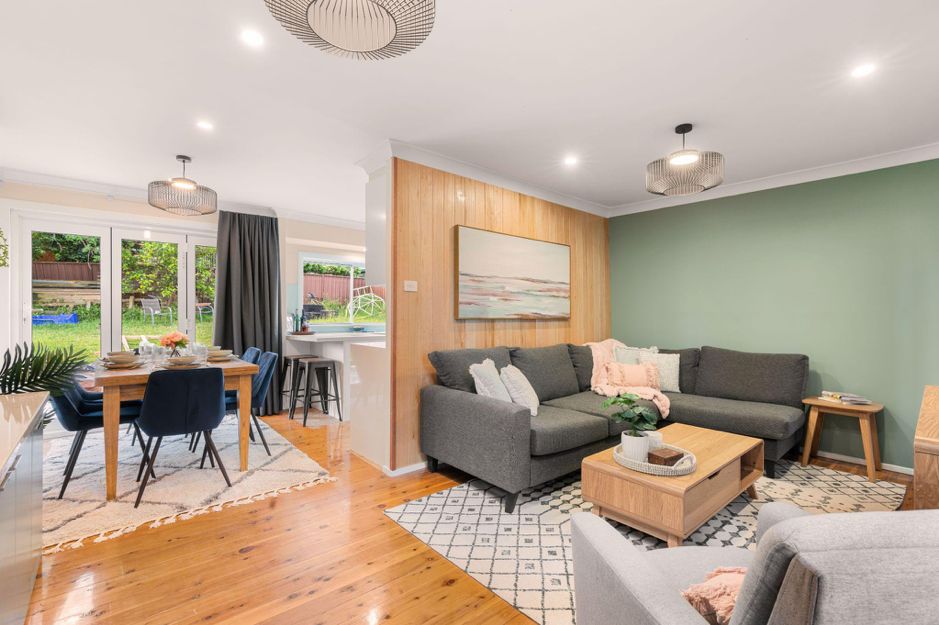
THE DINING ROOM
Thankfully, the dining room only needed a quick cosmetic refresh. All the unfinished plasterwork was fixed, sanded & painted & new lighting (downlights & a feature light) make a world of difference. A timber table was selected to continue the nature theme with the Reyna Dining Chairs from Fantastic Furniture adding a pop of colour.
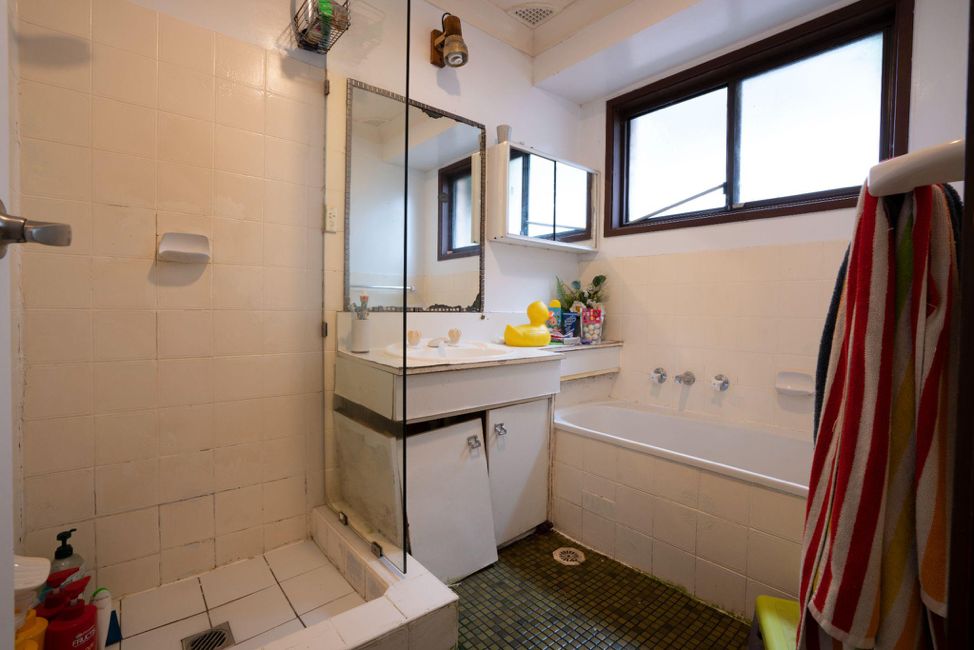
THE BATHROOM
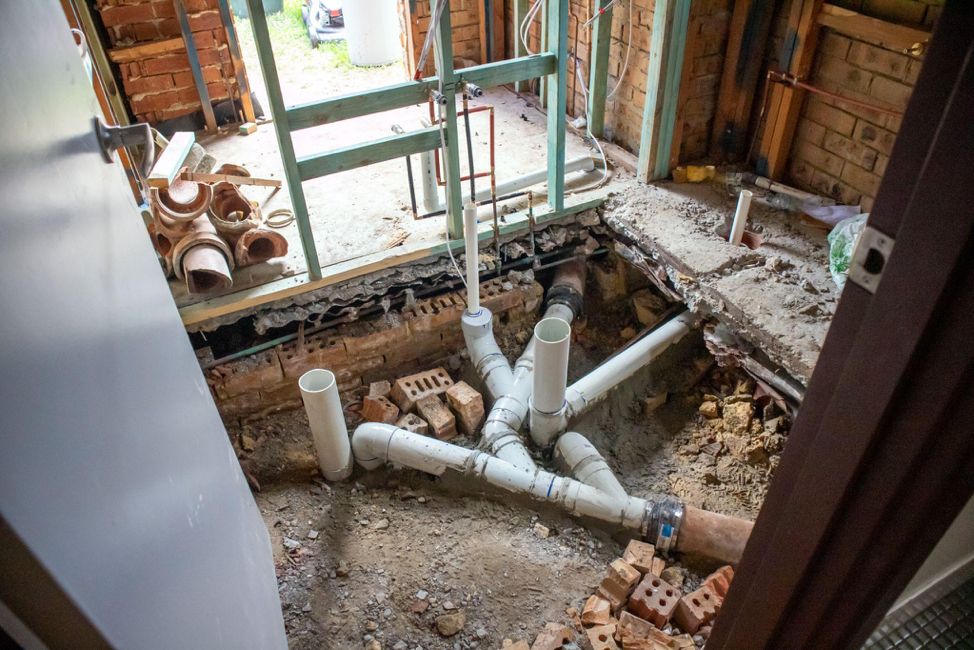
Now, to the troublesome part of the home, the bathroom – the room where everything that could wrong, did go wrong. The vanity was crumbling, the tiles were falling off the walls & the shower had major water leaks. This was always going to be a big job that would push our schedule & budget, but we had no idea what lay behind the walls & floors of this bathroom.
Once we started the demo, we uncovered every renovator’s nightmare, asbestos. Not only that, but the floor foundations & wall structure had been eaten away by termites & were only being held up by old pieces of roof sheeting. It was only a matter of time, before the bathroom floor would have caved in …
3 rounds of asbestos removal were done by a professional asbestos removal team (we kept finding more & more) & once that was completed, new floor bearers & joists were installed, along with new wall & ceiling framing. With everything now structurally in perfect condition, it was time to install the new bathroom.
I continued the nature theme into the bathroom so all the rooms in the home tied together cohesively. Being such a small room (2.6 metres wide x 1.8 m deep) & the homeowners wanting to keep the separate bath & shower, the old layout made perfect sense.

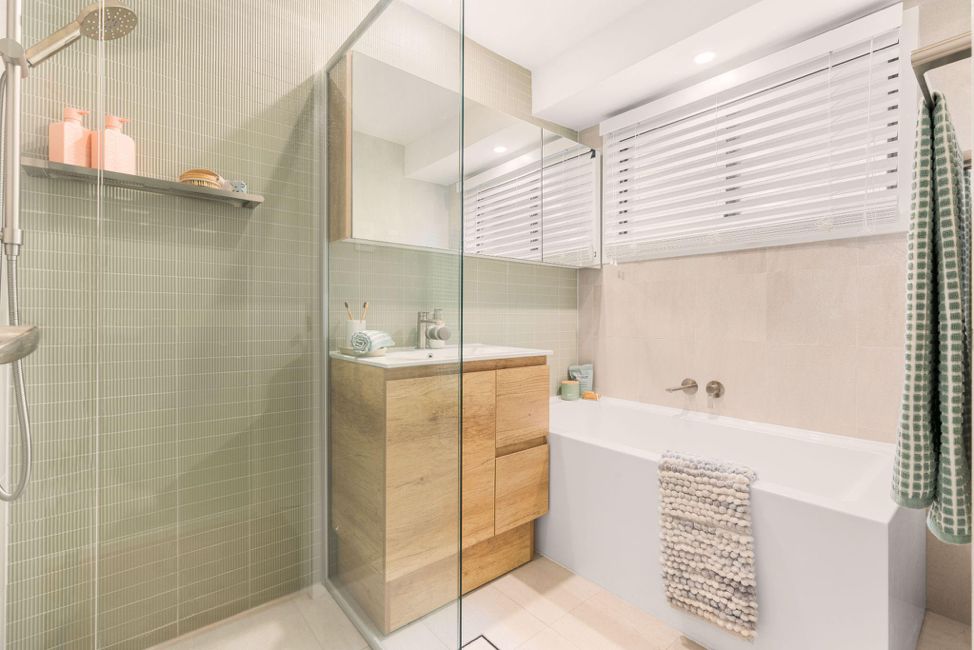
To ensure the room felt as spacious as possible, I kept the colour scheme on the lighter side. I installed the textural Barcelona Strip Green Tile from Beaumont Tiles for the feature wall with a light stone tile for the remainder of the walls & floor. Continuing with the organic palette, the Edge Vanity in Scandi Oak & matching mirrored shaving cabinet, offer plenty of storage in this otherwise small space & the modern nickel tapware finishes off the bathroom. This room was a LOT of hard work, but the end result was worth it.
THE LAUNDRY
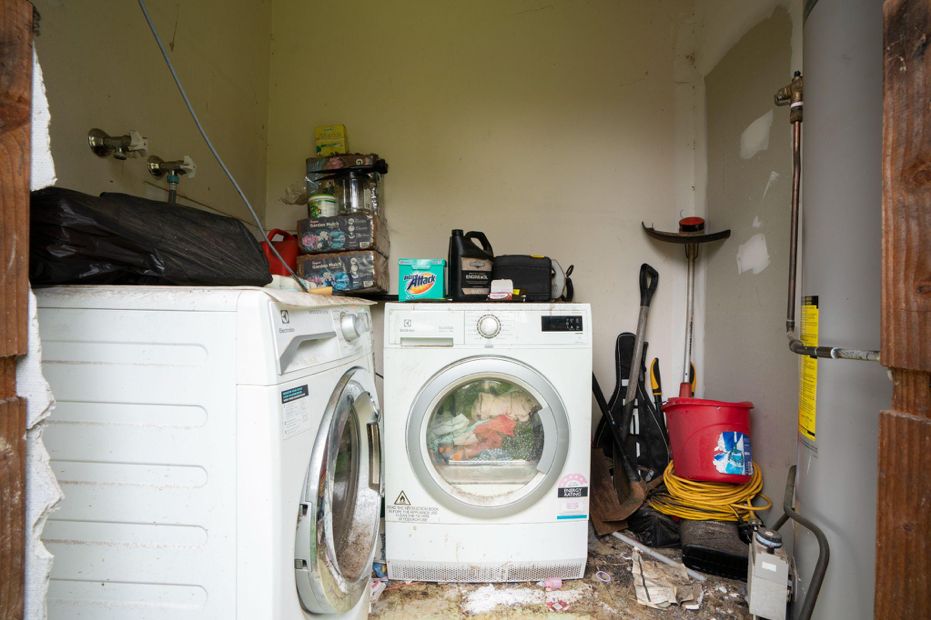
Another room in desperate need of attention was the external laundry. With no external door & unfinished building works in this room also, it needed a complete redesign. The old hot water heater took up a lot of room, so it made sense to relocate that to the side of the house externally.
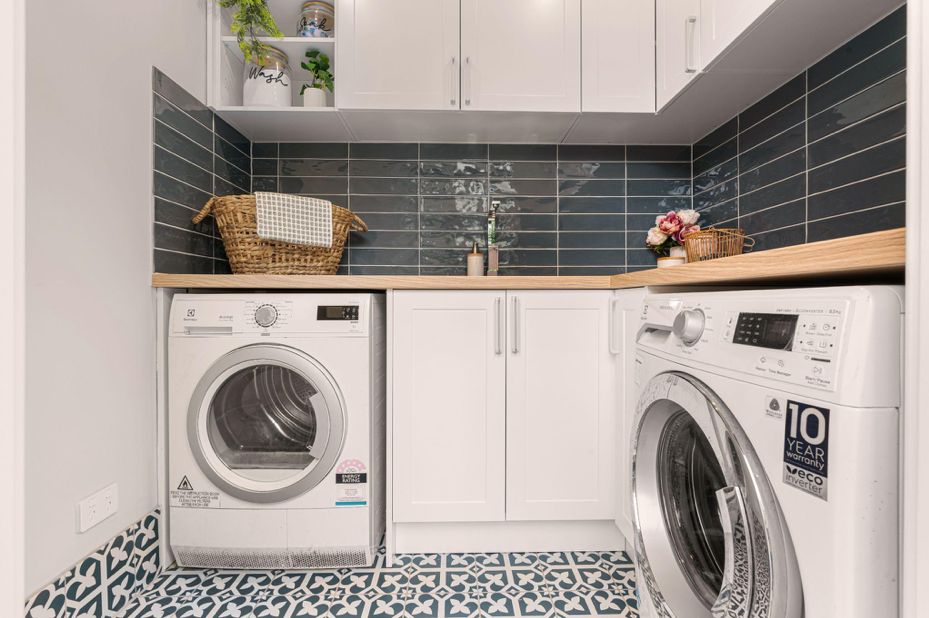
Once again, I installed my trusty go to flat pack cabinets, Kaboodle in Antique White with an Alpine profile to add that extra touch of detail. Continuing on with the homeowners love of blue, I chose the Majorca Palm Springs Deep Blue Matt Tile for the floor & paired it with the Boulevard Denim Gloss Tile for the splashback. A timber benchtop helps bring that nature feel to this room also & a large stainless-steel sink was dropped in for real practicality. The washer & dryer now have their own dedicated space & look at how much practical bench space, this tiny room now has!
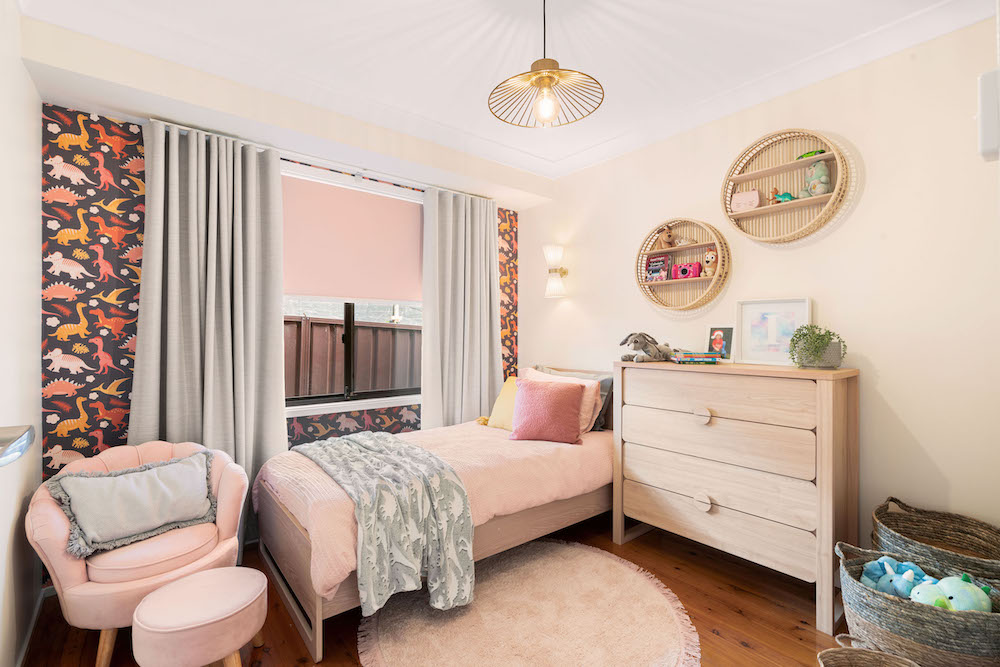
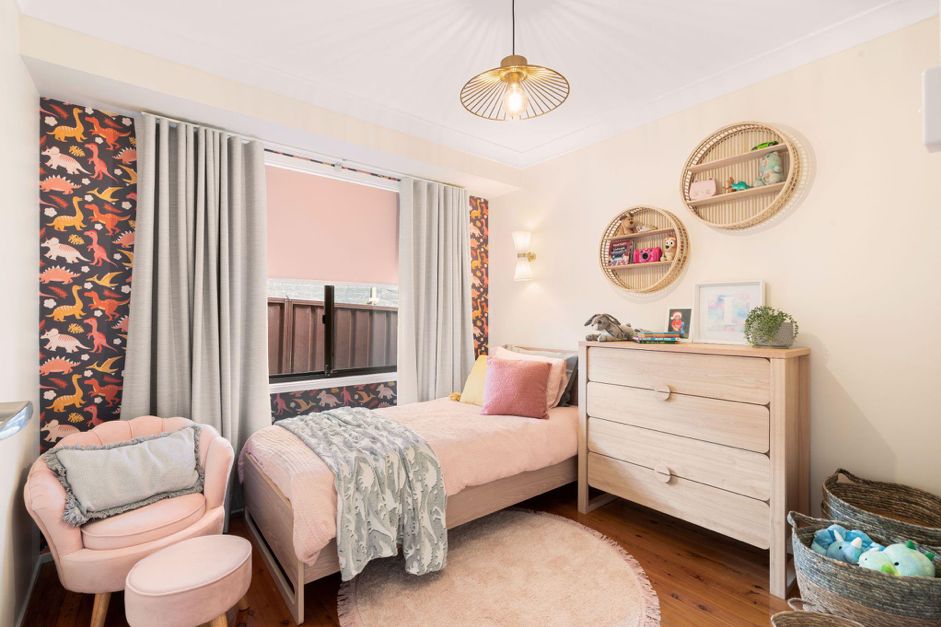
THE KIDS ROOM
The last room we transformed was little, 3-year-old, Isabella’s room. It was time for her to move from a cot to a big girl bed in a room that was safe & had plenty of room for her to play in. Isabella is absolutely obsessed with dinosaurs so when I saw this dinosaur wallpaper from Luxe Walls, I knew it would be perfect. Being such a bold print, I used it on the window wall, so the curtains & window break it up so it’s not too visually overpowering. The Lunar Kids range from Fantastic Furniture brings in those nature elements whilst pops of girly pink are scattered throughout. I finished the room off with the gorgeous Amore Pleated Wall Bracket Light in Brass as a reading light above the bed, perfect for bedtime stories.

All up, this renovation cost $88,078.46 for all the materials, labour, new furniture & styling items at full retail cost. Of this, materials accounted for $36,025.96 & labour at $52,052.50. The uplift in the property value was a whopping $ 320,000, resulting in a net renovation profit of $231,921.54.
One thing is for sure, this was an absolute whopper of a reno that pushed my team & I to our limits in just 9 days, but we’re not a team to ever back down from a challenge. I’m so happy to have transformed the home of Georgina & Nathan to help them get their lives back on track.
As always, if you have any questions on this renovation, be sure to ask them in the comments box below & my team or I will answer them promptly for you. Until next time …
Much love,
Cherie x


Hey Cherie,
I love these reno posts with the before and after photos and all the details of how you came to the end result. They are inspiring. A few photos are missing from this blog. Would you please be able to upload them? I’d love to see the whole end result.
I’m sure Nathan and Georgina were blown away and will be ever grateful to you for helping them achieve something well beyond their wildest dreams.
Thanks for being you Cherie and for helping us all to make the world a better and more beautiful place, not just by renovating but by caring for others around us.
In gratitude,
Carolyn
Hi Carolyn,
Thank you for your very beautiful words & I’m so happy to hear you love our blogs so much! Just in regards to the photos, we often post the “before” photos only when we are describing what the room looked like previously. Once we reveal what I did to the rooms, the before & after photos are revealed. Any photos with the caption such as “Bathroom – Before” are shown purely to show the room before renovation & not meant to have an “after” photo. Any photos that have the caption “Click & drag the arrow left & right to see the full before / after transition” are the photos that have the full before & after photo of each room. Hope this helps explain why some photos in the blog only have the before photo. CB x
Fabulous, as always, Cherie! Loving the colour palette!
Thank you Jane! CB x
Amazing Reno. Want to find out how much your course costs?
Hi Lillian, thanks so much for your lovely feedback. If you head to ‘OUR COURSES’ on our website you will find all of the renovation courses available & also the costs. One of our friendly team members are available anytime to answer any questions you may have, let us know. Cherie Crew x https://renovatingforprofit.com.au/courses/property-investment-renovation-course-online/