


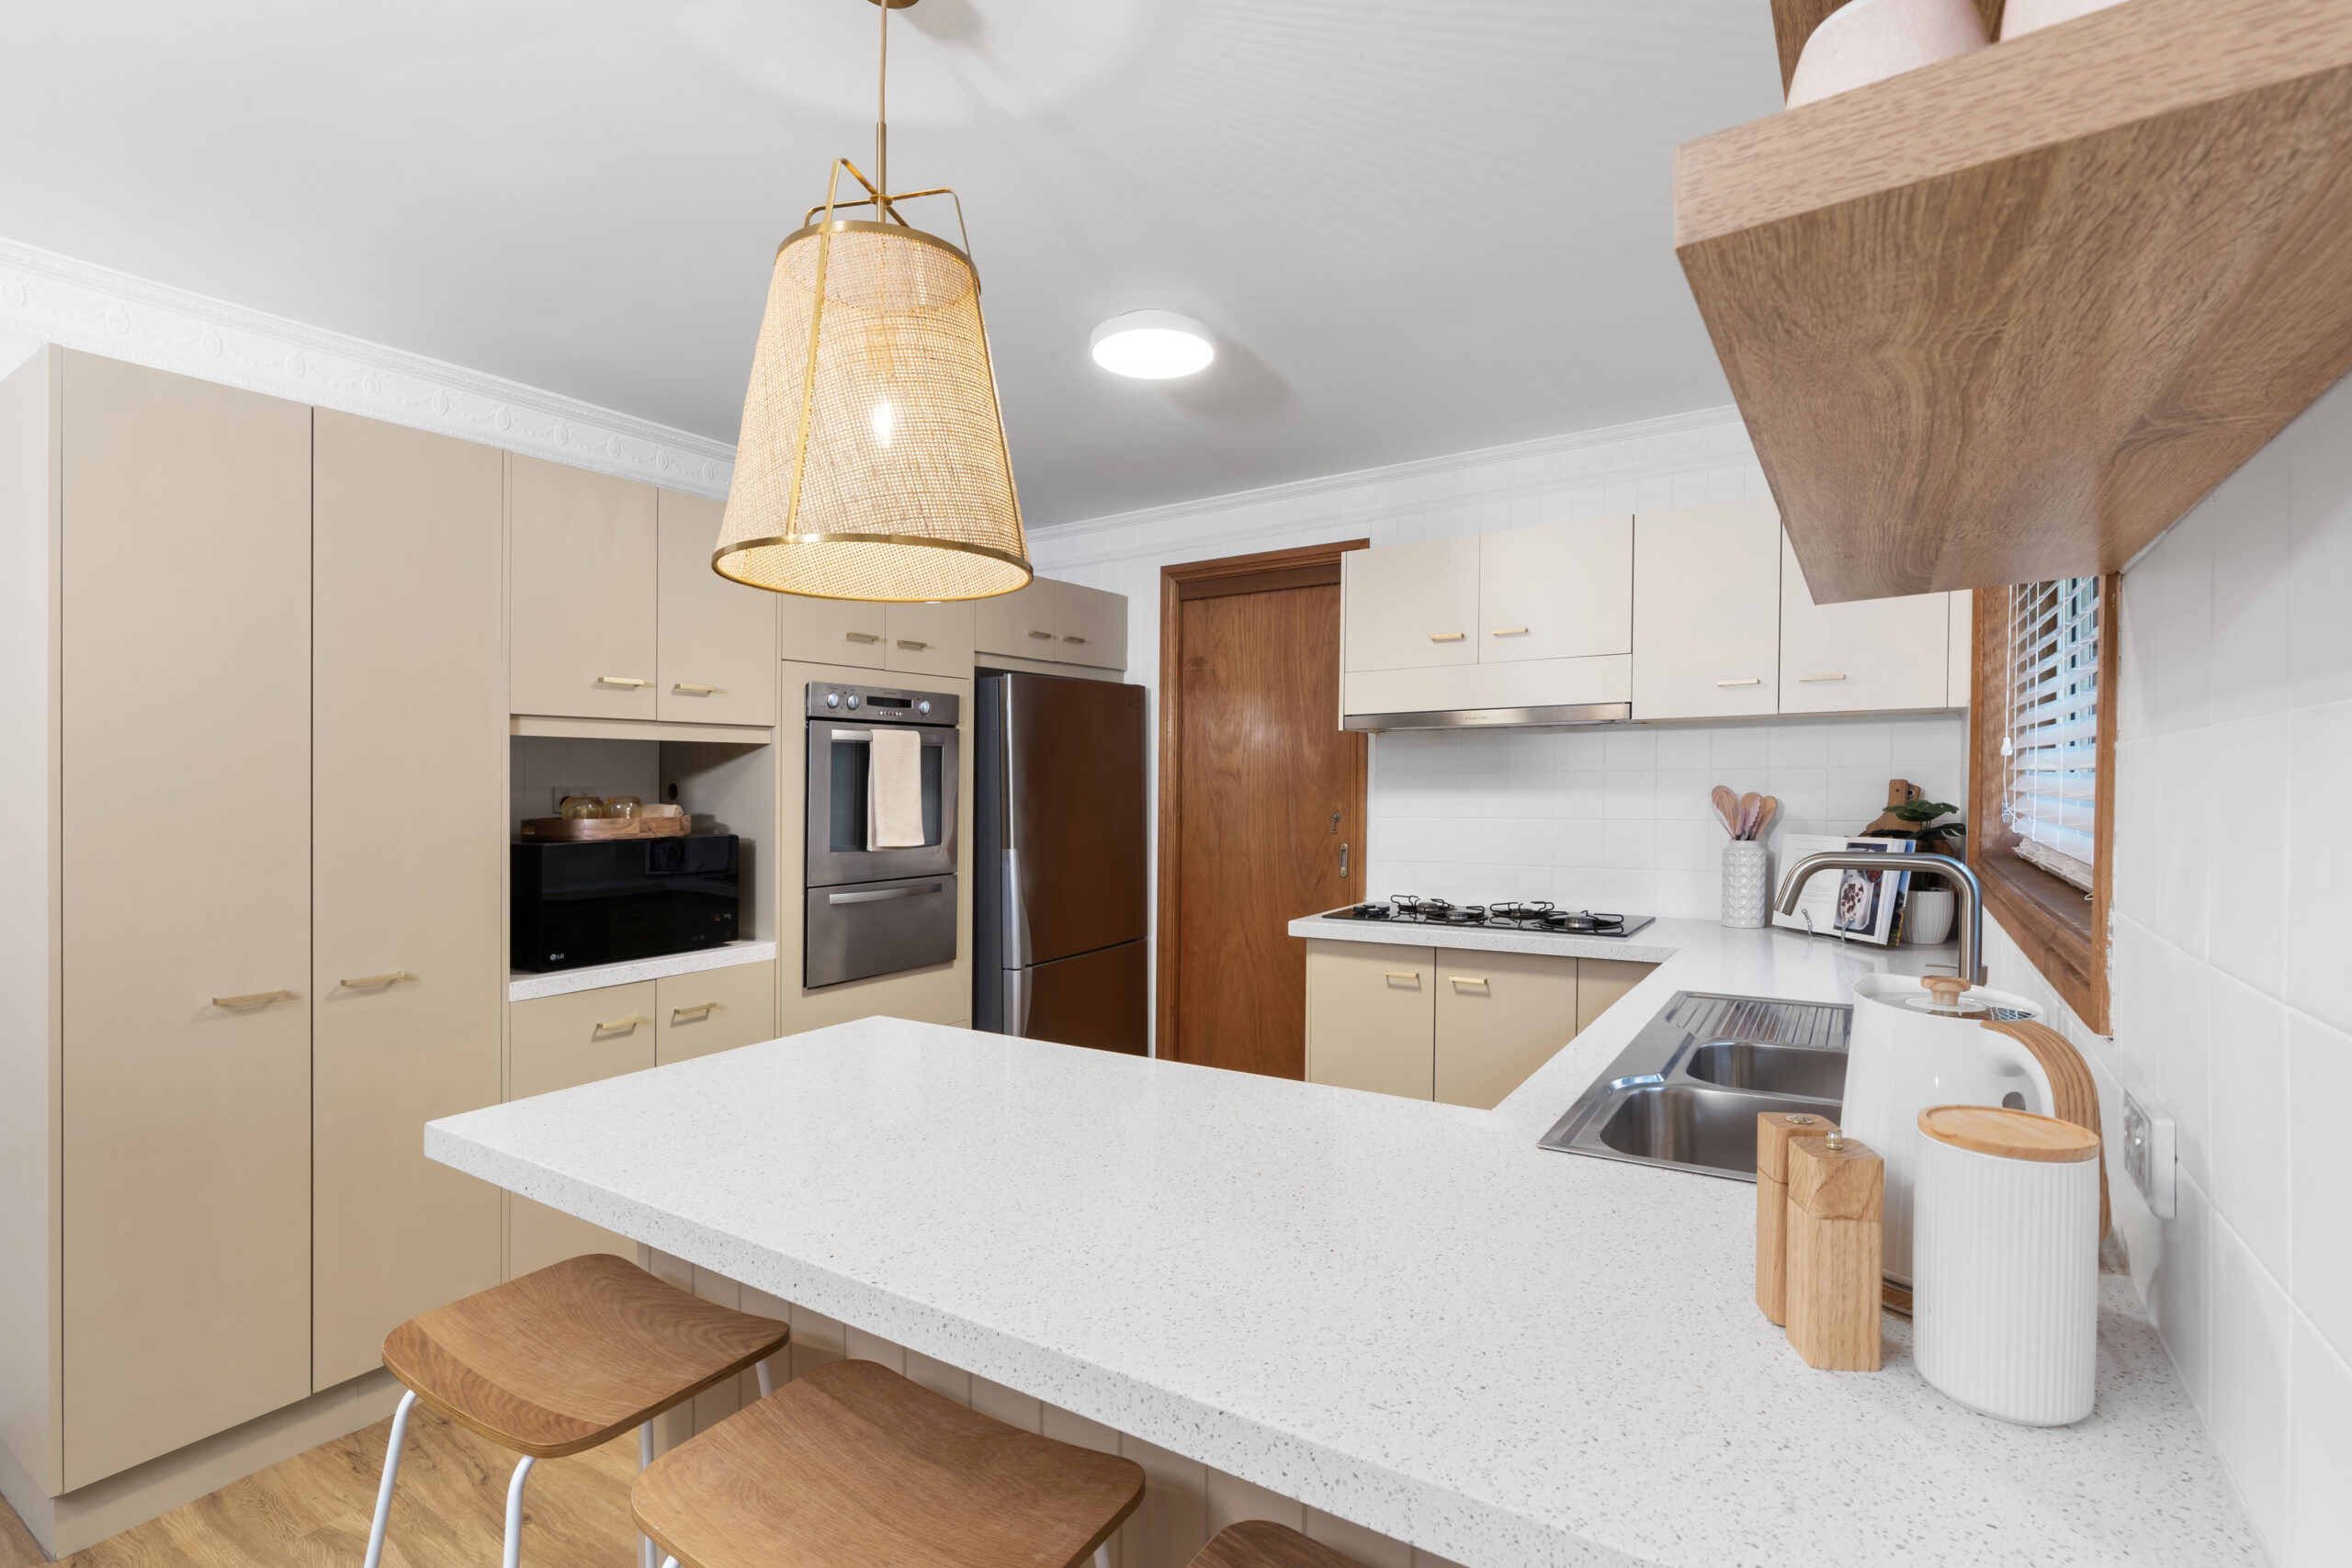
How I Overhauled An Old Kitchen For Less Than $10K!
Hi,
Buckle up because I’m about to spill the beans on how my team & I recently turned a drab suburban kitchen into a modern masterpiece – all for just under $10,000! That’s right, while the average Joe is typically forking out somewhere between $25,000 to $50,000 for a brand-new kitchen these days, we’ve done it for less than half that cost. How, you ask? Well, let me share this saga of penny-pinching prowess and a whole lot of elbow grease.
Watch the full kitchen reno (6 minutes) by clicking the video image above.
Alright, I’m going to assume you may be thinking of getting a new kitchen or renovating your existing one, eh? Well, hold onto your thongs because here’s the lowdown of what kitchens actually cost these days.
If you’re going budget and doing some of the work DIY, you’re looking at $10,000 to $20,000 inclusive of GST. That’s your basic setup with off-the-shelf, flat pack cabinets or through a no-frills cabinetmaker with laminate benchtops & basic appliances.
A mid-range kitchen will set you back $20,000 to $50,000 (inc GST) which means you can splash out a bit on custom cabinetry, with a wider range of cabinetry door styles & surface options, stone benchtops & nicer appliances.
For those of you who are feeling fancy and want to go top-shelf, high-end kitchens start at $50,000 and can go up to $100,000 typically, and in some cases, more. We’re talking custom designs, marble benchtops and appliances so good, you might actually enjoy cooking.
Just keep in mind that the cost of installing a new kitchen in Australia does vary significantly, based on where your home is located, the materials used, size and complexity of your project. The more structural changes you make such as demolishing or relocating walls, doors, windows & your flooring, the more those costs increase.
THE GRAND PLAN
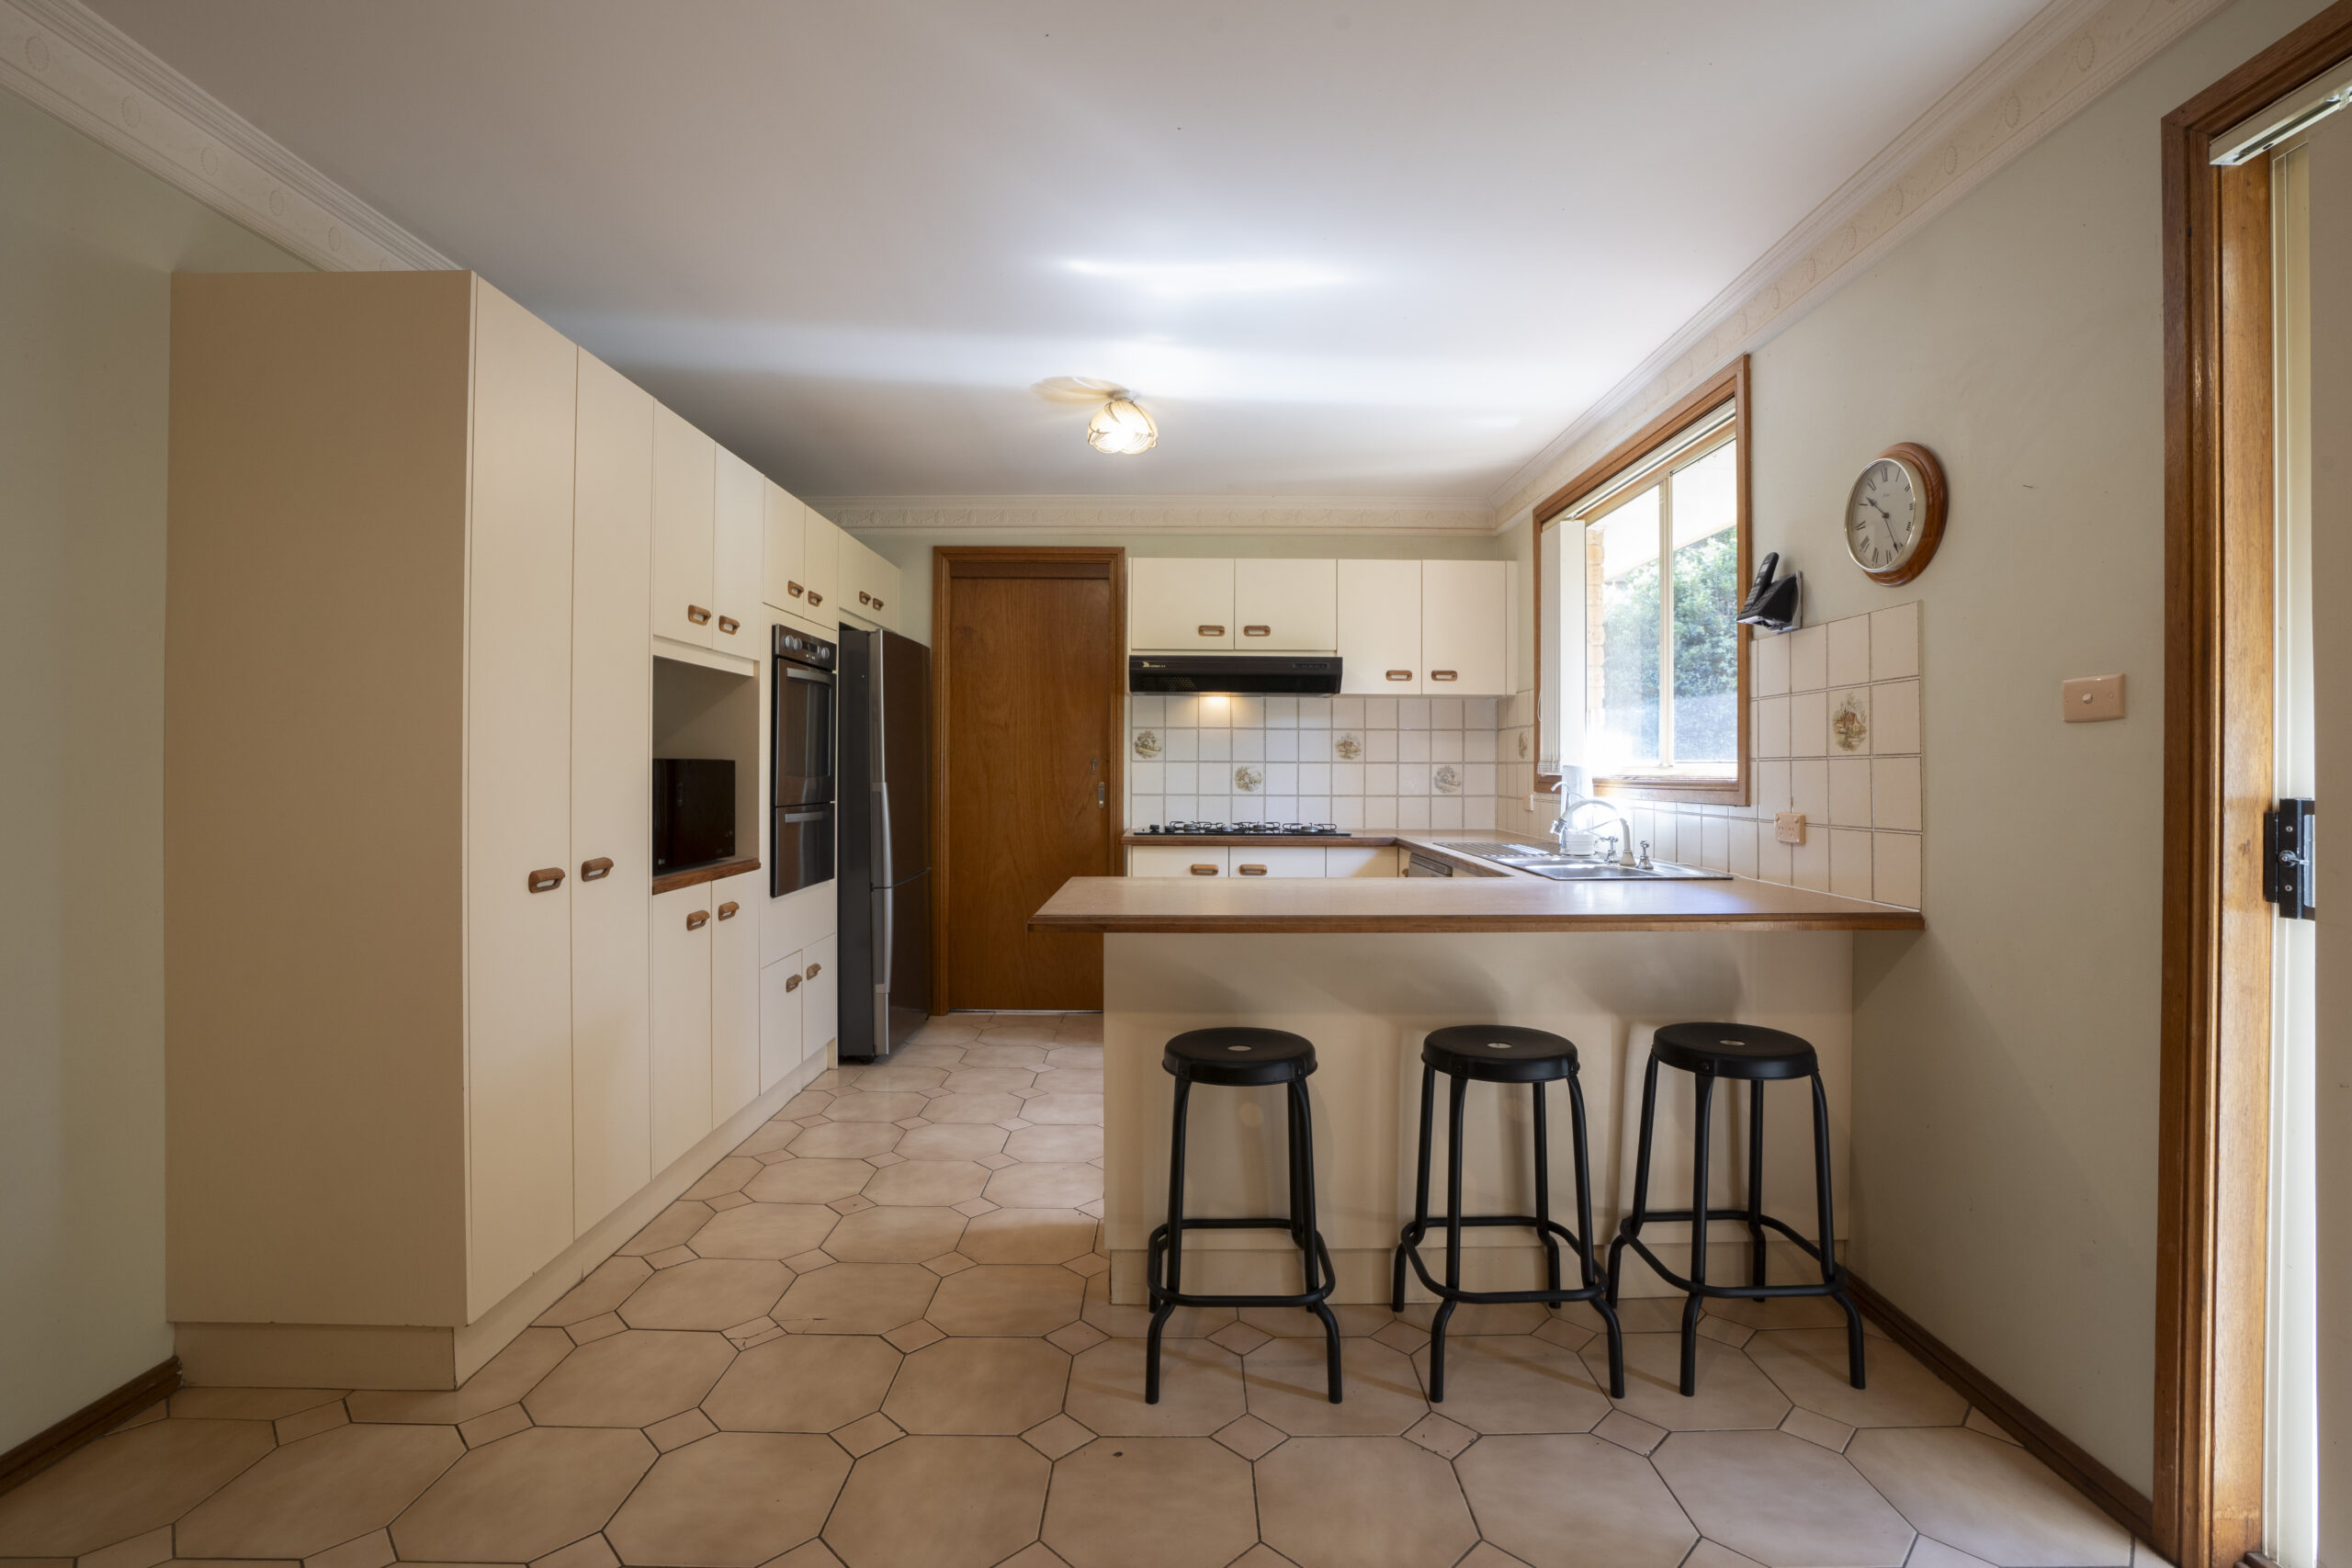
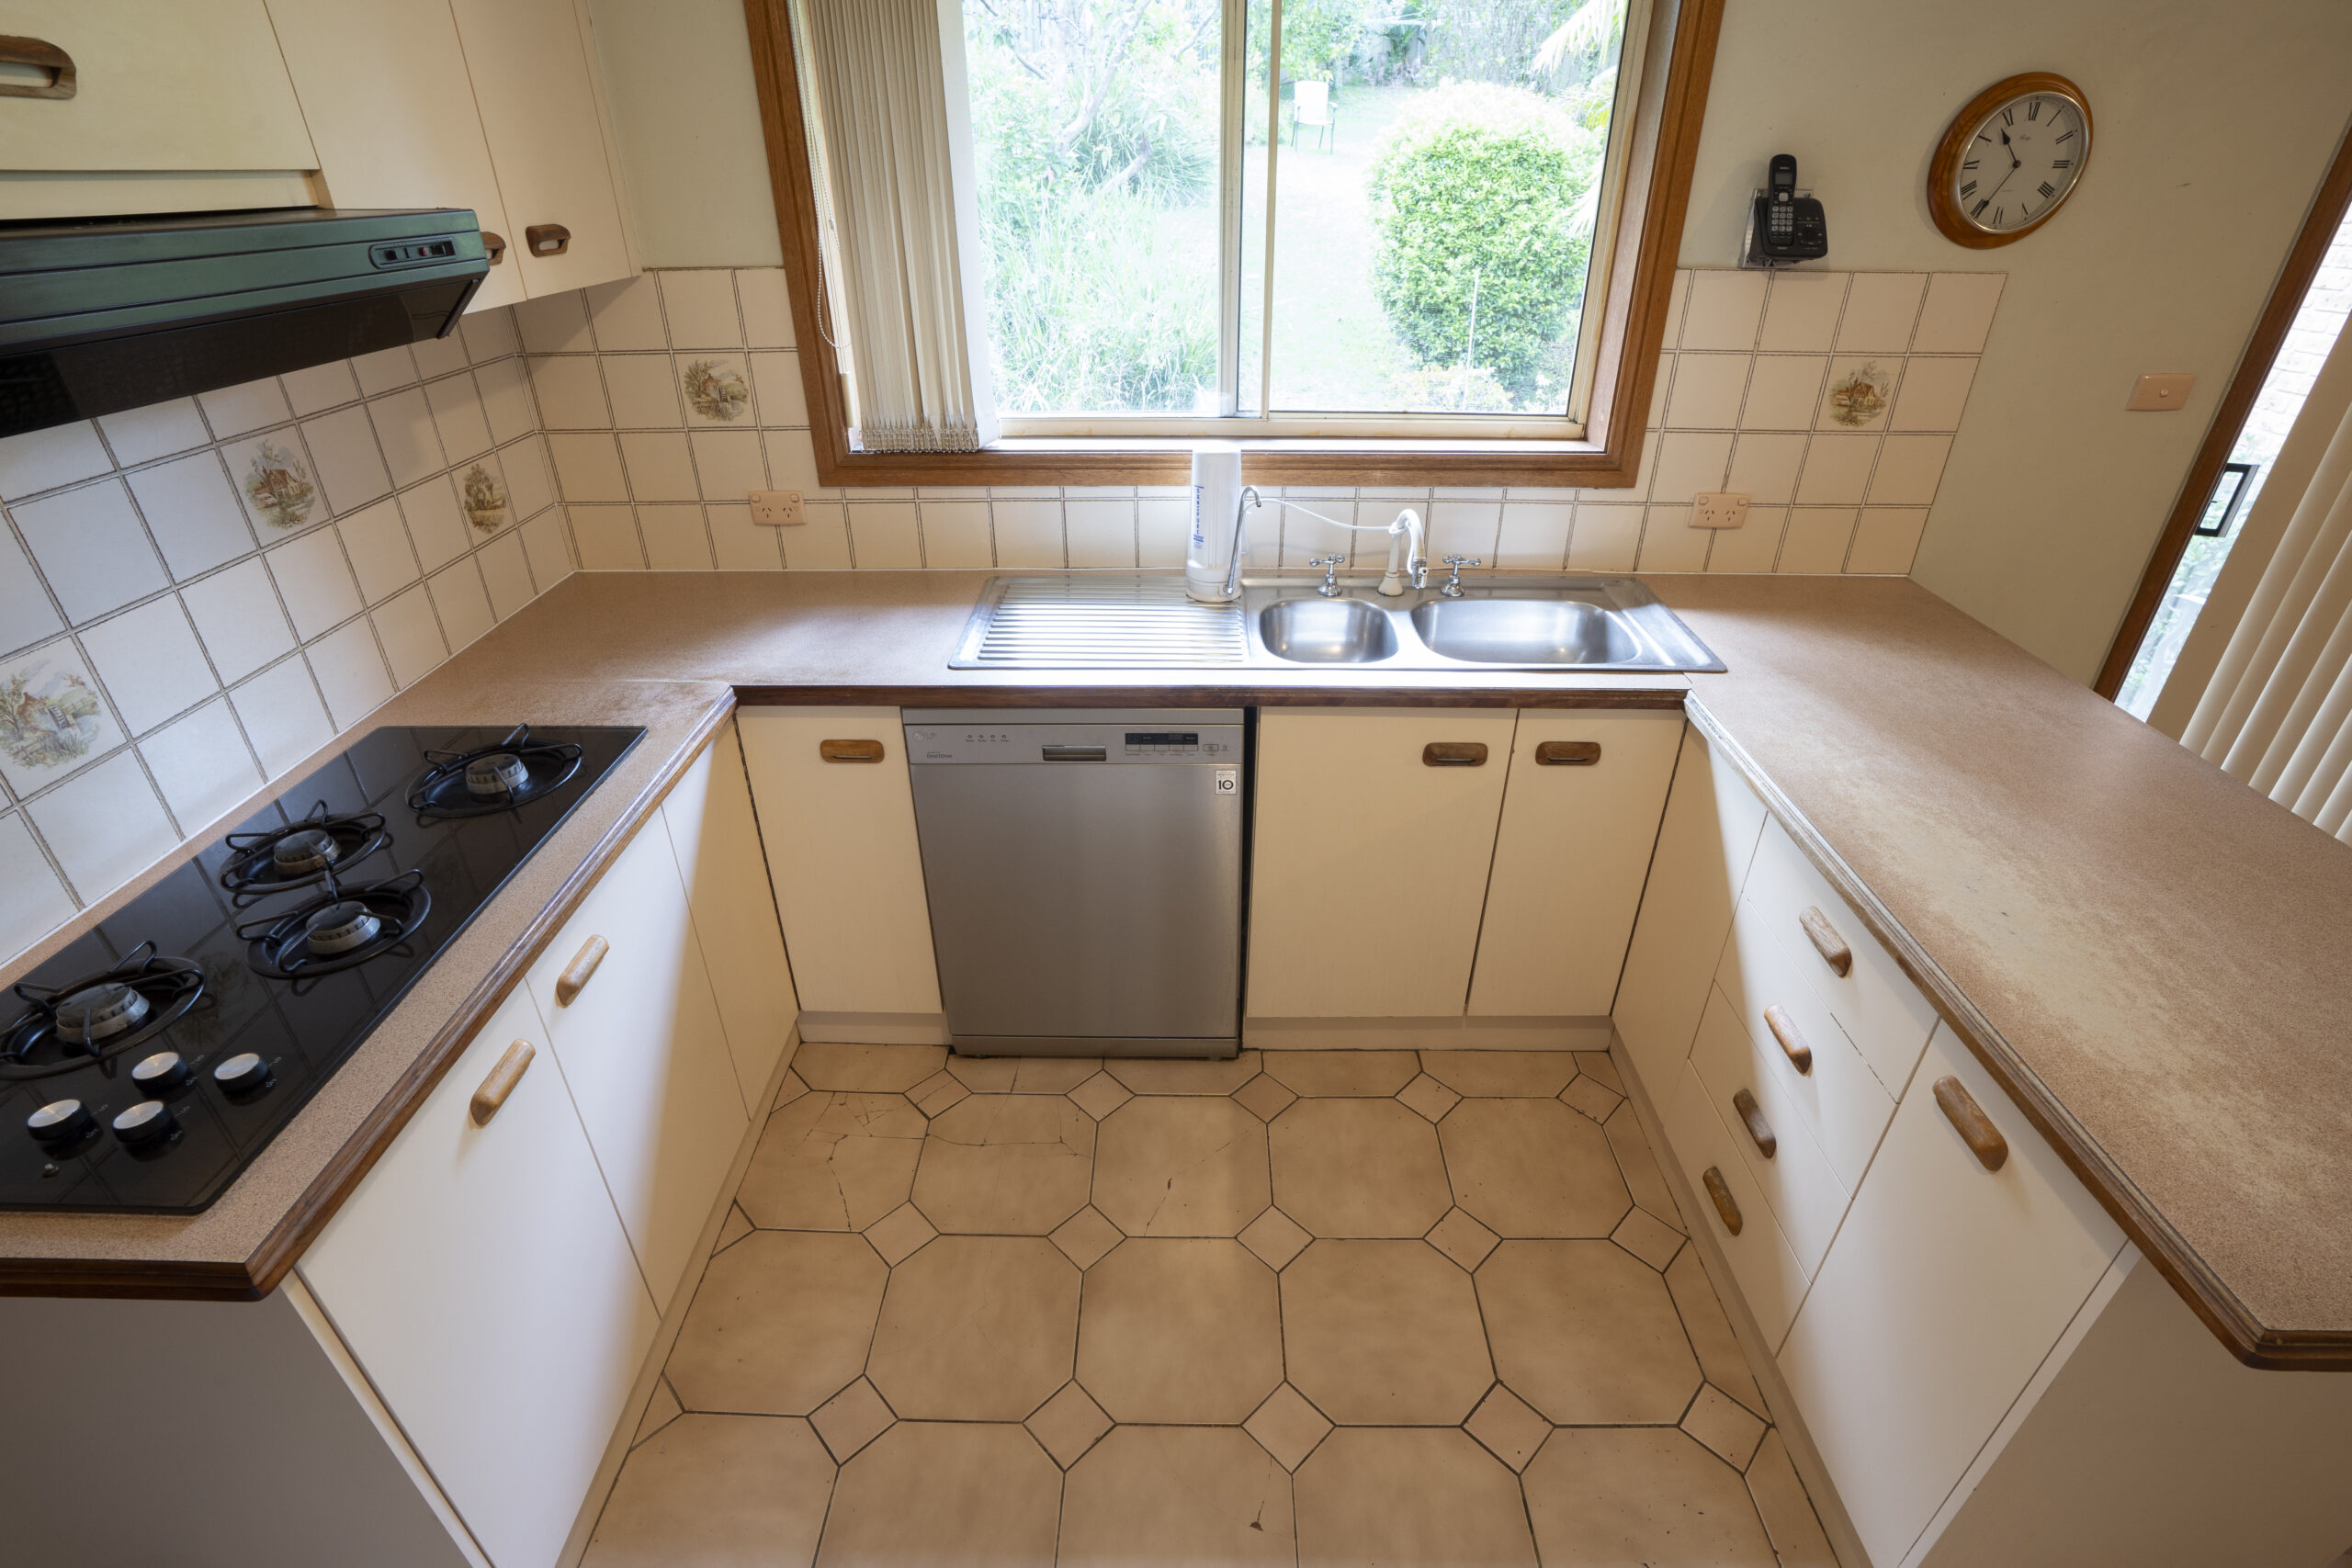
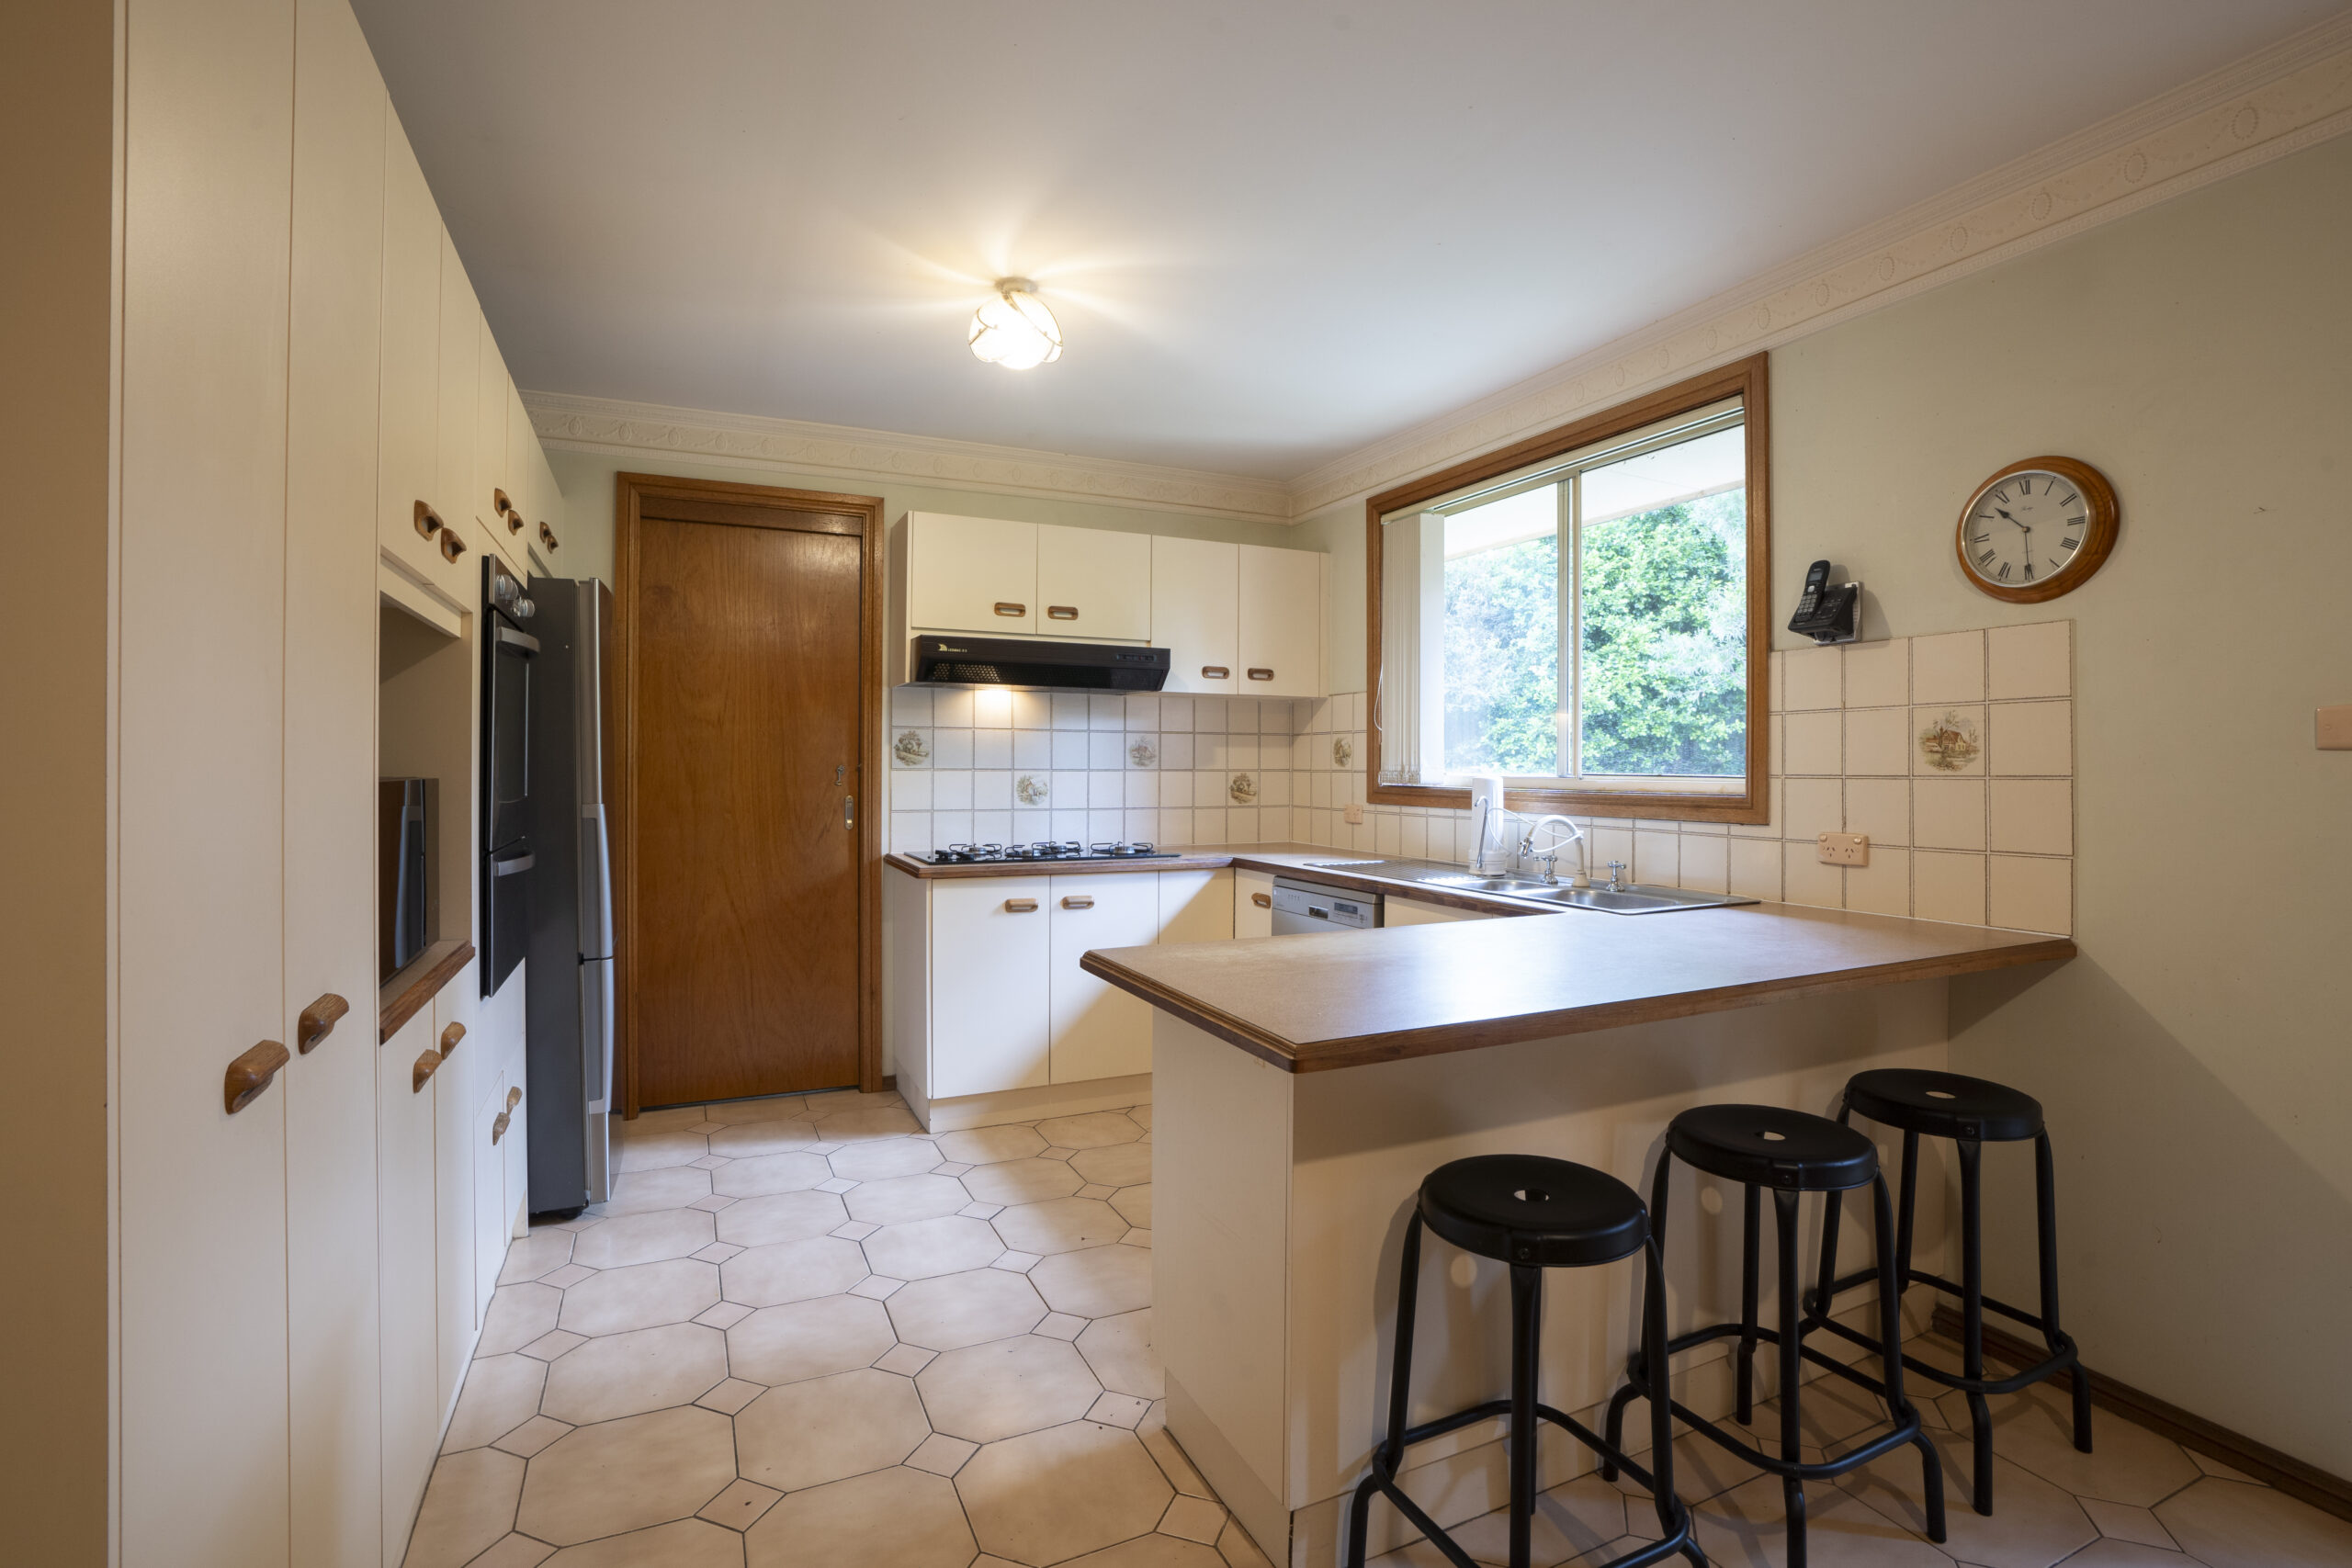
First off, let’s talk about the “before” scenario. We’re talking about a kitchen that looked dated but structurally wasn’t. Like a lot of old kitchens around the country, this old timer had been well looked after.
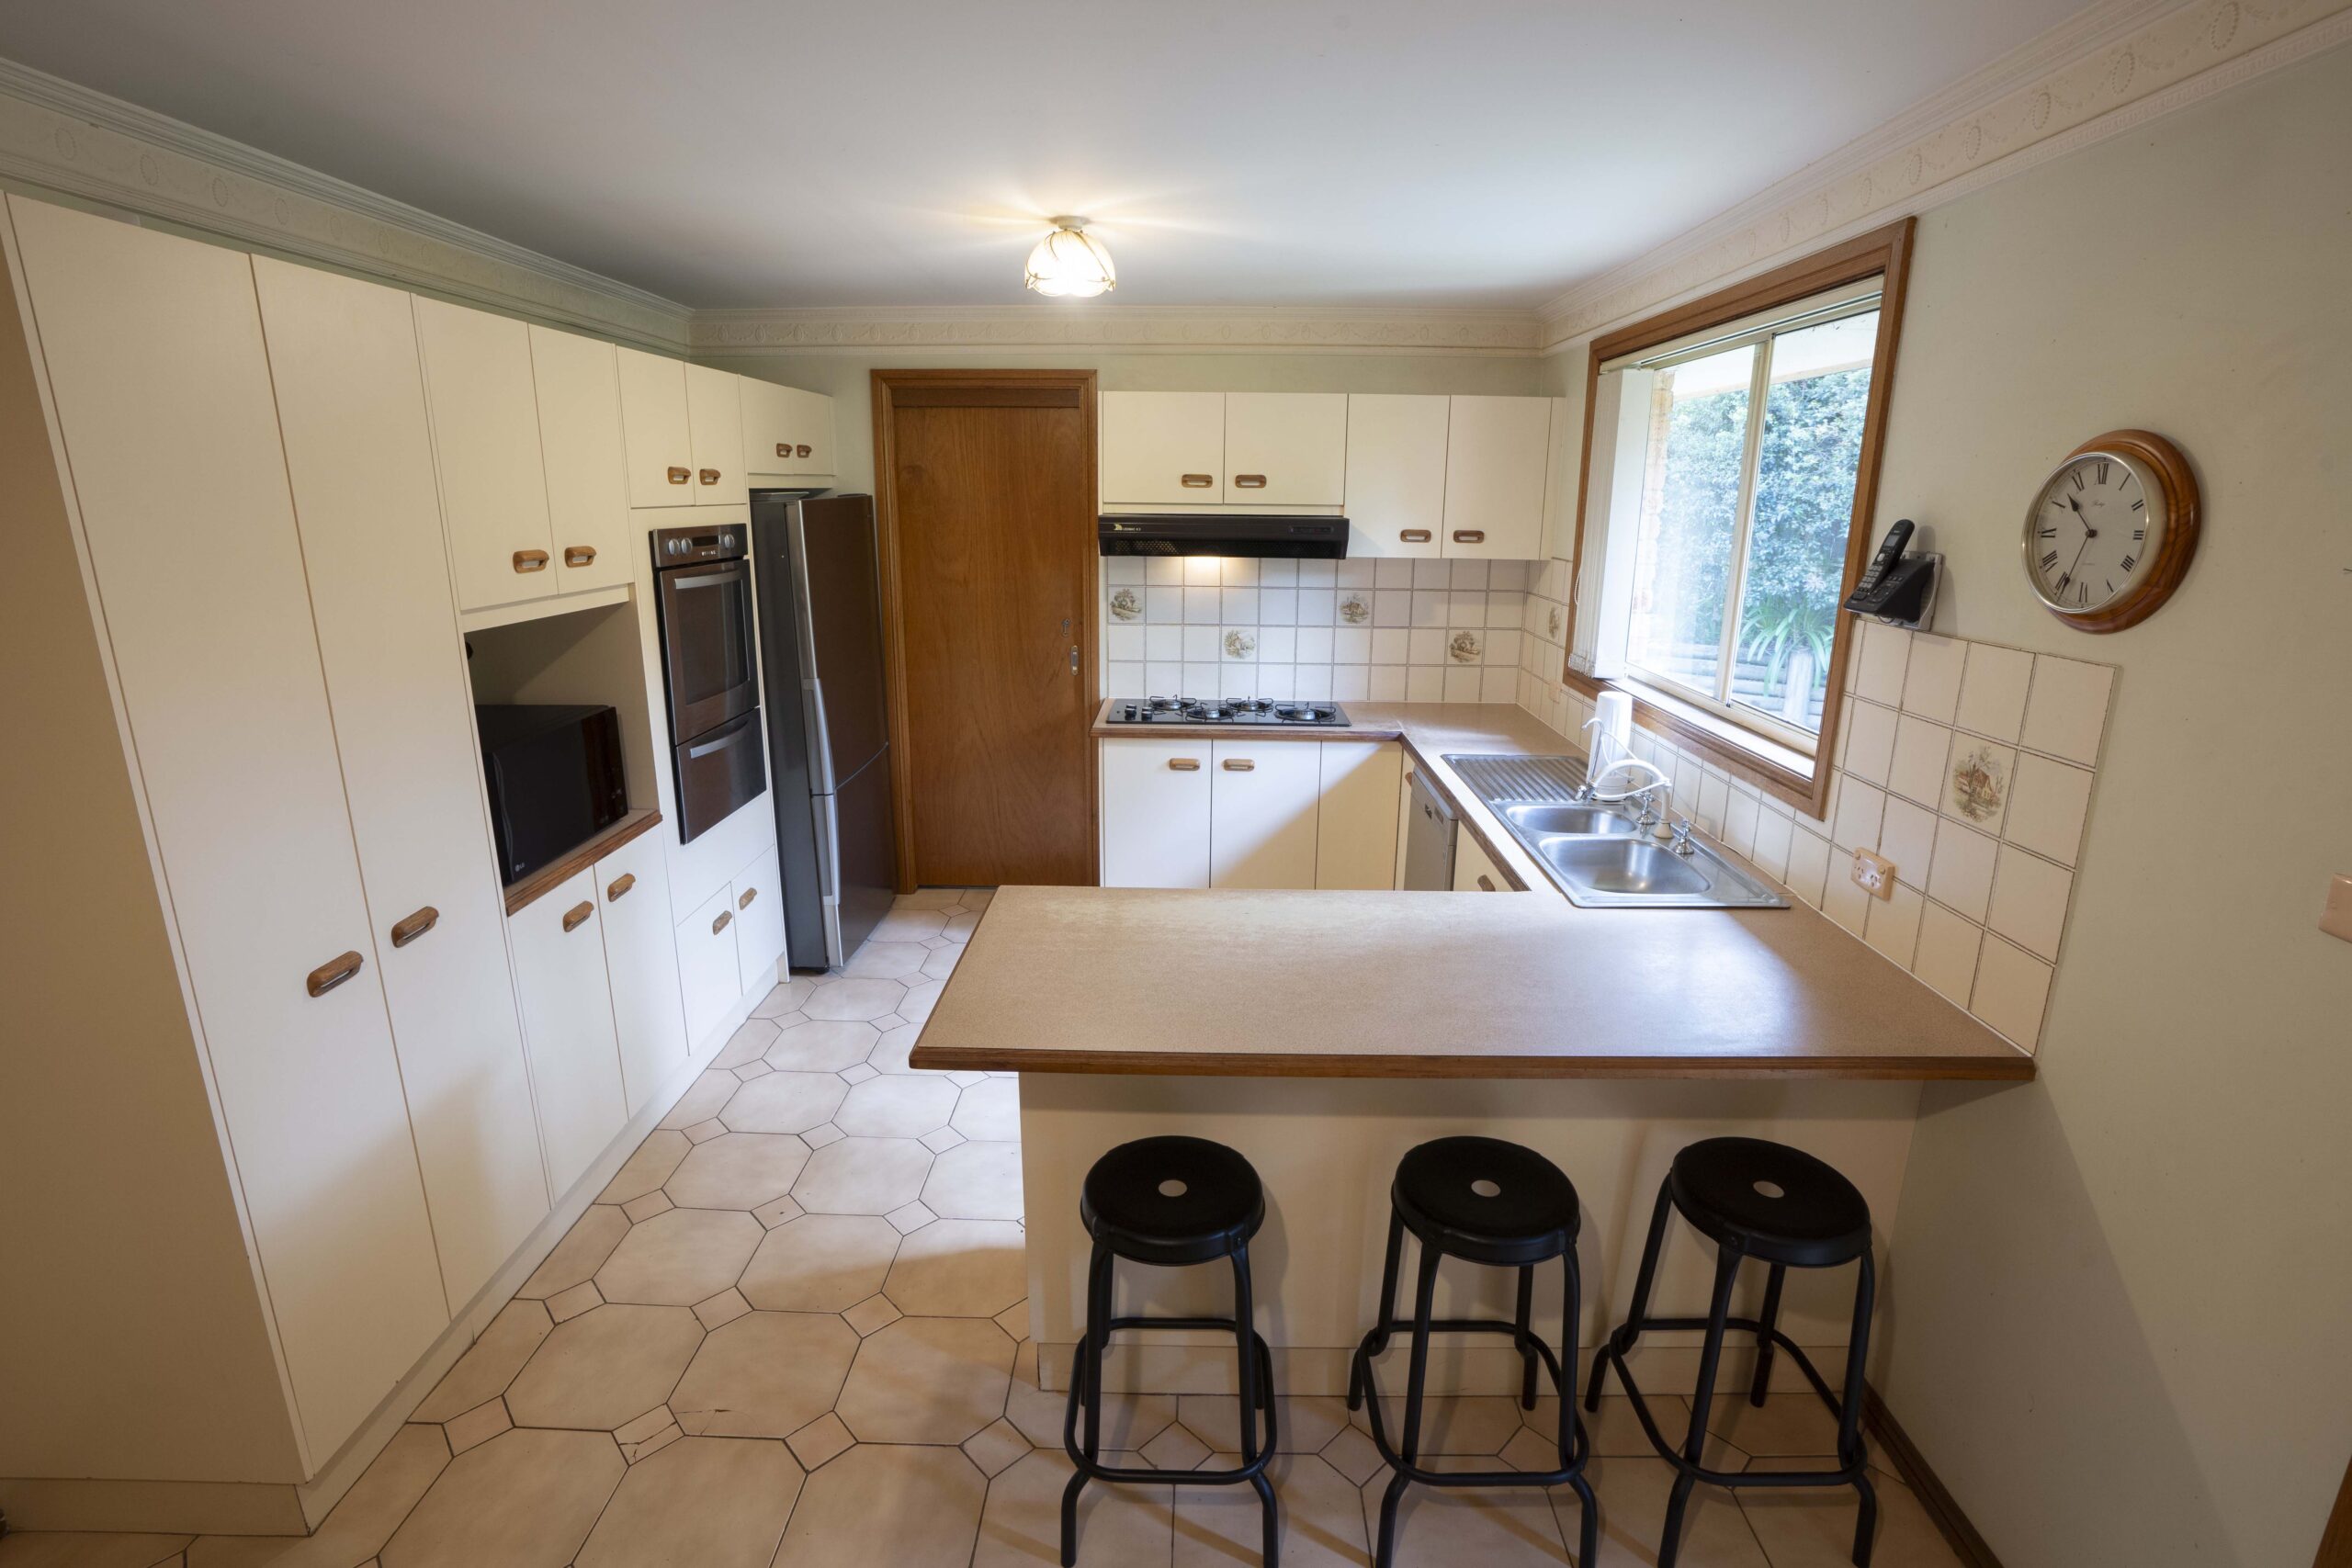
Kitchen – Before.
All the internal cabinetry carcasses & internal shelving was in tip-top condition & the layout was ideal, therefore didn’t need to change. The walls, windows & doors were in the right location so I quickly knew, this kitchen was the perfect candidate for a cosmetic refresh, versus a complete demolition.
Kitchen – Before.
Let’s also not ignore the fact that the two elderly homeowners (being 92 & 96 years young), couldn’t bear the thought of their kitchen being out of action for a month or two, nor did they have the budget for such a radical change. The challenge? To revamp this blast from the past into a modern, functional space quickly, without breaking the bank. Challenge accepted!
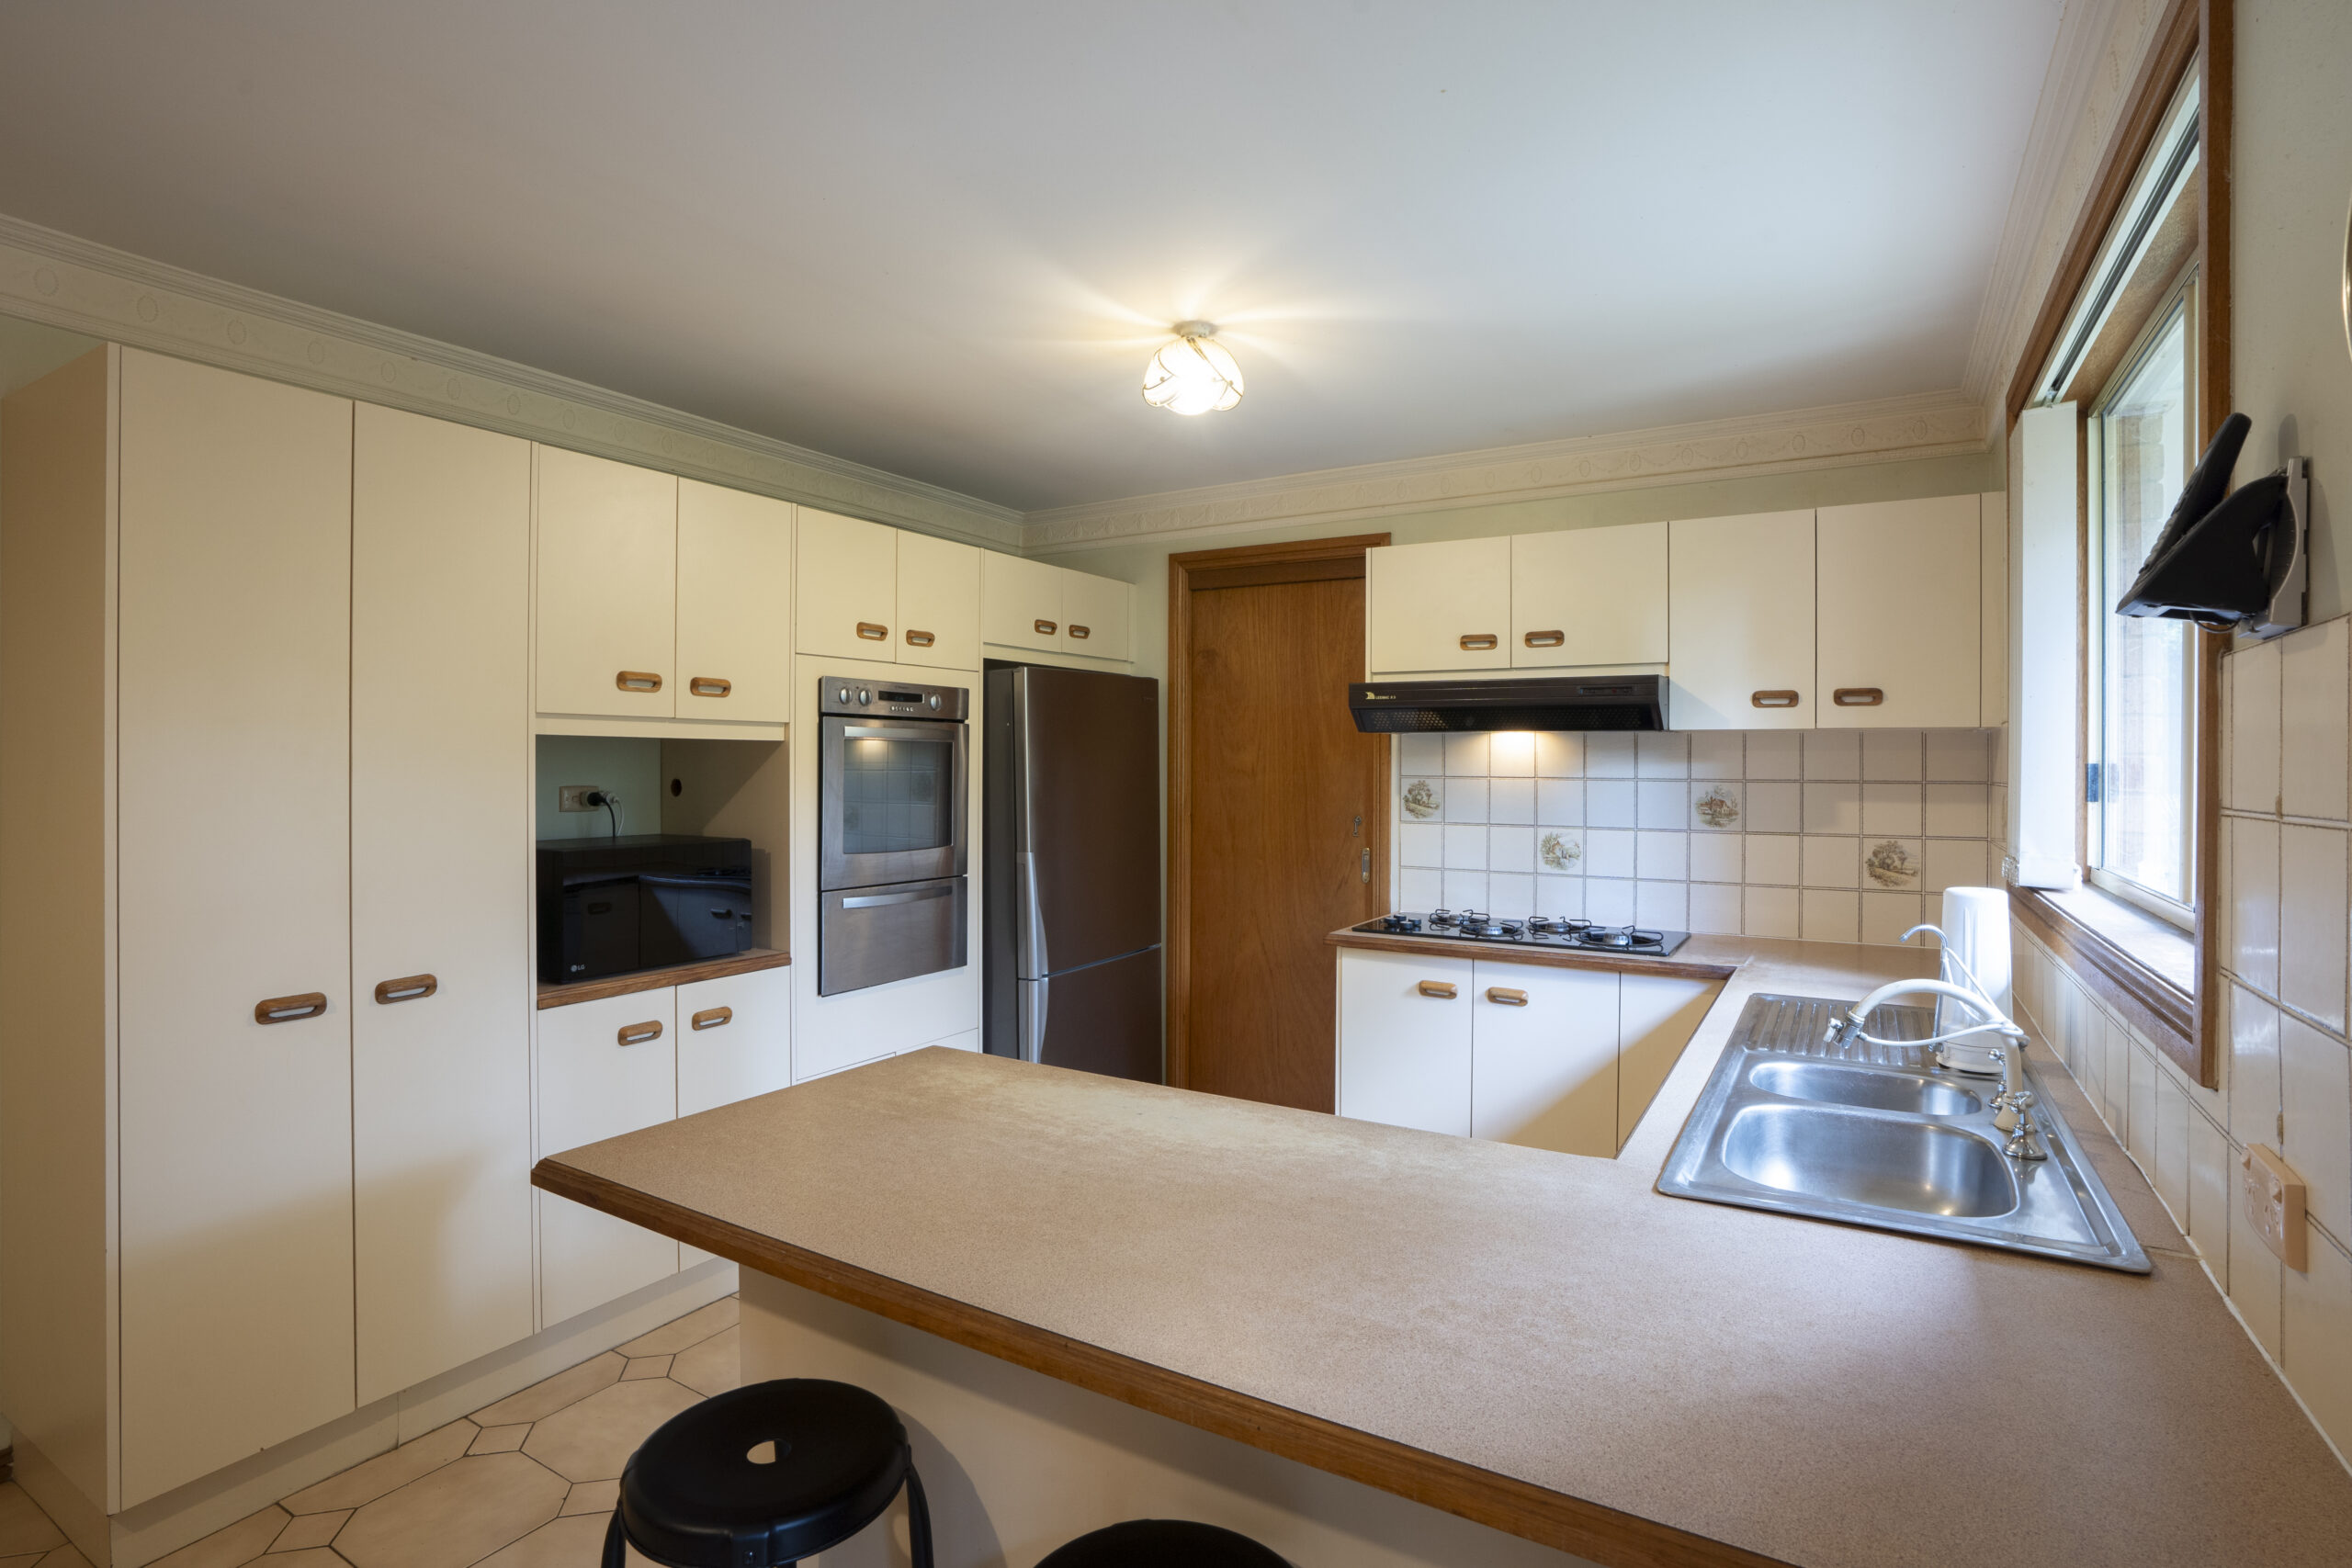
Kitchen – Before.
STEP 1: DEMOLITION
Sure, the thought of smashing your old kitchen to smithereens with a sledgehammer, sounds sort of fun, doesn’t it? Remember though, normally what you rip out, may need to be replaced with something else & what does that cost you? Money honey!
Scanning this room, I quickly worked out, the kitchen cabinets were in great condition so they could stay. The old benchtops whilst structurally in great condition also, albeit a little worn, didn’t have to go. The oversized sink took up way too much space & the old rangehood which hadn’t worked for years on end, were all removed. Those once trendy wooden cabinet handles were taken off & the little ceiling oyster light that wasn’t overly effective, also removed.
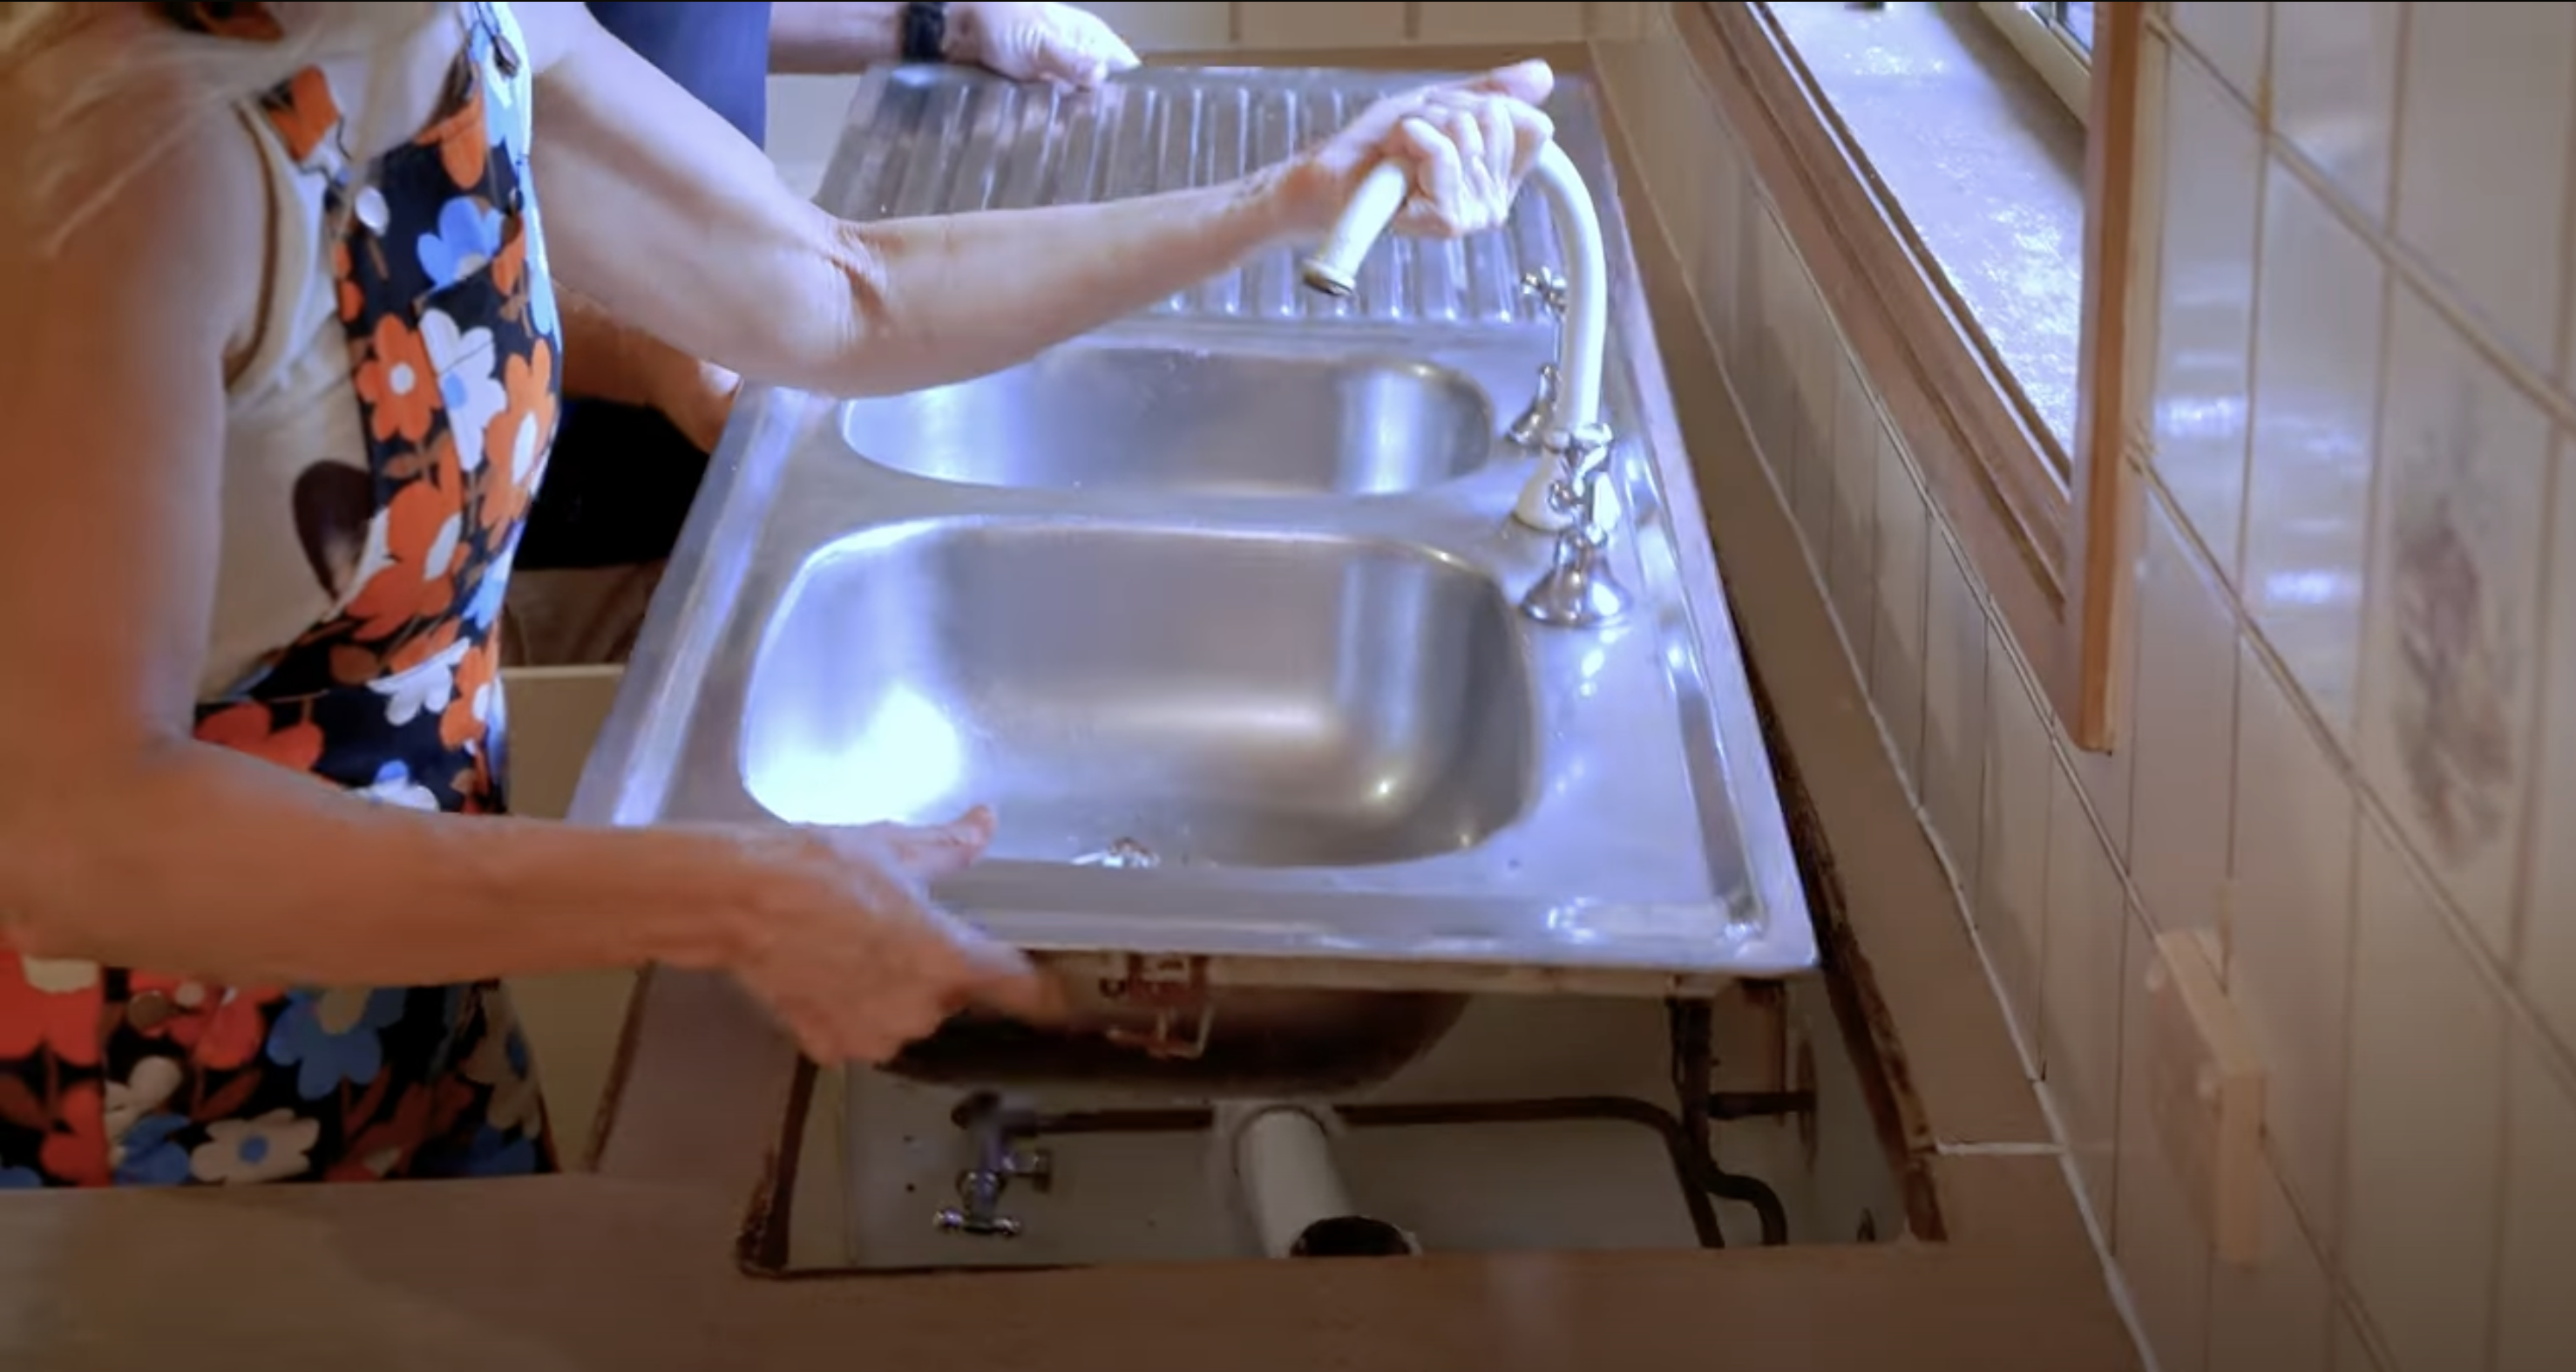
The old fixtures were removed to make way for newer alternatives.
STEP 2: TACKLING THE CEILING & WALLS
One great thing about keeping your home well looked after, is that it makes a cosmetic refresh so much faster & easier. The biggest issue with the kitchen walls was just the blandness of them all. Combine that with the blandness of all the cabinetry doors which resulted in a room that looked visually flat.
Before – the light green walls looked dated & bland.
To add much needed texture to the room, I turned to one of my trusty go-to-products, Easycraft’s VJ100 wall panelling. If you’re handy on the tools, it’s easily installed with liquid nails & screws but if you have lots of places that you need to cut around, I’d recommend you hire a professional chippie.
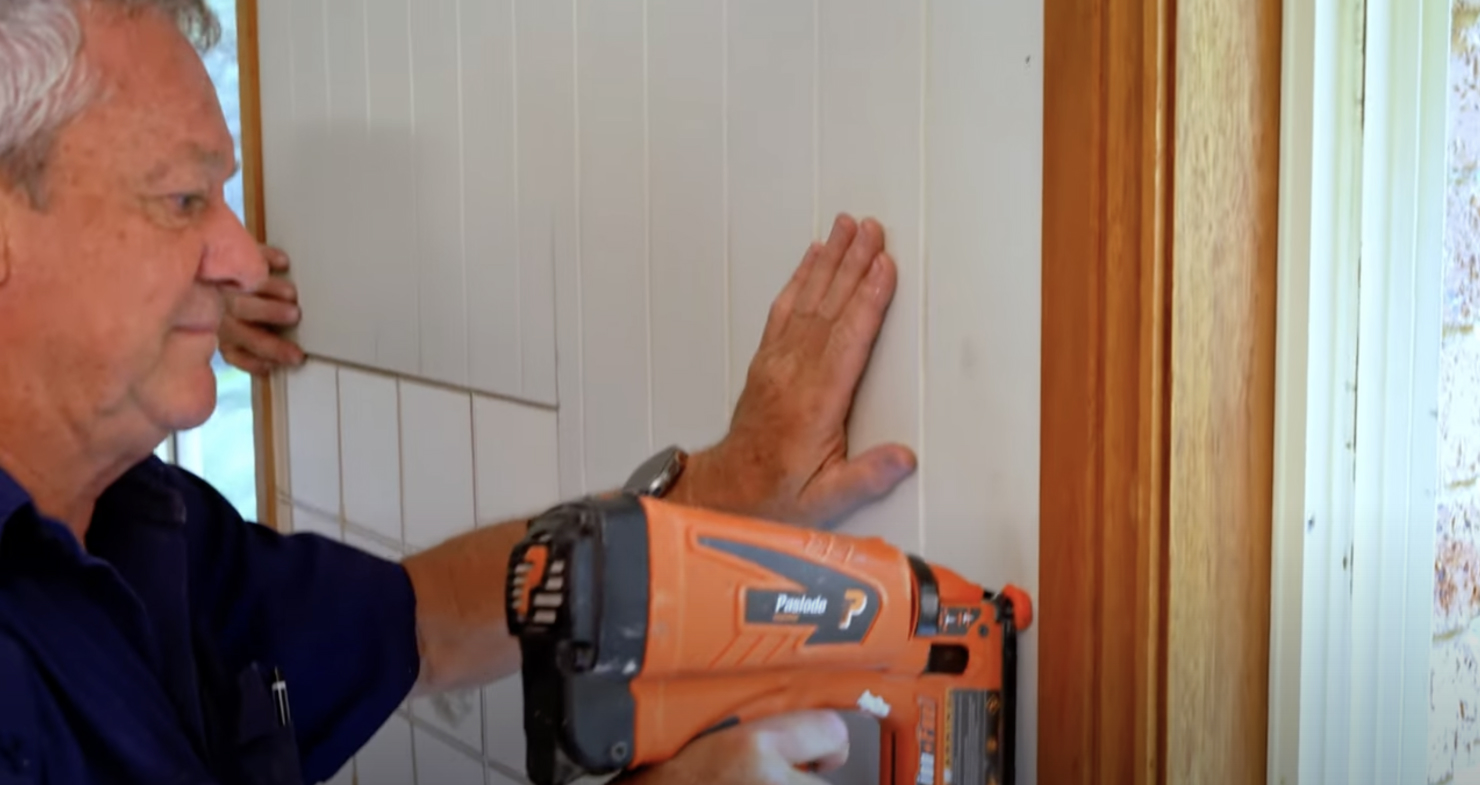
Bring in a chippie to install wall cladding if you’re not handy on the tools.
With the walls now clad in VJ & instantly looking more visually interesting, it was time to give the ceiling & walls a few coats of paint using Taubmans Kitchen & Bathroom paint in “Crisp White” colour. This paint inhibits the growth of mould, mildew & bacteria & it’s also exceptionally stain & scrub resistant which helps with kitchen greases that always seem to end up on your walls.
STEP 3: KITCHEN CABINETS TURNED CHIC
Next up were those old kitchen cabinets. Well, you already know I didn’t toss them out. Yes, I’m a frugal gal. Instead, I opted for a little trick called Cabinetry Paint.
There are 2 ways you can tackle cabinetry paint, either use a specialty semi-gloss paint like Taubman’s Tile & Laminate paint or Dulux’s Renovator range. Whilst these products are great & leave a nice sheen on your cabinets, you do need to let the paint dry overnight, in between coats ideally. It can be a longer project to complete but if you’re in no rush, its really not a problem.
Tasked with only 8 hours to transform this kitchen, I opted for chalk paint instead. You might think this is an unusual choice but brands like Annie Sloan or Frenchic give a totally matt appearance with 2 coats possible & minimal sanding required, all on the same day. I dragged my sister & team member Fran in to help me with the painting but this is something anyone can do DIY without having to hire anyone. Call it sweat equity.
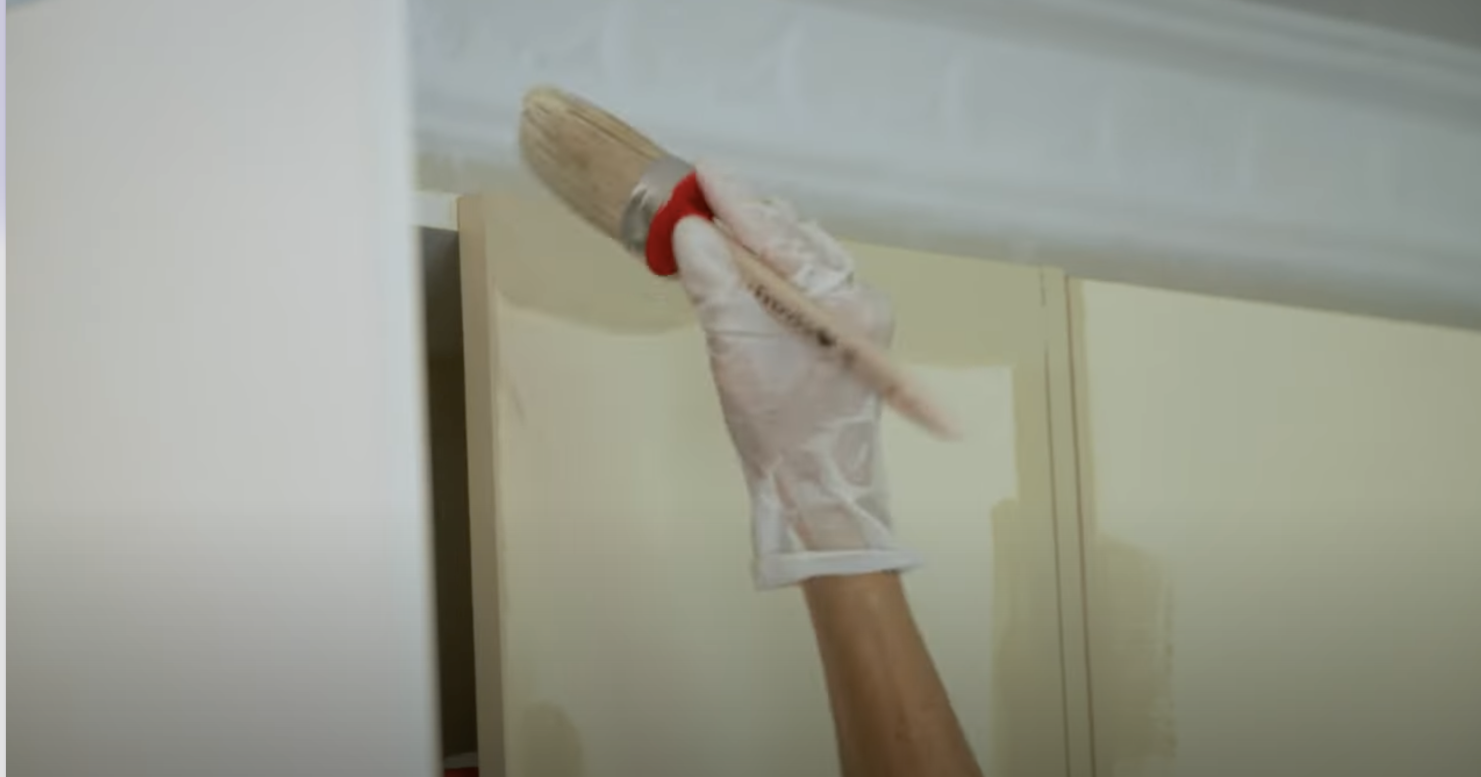
Cabinetry paint works wonders on old cabinets.
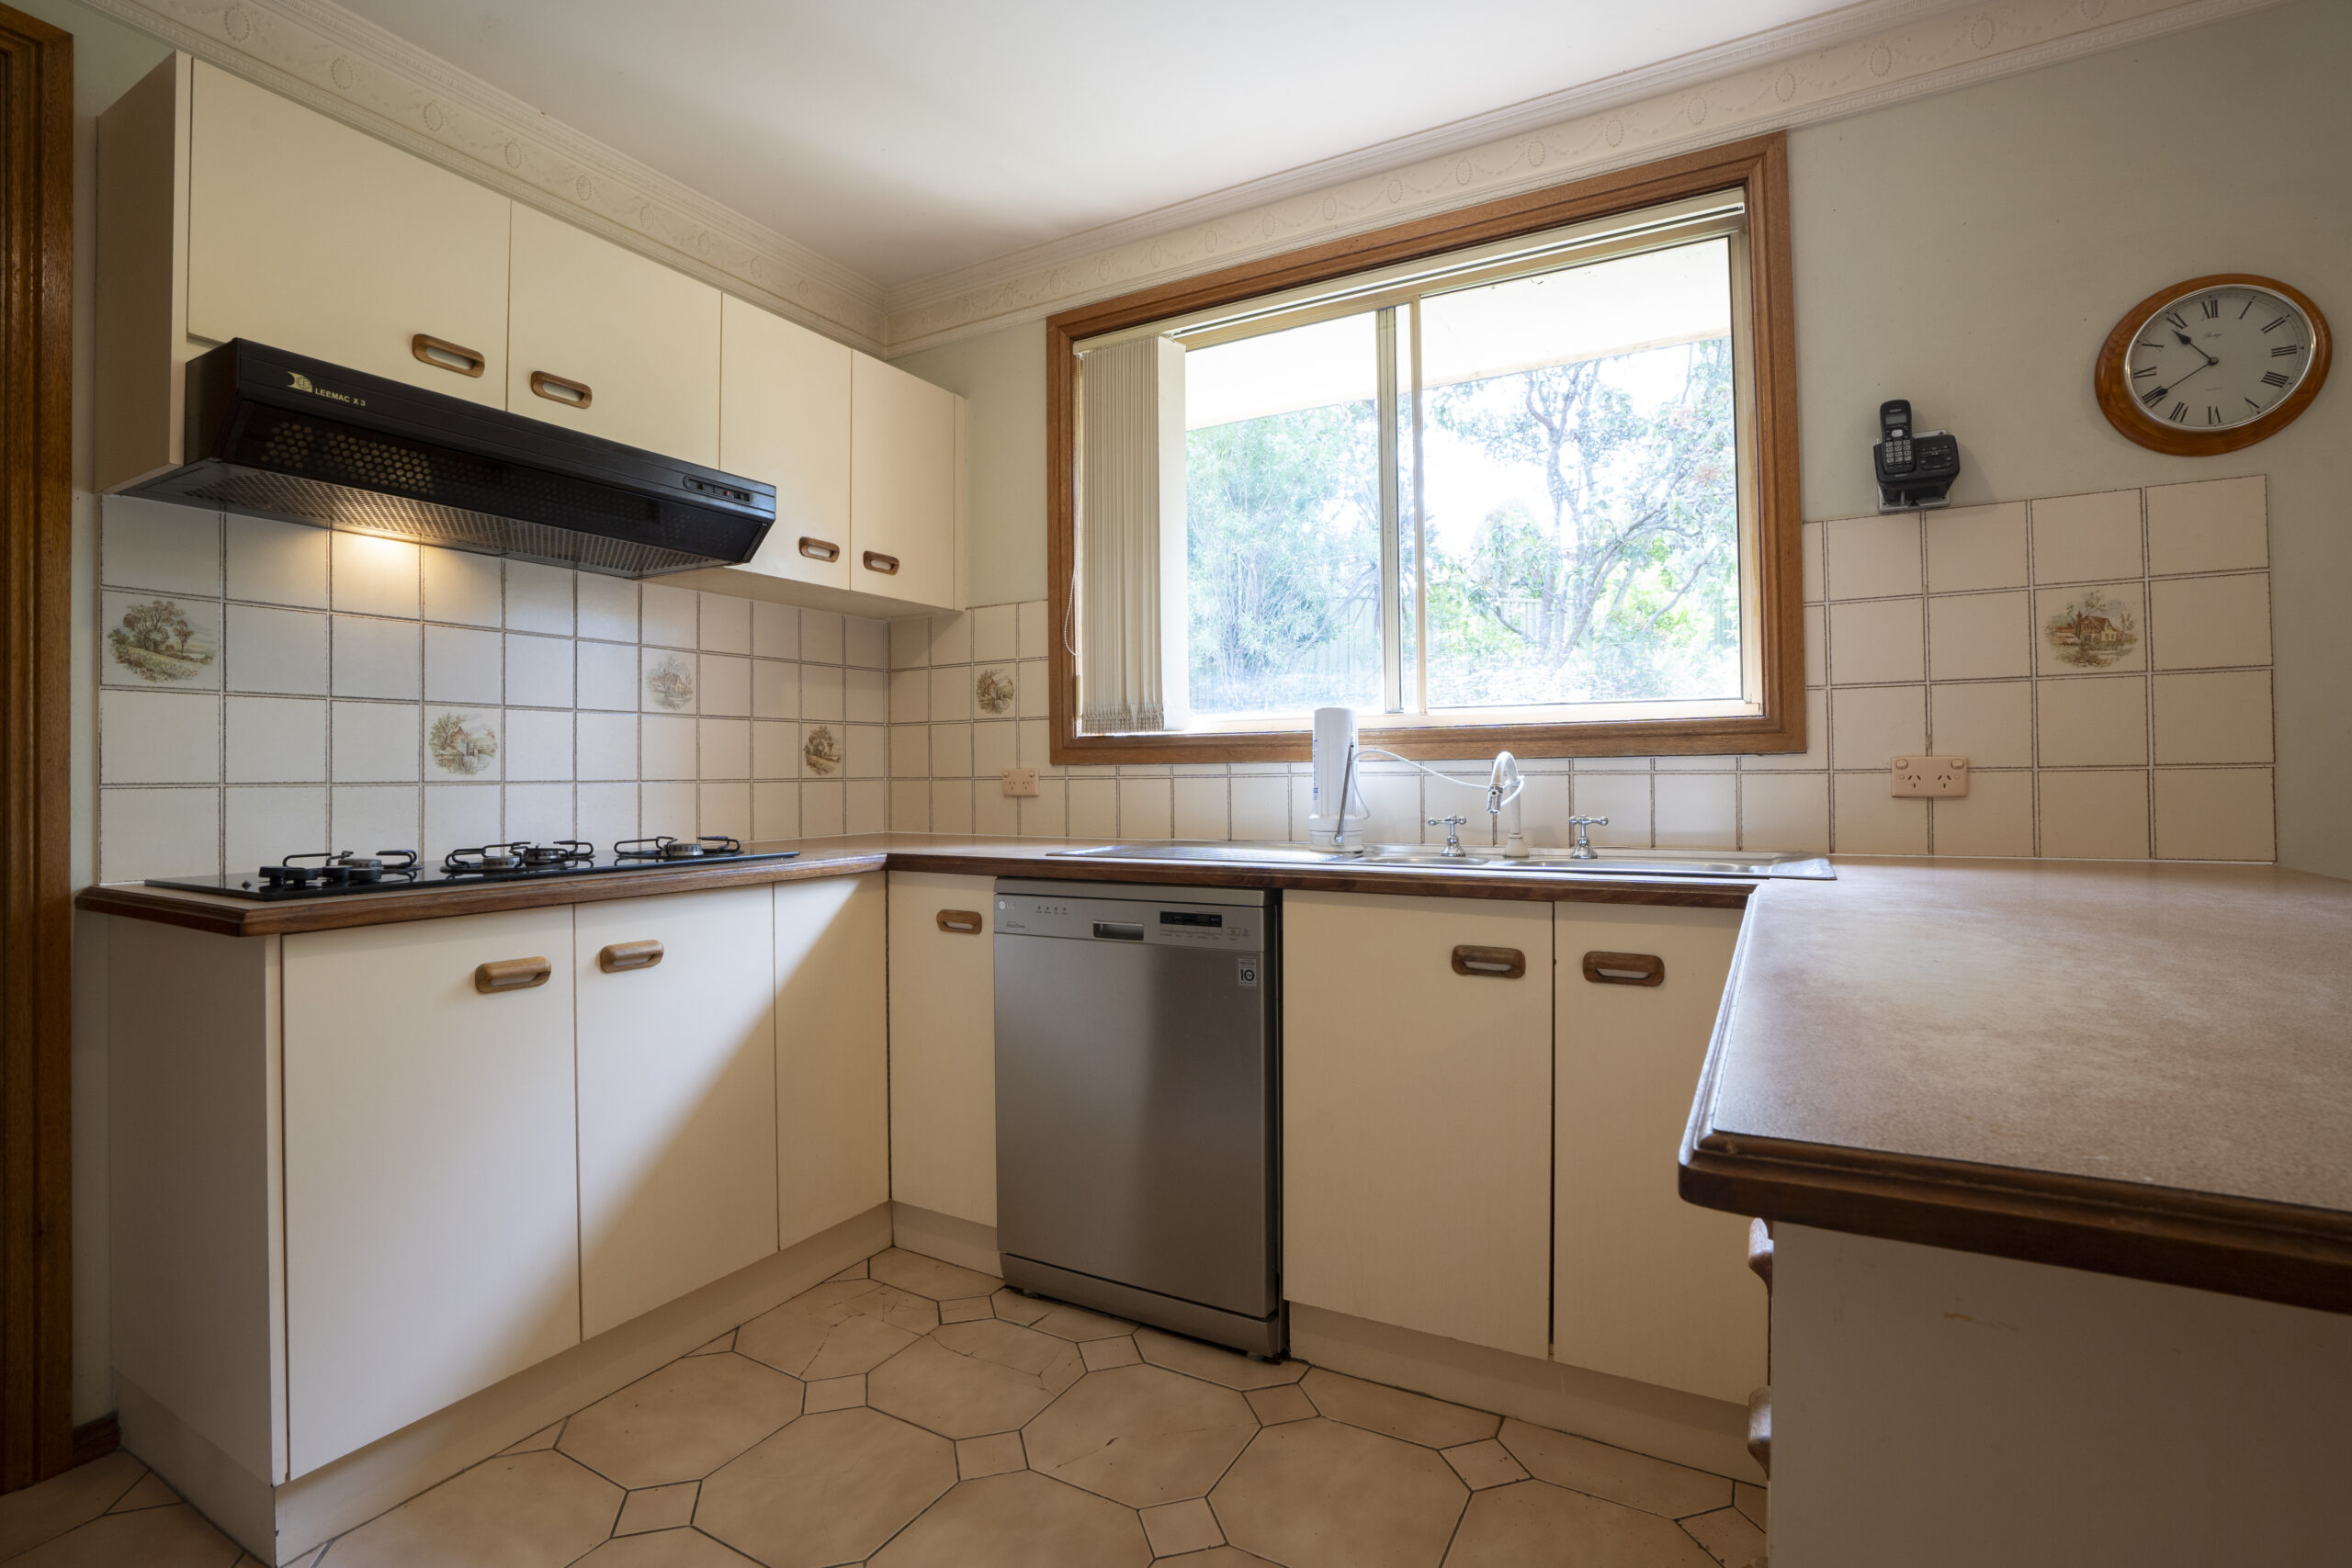
STEP 4: TILE TRANSFORMATION
Moving right along, it was time to tackle that old tile splashback with its old-fashioned picture motif (so 1970’s).
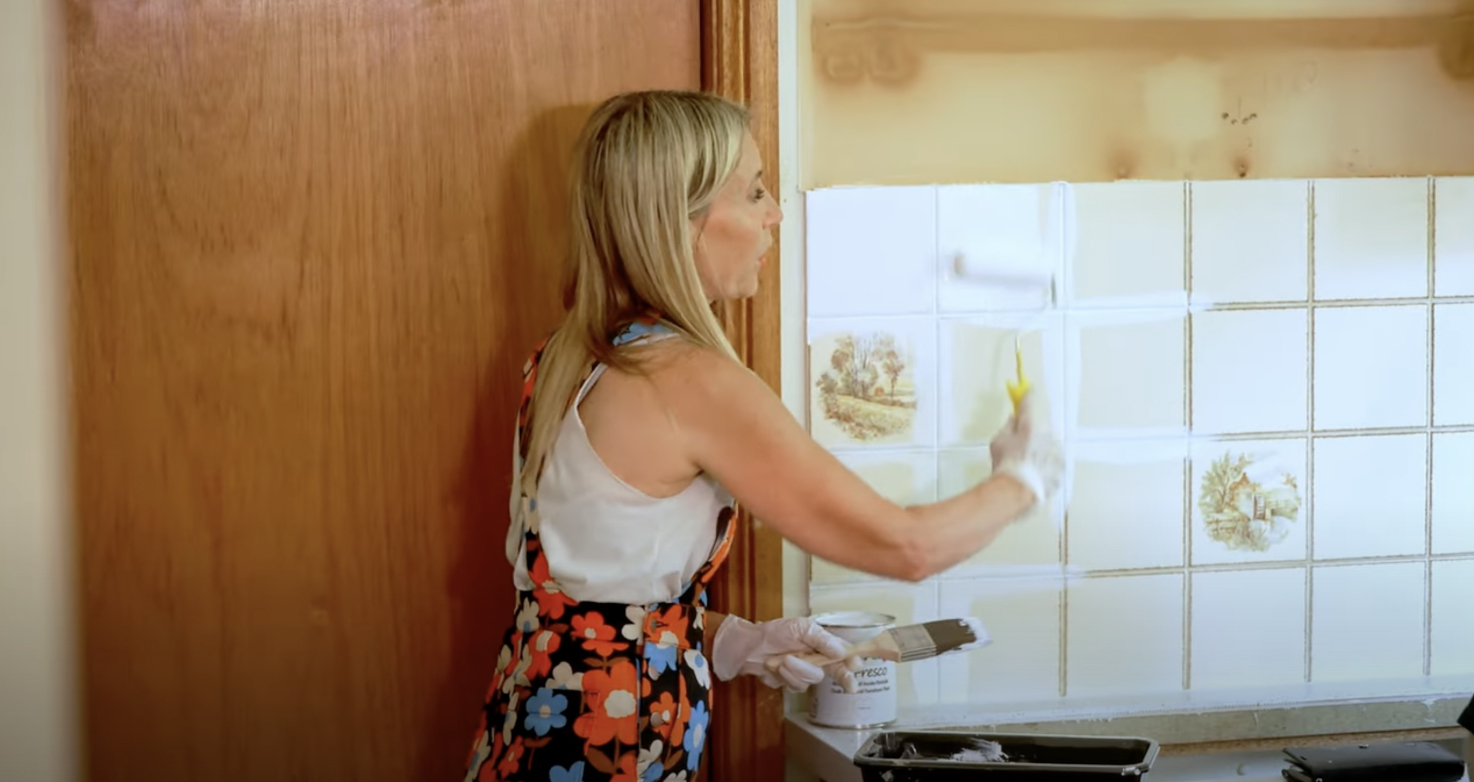
Splashback tiles transformed using Chalk paint.
Ripping those tiles off would have created all sorts of flow on problems & why throw out something that’s perfectly good? Again, the same products used on the cabinets, were also used on the splashback tiles. This splashback now looks brand new, even though it’s more than 30 years old.

Click & drag the arrow left & right to see the full before & after transition.
STEP 5: APPLIANCE APPLAUSE
Thankfully, the old appliances weren’t too tragic in this old kitchen. The ancient rangehood was about as effective as a chocolate teapot, so I swapped it out for a sleek new slide-out version that actually knows what to do with the smoke.
I purchased the new rangehood from a Bunnings clearance table with the rangehood marked down from $400 to $200. How great does it feel when you get something for half price! And the old sink? I swapped the old clunker for something smaller (1.5 bowls) and one that didn’t take up, the whole side of one benchtop.
STEP 6: BENCHTOP BONANZA
Let’s turn our attention to one of the biggest issues in this kitchen, the laminate benchtops. There were 3 big sides of them & whilst in perfect structural condition, wear & tear was definitely evident.
Before – Laminate benchtops showing their age.
In all reality, I had several options to get these benchtops looking better on a budget. For around $250, Rustoleum’s Benchtop Transformation Kit would have enabled me to paint the benchtops with a specialty paint. Whilst I’m not a huge fan of painting benchtops for longevity reasons, the reality is, they can be a good option for lower value properties when your reno budget is almost non-existent. With a bit of elbow grease over 1 weekend, you can paint your benchtops, instantly making them look better.
Another option in this kitchen was to remove the old benchtops and replace them with new laminate ones. In order to do this, the sink and cooktop would need to be disconnected & the old benchtops removed. To buy new benchtops & have them professionally installed by a chippie, you’d be looking at around $1,500. Whilst all possible, a major risk exists in doing this, damaging the first row of tiles around the base of your kitchen splashback. Crack one tile & you’ll be replacing them all. To avoid all this drama, I opted for a smarter option, granite benchtops.
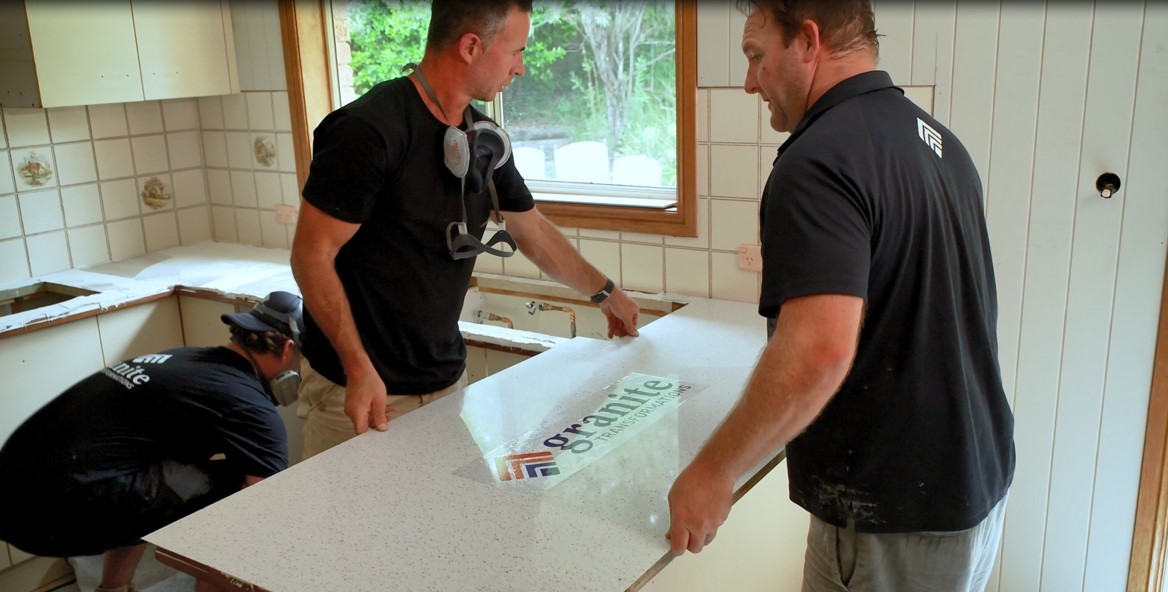
In comes the real showstopper of this kitchen, brand spanking new benchtops from the lovely folks at Granite Transformations. They’re one of my favourite companies for very good reason – they’ll resurface your existing benchtops using durable stone, in just a matter of hours! Who wants their kitchen out of action for weeks or months on end, right?
Click & drag the arrow left & right to see the full before & after transition.
Here’s how their product works … first of all, get Granite Transformations out to your home so they can measure your existing benchtops & give you a free quote. If you wish to proceed, select a colour from their incredibly beautiful range of benchtop colours.
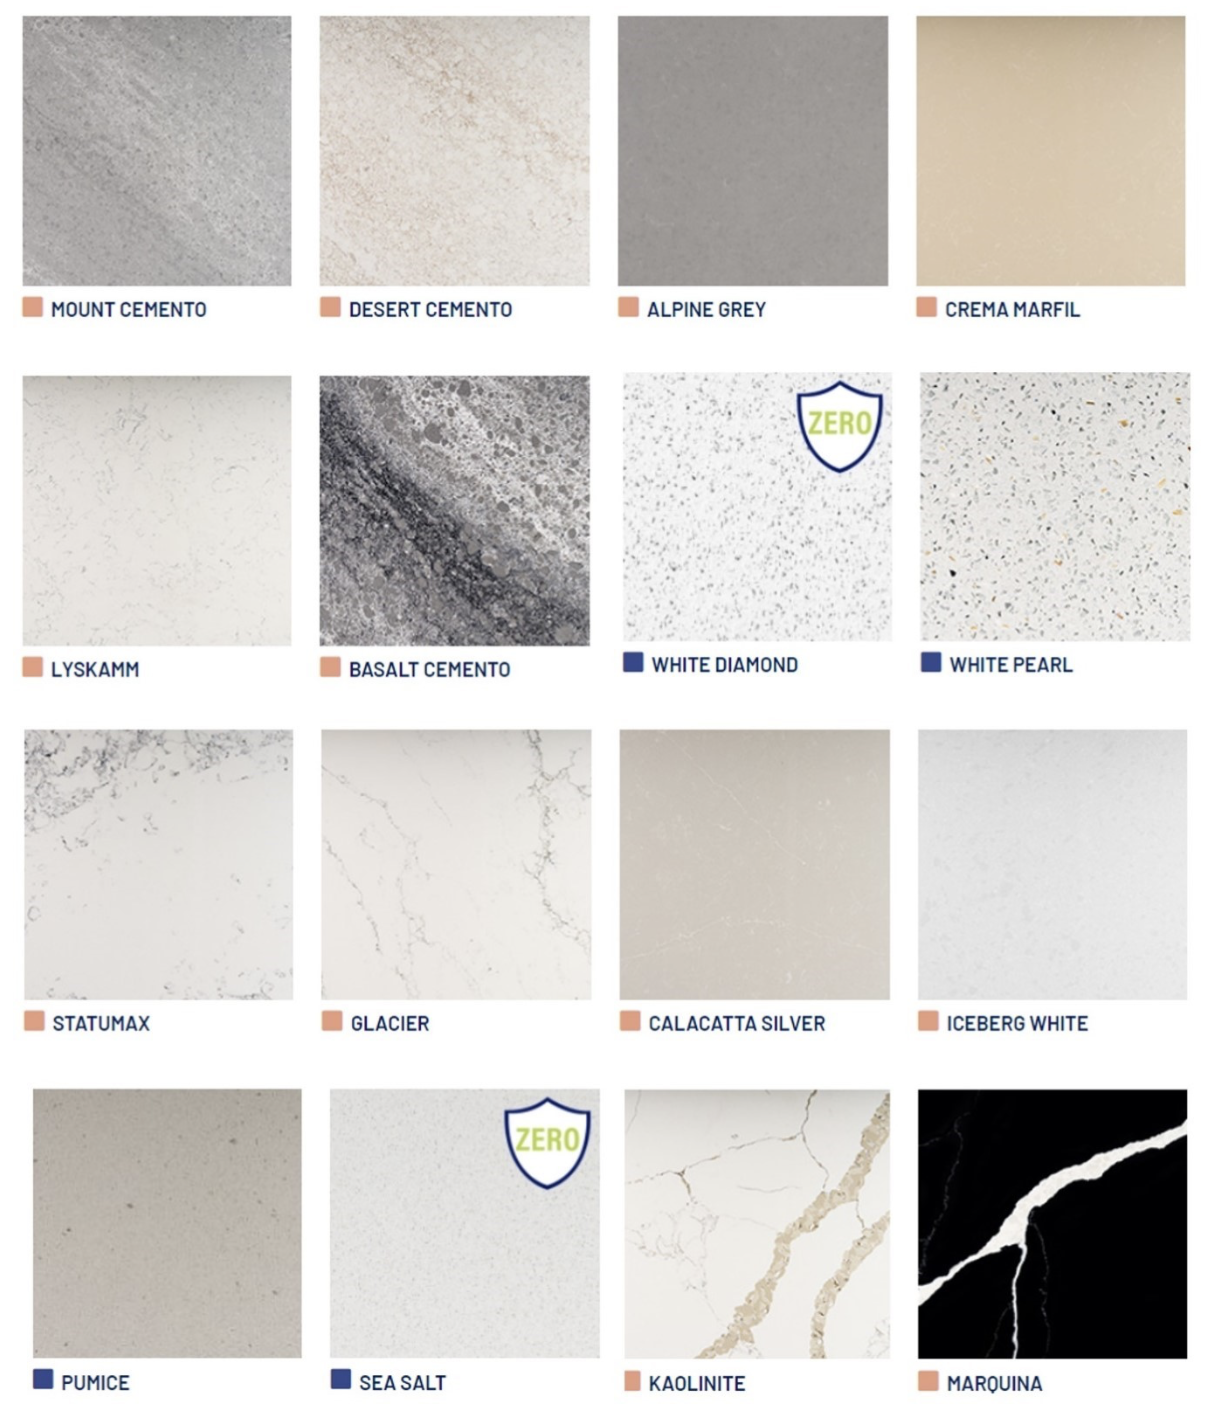
Just some of the colour range from Granite Transformations.
A final check measure will be done & an appointment scheduled for 1 or 2 qualified installers to arrive at your home who’ll then install a 7mm layer of stone, straight over the top of your existing benchtops. You can get your sink & cooktop immediately re-installed straight after & just hours later, be cooking in your kitchen.

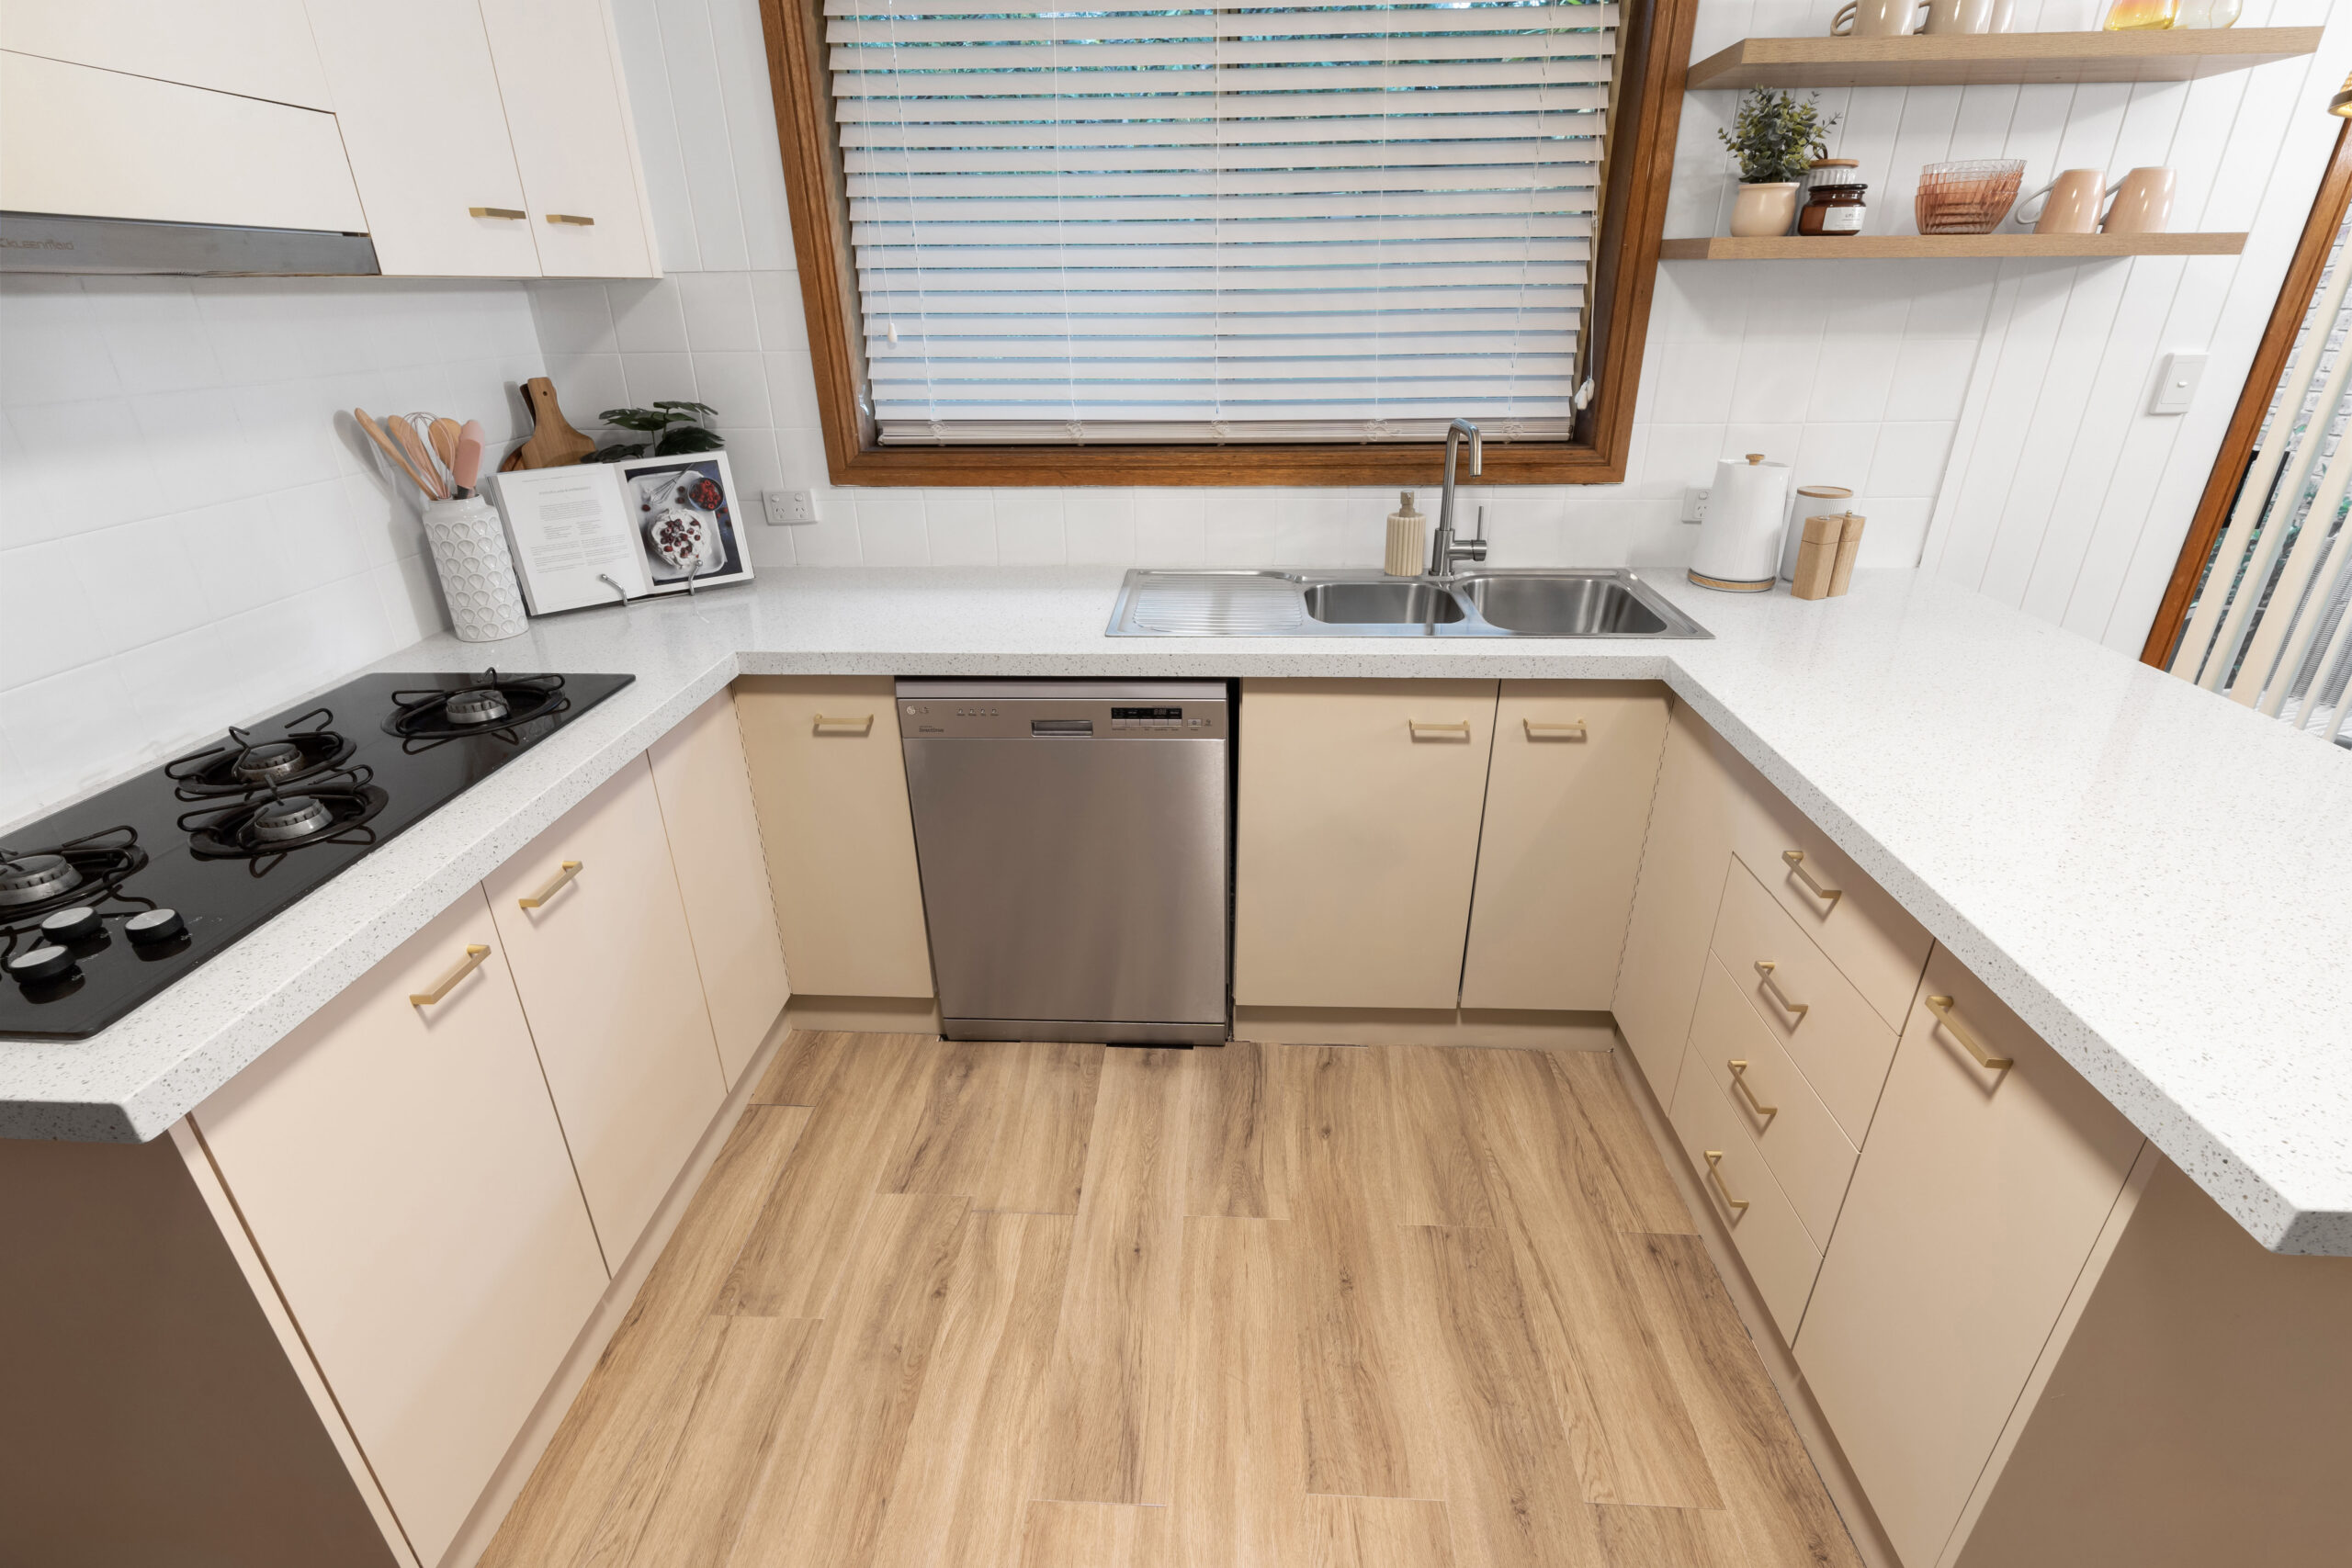
The old benchtops being resurfaced with new 7mm crystalline silica free stone benchtops from Granite Transformations.
While we’re talking about benchtops, many of you will know that from 1st July, 2024, there is a complete ban on the supply of stone benchtops containing silica within all states of Australia. This is due to the adverse health effects of silica poisoning, known as silicosis which I liken to be in the same league as the severity of asbestos. Thankfully, Granite Transformations were already ahead of the game in this regard with a new sustainable formulation available, proudly containing zero crystalline silica. It maintains the same colour range & the unmatched durability that has made this stone a favourite in over a million homes within Australia already.
Why did I choose the silica free stone benchtops in this home instead of the $250 painting option? The reality is, I could have renovated this kitchen for around $6,000 but painting the kitchen benchtops in a home with a property post the one million value, will devalue your property. As your home inches up in price, there’s an expectation that the quality of all the fixtures within your home increase, not decrease. The addition of the Granite Transformations benchtops provide not only a luxury addition to the property but huge product benefits being non porous, heat, scratch & stain resistance. Solid stone benchtops for this kitchen would have been around the $10,000 mark, with the Granite Transformation product supplied & installed for around $4,500.


Click & drag the arrow left & right to see the full before & after transition.
STEP 7: FINESSING THE FLOOR
The old kitchen had ceramic tiles in pristine condition. Whoever installed them decades again, did a fantastic job. There were 2 problems though, the floor tiles were visually dated & slightly slippery, not great for the 92 & 96-year-old residents living in this home. At their ripe old age, you don’t want any falls so my priority was to install flooring that minimises that risk, yet still be cost effective.
Before – dated looking floor tiles that were slightly slippery.
In come the Gerflor Senso Vinyl floor planks in “Noyer” colour. Sourced from Bunnings for roughly $110 per pack which covers 2.69 square metres of floor, they’re a great looking product for those on a budget. Best of all, they’ve super easy to install DIY straight over the top of your existing tiles & being so slip resistant, the golden oldies in this home can race their walkers across the floor, without a worry in the world.
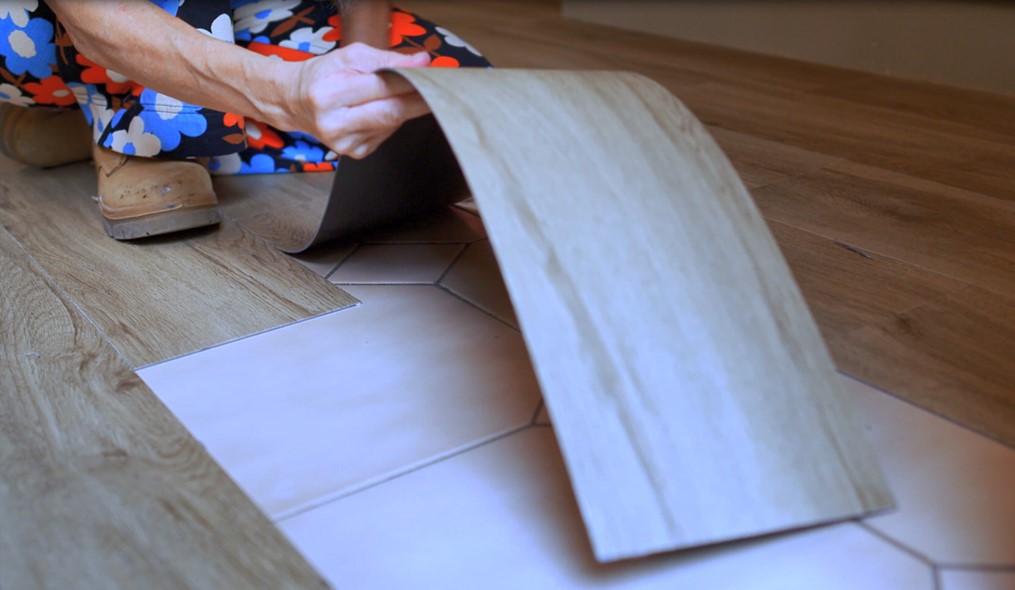
Vinyl floor planks being installed over the top of the slippery tile floor.
Click & drag the arrow left & right to see the full before & after transition.
STEP 8: LIGHT & STYLE ‘EM UP!
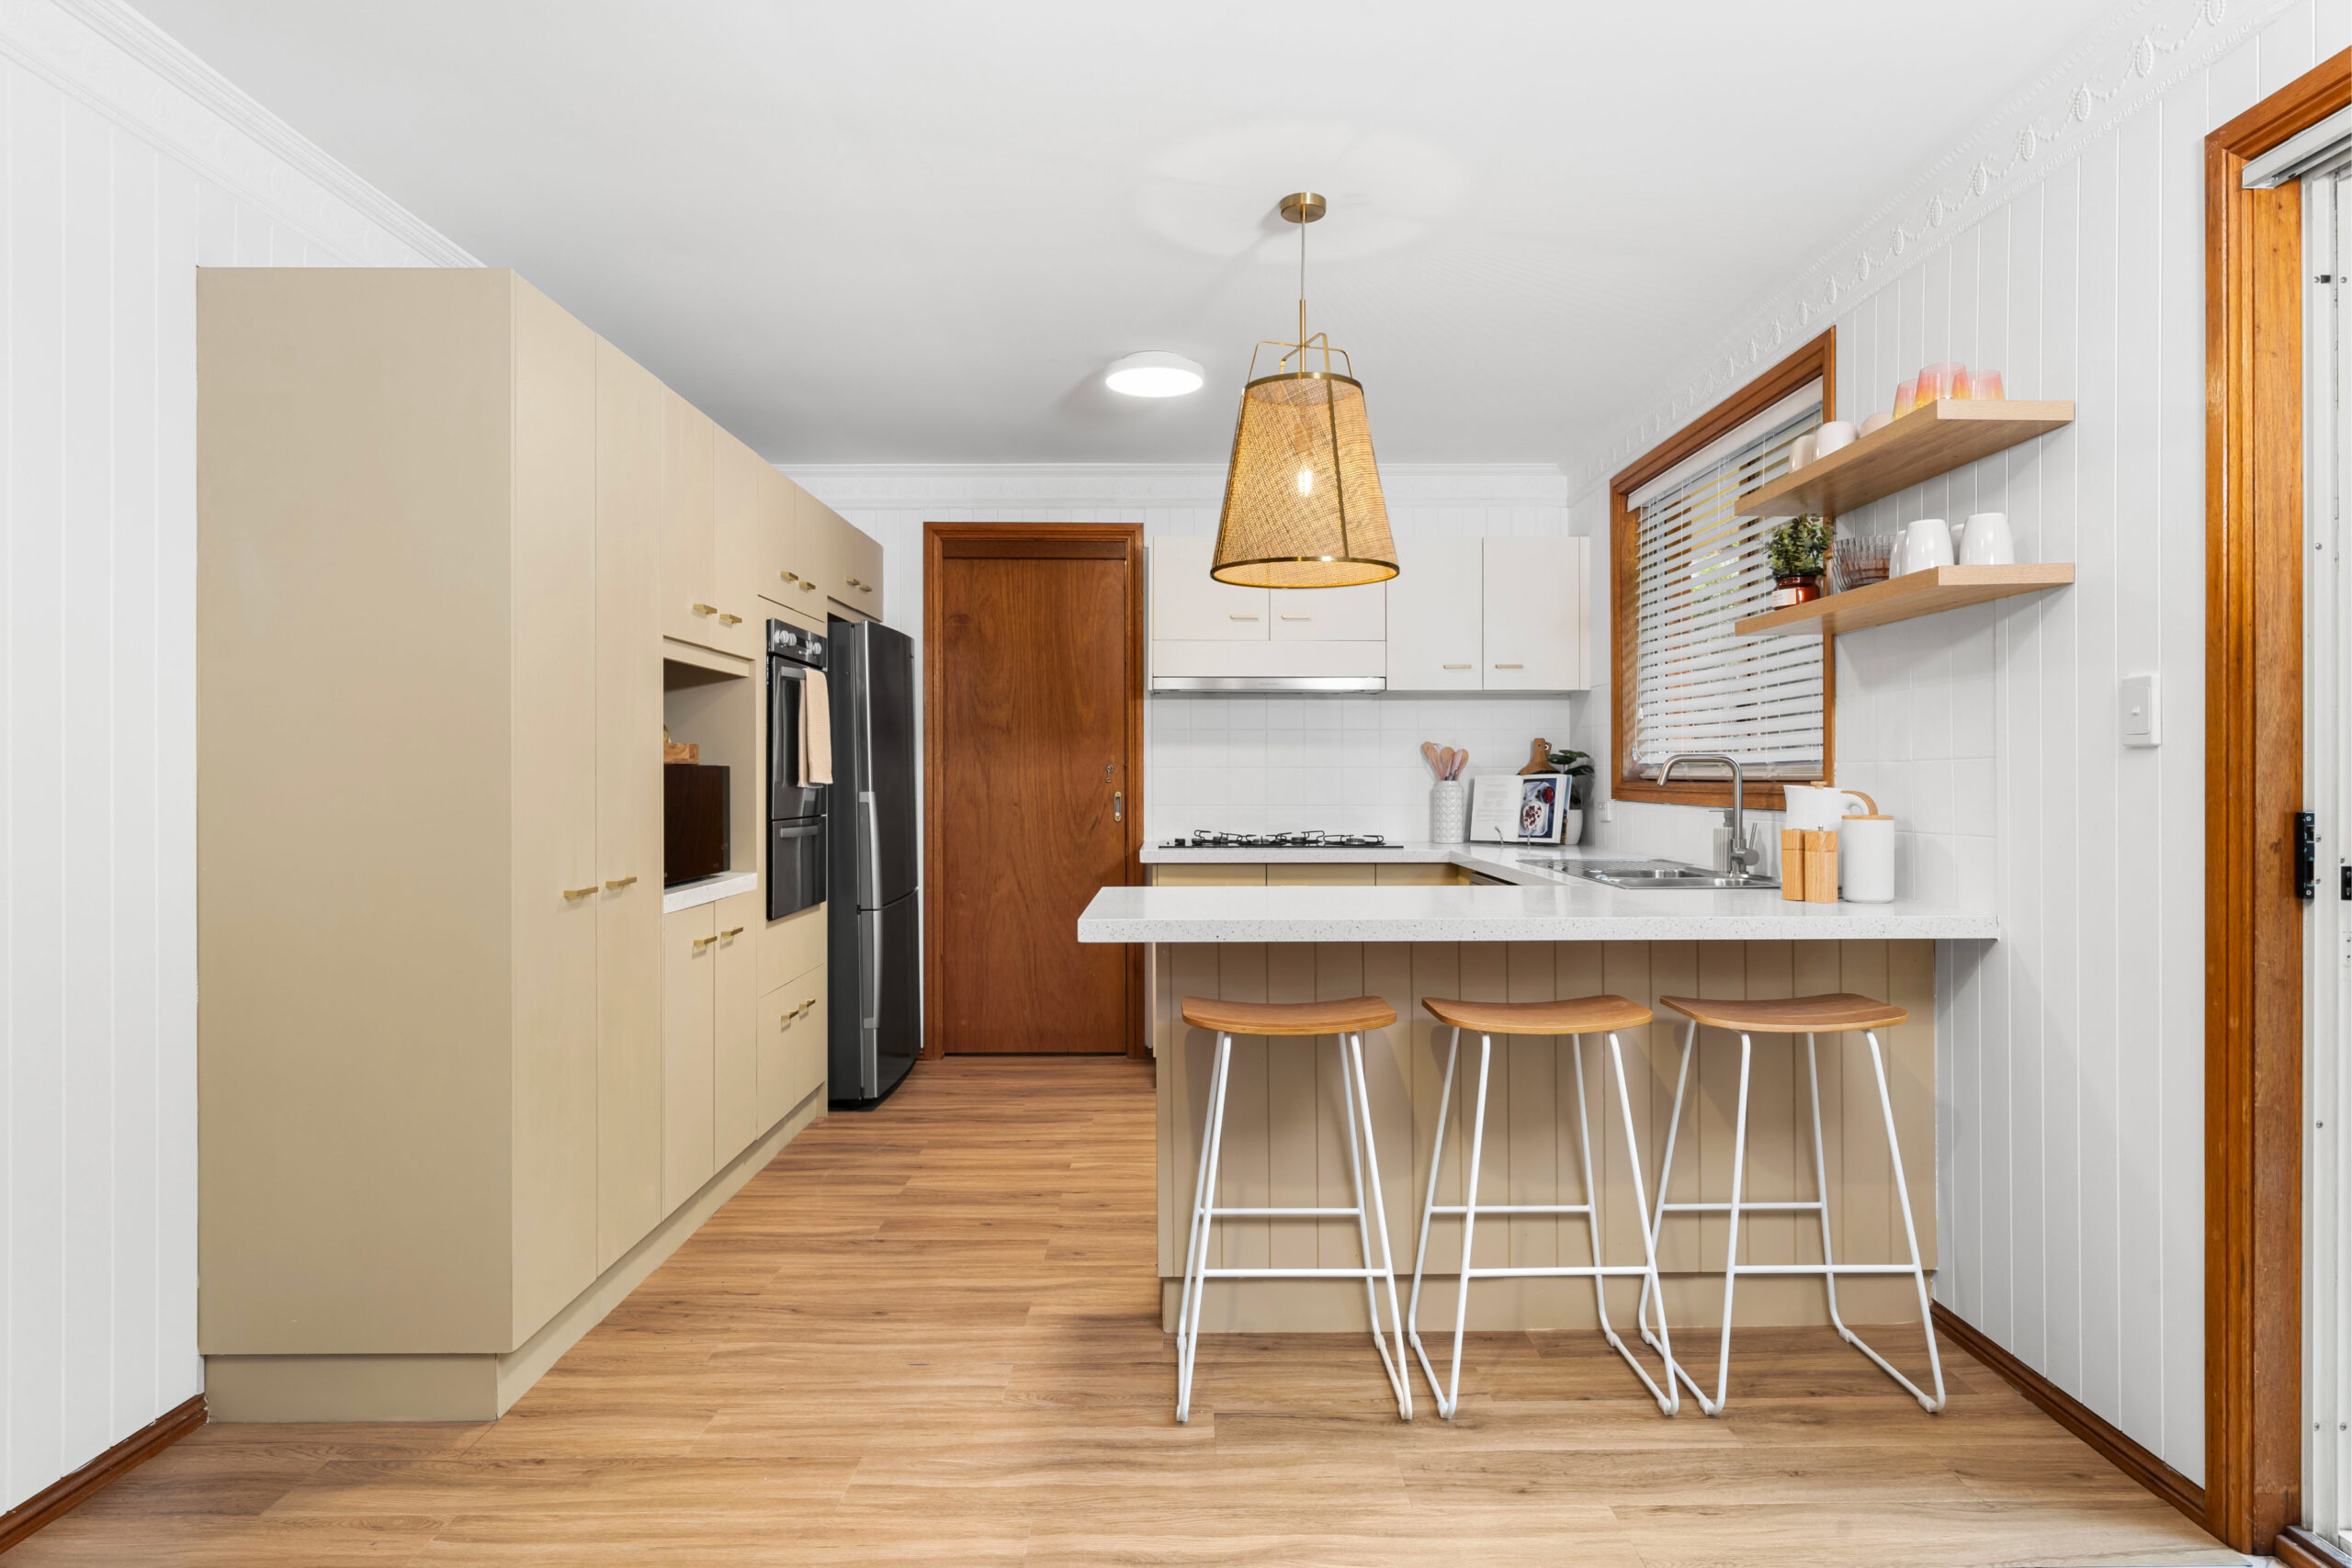
Out with the old lighting & in with a new modern LED ceiling light & the charming Hayes rattan pendant light from Beacon Lighting that screams “I’ve got style!”
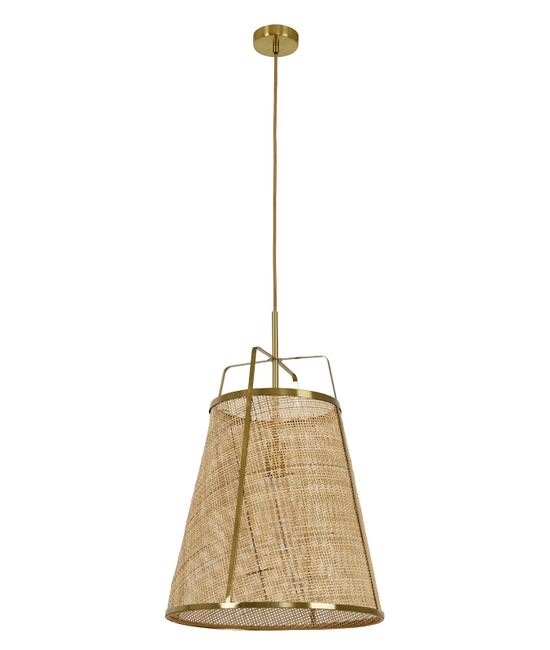
Beacon’s Hayes light added task lighting over one end of the kitchen benchtop.
Let’s also not forget that no kitchen is complete without a few pieces of styling which always helps to bring a room to life. A new off-the-shelf white timber venetian blind from Bunnings, new brushed gold kitchen cabinetry handles in a bulk pack to lower your per unit cost, new oak shelving, snazzy stools & affordable styling items from Kmart complete the look.
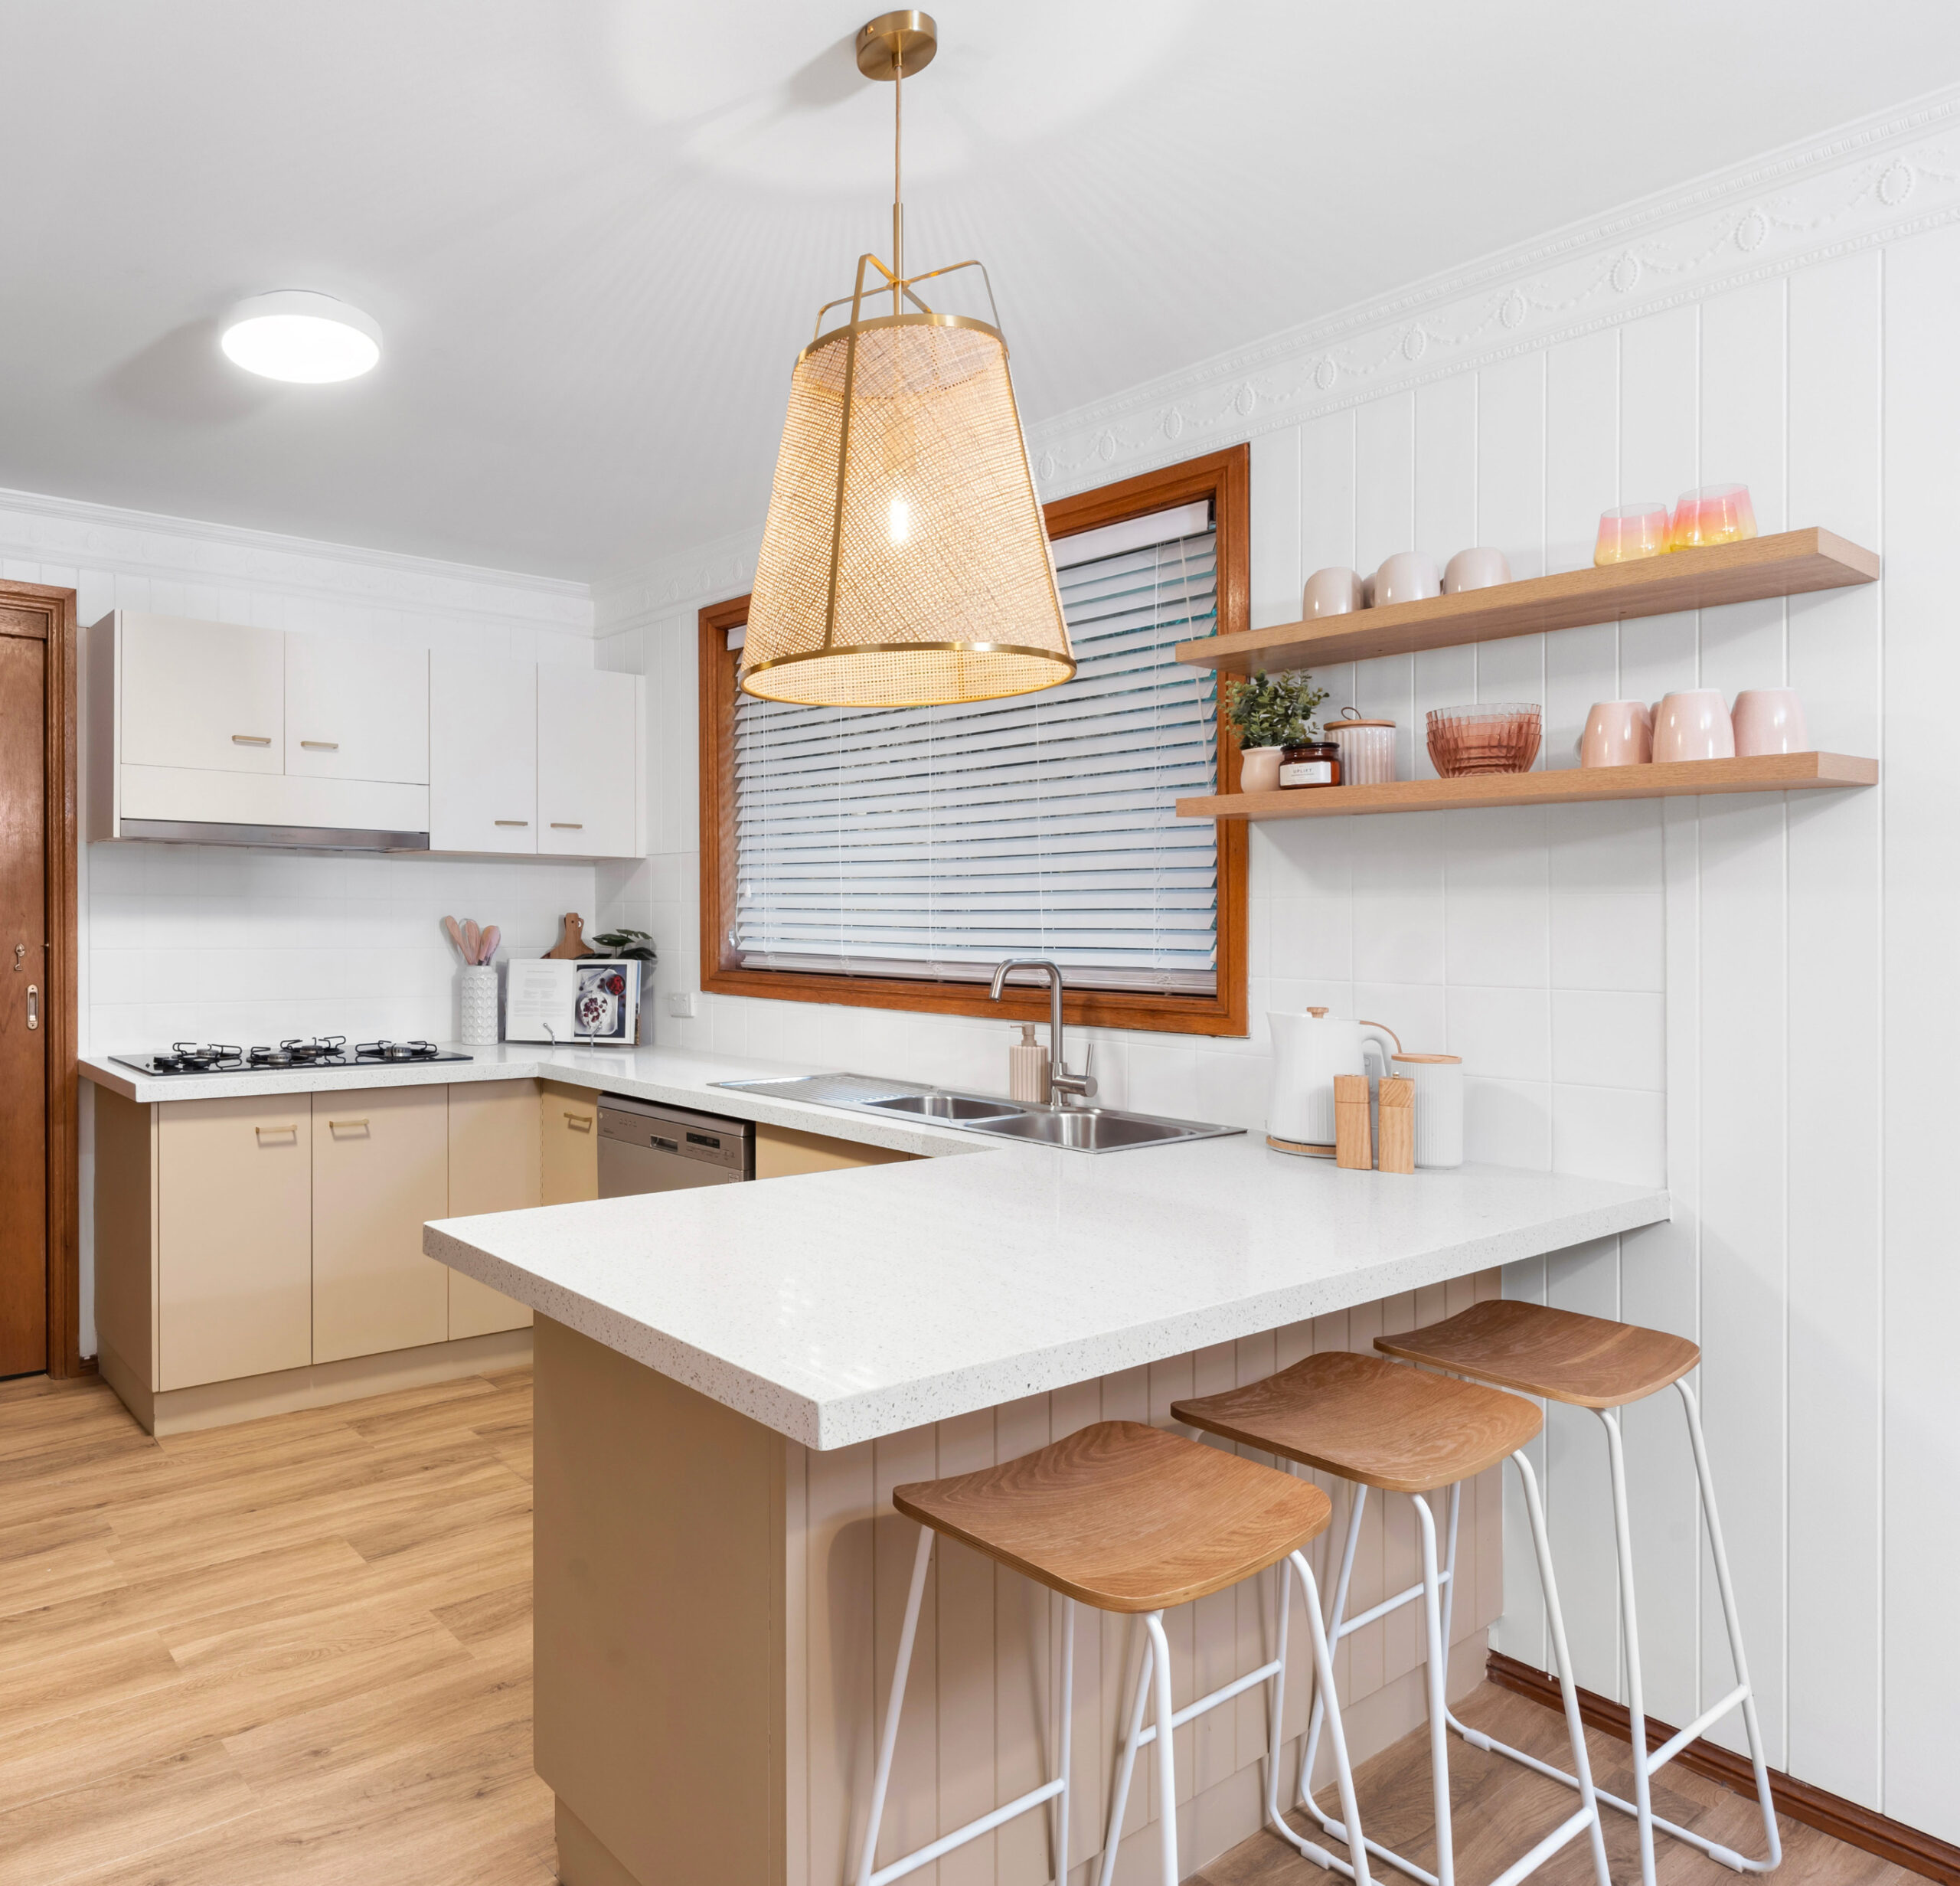
Kitchen styled up with affordable shelving & accessories.
THE BUDGET BREAKDOWN
I know this is the part of my blogs that many of you read the most intensely, the budget breakdown! Here it is:
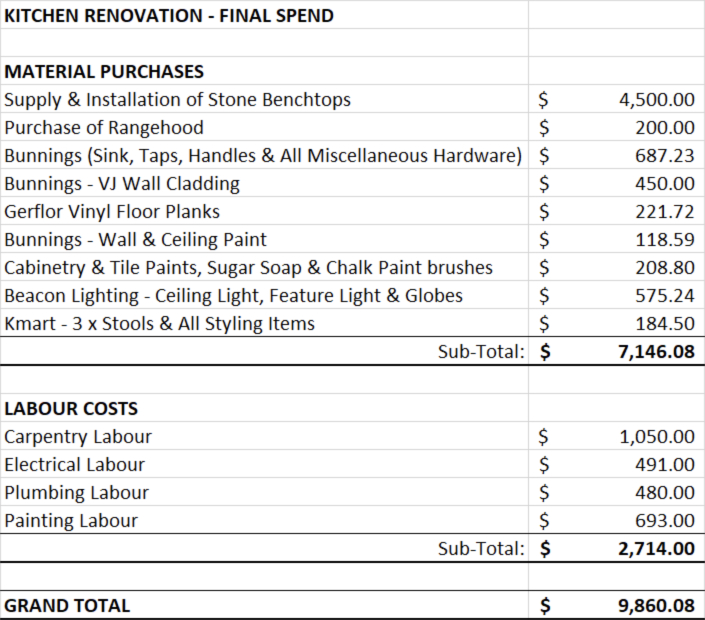
As you can see, this kitchen came in at $9,860.08, fully finished for all materials & labour, inclusive of GST. The most significant cost being the installation of the silica free stone benchtops at almost 50% of this budget, but a worthy addition for the longevity of this kitchen. For those of you whose budget can’t stretch this far, by painting your benchtops, you could bring the cost of this kitchen renovation down to around the $6K mark.
THOSE NATURAL TRIMS
Cue the online outcry! Some of you might be wondering why I never painted the original timber door & the timber architrave around the kitchen window, white? Well, my public Facebook community certainly had a very strong view on this.
Many people said the work done to the kitchen looked great but leaving the door & architraves natural, really let the whole look down. Many were of the view that if I had painted the door & window, it would have lifted the appearance of this kitchen reno another notch up, really transforming its look completely.
So vocal were people on this topic, that my Facebook page was flooded with thousands of comments, even people getting into arguments with each other as to whether to paint those trims or not paint them? To settle the debate, I did a separate Facebook poll asking what people prefer with a resounding 89% of my followers saying they always prefer timber trims being painted white, versus leaving them natural. Debate settled, amen!
So, this begs the big question, why did “I” leave the door & window architraves natural? Simply because the same natural doors & trims were in every other room of this large 2 storey home. If you paint one, you’ve got 378 other ones to do also. Do one, do them all or don’t go home, I reckon! When renovating you need to approach your home as one total look, not rooms silo’ ed out. You don’t want rooms to look & feel foreign from one room to another. Aim for rooms that flow seamlessly from one room to the next. This very concept is also one of the main reasons I never radically changed the colour of the kitchen cabinets also.
A SWEET DEAL
While my team & I were busy turning this kitchen from sad to sensational, the homeowners baked brownies for all of us, the night before. Not just any brownies, but the kind that could make you forget about those untouched door trims. A big thanks to the homeowners for thoughtfully doing this, which kept my team & I powering along on sugar alone.
So there you have it, my tale of tiles, trims & tight budgets. I transformed a kitchen with less money than it takes to say “avocado on toast” three times fast. And despite the untouched trims causing more drama than a season of “Married at First Sight,” we all came out smiling. Well, except maybe my social media followers, who still think the trims needed a tickle with the brush.
Remember, folks, when renovating, the only limit is your imagination & your credit card balance. Until next time, keep your tools handy & your renovating spirits high! In the world of DIY, the only thing you really need to paint is a smile on your face (and maybe the walls & definitely those trims).
Much love,
Cherie x


This looks amazing! Thank you Cherie! Would love to see a bathroom reno!
Hi Anne, we did a bathroom makeover, and it was posted to our Facebook page. Here is the link to the episode: https://www.youtube.com/watch?v=T5KGwPTdChA Cherie Crew x
Can you elaborate on the oak shelving?
Hi Leon, the shelving was bought off the shelf from Bunnings: https://trade.bunnings.com.au/flexi-storage-decorative-shelving-oak-900-x-240-x-38mm-floating-shelf_p2583900. The pack includes the shelf and brackets and here is the link to the installation instructions: https://media.prod.bunnings.com.au/api/public/content/bb910d6fc206476e8c7ef394885d9750?v=c49d3f7c. Cherie Crew x
Great read! Overhauling an old kitchen can truly transform the space and make it more functional. I’ve found that upgrading to modern Kitchen Appliances not only enhances the look but also improves efficiency. If anyone’s looking for top-quality options, Betta has a wide range of reliable choices to suit any kitchen renovation
Great read! Overhauling an old kitchen can be a challenging yet rewarding experience. One of the best upgrades I made during my own renovation was replacing the outdated dryer with the best heat pump dryer. Not only is it energy-efficient, but it also dries clothes without the need for excessive heat, which keeps fabrics in great condition. Highly recommend checking out options on National Product Review for anyone looking to modernize their kitchen
Great read! Overhauling an old kitchen can be such a rewarding project. Investing in high-quality kitchen appliances can really transform the space and make it more functional. Whether it’s a sleek new oven or an energy-efficient fridge, the right appliances not only elevate the design but also enhance everyday cooking experiences. Thanks for sharing your journey!
I don’t ordinarily comment but I gotta say regards for the post on this amazing one : D.
https://www.droversointeru.com
Glad you liked it & thanks for being in our community! Cherie Crew.
“Such a smart and budget-friendly transformation! Love the creativity and practical tips—proves that great design doesn’t have to break the bank.
Thanks Vasanth! Glad you liked it! Cherie Crew x