


How to easily plan and project manage your bathroom renovation
So you’ve decided to tackle a bathroom renovation. Fantastic, bathrooms are the second most important room to renovate behind kitchens, in terms of adding value. And let’s face it, there are a lot of older properties that have a bathroom in desperate need of an update. But there’s many things to consider well before deciding on tile colour – from how much to spend so you don’t overcapitalise, the order in which work needs to happen, to the trades you’ll need to hire and manage. Phew, that’s a lot so let’s break it down…
PLANNING
The essential thing is good pre-planning. Now if your bathroom is too far gone, you’ve made the decision to rip it out and install a brand-new bathroom, you have two options: you can go through a bathroom renovation company or you can project manage your own bathroom renovation.
If you’re using a bathroom renovation company. it’s generally an easier process for you. If you don’t have the time or the skills or the knowledge of how a bathroom comes together. Most companies will do your bathroom in a period of somewhere between two to four weeks and the typical cost is somewhere between $15,000 to $35,000 depending on the size and complexity of your job.
On the other hand if you’re happy to project manage your own bathroom renovation where you oversee the trades coming in, it’s a fantastic way to save money, but you do need to have good time and organisational skills.
BUDGET
The rule of thumb is 2% of your current property value. So for example if you have a house worth $300,000, your fully finished bathroom renovation should cost no more than $6000. If you have a house say $700,000, your fully finished budget is $14,000 dollars. Try and stick to this formula so you don’t overcapitalise.
FLOORPLAN
There are no rigid rules when it comes to bathroom layouts, but there are definitely some good pointers to follow. Walls, windows and door openings will largely dictate the placement of your prime cost items like your toilet, shower, bath and vanity. Especially if you have a small space to work with.
If you need to move the plumbing around to get a better, more functional bathroom (which in itself will add value) then get a fixed price quote so you know exactly what you’re in for.
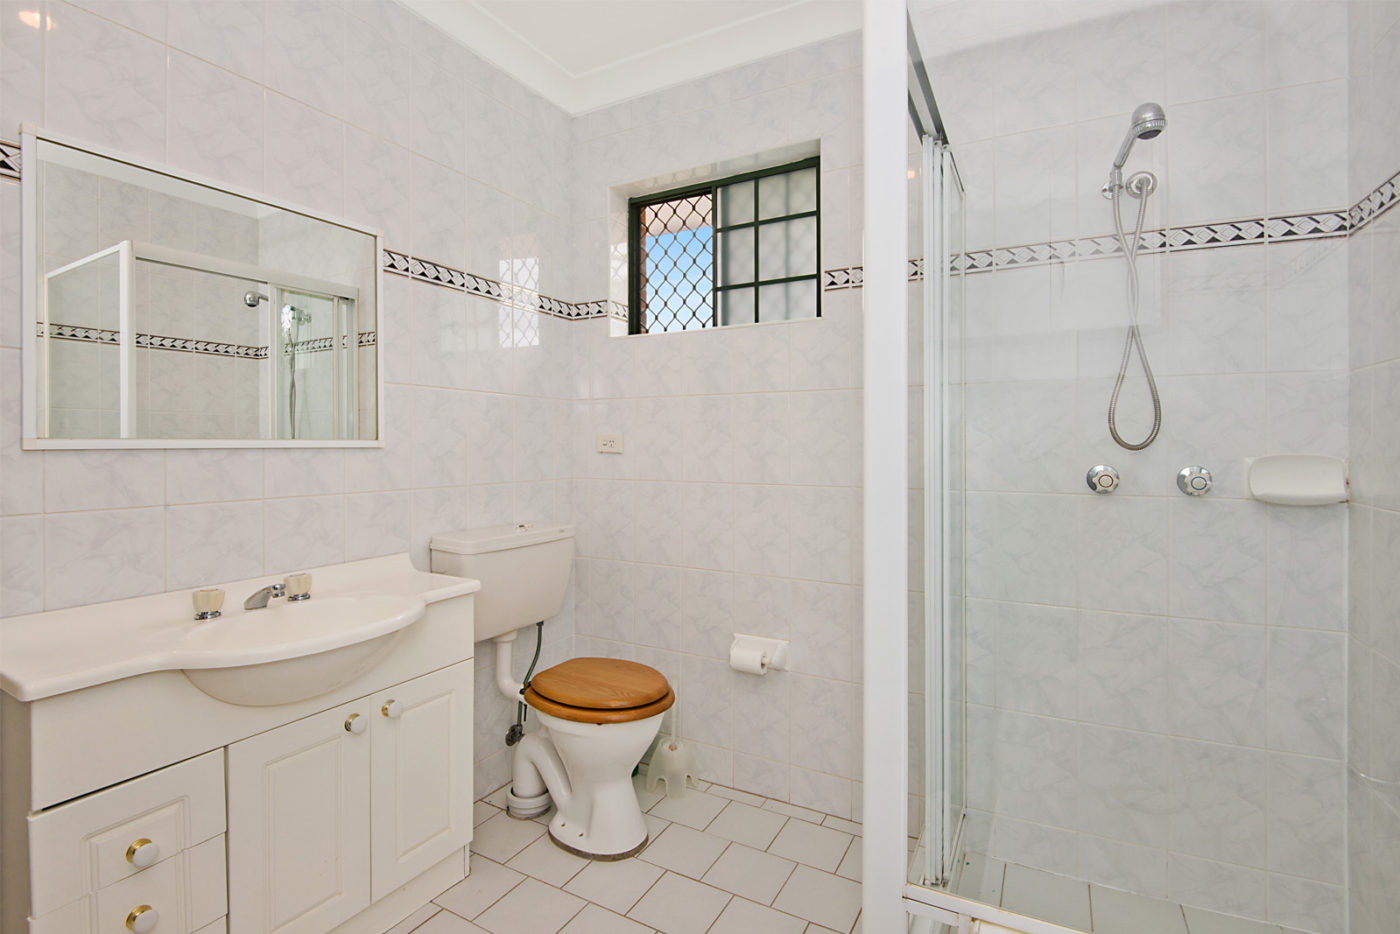
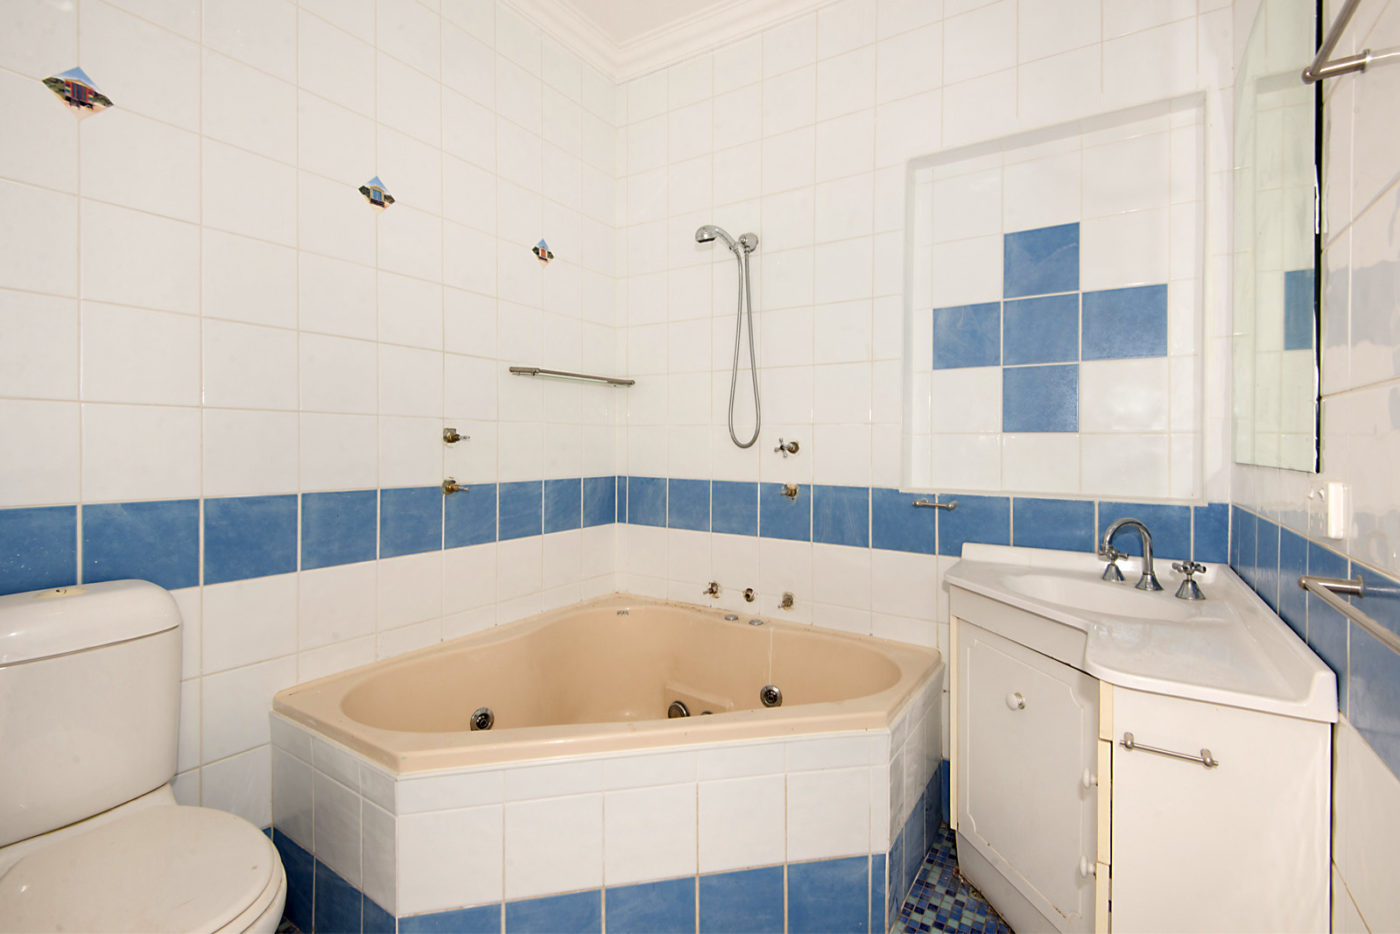
If you decide to go with the existing layout then your renovation could be as straightforward as updating the fixtures and fittings and picking out some smart new tiles. First impressions do count. So try to avoid having your toilet as the focal point of the view into your bathroom. If it’s unavoidable then be sure to buy the smartest looking one you can afford.
If you’re going to be buying a number of items be sure to look into becoming a Home SuperSaver member which is a national buying group where renovators can get the benefit of people-power – it works just like a trade discount. Become a member and save 15% off Cook’s Plumbing (where you can get your toilet, bath, vanity) and up to 30% off Taubmans paint not to mention lots of other retailers, with more added every month. You’ll end up saving big if you’re doing a full new fit-out. Be sure to do the sums and see how much you’ll save.
STAGES OF CONSTRUCTION
Be aware your bathroom is one of the most labour intensive rooms to renovate. You can have a lot of tradies coming and going so from the outset so make sure you have a scope of works, an order of works, a budget and a timeline or you’ll end up in strife.
1. Before any renovation work begins you need to either disconnect or isolate the services; electricity, water and sometimes you can have gas; older bathrooms have an old gas water heater in them.
2. If you’re living in the property while you’re doing the renovation you can get your electrician to isolate the electricity to the rest of the house so there’s no power in your bathroom. But if you’re doing a whole house renovation then the safest way is to isolate all the electricity to the meter box. What that means is you’ll have no power to the house and that’s great because when you’re cutting through walls and you haven’t isolated the power, somebody can go straight through a cord and they’re not going to be feeling so great.
TIP: Sometimes your electrical switchboard won’t have a power point in it. Trades will run all of their tools from the switchboard so you will need to get your sparkie to install a power point. Just be careful as your old switchboard can also contain asbestos.
3. Next up is your water. If you’re living in the property your plumber can isolate the water in your bathroom so that you still have access to water everywhere else in your property. But again, if you’re doing a whole house renovation ask your plumber to isolate the water to the water mains. Normally that’s located somewhere around the front of your property. It’s as simple as a plumber coming onsite and just turning off the tap. But if you’re going to do that ask them to install a temporary tap because your tradies will need water during the renovation.
4. Don’t forget the gas, your plumber will isolate that too. This may be something you can save money on by being an enthusiastic DIYer otherwise find a tradie for the job.
5. Items like baths, showers, toilets and vanities need to be removed, all the features like cabinets and towel rails taken out and all existing tiles chipped off. Then the fixtures and fittings, the walls, and the ceiling sheeting can been taken out. When you’re doing a demolition, always make sure you flat stack your skip bin. That means crush down your boxes and squash your old vanity. If you do this, it’ll save you thousands of dollars and not having to hire multiple skip bins.
6. With the demolition done, you need to start with the flooring set out. New floors can be constructed a number of different ways. You have your concrete floor which is typically from the ground upwards. You also have a suspended concrete floor and a lot of old houses have what’s called bearers and joist with a layer of compressed fibro on top. Be careful with those type of floors as there can be asbestos. You need to make sure your base is structurally fine because obviously everything is going to be sitting on your floor.
7. Once you’re confident your floors are in structurally good condition, it’s time to move on to your walls set out. If you stripped out an old bathroom, quite often your hardwood timber studs will be left and there’s no need to rip those out if they’re in great condition. If you find the noggins are rotten, you’ll need to replace them with H2 termite treated structural pine. If you’re keeping the old hardwood just make sure you pull off all the old nails. Spacing-wise, building code says you can space your timber studs 450 or 600. I always think 450 is a good size because it gives you more room to brace things like your towel rails, soap dish, toilet roll holders, for example. Always make sure your walls are plumb square. If you don’t check this before the sheeting goes on you can have some real issues with your tiles.
8. Electrical work is where you bring a licenced Sparkie in and they start to install all your new electrical lines. It’s a good idea to get them to remove all the old electrical wires too as it’s always nice to have a clean base to start working from. Now your electrical items will typically be your light switch. Always put your light switch on the entry side of your door not behind it and when it comes to power points near the vanity, make sure they’re not located too close to the water. There are Australian building regulations as to where you position those and your Sparkie will know all of this.
9. Next, lights. Install two to four downlights depending on the size of your bathroom and you can add a heat lamps too. If you’re doing a structural renovation quite often you’ll have plans that will have your electricals set out; details about where your light switches and power points go. But if you’re a cosmetic renovator you probably won’t have any plans so then you need to work it out with your Sparkie; really rely on their expertise here as they do this day in day out. You don’t need all the answers as the renovator.
10. Now it’s time to sheet up your bathroom. Normally you would start your ceiling sheeting and that could just be a standard plaster board, then once that’s done you’ll install your walls. Don’t use standard plasterboard, instead use 6mm billaboard as that’s a water-resistant material.
TIP: Your carpenters are a multiskilled tradesperson. So instead of getting plasterers in which will cost you more money, get your carpenters to do the wall and ceiling sheeting.
11. One of the biggest failures in any bathroom renovation is not installing your waterproofing correctly. Now what is waterproofing? It’s a membrane you put over walls and floors to stop water penetrating into those areas. If you don’t install waterproofing correctly it can be disastrous, especially if you’re doing an apartment renovation where you’re on the upper levels of a block. Waterproofing is definitely not a DIY product. You should always use a licensed Waterproofer because you need to obtain a waterproofing certificate. If you’re ever selling your property that waterproofing certificate needs to be attached to the contract of sale.
12. Once your waterproofing is complete, the next stage is tiling. Always start with your floor tiles first and once that’s completed move up and do your walls. The trend these days is to tile floor to ceiling and if you want a contemporary look, always try and make sure your grout matches the colour of your tiles.
13. The next stage is your plumbing fit off where your Plumber will come back to install your shower, toilet, bath, taps and vanity. This is where you bathroom really starts to take shape. Pretty exciting!
14. Time for your Sparkie to come back install your light fittings; downlights and XL heat lamp. They’ll also connect your power points and light switches.
TIP: Make sure all your electrical outlets are earthed. If they’re earthed, you don’t have any risk of electrocution which can be a problem in older houses.
15. You’re almost the last stage of the bathroom renovation process which is what I call the carpentry fit off stage. This is where a carpenter will reattach the door and window architraves, and install your soap dish, towel rails, toilet roll holder and mirror.
16. Any surface you’re not tiling will need to be painted, including the ceiling. Be sure to choose paint specifically made for steamy bathrooms which is ultra durable, easy to wipe down and has mould inhibitors. The major brands have specific kitchen and bathroom paint for this very purpose.
So now you know how all components of how a bathroom come together from start to finish. I think you’ll agree it’s not a hard process but it definitely takes time, requires good communication skills and organisation of tradies. But do this well and you’ll save yourself so much money. Typically half the cost of the bathroom renovation company, so it’s definitely worth having a crack at it.
FIT-OUT DETAILS TO CONSIDER…
LIGHTING
Good lighting is essential; you’ll need a mix of general lighting. Think a track light, central light or recessed ceiling down lights. Specific task lighting for areas like the mirrored cabinet where you’ll be shaving or applying makeup and maybe some more atmospheric accent lighting like a fancy feature light. One absolute no-no is for the mirror is to have a harsh light directly above your head, like a recessed ceiling like. This casts unflattering shadows that will age you 10 years. If you have enough space a light each side of the mirror at eye level that for an even wash of light is ideal.
VANITIES & BASINS
You can either have floor standing or wall hung vanities. It may come down to what your existing plumbing is. Your basin choices are equally varied from recessed, semi recessed, countertop and under counter basins. You may not want a vanity at all and instead go for a freestanding basin.
BATHS
Freestanding baths are all the rage these days and they come in all sorts of shapes materials and sizes. Then there is the traditional inset bath are generally acrylic these days, which is built into a frame, which will need to get your carpenter to make up on site. Walk-in showers. Again there are just so many options. Maybe you don’t even have space for a separate shower and you have to settle for a shower over your bath, which is perfectly fine. Open walk-in showers have become really popular, a blade of frameless glass is commonly used to define the area. If you want the more conventional shower enclosure you can have it all in one unit complete with base. They can slot against a wall or into the corner of the bathroom.
TOILETS
The humble dunny has certainly come a long way in the last decade or so and can be now a designer item in itself. You can still get a very basic model for a couple of hundred dollars or spend anything up to $2,000 on a sleek in wall cistern toilet.
TAPWEAR & SHOWERHEADS
This is part of what I call your bathroom jewellery and where you can make serious savings or blow needless money. My suggestion is contemporary smart tap wear that looks like you’ve paid big bucks, but you picked up for a bargain.
When it comes to showerheads. The bigger the better modern water saving technology means you can easily find a nice oversized one that is also eco-friendly.
TILES
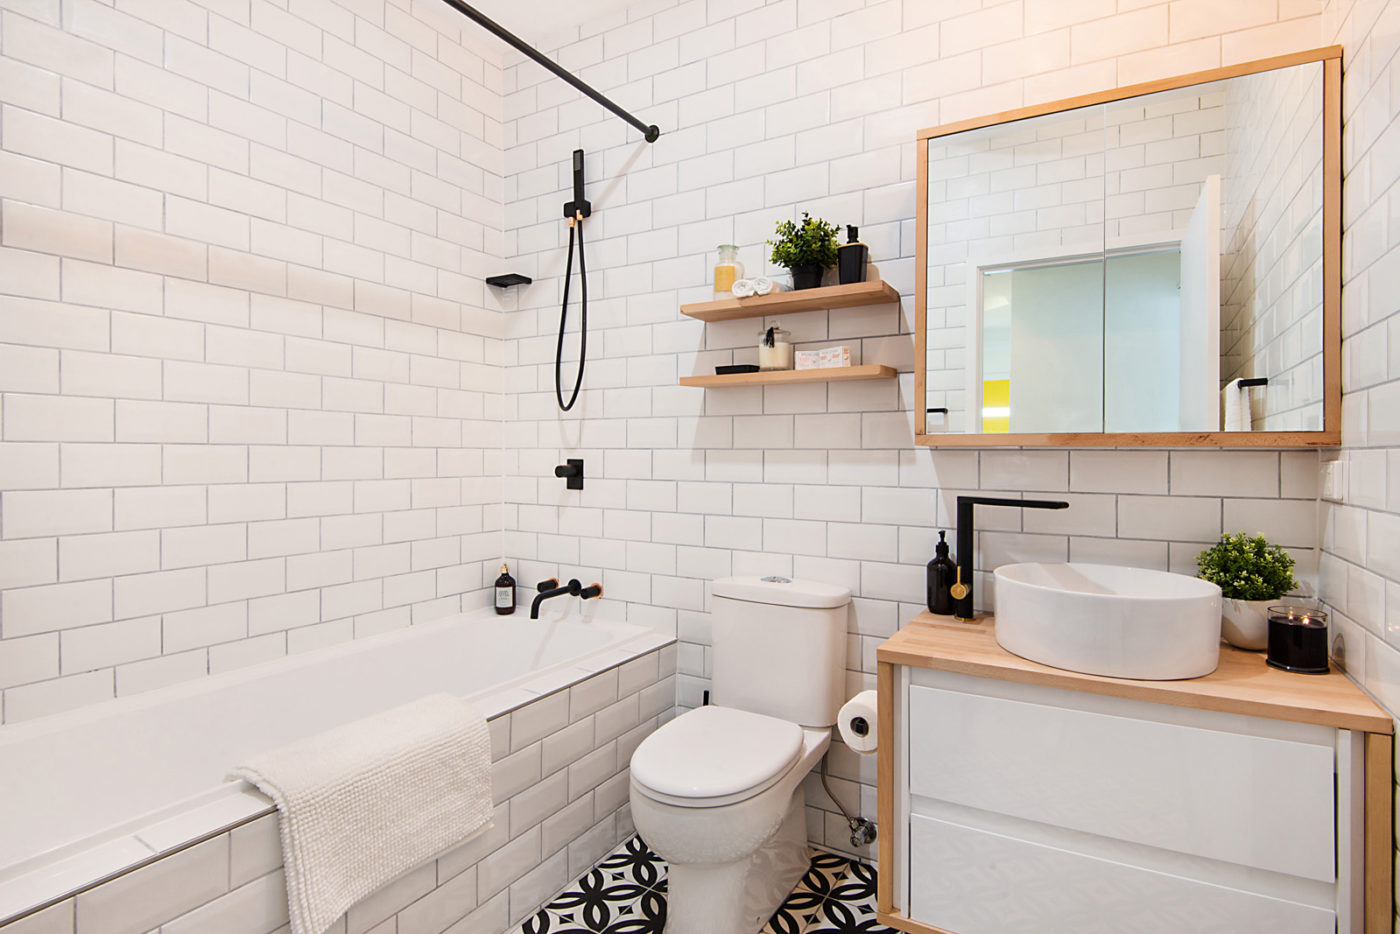
Big tile warehouses, factory stores and online sites like Grey’s online or ebay, you can buy tiles very cheaply these days. The big 600 by 300 size tiles are very popular and the trend is to run them floor to ceiling around the entire bathroom not just in the wet areas. My advice is to go for neutral colours that won’t date and you won’t get sick of.


I’m one of your Perth students.. As our houses are majority double brick & cement floors I would love to get more information on Reno’s of this type which very few people cover, especially bathroom Reno’s. I did my ensuite bathroom a couple of years ago practicing for my main bathroom and there’s not much information available for us and pricing is a little different.
As a graduate it would be much appreciated as there is plenty of information everywhere for the stud walls, fibre Reno’s types for the eastern states students.. I think it would be very helpful for someone like Cherie to extend out west, the other half of oz. I throughly enjoyed the course but still find it limited somewhat to eastern states housing..
Thank you for taking the mystery out of what can be a very daunting and possibly massively expensive process of renovating bathrooms.
Hi Julie;
I totally agree with you.
Bathroom reno (or generally reno) in brick houses is easy and hard.
It is easy, because you don’t get your carpenter involved as much. until the very end when you gonna hanging doors or install your bathroom accessories.
It is difficult, because you deal with bricks and mortar. it is actually a bit difficult to move brick wall locations ; however instead of having a carpenter for wall frames (like people in eastern state, you need to get a bricky or even a handyman to do brickwork for you. (but you need to make sure walls are straight with 90 degree corners to avoid any issues with tiling) you dont need to be worry about the quality of the render in the bathroom, because you are gonna tile over it anyway.
I hope this helps a bit 🙂
Your content always keeps me coming back for more!
Thanks Kody! Cherie Crew x