


How To Transform An Old Bathroom For Just $4000
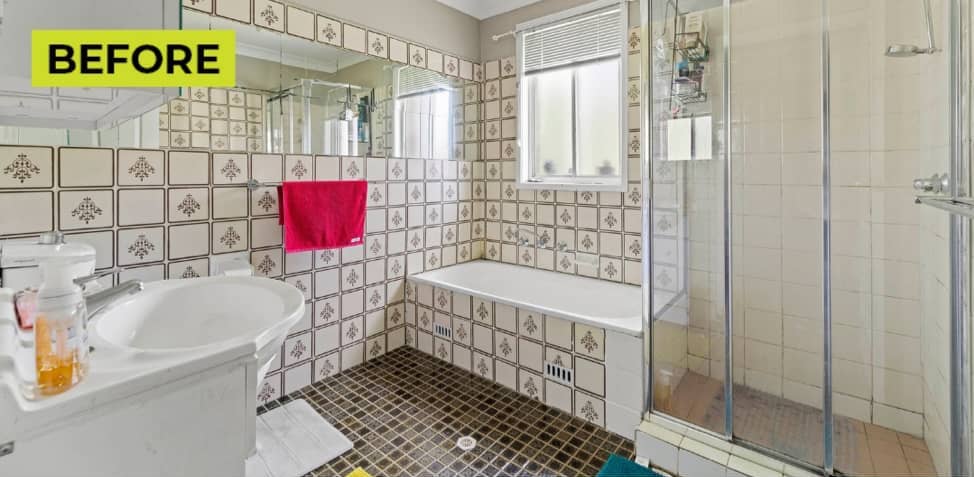
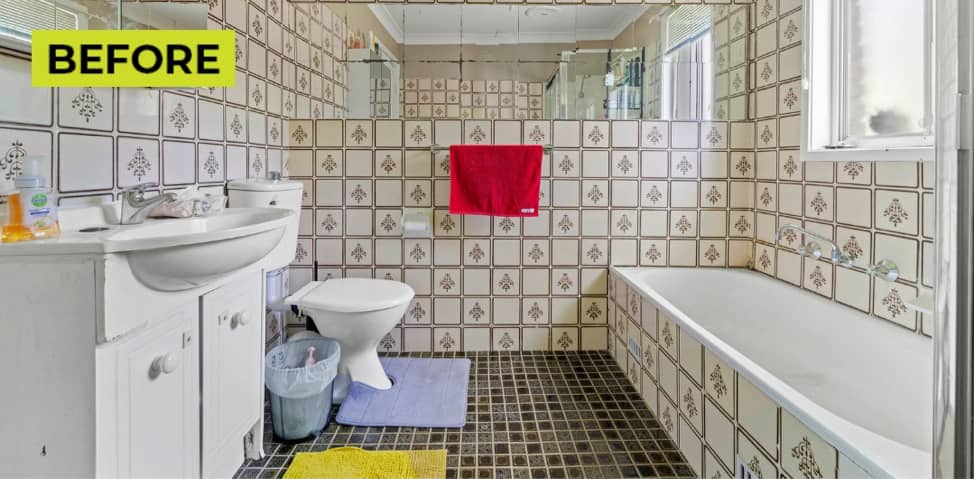
You’ve gotta love Aussie bathrooms from the ’70s and ’80s. With their way-out-there patterned wall and floor tiles, hallmark out-there colour schemes and clinical white fixtures, there’s plenty of things to both love and loathe about them.
Many people across the country have these sorts of bathrooms. They were rather sexy back in their day but border more on the sad side now. But I give it to them – they built these bathrooms to last. Whilst they look dated and daggy now, you’ll find them in perfect structural condition, presenting the perfect canvas for renovators on a budget to work their magic.
With the average bathroom renovation cost currently hovering around the $20,000 mark, it’s a room that’s trade labour intensive and fixtures heavy. Whilst a new bathroom is always ideal, the costs to do so can be prohibitive for many.
So, in this blog, I’m aiming to show you how I transformed an old bathroom on a much tighter budget. The subject bathroom is in a rental property in Sydney’s western suburbs. The homeowner plans to save up and install a new bathroom in the next five to 10 years. In the meantime, she wanted to freshen up the existing bathroom for her tenant. Isn’t that nice? 🙂
So where did I start?
Firstly, I assessed what was good and bad about the room.
The shower and bath were in great condition so they could stay. No point ripping out something that’s perfectly good.
 My plumber removed the vanity and toilet to make way for some modern, new alternatives.
The shower, bath and vanity taps were removed however could have been kept if the budget had been tighter.
The old toilet roll holder and towel rail were removed.
With all the old fixtures out, it was time to start putting it all back together again.
First up, the walls above the tiles got a fresh lick of crisp white paint. I used a cool, not warm white to help increase the sense of space within the room.
The strip of mirrors on one wall was an unsightly addition. Instead of smashing these off, we simply glued moisture-resistant planks of VJ panelling straight over the whole wall on that side of the room, then painted those in Taubmans ‘Diesel Engine’ colour. If I had removed the tiles, the waterproofing membrane would have been damaged, possibly tipping the bathroom to the point of needing to be gutted completely.
With the bath in good structural shape, we installed a black tile trim around the front of the bath front then extended the same VJ panelling underneath for design cohesion.
 Next up, we waved bye-bye to those unsightly wall tiles. Instead of ripping them out, we sanded and undercoated them first with White Knight Tile & Laminate Primer. That’s the undercoat that helps your tile paint bond to your tiles for long term adhesion. Miss that step and your tile paint could peel off in days. We waited an hour for that to dry, then applied the first coat of tile paint to all the other walls. As this needs to dry overnight, I turned my attention to the floor.
With no tradies around, I swept and wiped down the floor tiles, making sure they were spotlessly clean. I then used Rustoleum’s Tile Transformations Kit in Slate Grey colour to cosmetically transform the floor tiles. Most people don’t know you can’t use regular tile paint on your floor tiles, only your walls. This product comes in two parts – the paint and an activator which you mix together. Once you mix these two bits, you need to work at lightning speed as this product dries quickly. It’s key your floor is ready to go as soon as you mix the two parts together.
I worked in sections, brushing the edges in first with a paintbrush then quickly rolling larger sections in with a foam roller, patch by patch. Be careful not to get this tile paint on any other surfaces as once it dries, it tends to not come off anything! We unfortunately got a small patch of it on the floorboards outside the bathroom… boy was it hard to get off! This tile paint sets seriously hard so be fast but super-careful when applying it. With that done, I decided to call it a day, allowing both the wall tile and floor tile paint to dry overnight.
 The very next morning it was time for all the new fixtures to go back in.
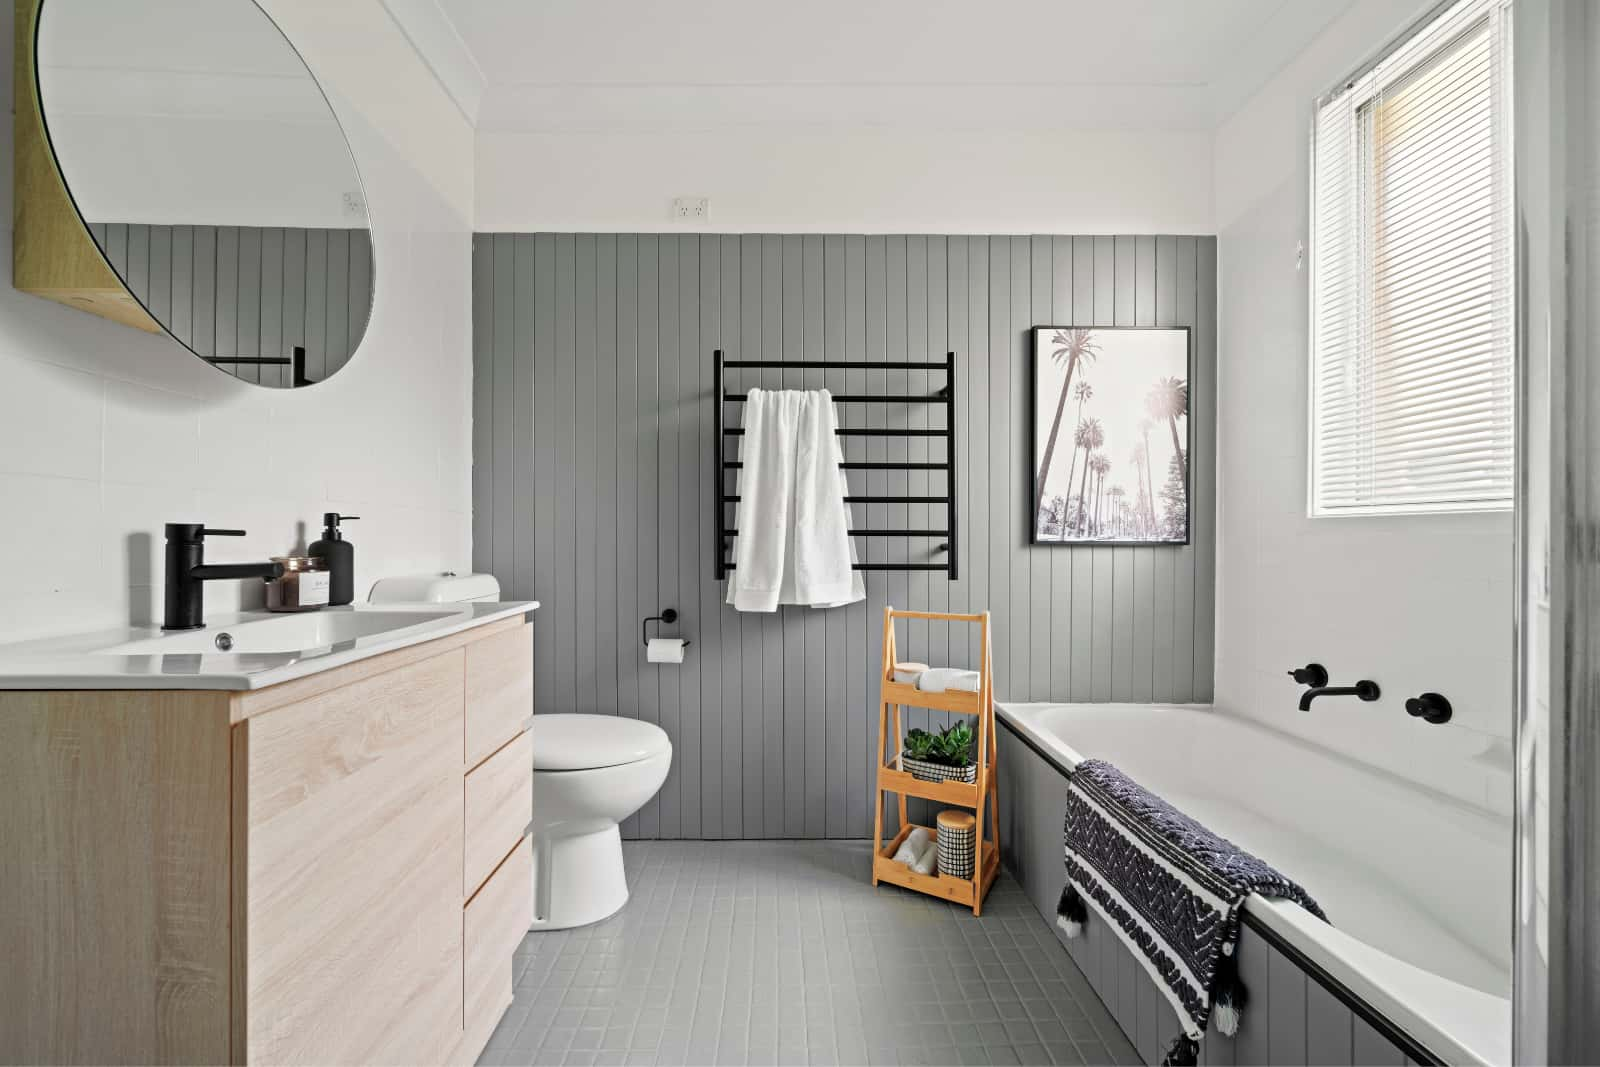
My plumber installed a new toilet and a beautiful oak vanity from Bunnings (Cibo Design $426). The timber tones soften the room against the backdrop of grey. The matching round mirror provides practical storage behind in the concealed cabinet which can be recessed in or out of your wall cavity. The circular shape of the mirror again, helps soften the room.
Next up, it was time for a series of black fixtures to be installed to provide an element of contrast in the room. A black, non-heated towel ladder was added to the VJ panelled wall to visually break it up. It’s also more practical and by far more eye-catching than a single chrome towel rail. A black toilet roll holder finishes off that wall.
A family of black bath, shower and vanity taps were installed, all relatively cost-effective fixtures sourced from my local Bunnings store.
Last but not least, a few styling items were added to visually fill the space. The timber caddy sourced from Kmart for just $22, provides a bit of extra storage for all those bath essentials (bath salts, face washers, that sort of stuff!). Another cheapie addition was the L.A. inspired print from Kmart. You can lay in the bath now and imagine yourself there, even though you’re in Sydney’s west. A bath mat, candle and bottle of handwash complete the look.
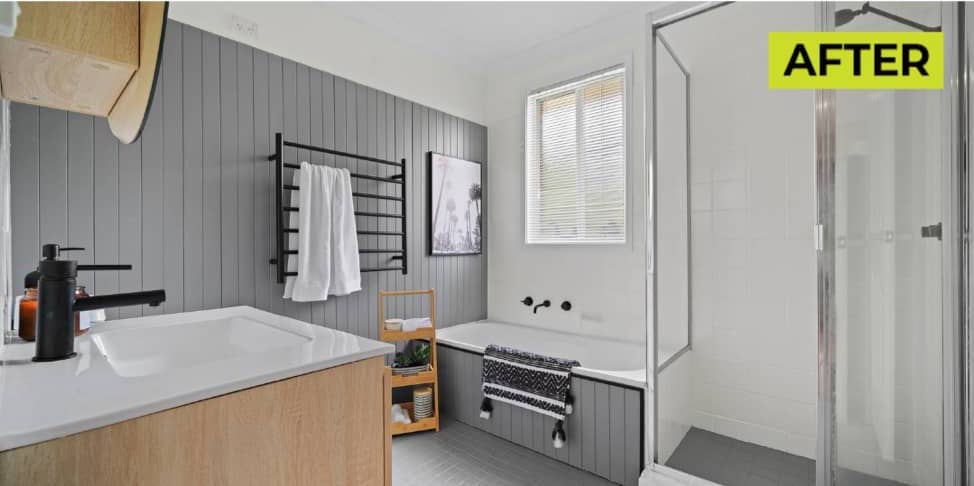
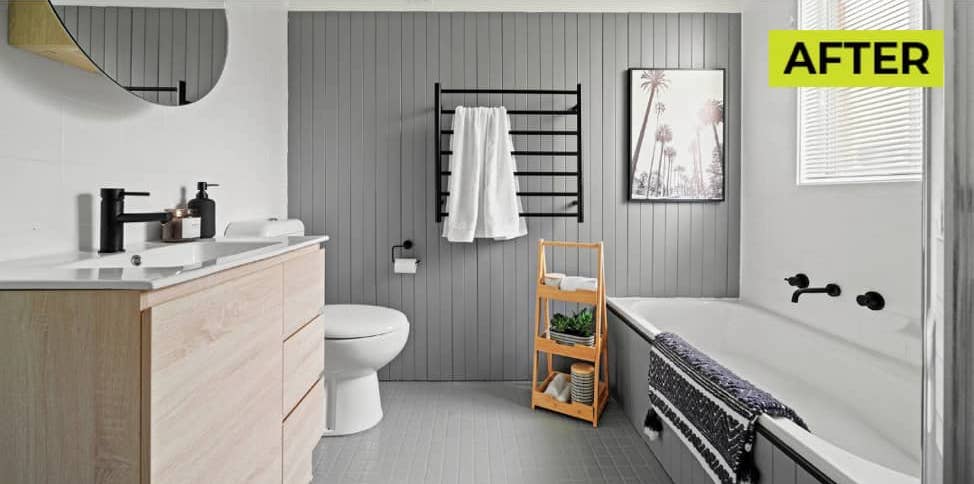 This bathroom, all up with materials, trade labour and styling included, rolled in at just under $4000. What we do know is it’s not a forever bathroom but it sure as hell beats the original ’70s number that was there previously. With a very happy tenant, it goes to show, anything is possible for even those on a budget.
Download a copy of my FREE BATHROOM RENO EBOOK for even more budget-busting renos, as well learn how to managing your project. Of course, there are other smart ways to try and keep your bathroom costs under control. My Home SuperSaver group is a national buying community (think people-power) that enables anyone to get big discounts off a plethora of items you’re likely to need for your bathroom reno; your vanity, bathtub, tiles, fixtures and more. Be sure to check it out.
Much love,
Cherie x


Awesome transformation. The Before was pretty bad but not quite as bad as our 1970s kitchen with pullout hotplates, faux wooden cabinet doors, orange inside cabinets, tea pot wallpaper and an appropriately clashing tile. It was so awful it was kinda lovable. What gets me the most is at some point someone actually thought all that was a good idea!
Hi Anna, thanks so much for your lovely comment. There were some pretty crazy designs & colour combinations back in the day thats for sure. Cherie Crew x
Fantastic job Cherie and so much to learn from this. Is the round shaver mirror also from Bunnings?
Hi Kelly, the mirror & cabinet are Cibo Design from Bunnings! Cherie Crew x
How did you get the vj panelling to stick to the tiles. Which adhesive did you use? Can it be stuck to rendered walls do you need any screws??
Hi Sarah, Cherie used liquid nails for the VJ panelling on the tiles. You can use the same process for the rendered walls just make sure that they are straight & level, Cherie Crew x
Looks fabulous
Thanks Marg, Cherie Crew x
Absolutely love, am renovating soon so seeing these ideas is going to help. Cheers 😉
Thanks Irene, happy we can help! Cherie Crew x
hi Cherie where did you get the floor tile paint from ? thank you
Hi Melissa, Cherie used Rustoleum Transformation Kit from Bunnings for the tile on the floor. Cherie Crew x
So good looks amazing
Thanks Sue, Cherie Crew x
Fantastic Cherie
Thanks Steve, Cherie Crew x
I love this makeover, great work👏🏻👏🏻👏🏻🙂
Thanks Trish, Cherie Crew x
I think you r amazing ever since I saw your reno work on the living room show.
Such a talented & hard worker
I will keep following 😀
Thank you Lesley for your lovely feedback, Cherie Crew x
Absolutely love the transformation! It’s simple, stylish and looks so much bigger. Lucky tenant hello beautiful bathroom, thanks to Cherie. 💞
Thanks Lorraine, Sandy’s tenant is so thrilled with the new bathroom. Cherie Crew x
Hi Cherie great work here.
What did you use for the black trim above the VJ on the tub?
Thanks so much Chris, Cherie used Black Tile Angle from Bunnings. Have a great day, Cherie Crew x
What type of white tile paint was used on the walls?
Was it rust oleum?
Thanks!
Hi Jo, Cherie used White Knight Tile & Laminate Primer for the wall tiles & Rustoleum Tile Transformation Kit for the tiles on the floor. Preparation is key to getting a great result with these products, Cherie Crew x
Amazing. Love watching you on TV makeovers and this blog is very inspirational. I’ve renovated for over 50 years and next up will be my last and forever home, in a retirement village. will be doing this renovation on my own this time and on a tight budget. Your site will be such a good reference point. Its great that the products you use are readily available. Thank you so much.
Fantastic Judith, that is so exciting! Cherie Crew x
Hi Cherie,
What an amazing job you did of that bathroom! We moved to a house with white tiles and cabinetry in the bathroom, but the owners had left the faux terracotta peachy orange tiles on the floor. They appear to be laid above a previously tiled floor. I would love to rip all the floor tiles out, but don’t have the budget to replace them. My question is…how hard wearing is the floor tile paint? Will it last 5 years or more? Thanks x
Hi Paula, tile paint is not a forever product but will give you a few years if it is applied correctly. You can DIY this or hire a professional floor sprayer which might give you some time to save up to have the tiles removed in the future. Cherie Crew x
Hi Cherie we have some cracked tiles on the floor in the bathroom. What wld you suggest? Thanks Donna
Hi Donna, even though a cracked floor or wall tile may not seem like an urgent problem, it shouldn’t be ignored. As water drips into a crack, it can lead to extensive damage over time. On this occasion you’d probably be best to bring out a tiler to assess if the tiles could be matched & replaced, Cherie Crew x
Hi Cherie, this looks fantastic, from the photos it looks like the shower floor tiles have also been painted, was the Rustoleum Transformation Kit also been used on the shower floor ? thanks Karen
Hi Karen, yes I used the Rustoleum Transformation Kit in Slate Grey on the floor. Cherie x
The transformation looks great! We have a similar bathroom from 1982. The walls unfortunately contain asbestos, which is why we are unsure if we can even do a cosmetic reno. Unscrewing an old towel rail or changing the toilet, bathroom mixer- I am not sure if we can change those items without touching the asbestos wall. Thank you for your recommendation!
Hi Bredi,
Removing the items you’ve mentioned will disturb the asbestos. As they are only small things to remove, get your tradie to wear a proper asbestos mask & disposable overalls. Also spraying the area with a water spray bottle as they are being removed will help prevent asbestos fibres becoming airborne. Make sure no-one else is in the room, unless they are protected also. Anything more than this, you really should bring the professional asbestos removers in. You’re allowed to remove up 10 square metres yourself but I believe that rule should be changed as asbestos is a dangerous material, even in small quantities. Hope this helps. Cherie x
Great tips! I especially liked the emphasis on cost-effective upgrades that make a big difference. Perfect for anyone looking to refresh their bathroom renovations without breaking the bank.
Thanks Maria, glad you’re enjoying our blogs. Cherie Crew x