


5 Of My Bathroom Renovations That Will Inspire You
As the old saying goes, “kitchens & bathrooms sell houses” so if yours – like many across the country – is a little tired & dated, there’s plenty you can do to get these rooms looking their best again. Whether you have the budget for a full-blown bathroom renovation (which typically costs somewhere between $15,000 – $35,000) or you’re ready to tackle a DIY upgrade to modernise your space, these renos will show you what can be achieved.
The general rule of thumb for what you should spend on your bathroom renovation is 2% of your current property value. If for example, your home is currently worth $750,000, your fully finished bathroom budget should be no more than $15,000. Sticking to this formula or less will avoid you overcapitalising on your property.
1. A BUDGET BEAUTY
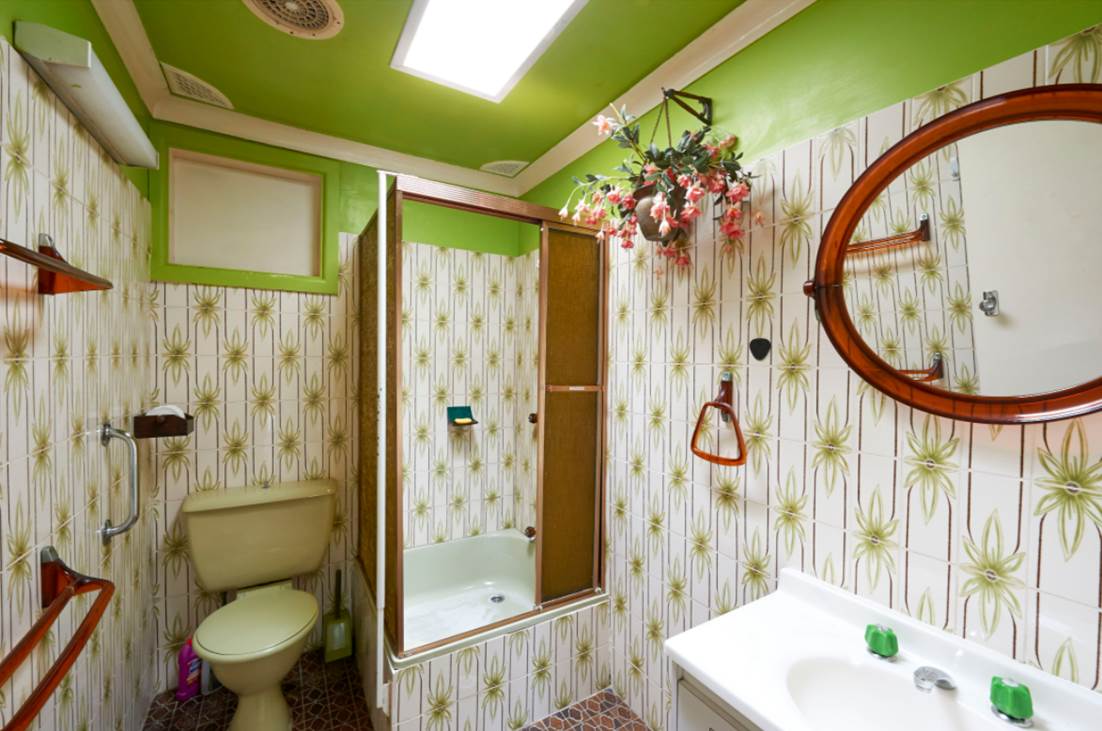
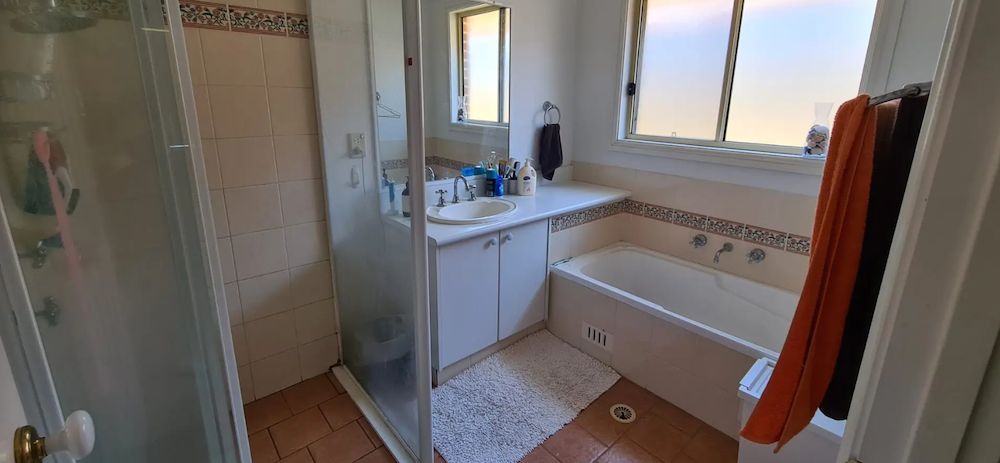
Back in 2016, I was given the difficult task on national TV to update this 1970’s bathroom into something a bit more modern. Let’s face it, $2,500 aint a lot to work with, especially in a room that’s very trade labour intensive & fittings & fixtures heavy. In order to bring this reno in on budget, I deliberately tried to salvage as much as I could. Relocating the toilet & ditching the bottled brown glass shower screen was the most dramatic improvement in this room. It meant I had to remove the floor tiles and re-waterproof the floor but was a change that was well worth it, to open up the space. The bath, toilet & vanity were all good quality items sourced second-hand for a ridiciously low amount of money. Better still, the local tile shop had a couple of end of line tiles that I picked up for just 8 bucks! Once everything was in place, I tile painted all the existing wall tiles in Taubmans Crisp White.
Now, let’s all be honest; this bathroom reno certainly isn’t going to win any design awards but you’ve got to agree, it looks so much better than before! All up, the renovation rolled in at a very low $2,563 for a fully finished bathroom. To read the full fact sheet, CLICK HERE.
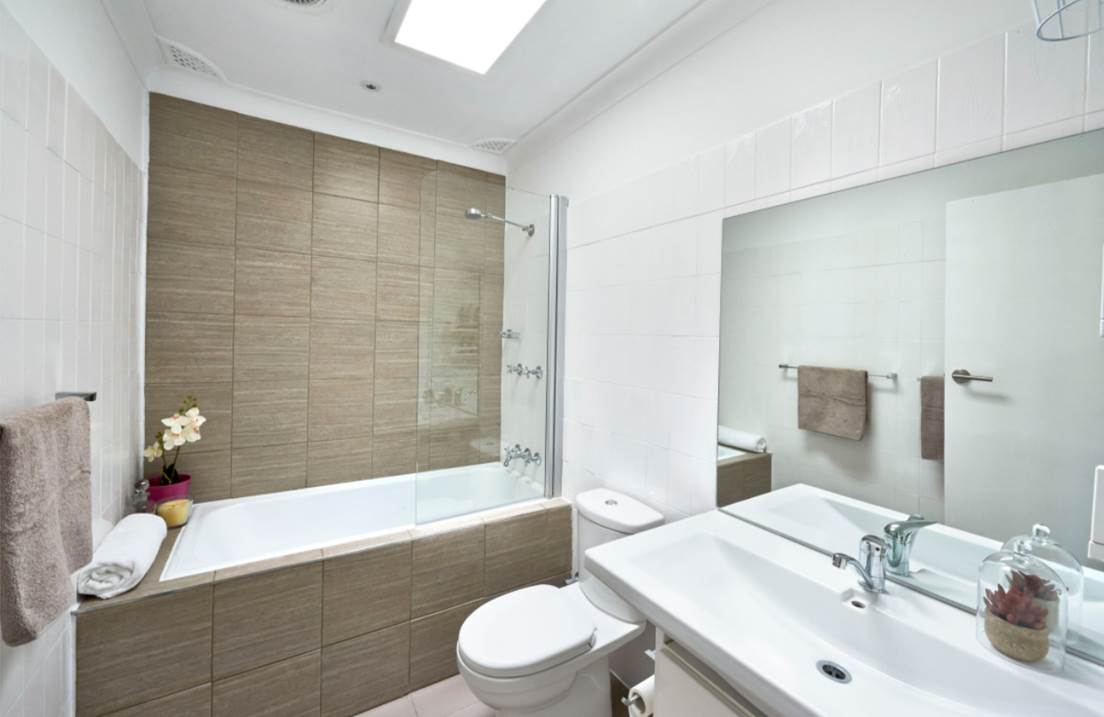
2. A FULL COSMETIC REFRESH
Just $4,000 was all that was needed to get at least another 10 years out of this old, dated bathroom. To keep costs under control, the shower & bath were kept as they were both in great condition. The vanity & toilet were replaced with modern alternatives that instantly modernised the space. As for those unsightly tiles, a few licks of tile paint instantly made them look better whilst the addition of a new waterproof VJ panel feature wall added a bit of textural interest to the room. Some cost-effective fittings & fixtures completed the look. If you want more detail on this reno, simply click here: SEE THE FULL RENOVATION.
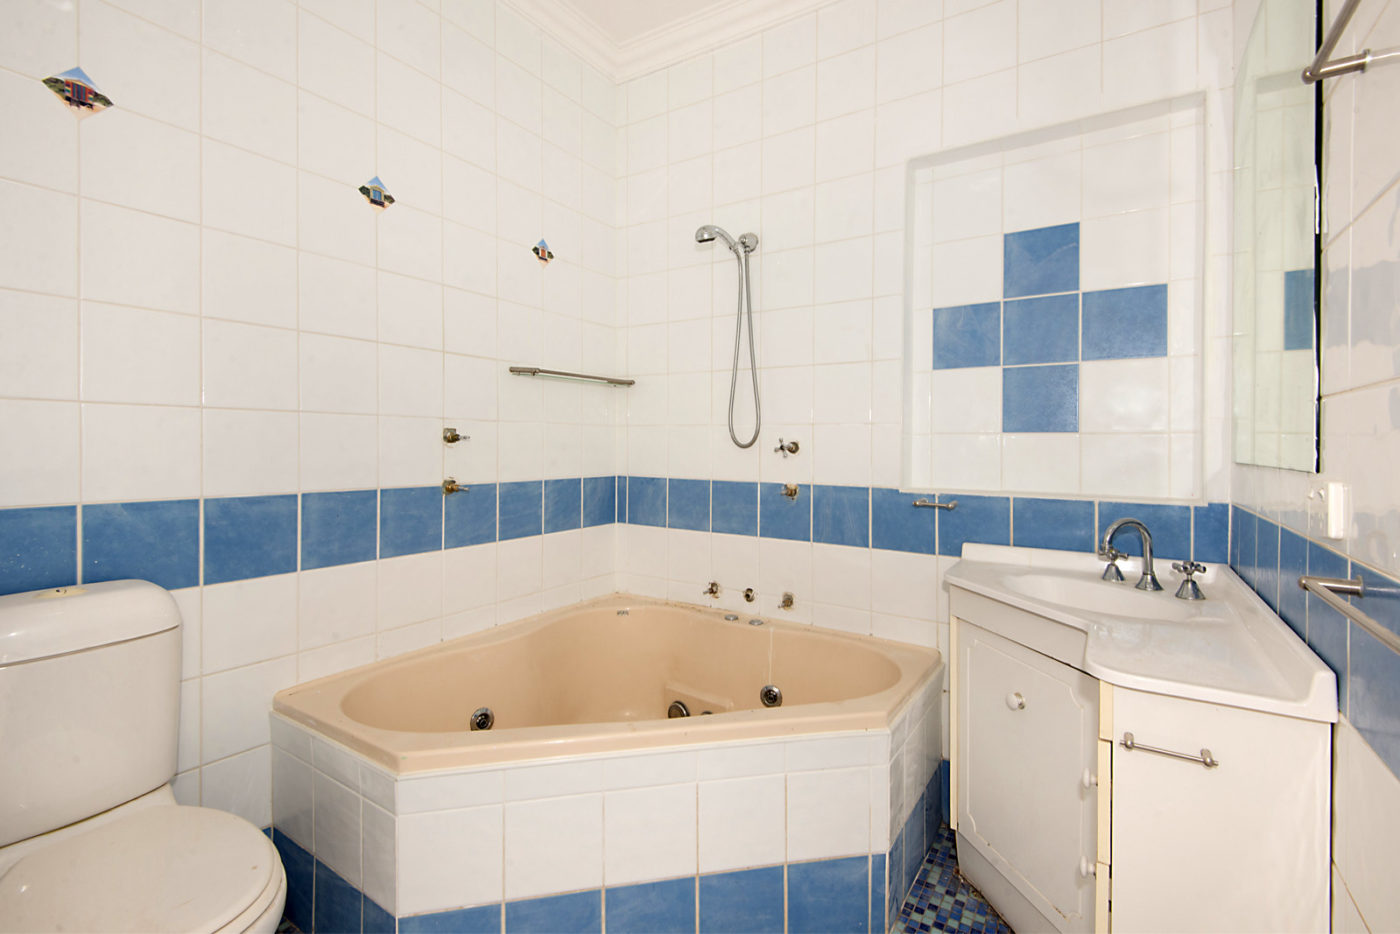
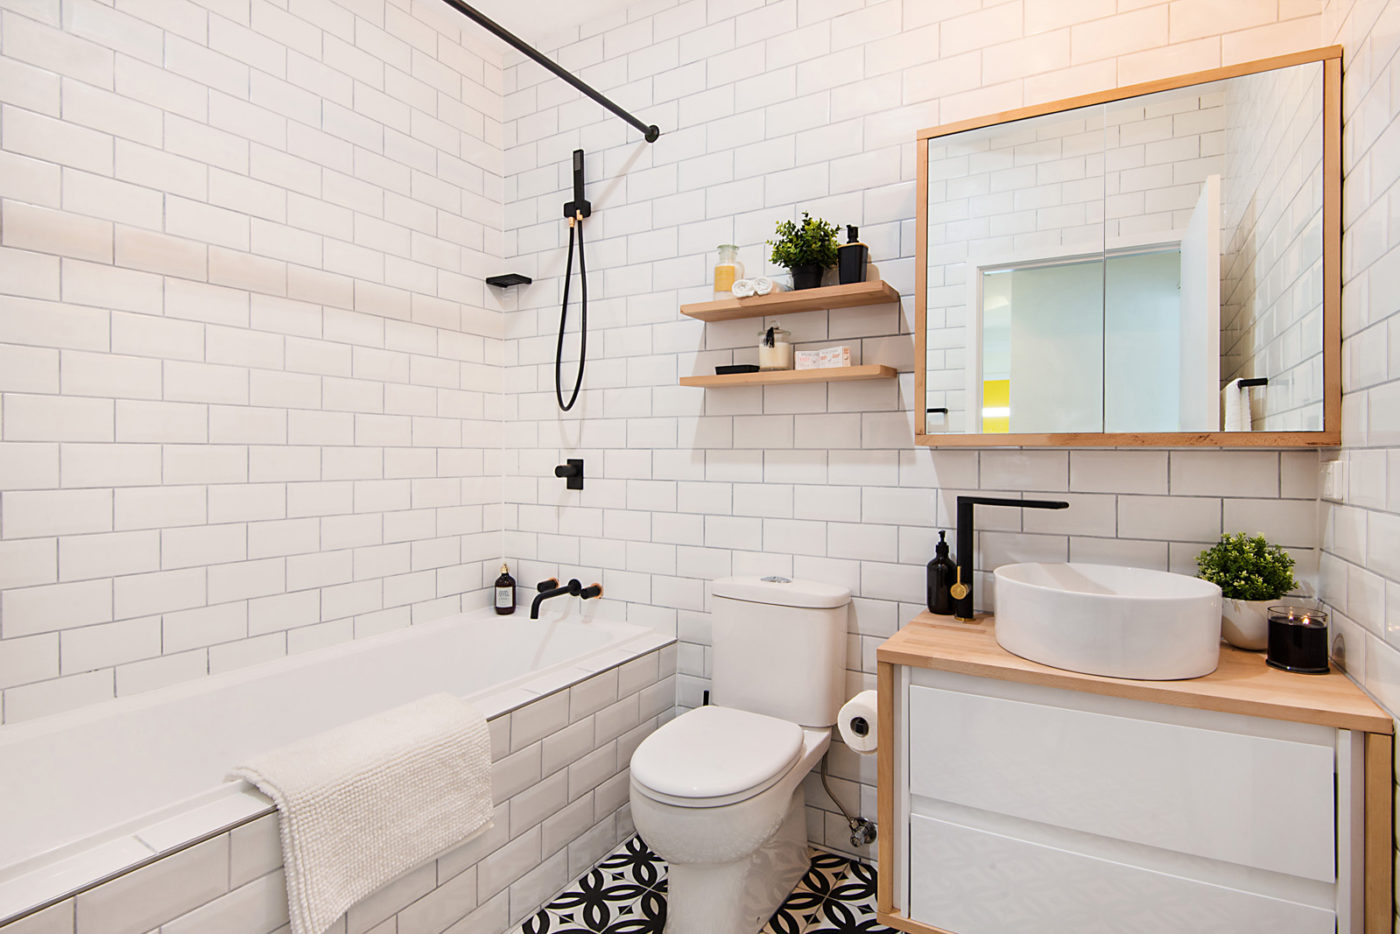
3. CHANGING THE LAYOUT
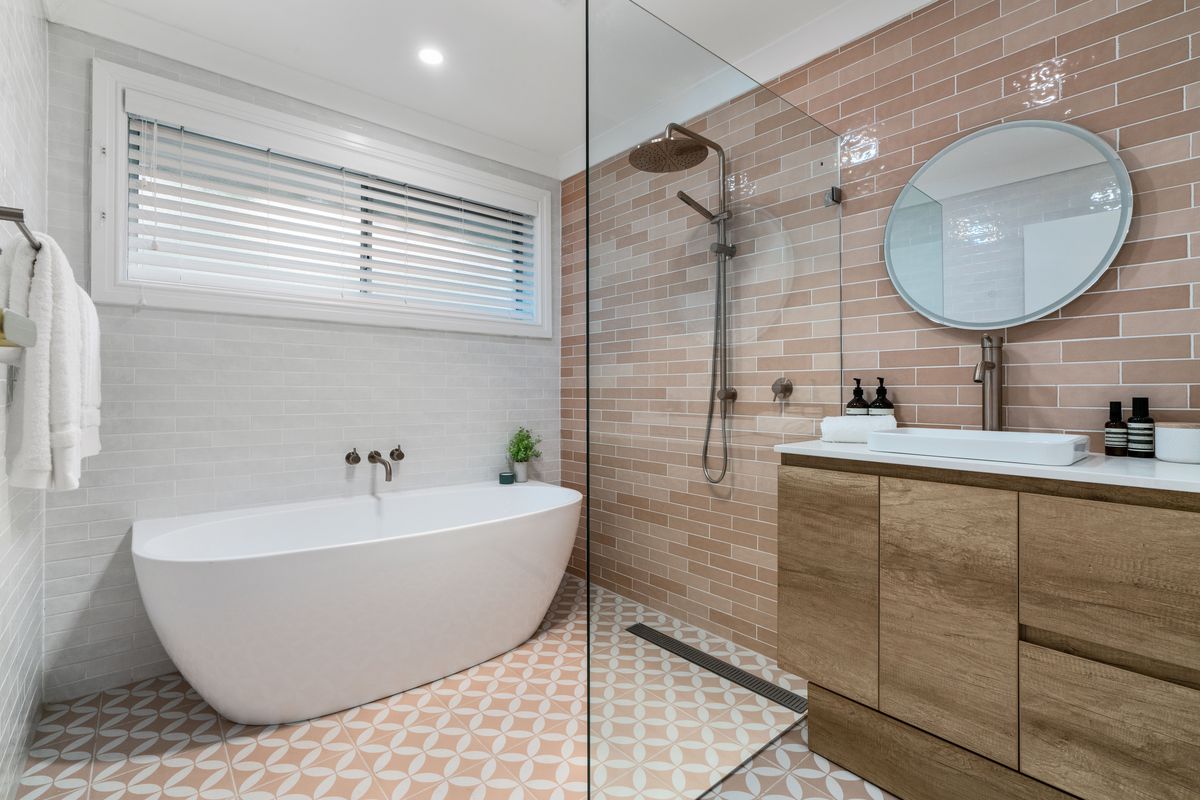
For this bathroom, the biggest change was the layout. That big spa took up way too much space so by removing it, room was freed up for a standard size bath & a new toilet to be squeezed into the layout. By keeping all the plumbing on one wall, plumbing costs were kept to a minimum. Inexpensive white subway tiles with a classic bevelled edge were laid in a brick pattern with light grey grout to give the tiles an element of contrast. The patterned floor tiles & black taps & accessories bring an element of visual drama to the room. SEE THE FULL RENOVATION.
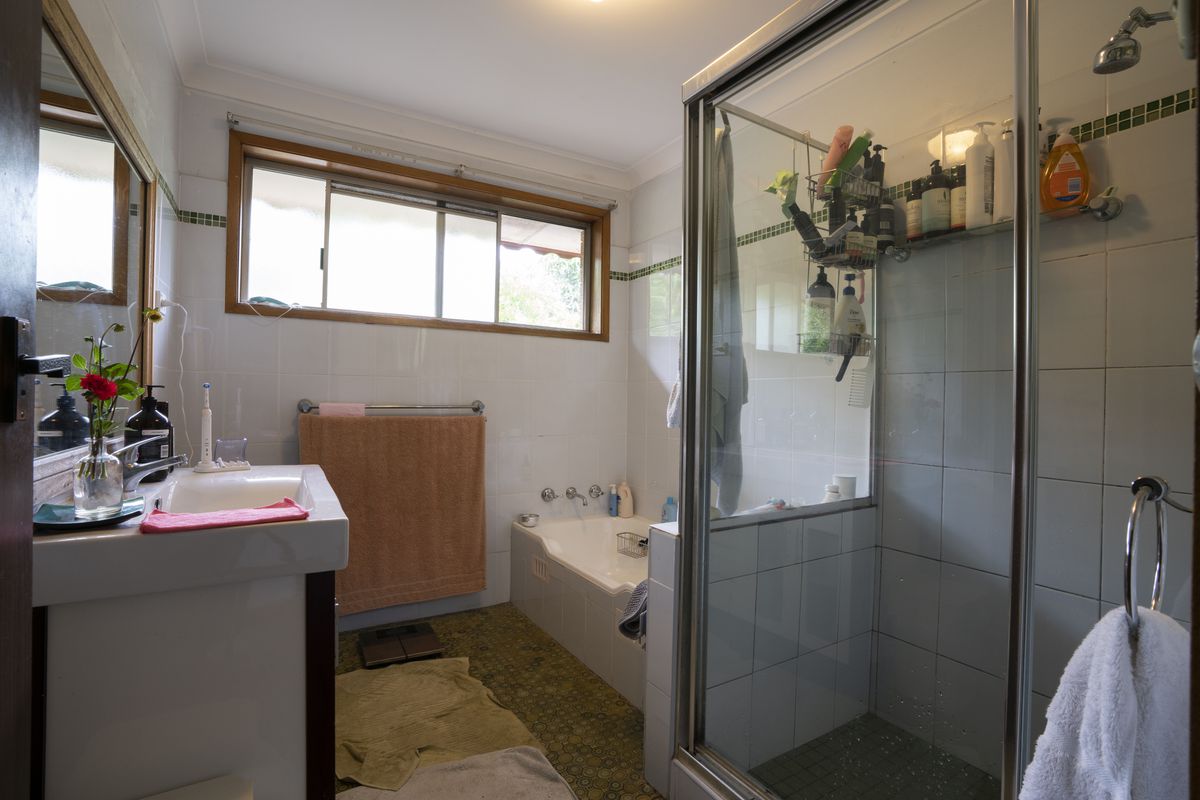
4. A GUT & START AGAIN BATHROOM
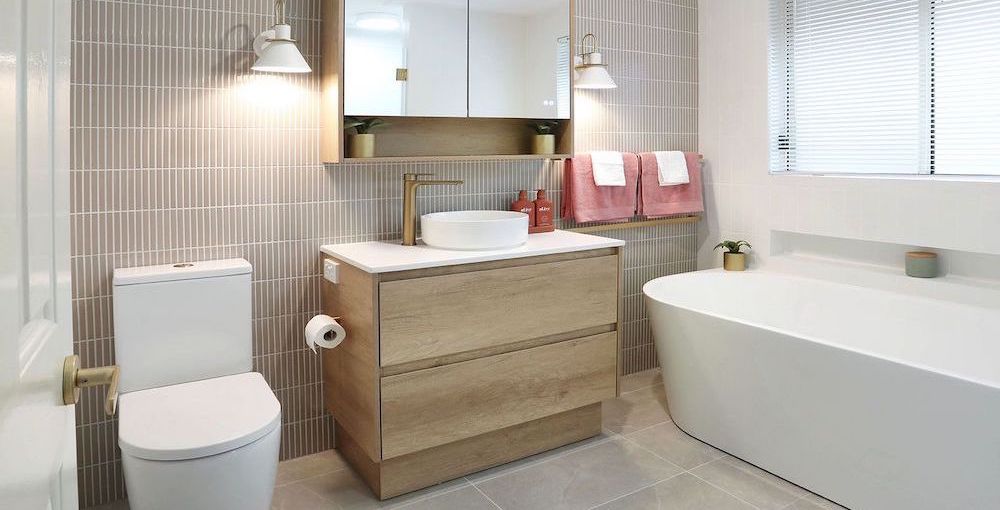
In my most recent episode of Channel 9’s Space Invaders show, this 1970’s bathroom was not only in need of an update, but seriously lacking any ounce of personality. Like many older bathrooms, asbestos was present in the walls so all of that was professionally removed by Jim’s Asbestos Removals. Asbestos removal is definitely a job best left to the professionals, not DIY. The layout was rejigged to make better use of the space & a patterned floor tile installed to complement the feature wall. The older aged homeowners are now able to walk into their shower a lot more easily than their old shower cubicle. On trend fixtures & fittings modernise the space, that helped add real value to the property. SEE THE FULL RENOVATION.
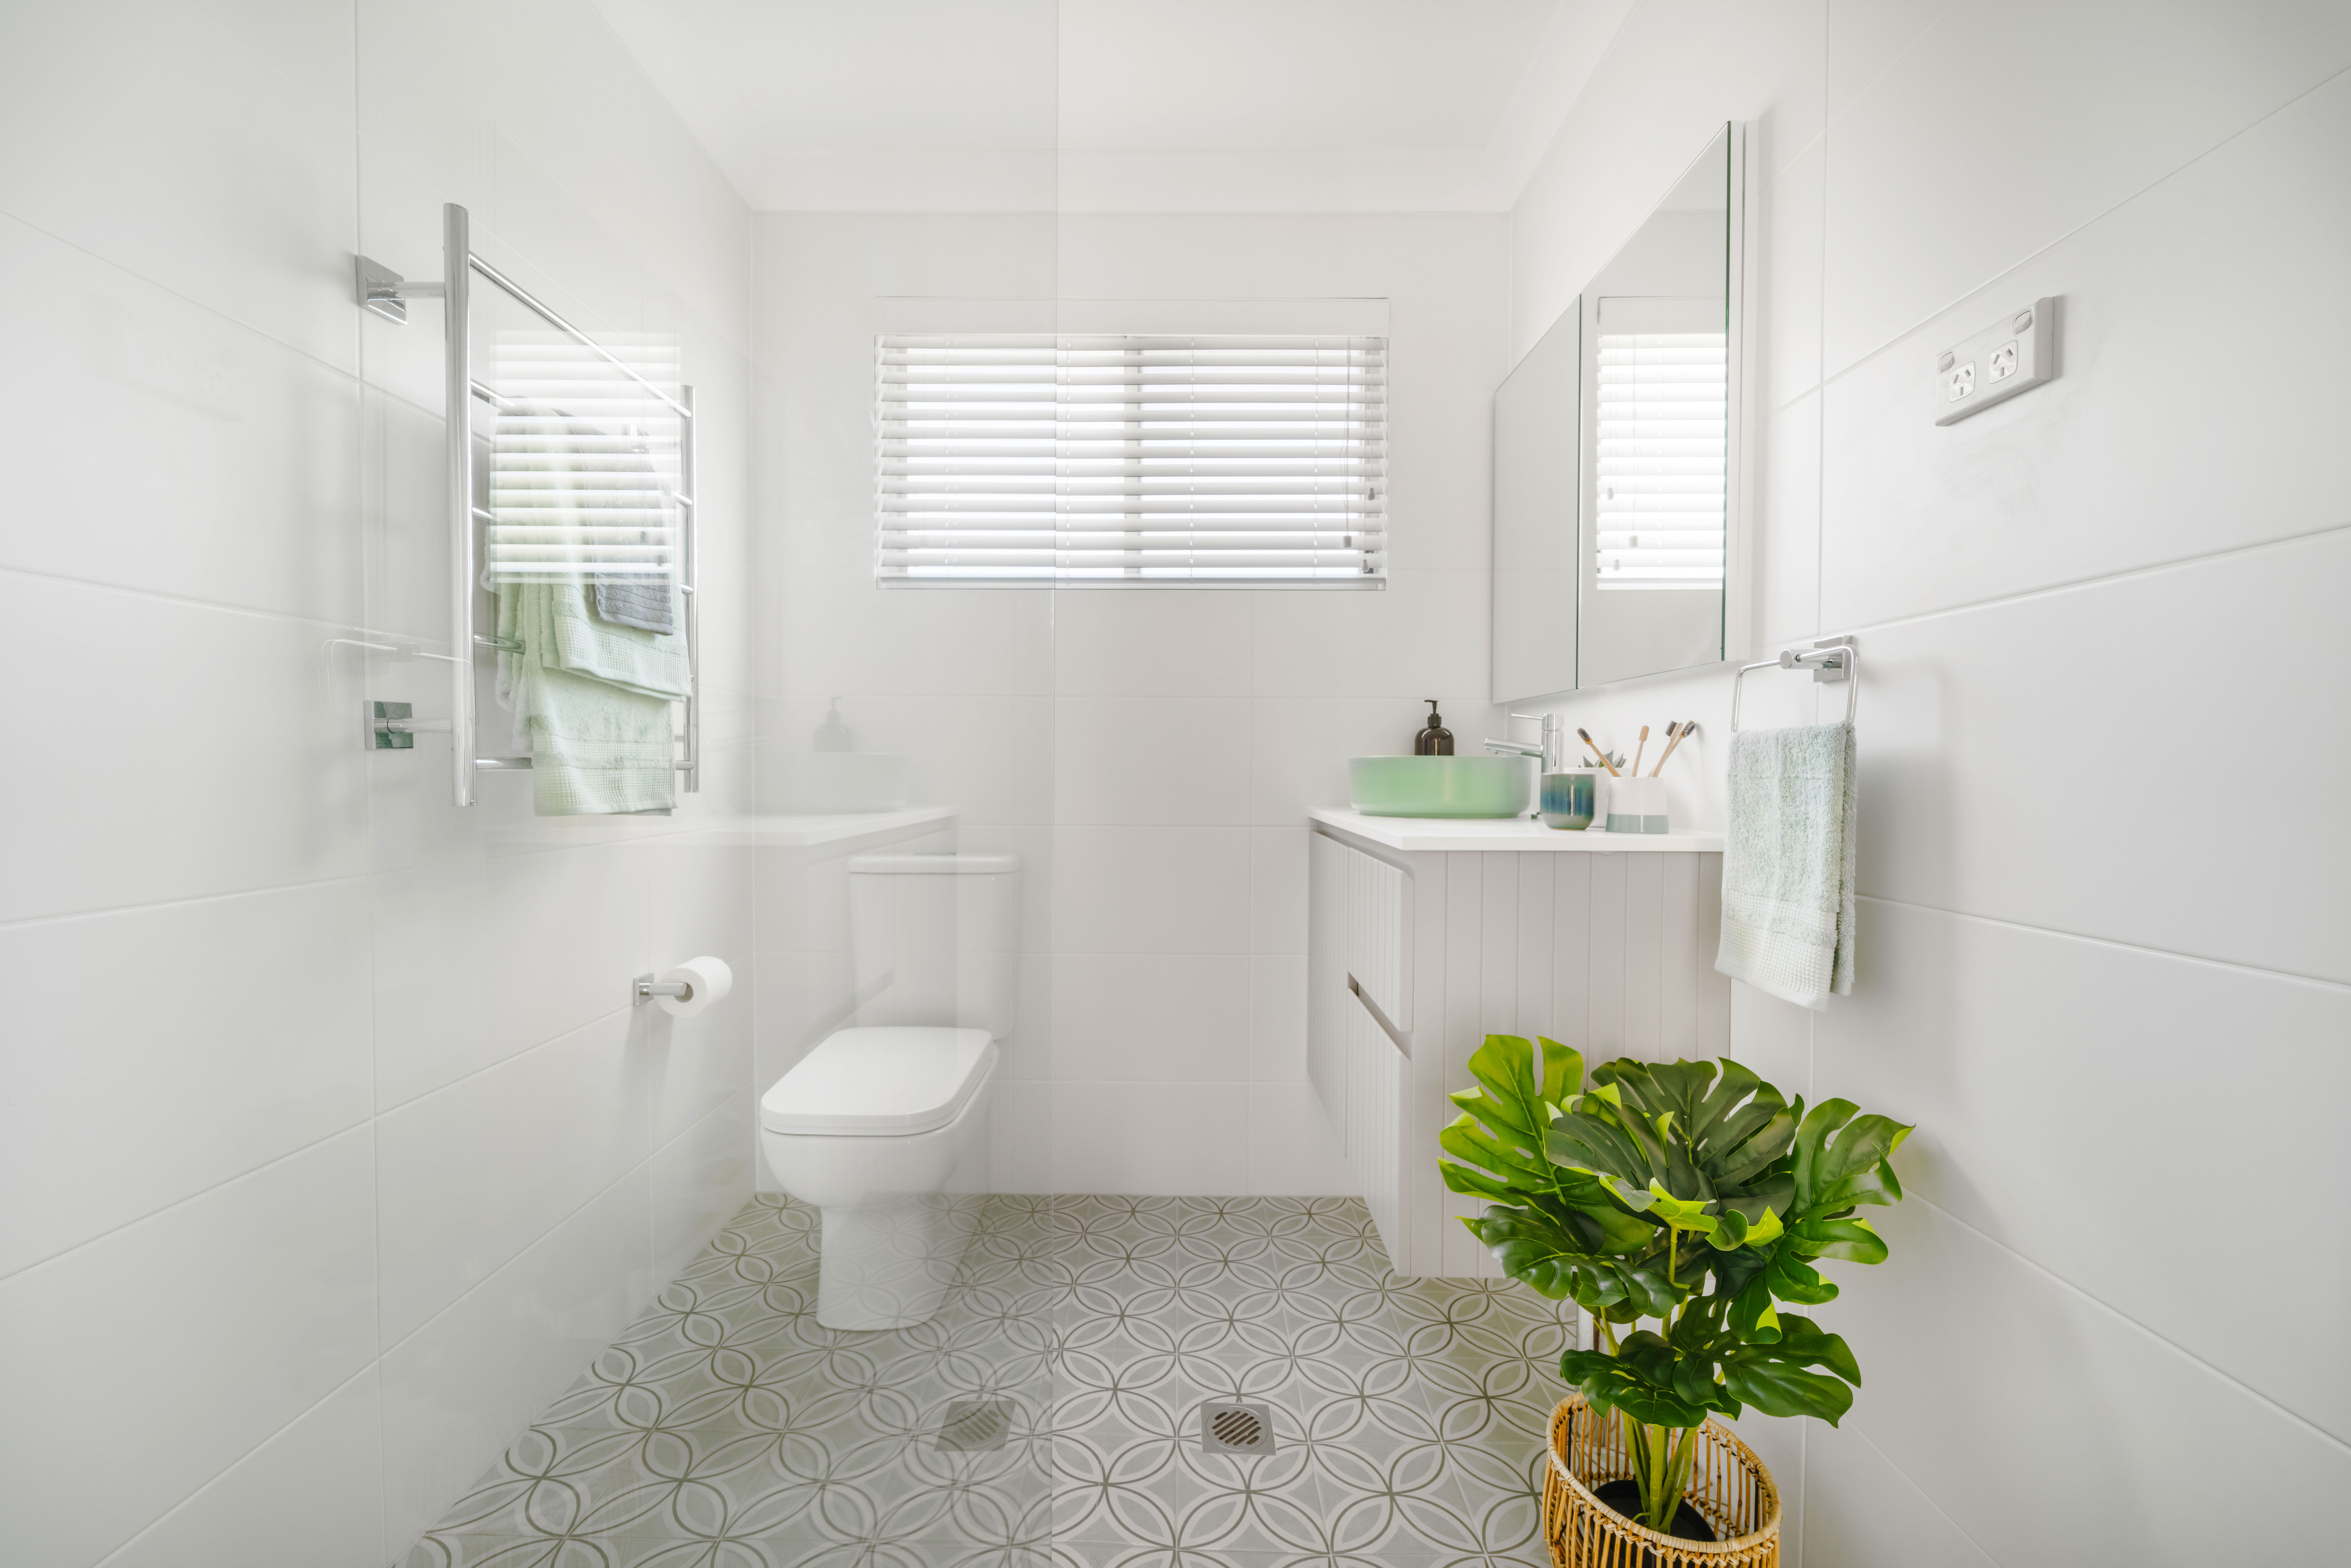
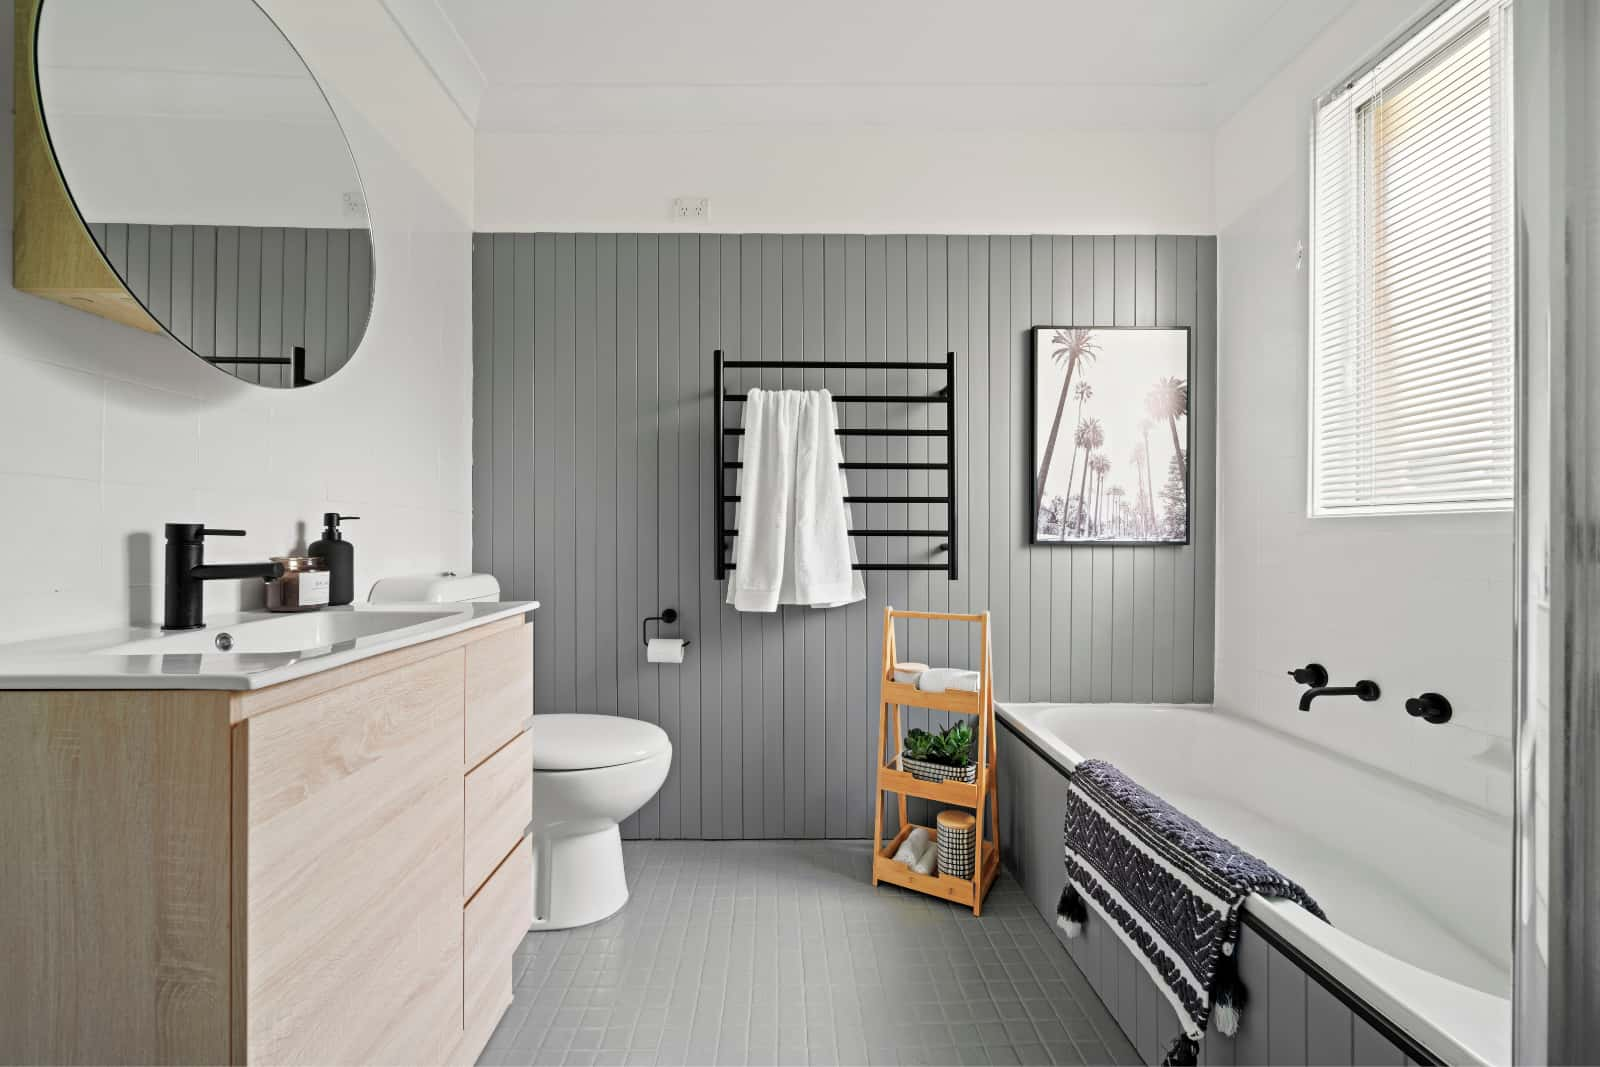
5. A MODERN MASTERPIECE
Only in use for just under 2 weeks now, homeowner Anita was the lucky winner of the Cook’s Plumbing Supplies $20,000 Bathroom Renovation competition. When I rocked up to see Anita’s space, she said to me “all white please Cherie”. I sought her permission to inject a little bit of colour into the mix to avoid her bathroom looking too cold & clinical. With Anita’s full support, I installed 1 wall of a lighter feature tile & tiled the rest of the space white. Texture & tonal interest was added through the timber vanity & all the gorgeous brushed brass tapware from Caroma’s Urbane II range.
Now the good news is – if you want to replicate this look, I’ve negotiated with Cook’s Plumbing Supplies to give all my subscribers 15% off all Urbane II products until the end of May, 2022. Simply jump onto www.cooksplumbing.com.au & enter promo code: URBANEII at the check-out. For the full reno factsheet, simply click: Cook’s Plumbing Fact Sheet.
Feeling ready to tackle your own bathroom reno? If you’re on a budget, be sure to download my free bathroom renovation e-book which will inspire you to update your bathroom, even if you’re on a budget. If you want to save even more money, check out our Home SuperSaver membership group. It’s s a national buying community that enables anyone to get big discounts off a wide range of renovation fixtures & fittings & general building materials such as 15% off at Cook’s Plumbing Supplies who can supply your vanity, toilet, bath & everything in between.
Much love,
Cherie & The Renovating For Profit Team x


Thanks for all u do Cherie
You are so helpful
Love watching your work on Tv
Your welcome Steph, Cherie Crew x
Hi Cherie
Thank you for all the great information. I recently purchased a large bus shed and am in the overwhelming process of making it become a home. I love all of your ideas. Thank you. And if you want to come and make over a whole shed let me know 😉
Hi Michelle, thanks so much for your lovely feedback. A bus shed transformations sounds so exciting, make sure you send us some pics, Cherie Crew x
Cherie I love your work!
When sanding bathroom tiles using 240 sandpaper, should you feel a slight change in the texture once done? Mine feel smooth and shiny so doesn’t feel even slightly rough. I’m using a hand held electronic sander.
Thanks
Hi Nicky, no you don’t need to feel any change in texture. You’ll still see the gloss finish as sanding never takes it off, Cherie Crew x
Hi Cherie, I love the work you do and I have to say that as a woman in my 60s I have been inspired by your creative work and I am giving small renno jobs a go!
Fantastic Jo, keep it up! Cherie Crew x
There are some wonderful ideas here, especially for a corner spa and floor to ceiling wall tiles. I am inspired to renovate from bathroom number 3 to bathroom number 4 – thank you.
When you use the tile paint, do you paint over the grout? In the wet area, I am tempted to remove the old, sometimes moldy grout, paint, then re-grout and seal. What would you recommend please?
Hi Julie,
Glad you liked the reno, thank you 🙂 Yes, when you tile paint, you can paint straight over the grout lines too. If your grout is mouldly, it may indicate a water leak somewhere or a high moisture content in your walls so be sure to check that first, otherwise the mould is likely to keep re-occurring over time. Would be best to re-grout first, wait for it all to dry then follow with tile paint over the tiles & grout for a seamless finish. Companies like Megasealed also specialise in regrouting of your bathroom so be sure to check them out. They can also do a moisture reading for you as part of their quote process. Hope this helps. Cherie x
The ideas that you have are an eye-opener. This is a very wise way in renovating a bathroom. The first section which is “A budget beauty” caught my attention because I love how it shows that simplicity can still win over the decorated ones. Thank you for sharing this with us!
Thanks Shelby, glad you enjoyed the read! Cherie Crew x
Hi Cherie, this is crazy but we are using the same bathroom tiles for our main bathroom reno, and possibly the exact same coral wall tiles as a feature (except we’ll have them vertical, not horizontal). Is the feature tile the Atmosphere Coral Gloss? What a coincidence if so! Nice to know that what we picked will work well together. Congrats on such a great transformation!
Yes, they are the same tiles! Good choice! CB x
Great inspiration comes from real transformations. These bathroom renovations showcase creative designs, smart upgrades, and stylish ideas to help you plan your own dream space.